Table of contents: [Hide]
- How to make a children's table
- Children's table do it yourself from cardboard parts
Many children in the period of extinction of the raging physical activity love just sit and prevent.

Wooden table is recommended for water-based lacquer.
They do it anywhere - sitting on the floor, in a chair, leaning on the bedside table, in uncomfortable poses, in which hands, legs and backs are quickly pushed. At such moments, parents come to mind the idea of fulfilling the table with their own hands to practice the drawing of their child.
Designing a children's table with your own hands, you will be able to adapt it as much as possible for your child, being confident as a product.
How to make a children's table
All the necessary materials for the design of the table can be purchased in the joinery workshop. You need to order a worktop, 4 bar for the performance of the power body and 4 blanks for the feet of the future table.
Before proceeding with the manufacture of a wooden table for a child, make sure that the following tools are at hand:
- Electrode with a set of special wooden nozzles.
- Wood hacksaw.
- A hammer.
- Clamp.
- A sharp knife.
- Sandpaper
- Carpentry glue.
- Rule, roulette, square.

Diagram of the table of the table.
Having received wooden billets and collect all the tools, you can start work. First of all, measure all the details of the future table. Corollary Check the accuracy of the corners of the panel for the table top, tape measure check the same length of the legs and bars for the power body.
The height of the table is more dependent on the chair on which the child sits. The back of your chad when working at the table should be smooth. Tables for adults begin to produce from a height of 70 cm, the children's table, made with their own hands, is made with a minimum height of 55 cm.
Article on the topic: Circums in the country do it yourself: how to make a beautiful garden (36 photos)
Cover the feet of the table with a hacksaw, trying to make them the same length. Plots dug diligently cleaned with sandpaper so that there are no burrs. Make grooves in legs: Hold them with a clamp and drill to do one hole in the end of the part, and then with a cutter at low speed, perform a rectangular groove. The same action needs to be done with all other legs.
Then the depth of the received grooves is required to measure. We take the bars from which the power frame of the table will be made, measure the ruler on each segment, equal to the depth of the grooves on the legs. Check the same size of all four bars if you find the difference, eliminate it with hacksaw.
After that, inscribe bars from all sides. Remove the unnecessary wood to the sharp knife, making the shape of the connecting part of the corresponding rectangular groove.
Collect the base of the future table without fastening, connecting all the prepared details among themselves. By all the corners, make sure the accuracy of all angles - they must be straight. If necessary, swap some components to get one-piece design.

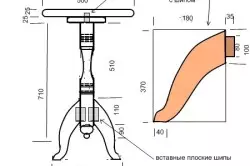
Wooden round table scheme.
Before disassembling on the part of the base, make a margin of compliance of grooves and legs. Now you can join the joinelar glue to lubricate the elements of the connection and collect the finished base of the future children's table.
Then you can fasten the tabletop to the base. First, put it on the front side down on the floor, and on top attach the finished base. Mark the sections of the feet of the legs to the panel. In each compelled square, it is necessary to drill a hole for the furniture spike. Apply glue to these spikes and secure them in the tabletop. On top Set the base.
DIY table ready! Now your child without harm to health can do drawing.
Back to the category
Children's table do it yourself from cardboard parts
To perform a light choice of children's table, you will need:
- Line.
- Stationery knife.
- Simple pencil.
- PVA glue.
- Compass.
- Cardboard box.
- Cardboard cylinders.
Article on the topic: How to do the electric warm floor with your own hands?
Using a pencil, make marks on the cardboard and cut one element, the dimensions of which are 55 × 31 cm. Then cut the corners from the resulting rectangle. Rounded angles are safer for children, in addition, when the cardboard product is dropped, they will not sweat. Upon completion, make the layout of the holes for the legs using a circulation. They also need to be cut. The diameter of the holes must coincide with the size of cardboard cylinders.
Using the first part of the table top as a template, cut another three similar elements. Then you pick up the same stencil and cut the countertop cover (you do not need to do in it). Pick the cardboard cylinders of the required length for the legs of the children's table. Cardboard For all design components, choose durable, in several layers, corrugated. Basically, such a cardboard are made boxes for household appliances. Cardboard tubes can be taken from under paper towels or toilet paper. A cardboard base for food film or foil for baking is well suitable.
With the help of the stationery and press, connect four table top layers (without top); Sample the legs to the holes. If the holes are not very suitable, overlap them with the help of sandpaper, but do not overdo it.
After the legs of the future table were tried, glue the countertop cover, which you can reap by desire. You can cover the table with ordinary white self-tech, which can be easily insolent and change at any time.
Now you only need to stick the legs to the table top - and the table is ready for use.
Such a table with your own hands is convenient for drawing, modeling and many other types of creativity, and you can sit down with him anywhere anywhere - on the floor or on the sofa.
