
In the process of performing decorative repair inside the house sooner or later, the question is about how to glue the base on the floor. After all, without this design element, it is impossible to get a room having a beautiful finished look. Unlikely, even the most expensive and stylish wall and floor coverings will hardly look properly. Plinth is needed for decorating gaps formed between floor coating and wall. Moreover, with its help, the edges of the floor are protected from various damage. The role of an interlass element can be used simple direct or with decorative elements of the plank.

Plinth not only decorates the room, but also hides the wires.
Plinth installation options
On the floor, the plinth can be fixed in various ways. These include:
- attaching with screws and nails;
- Anchor or clips fastening;
- gluing to the back side;
- The use of self-adhesive on the floor of the plinth.
Among these methods, one of the most convenient is the option to glue the plinth on liquid nails or durable glue.
Thus, you can securely fasten the planks on the dedicated place, without damaging the design. Most often, this method is used in the case when working with wood products, which can crack under the action of a hammer or screw.
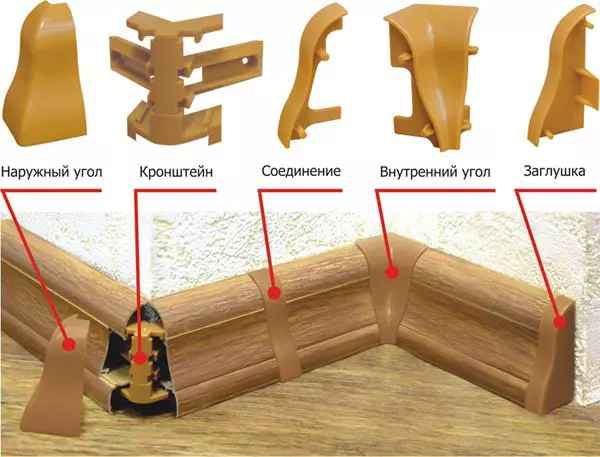
Elements for fastening plastic plinths.
The objective pluses of liquid nails are primarily believed that the use of them in no way spoil the surface of the finishing material. After the attachment it is impossible not to notice a dentin, nor abandon from the hammer. At the same time, you will not need to suffer with decorating the hats from nails or self-tapping screws, which in any case will remain noticeable. The advantages of fastening the plinth on liquid nails are:
- high quality adhesive fastening base;
- Fast fixation of the connected parts;
- Ability to use with any building materials: from natural wood and stone to materials of synthetic production, such as ceramics, plastic and MDF.
- The advantages include the possibility of using these fasteners in a high level of humidity, in view of which it will be possible to glue the plinth on the floor in any room at home: living room, kitchen, bathroom or toilet.
Article on the topic: How to make a blind area around the house with your own hands: a device concrete, soft, video
How to glue the plinth on liquid nails?
Plinth on liquid nails will be held only on the perfectly smooth wall.
The technology of gluing a plinth with this means is very simple, since a special nozzle is used to apply to the back surface. The preparation of the plinth to apply liquid nails involves the surface treatment with emery paper, which will save it from dust and dirt. Before sticking the plinth to the floor, you must once again make sure that the surface is clean. To do this, use a piece of sandpaper, which are passed on the back of the panel several times. Experts recommend purchasing universal liquid nails suitable for fastening panels from any material. Specialists advise if it is impossible, for example, to get the above-described material to replace it with waterproof glue 88. This is an easy-to-use binding material that has such advantages as:
- high-quality education;
- obtaining elastic and waterproof seam;
- the absence of chemicals harmful to humans and animals, for example, toluene;
- The glue is ideal for any outdoor and ceiling mounts, while it does not freeze it for a long time without losing its adhesive properties, which allows you to work with it for a long time without fear that it will be necessary to add a fresh layer once again.
Phased instruction of how to glue the plinth on the floor
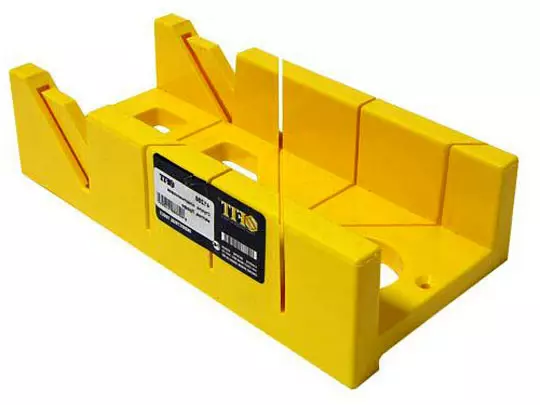
For cutting plinth, you can use stousry.
All work must begin with a plinth cutting and cooking the necessary tool set. Believe it:
- hacksaw;
- roulette;
- a hammer;
- tube with liquid nails and a special nozzle, gun;
- Rubber spatula.
When you prepare all the necessary material and the tool, you can move to further work. They suggest measuring the perimeter of the room, taking into account the existing protrusions and recesses. According to this data, a method is calculated and an almost accurate number of necessary materials. Then get glue. The next important point is to cut the plinth on the items of the required length. Experts insist on the need to cut the plinth at an angle of 45 °, both when creating internal and external corners. Before starting to cut the second side of the corner, attach the panel to the first and try to sprinkle so much so that the angle is not formed on the surface of the corner plinths.
The next step is marked by applying liquid nails to the surface of the plinth, which it will be pressed against the wall and the floor. If you use a narrow plinth, then you need to apply it up drop, at a distance of 5-10 cm from each other. If you purchased wide plinths, the glue is superimposed on the reverse surface of the glued zigzag panel. This guarantees a solid connection.
Article on the topic: What to choose the impregnation for concrete floors

Plinth on the floor should be started to glue from the corner.
The first segment that will be glued to the floor will become the longest that is applied to the corner. At the same time, notice that the wall to which the plinth will be adjusted must be perfectly flat. Otherwise, the panel will be glued wave-like, and the plinth will, in the end, will swell and fall off, even with the fixation of it for superproof glue. Immediately after the glue is applied to the plinth, it will need to close it tightly to the wall, holding it in such a position a small amount of time so that the peller is in high quality fixed on the place allotted for it. As a rule, after about 15 minutes, the plinth will not be able to tear off. But even if you decide to cross it and remove from the gap, much earlier, it will be impossible to reuse the same panel, since the plank is deformed.
It is worth noting that if you are planning to cross the wallpaper in the near future, it is better not to hurry with the installation of the plinth. After all, the wallpaper replacement is impossible to do over the plinths, so we carefully think over each stage of its repair.
If the installation of the bar is accompanied by hitting the glue to the surface of the plinth, then it will need to be cleaned immediately using a rubber spatula. Then the front face wipe the wet sponge. All seams formed between the plinth elements should be filled with liquid nails, which will easily and gently make using a small rubber spatula.
Self-adhesive plinth, its characteristics and use
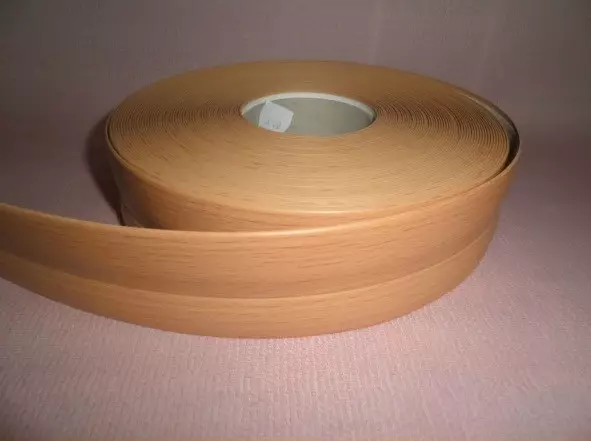
Self-adhesive plinth is very convenient in use, since the perfectly smooth walls are not needed for its device.
Self-adhesive floor plinth was designed and released in retail sale specifically for those builders who do not want to mess around with repair for a long time, and they strive to finish it as soon as possible, easier and not creating dirt. Such an innovation appeared on the market for more than 5 years ago and is considered suitable for decorating the interior of the rooms whose gender is covered with laminate or linoleum.
Article on the topic: Height of the floor of the radiator from the floor: on what to hang away
The distinctive features of such a plinth include:
- Material of manufacture - soft PVC or aluminum.
- The ability to be used in large spacious rooms, both residential and office premises. Easy installation on almost any flat surface.
- Self-adhesive plinths differ in a rich color range, including imitate natural wood, stone, etc.
- It can be glued in difficult places not only by flexion, but also fixed by ordinary connecting elements. The aluminum option is pasted on the surface with the assembly adhesive tape or on double-sided cattle.
Attaching the self-adhesive plinth, it is important to know exactly, and it is better to celebrate those places where you will be fixed. Since to tear, in case of improper application, leaving the unauthorized surface of the wall and floor, you will not succeed.
Careful for these finishing materials will be quite simple. It can be washed with conventional water and a soft sponge. As a rule, the surface of such a plinth is protected by an oxide film, which protects the bar from various damage. Installation of this material does not imply practically no trimming, as it is very economical. With it, it is easy to separate any angle. The cost of flexible plinth is much lower than the variant of solid materials.
What needs to be done to properly glue the plinth on the floor?
Knowledge of technology of correct gluing soft plinth allows you to quickly and easily cope with this work, and therefore, and at times faster finish repairs. First clean the surface where the tape will be glued. It should be wiped, removing all the dirt and dust, wiping everything with a damp cloth moistened in the water. And then degrease, for example, with a 95% alcohol.
Then take the tape and carefully remove the protective tape from the back side and attach one end to the corner, after making the stitching markup. In this process, slightly press the flexible plinth to the wall to ensure the best clutch. Make sure that the tape is laid evenly and does not change the designated course.
The soft plinth is more convenient, because it already has a sticky mounting base. It became necessary to apply other adhesives. Thanks to this equivalent of solid floor plinths, it becomes possible to equip the room of any configuration and save on materials and tools.