
Is it possible to say that to create a kitchen apron with their own hands, the tile of any texture and format will come? Probably not. The working wall should be such that it is easy to care for it and of course, I want to have an attractive kitchen, which means that there is a beautiful apron. This dream is quite achievable. You should want to buy material and you can lay out the working area in the kitchen with your own hands and that tile that admires design and quality.
Many dream of making an apron from ceramic tiles with their hands, but this material is not cheap now. Someone postphes half a year before allowing themselves pleasure, lay out the working area in the kitchen with a practical cafeter. Now the tile of various sizes, types and monotonous either with a pattern for every taste is sold in construction supermarkets, it can be purchased on the market, order on the catalog through the online store to the house. Choose the option that you think is practical and make an apron with your own hands.
Choose tiles
A beautiful work zone will be released or not very dependent on the drawing on the tile, but also from its shape, size and smooth it or rough. The tile has different sizes. Tile 33x60 cm You will faster, but in a small kitchen, it will be much more beautiful to look like a working area with a tile of 10x10 cm. Still decide what thickness you need a cross-space, which is used as a temporary laying between the seams. Many enjoy and recommend it with a thickness of 3 mm.
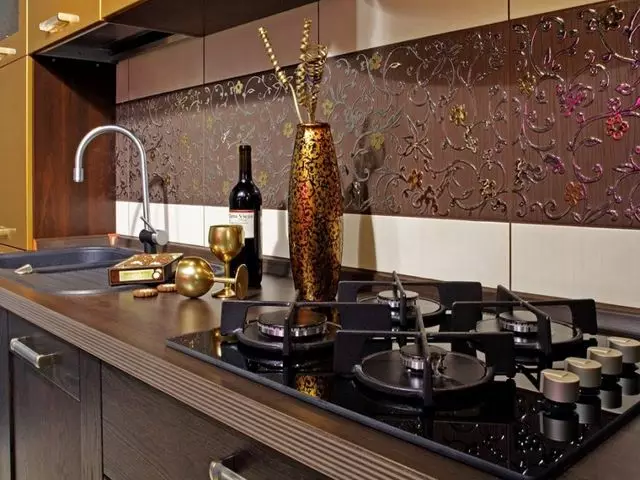
Now let's talk about the surface. The work area will almost daily splash in soapy water, the fat from soup will fall on it, splashes with a cutting of meat, because the material surface is better to choose a glossy, which is smaller. It is easier to care for it.
Do not take relief. She is beautiful, but in the fold will get fat, then dust and get dirt. When you decide and select a tile, will remain to purchase, bring home and cook the walls and the whole kitchen to repair with your own hands.
Acquire a tile
What is an apron for the kitchen? This is a strip of a tile, which begins at the slab and ends at the sink. And height from the table top to the mounted lockers. Over the plate, the tile is laying out just above the hood.Article on the topic: Review of bedroom furniture from the company Shatura
If you have not yet ordered kitchen furniture, make marking apron right on the wall, which is convenient.
Tile sizes are known to you, calculate how much material you need and take with a margin. Do not hope that you can buy later. Tile with the same pattern, but from another batch may differ with a tint, because, buy immediately with a margin.
Spare material immediately buy and because of the human factor. It happens that the packter does not sleep and you will have a tile of different shades, and even the picture. It happens that I do not discard the curve, and it is also not suitable for work.
When you drill a hole in the tile to attach the locker. It can split and need a spare. For these reasons, be sure to buy more material.
Preparing for mounting
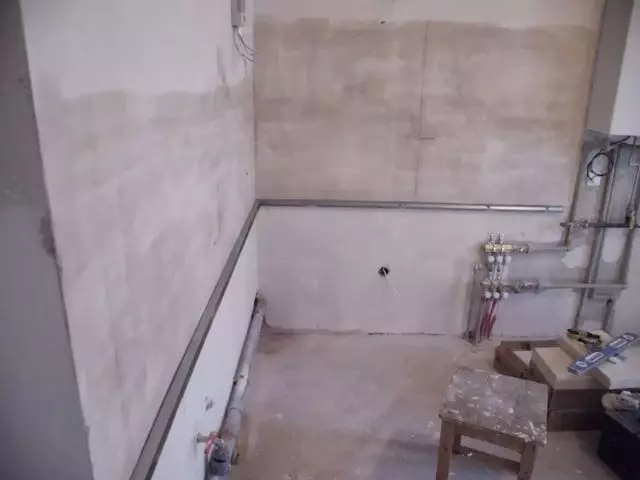
For example, in our case 2 outlets, mark their exact location and install the necessary submersers. Next, you need to determine where the lower row will be? Consider a specific example.
You purchased a tile 27x40 cm. The height of the part of the working area, which you see - 65 cm, and the tile in 3 rows, is already out - 81 cm. How to place apron - from the table top or you need to lower below? And if lower, how much?
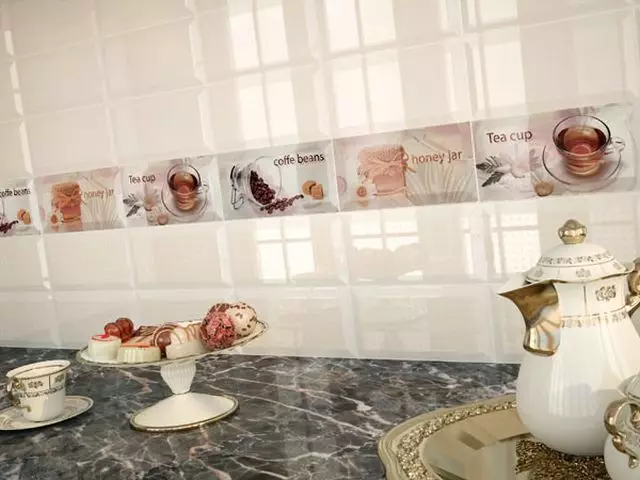
Focus on the drawing depicted on the tile. In a concrete example on the tile, there is a horizontally distinguished band. It visually divides the laying space. The first row will shift relative to the table top. It is best to do 1 to 2.
Preparation
- You calculated how much tiles needed and marked the beginning of 1 row. Set the bar, from it and start laying. Take the hydroelectric background and place a special line of the horizon that will pass through this marking of our height. Screw the profile from the frame there. Use either guides or racks that are more convenient. A peculiar "shelf" will come out. She will not give the kafly to move down while the glue will not freeze. With such a bar, it will be easier to align all the seams that go horizontally and make a masonry.
- Grinding wall. When you buy a primer under the tile, consult from the seller, which is high quality, that and purchase. Or, if he recommends a friend who put the apron with their own hands, listen and you can buy the same. Often, the stovetonite is used for the primer of the kitchen wall.
Article on the topic: Ideas for a small apartment Studio - which curtains increase space
Newcomers are often interested in the tile to apply glue or on the wall? Best option, apply glue on both surfaces. In this example, we laid the tile on the base of plasterboard. Here is almost even completely surface.
Depending on how the size of the plate and what is its weight, you will pick the desired size spatula comb or comb. She will apply glue on the wall. Tile in the example is heavy and needed 0.8x0.8 cm combing.
Experts recommend if glue the tile directly on the wall, apply glue and on the wall and on the material, but in our case the base is a plasterboard, so. Apply glue on the wall with a thin layer, spatula to remove too much and attach the material. We usually start on the left and moving on the right side.
First glue on the left. Take the rule and press it to the plane of the "lighthouse" and 1 tiles. Slightly push the rule and adjust one plane.
Monitoring the location of the tile vertically makes the level. Suitable level - 60 cm long. Printed 2 tiles? You can rent a tile "lighthouse". Clean the place from glue.
Laying the tile, check exactly if using the rule. By gluing the tile, level it over the previous one and correct using the rule, if necessary. Do not worry, you will get to lay out the work surface with your own hands.
Features
Do you like a definite tile in the catalog? Not a question, buy. But in your kitchen, she will lie and look somewhat different. Anyway, it's nice to work hard and put a worker apron with your own hands. When you start laying the tile, you will notice that it is somewhat different from the other size. This eye difference compensates, increasing or reducing the seam between the tiles.
For clarity, imagine the road on the sides of which borders. If you move both and put, then already, wider, we will not be able to call the line, and if one side is smooth, and the second one is slightly strung and expand, then in general the road will seem straight. Consider it practically.
Article on the topic: How to make a podium with a pull-out bed with your own hands?
Pre-screwed to the wall. Stand shows straight. But if you want to put 1 tiled row on it, due to the difference in size, the top edge will look uneven. Therefore, do so, insert between the tile and the stack of plastic clins. From the depth to which you will immerse the clins, will depend easily or drops the tile.
Put our level on top to 1 row and come out even horizontal. Put the second row in the same way, but use not clins, but special plastic crosses. In this example, a thickness of 1.5 mm was used. If you completely immerse, then the seam will be 1,5 mm. If it is not completely immersed, the seam size will become less.
This is how crosses are used that help not only make the seam exactly 1.5 mm, but also adjust the width of the seam, when one material is slightly shorter, the other is longer. Regard that exactly vertically lay out a number, we look at the corners or levels of flattering the tile on the right edge. If in some place it is necessary to display a wire or drill a screw for a screw, then we use a special that can be used to do up to two dozen holes, drill. The wall tile is softer outdoor, it is easier to drill through.
To install sockets on the apron, you will need to cut a little more than the opening socket. To do this, use a drill in which crowns with diamond spraying. You can use the grinder having a diamond disk. It is universal. It is convenient for it to fulfill many work, if you stretch. When glue the tile at the outlet, it is more convenient to apply it to the tile immediately than on the wall.
Posted apron? Let night stand, and in the afternoon, pull the crosses from the seams and you need to clean the seams. Profile Unscrew and set the seams.
After 3 days, the tile will stick exactly firmly. Look, and it turned out well and the drawing on the tile is pretty! It is always nice to do with your own hands, something for home.