
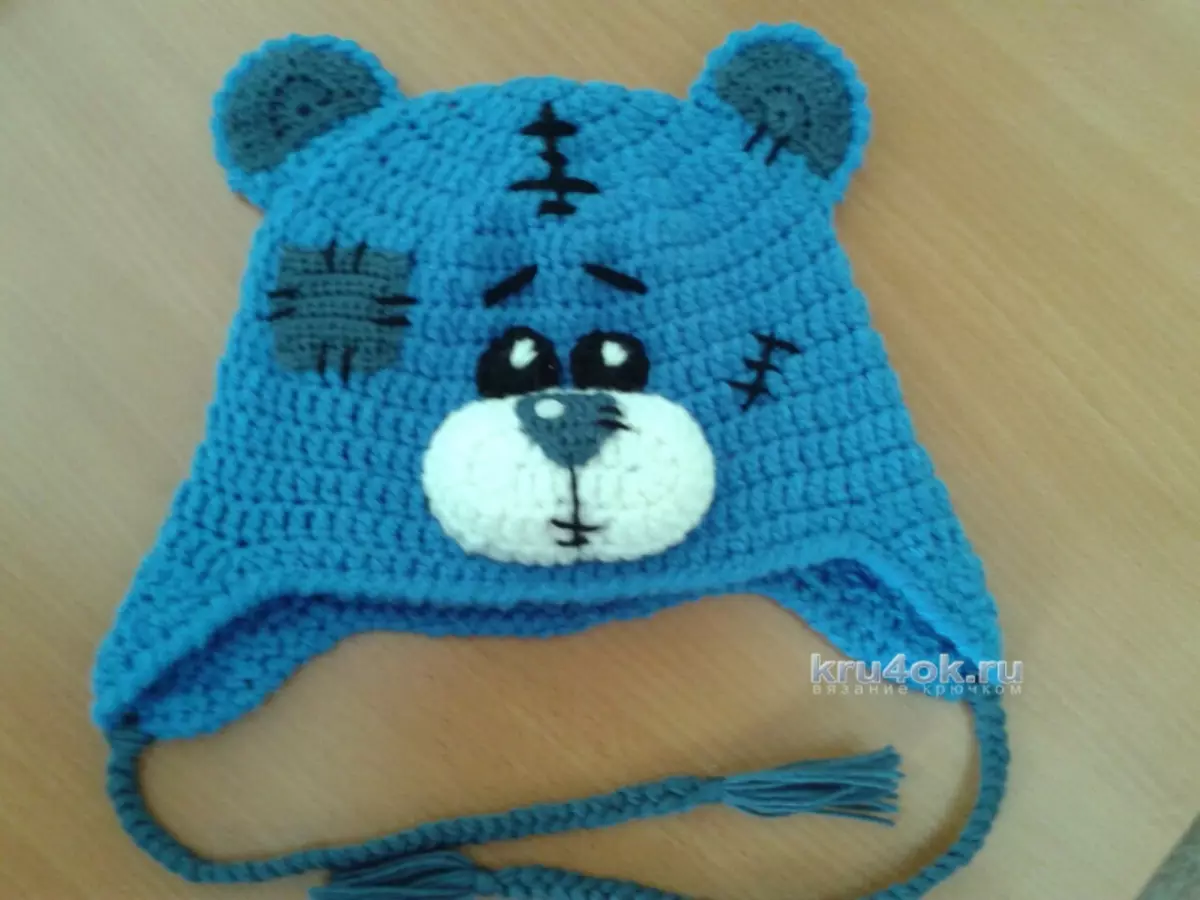
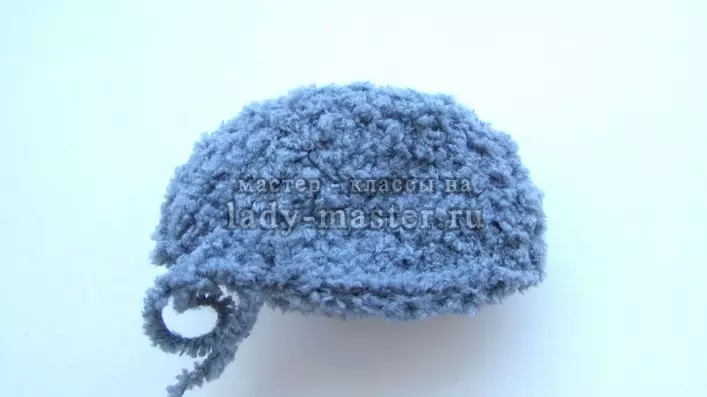
One of the favorite activities of children - watching cartoons in which there are memorable heroes. One of these characters is Teddy's Bear - a kind and positive hero of cartoons. This bear is so popular among the defeats and parents, which appears almost on every clothes, so it is not strange that moms, wanting to please their kids, begin to sew or knit such things. Now a lot of needlewomen perform such problems without difficulty, but the newcomers need a detailed instruction. Next will be presented to the master class on the Teddy Crochet's header, which will help every beginner needlewoman to cope with it.
Such caps Children are worn with great pleasure, so parents knit them, being confident that the kids will be warm and happy from such a head. The caps knit both with ordinary woolen threads, and with terry, so that the bear's wool was like.

Teddy happy
In this master class, we will knit a beautiful and soft hat for a child in the form of Teddy Bears. The kids love such caps very much, they are so nice to the touch. Such a hat fit simple, so, together with a step-by-step instruction, even those who only get acquainted with crochet technique.
What do we need to prepare:
- Gray plush yarn "Alice Softty";
- hook at number 2;
- yarn "iris" color turquoise;
- Threads "Jeans" black;
- needle and thread for embroidery under the color of the cap;
- scissors;
- measuring tape;
- Wat or Singrytepon.

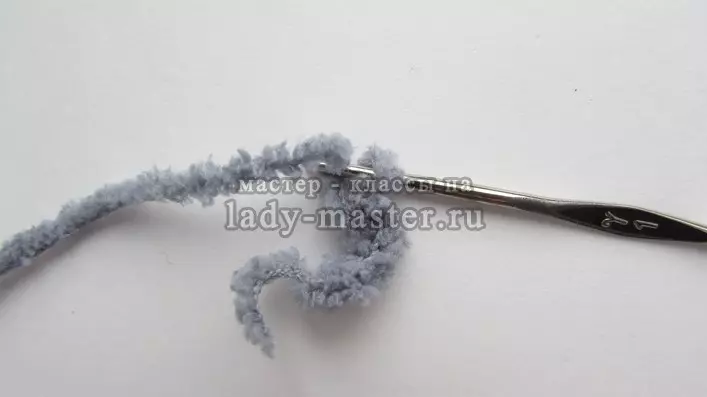
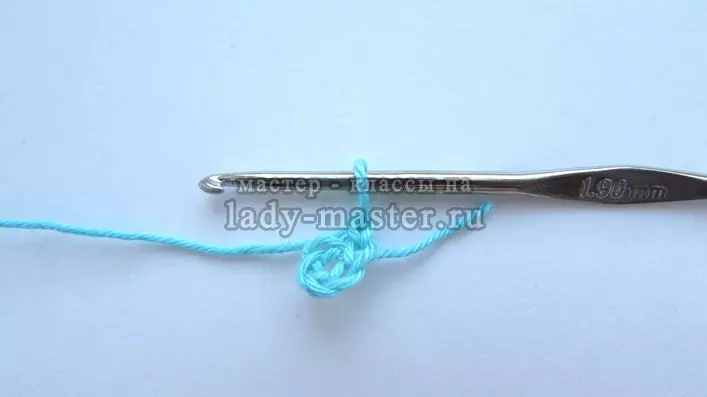
We start knitting, for this, it is necessary to dial 5 air loovers. Now, with the help of the semi-solol, we connect the chain, and then they insert one loop with the half-brace, it will be our rise. Next, in a circle, we make columns with Nakid, but it is necessary to knit solely in a circle, and not a spiral.
Please note that the lines are obtained at the joints, but at the expense of the plush yarn of the seam will not be seen.
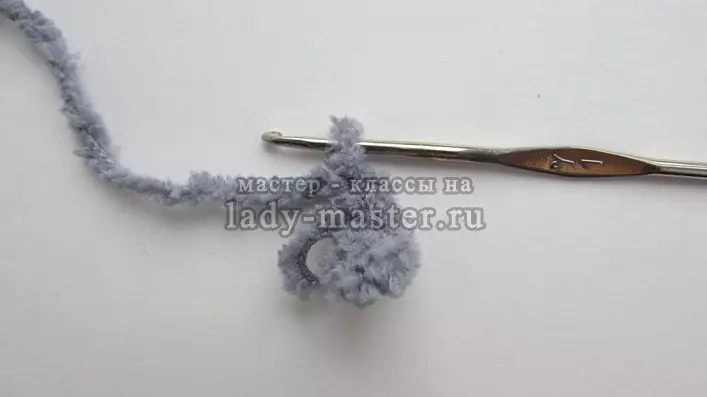
We are sought by columns with Nakud and make the addition to each loop, the edges should not roll out, we are doing in the second row.
Article on the topic: Crafts from rubber bands with their own hands: Schemes with photos and video
The next row, or rather the third, we knit similarly to the second, but already make supplements not in each loop, but through one. Thus, we are preferring the two next rows. Further rows need to knit the same, but add a loop after 3-4. When knitting, you need to ensure that the knitting corresponds to the scope of the child until the scalp is closed. After that, we knit simply without additives, the edges will begin to wrap independently.
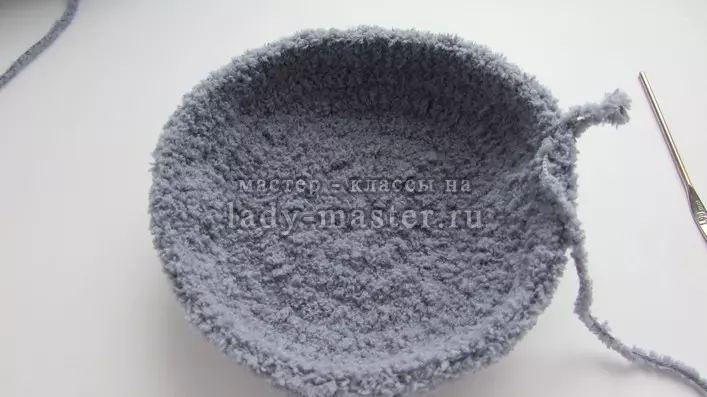
We take a measuring tape and measure from the baby's crown to the tip of the ear or eyebrows, it is the depth of the header. Now you need to knit by conventional columns without using the Nakde, to the length that is necessary. When everything is ready, cut off and stretch on the wrong side of the caps on the irons.
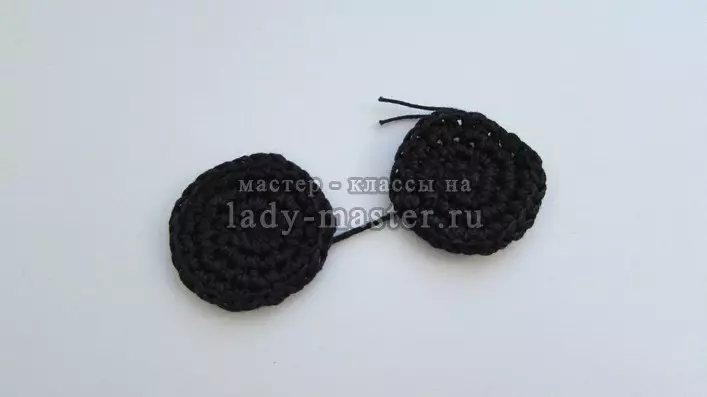
Now proceed to knitting ears. To do this, we recruit four aircrafts from the main thread, weching in the ring. After just in a circle, without using the Nakid, but we make an increase in each row. Weighing We add so that the resulting circle has not started to roll. So it is necessary to check 6 centimeters. Now let's knit without adding and outbreaks so that the eye began to turn around. Thus you need to check and the second ear.
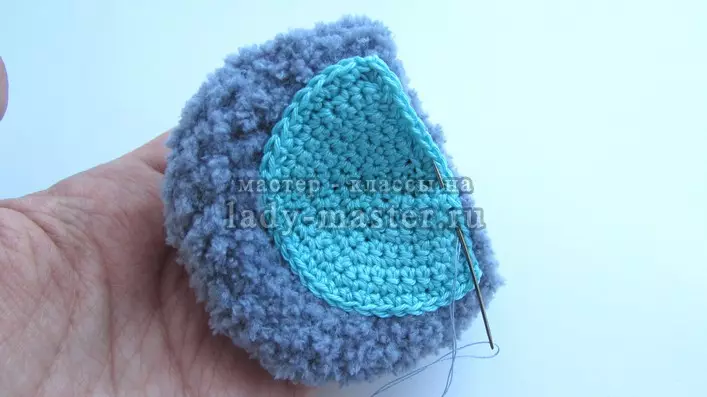
The next part of the ears is the inner birch yarn. We recruit 5 air loopers and flushing into the ring. We make a loop for lifting, and after those who are tied up to half the columns without Caida - they are in charge of two buttons in the three first petrolets of the row. It is necessary to make a climb and deploy the product. Add adds where there are pointers in the photo below. When everything is ready, smooth shots simply check the columns without Nakid. It remains only to sew one detail to another and tie the second ear.


Further showing a stuffing pattern of a bear. We take a turquoise thread and make a chain of 5 air, then we are closed in a ring and tie the columns without an inlet, so in a circle. It is important that in the first three rowings it is necessary to make additions through one looper, and already in the latter you need to do 3-4 buttercups for a whole series. Attentively, it is necessary to ensure that the face is not a flat bottom.
Article on the topic: Fusing at home with your own hands: Master class with video
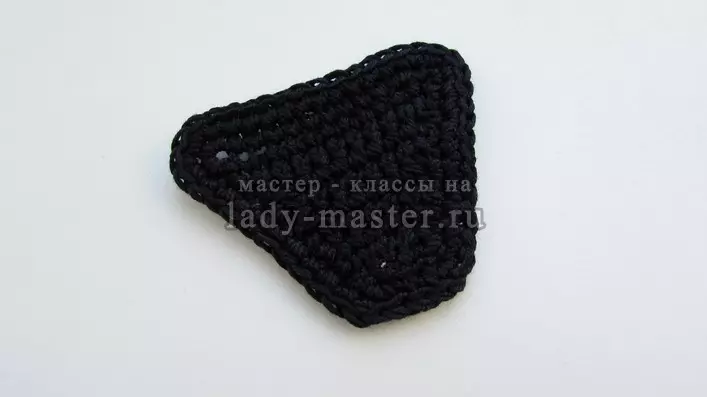
Now we proceed to the nose, which is triangular by the bears. For this, from the black thread, we make 15 loops and insert the row without Nakid. Turn the work and knit the primary pettle with the semi-solol, after the air, and then the columns without Caida and so to the very end, while the last butter is not tied. In this way, other buttercups still knit until it remains only 4. It remains to lie the spout in all edges with two rows of columns without Nakid. The eyes knit, like a cap, only they will be less - the size will be up to 2 cm. The spout is a triangular to be seed with black strings to the muzzle.


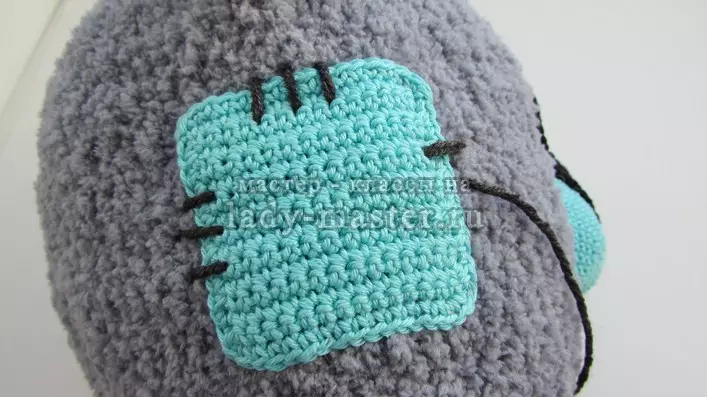
We start knitting a patch that is very easy. It is necessary to make 20 air, and now simply plunge 15 or 16 row by columns without Nakid. Get a square. When to do it, we interfere with the columns without Cidid. We need this detail to sew black threads to the teddy's cheap, but as indicated in the photo below. In the same way, we do with all the other details, do not forget that we are filled with cotton wool or syntheps. In order for the cap well well, the base must be tied with columns without a black threads in black. And here our headdress is ready! It is important during knitting caps to try on the head of the baby.


Video on the topic
This article presents videos with which you can easily learn to knit Teddy Crochet's caps without much difficulty.