
Traditional Japanese art bonsai firmly entered world culture. The cultivation of trees in miniature is troublesome and requires incredible time costs. Sometimes to grow a miniature tree, gardeners spend more than a dozen years, and care for the created dwarf is so complicated that it is better to leave it professionals. We offer you to get around a large number of difficulties and pamper yourself with a bonsai bonsai tree, step-by-step instructions will help you in creating miniatures.
Useful tree
According to an ancient Japanese legend, one of the emperors commanded his subject to create a miniature copy of the state. To accurately reproduce urban streets on the layout, dwarf trees were invented. The advantage of a beaded bonce is hard to overestimate:
- beauty;
- lack of care requirements;
- the ability to create almost any instance in a short time;
- a wide selection of forms, sizes and ways of design;
- The ability to admire the miniature year-round (the real bonsai takes place for the winter period of rest and loses its decorativeness);
- The composition of the composition is suitable even for beginner masters;
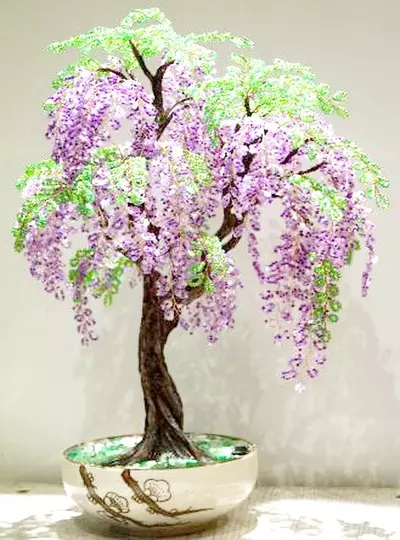
- The ability to realize your plans, for example, make a flowering tree.
Caring for such a composition will be minimal, you just need to wipe dust from time to time. But you can admire it year-round and will fit the bead tree to any interior.
From the history of bead
Modern craftswomen can create miniatures from various materials such as natural origin and synthetic, but most often the choice stops on the bead. Why? The answer is very simple - tiny beads are able to undergo a test of time and not lose their decorativeness. This is evidenced by archaeological excavations.
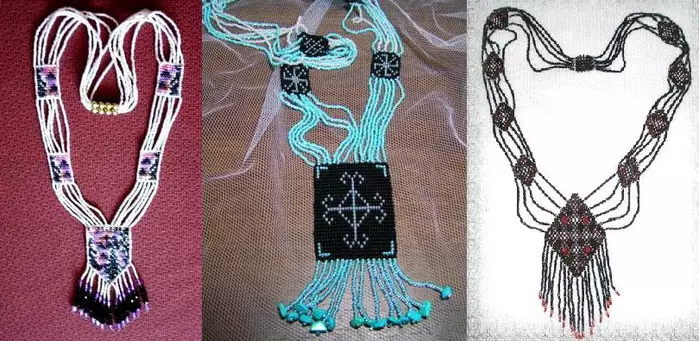
Beads was invented by the ancient Egyptian masters. They were the first to revealed the secretion of glass manufacturing and created small beads. From the modern material, the ancestor was distinguished by turbidity, an uneven surface, dull paints. Nevertheless, the green bead detected by the Egyptologists did not lose its type, although according to the calculations of scientists for more than 5.5 thousand years! It was the Egyptians that contributed to the creation of crafts and the development of beadwork as an independent type of creativity. They invented the technique of mesh nose, allowed to make crafts without the foundation.
Article on the topic: Takes with a flower and a crochet scarf
Modern material is produced throughout, but the main centers specializing in the manufacture of high-quality glass is Czech Bohemia, Italy and Japan. Buying beads of these manufacturers, you may not doubt his quality. The Japanese not only mastered the creation of glass beads, but also beat their shape. It can be both simple or corrugated and have complex geometric shapes - cubic, capped, triangular, curved (IATIA).
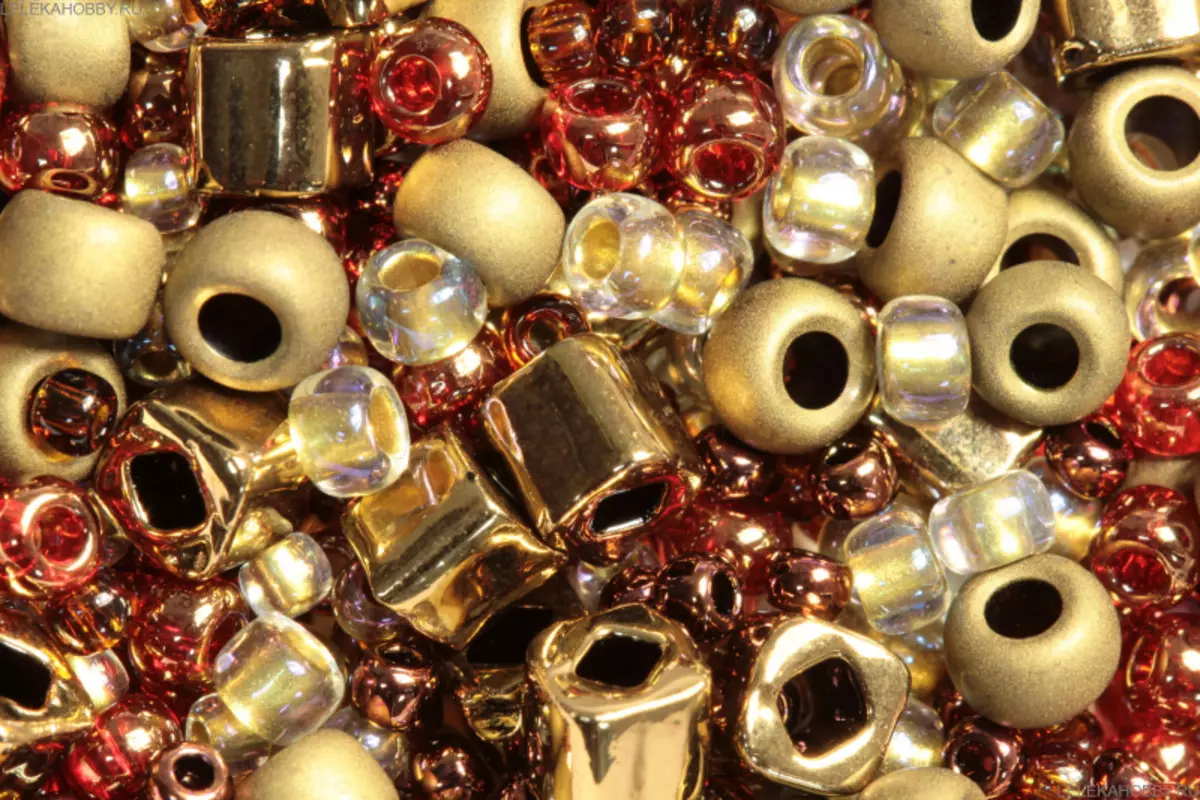
Choosing the material, know that its number is the greater, the smaller the bead itself. And so that the work was neat, the tool should be seamless in accordance with the number.
Materials and machinery
For registration of thumbnails you will need:
- beads of several shades of green;
- wire suitable size;
- segment of a durable wire for the trunk;
- Floral tape;
- nippers;
- Gypsum (Alabaster);
- Glue "Moment Crystal";
- PVA glue;
- acrylic paints or gouache;
- Decor (pebbles, small figures);
- Tank capacity (optional).
There are many techniques for the manufacture of bead crafts, but for a bonce of needlewomen choose looping weaving. It is characterized by simplicity and speed.
The technique is to create a loopset on the segment of the wire. Work is performed on the following weaving scheme:
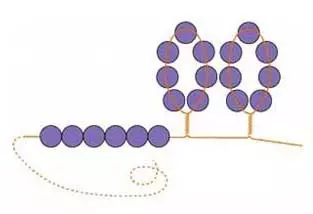
On the segment of the wire 40 cm long, 8 beads. Align the first and last and twist the ends under them in several revolutions. A neat loop is formed.
Boning Bonsai
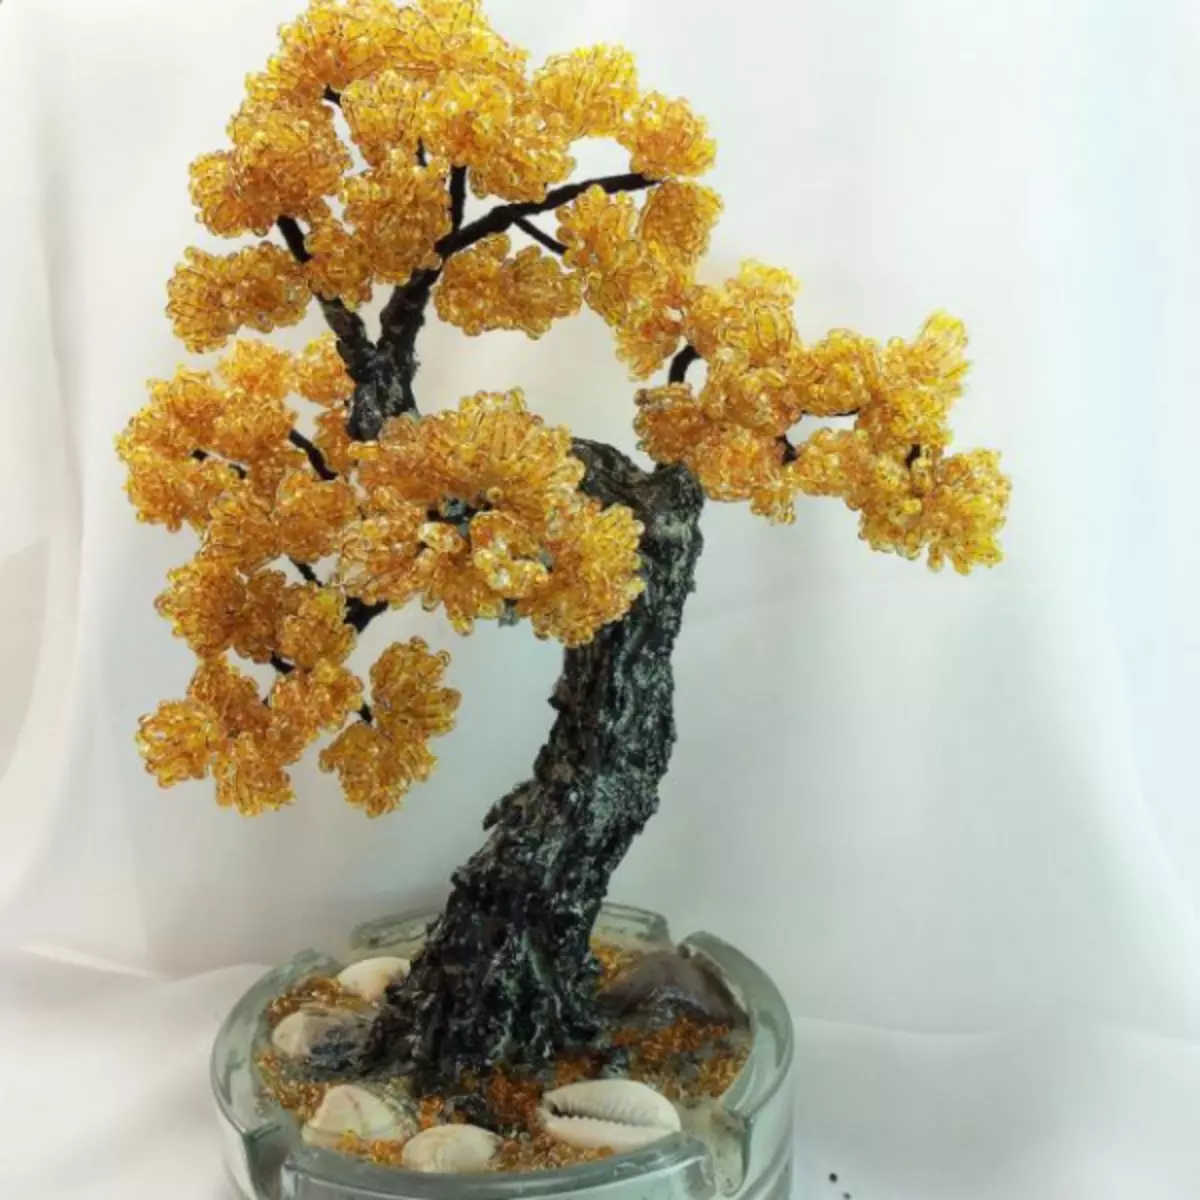
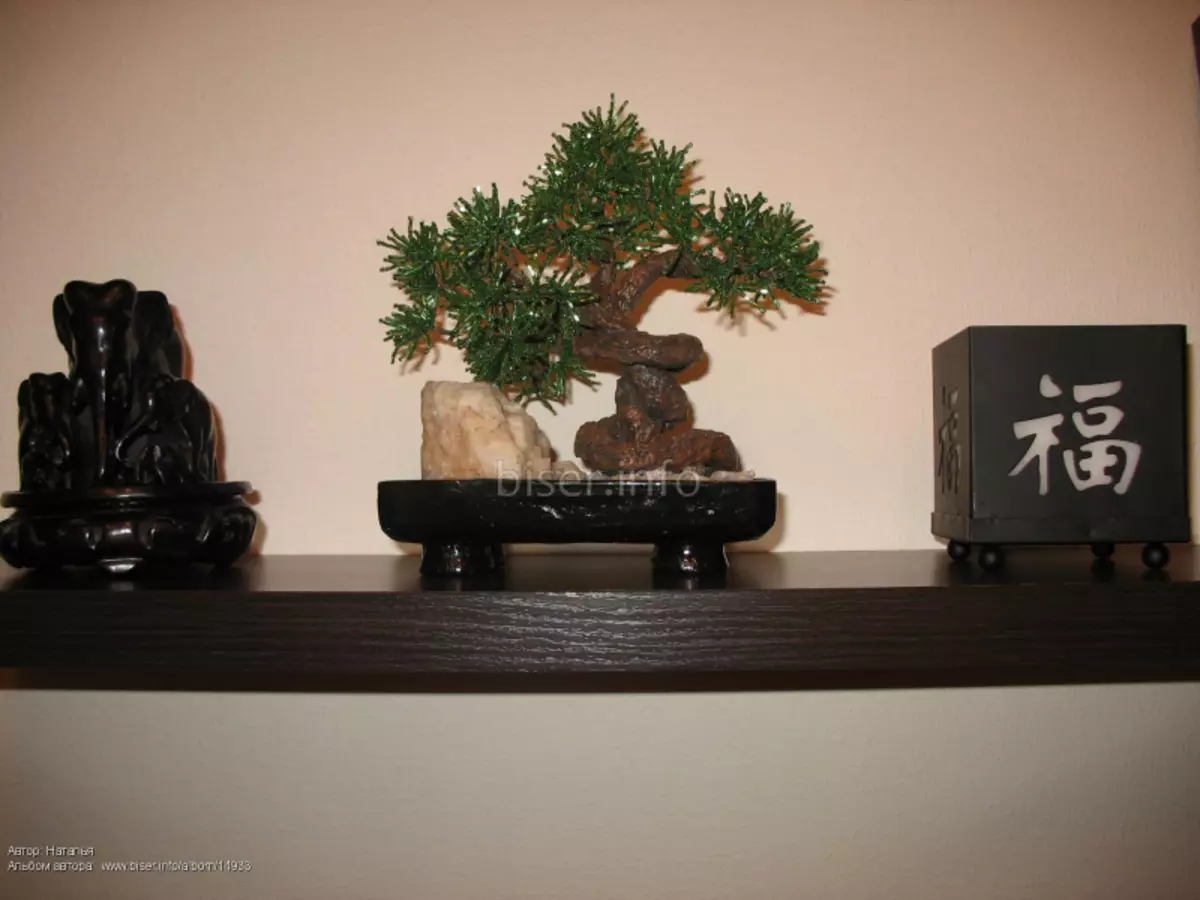
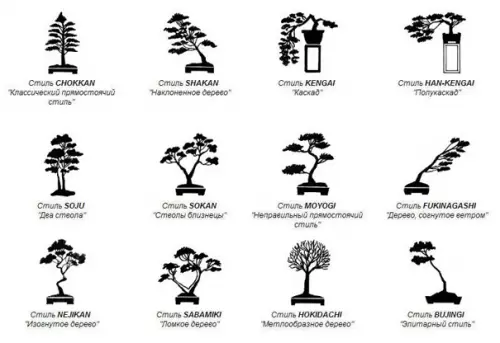
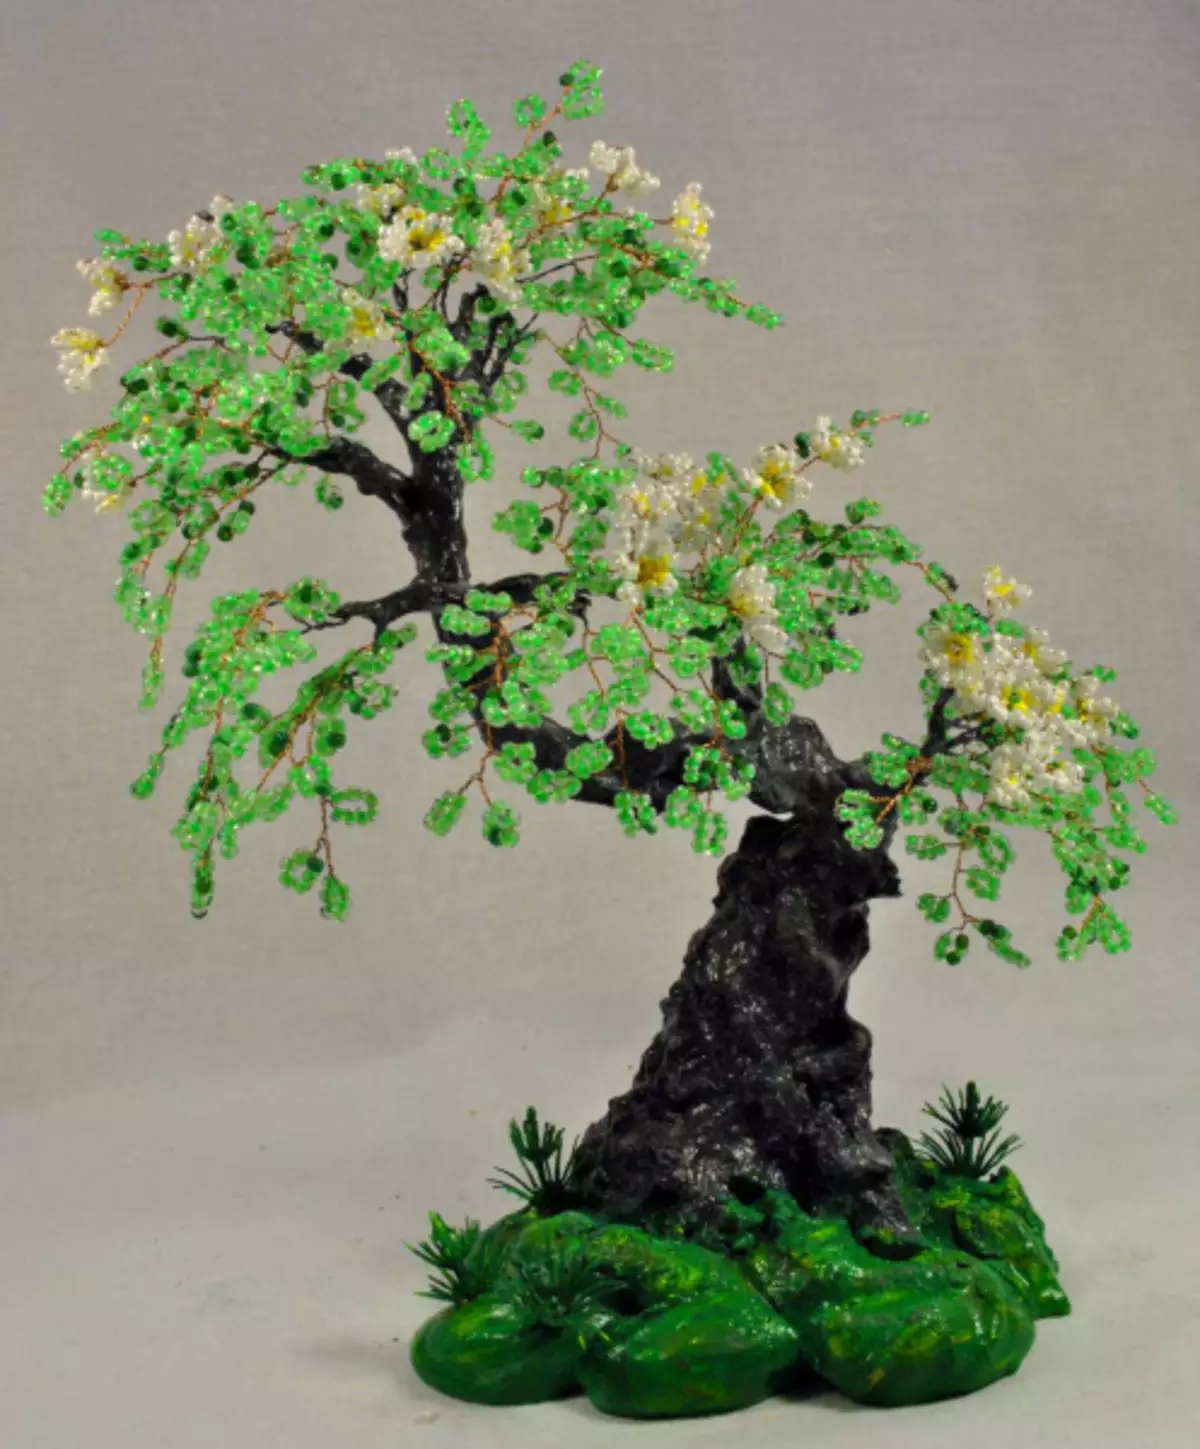
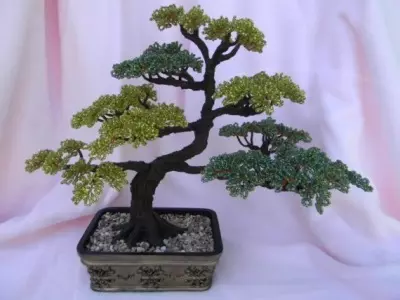
Create your own hands bonsai from the beads will help you with a detailed instruction with a step-by-step photo. Before performing the work, pick up a suitable sketch or draw it yourself. Take a look, which variety of forms offers traditional Japanese art:
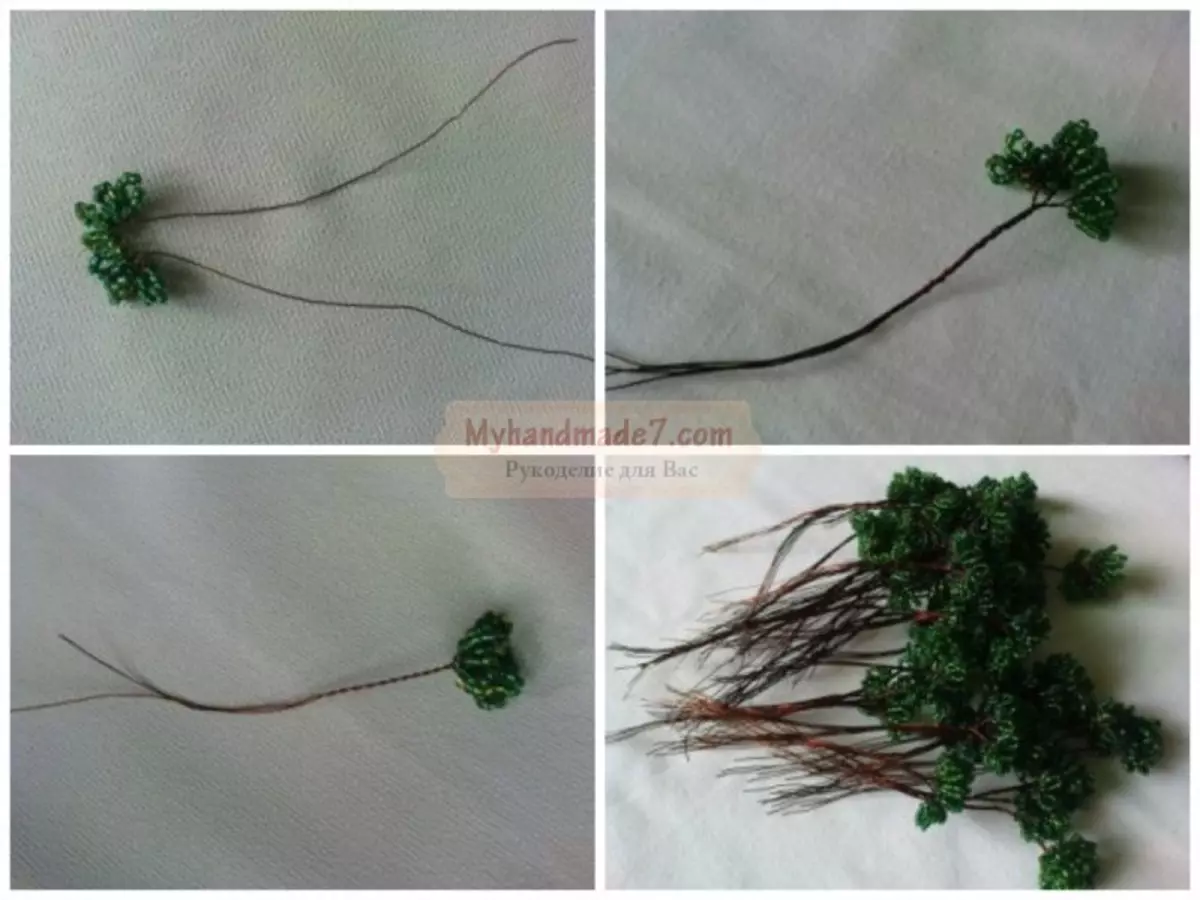
Deciding with the style of miniatures, you can start work. First form sprigs according to the scheme described above. On the beaded wire, form a loop of 8 beads. Their number may be arbitrary, it depends solely on your imagination. Place the beads on the free end again and form the next loop. In total, 8 green hoppers should turn out on top of the branch. Wire ends twist and reduce up to 10 cm long with bodies.
Article on the topic: Boots with hook bearings. Knitting schemes
To create a bonsai need at least 150 such twigs. Form the larger branches from them by connecting the bundles of three pieces. Make branches in accordance with the selected sketch.
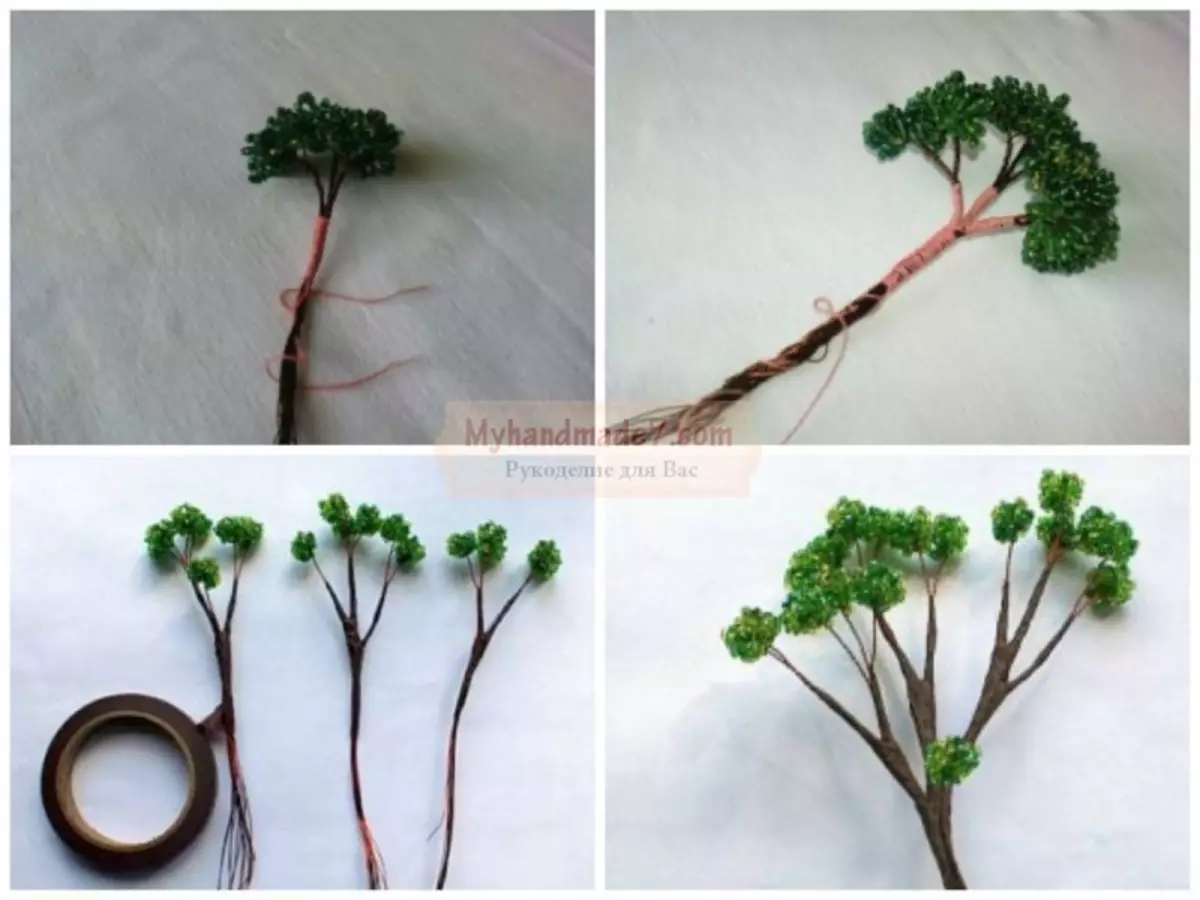
After connecting the wire segments, wrap the surface with a floristic ribbon or yarn. You must have several large branches that should be closed to a trunk from a thick wire.
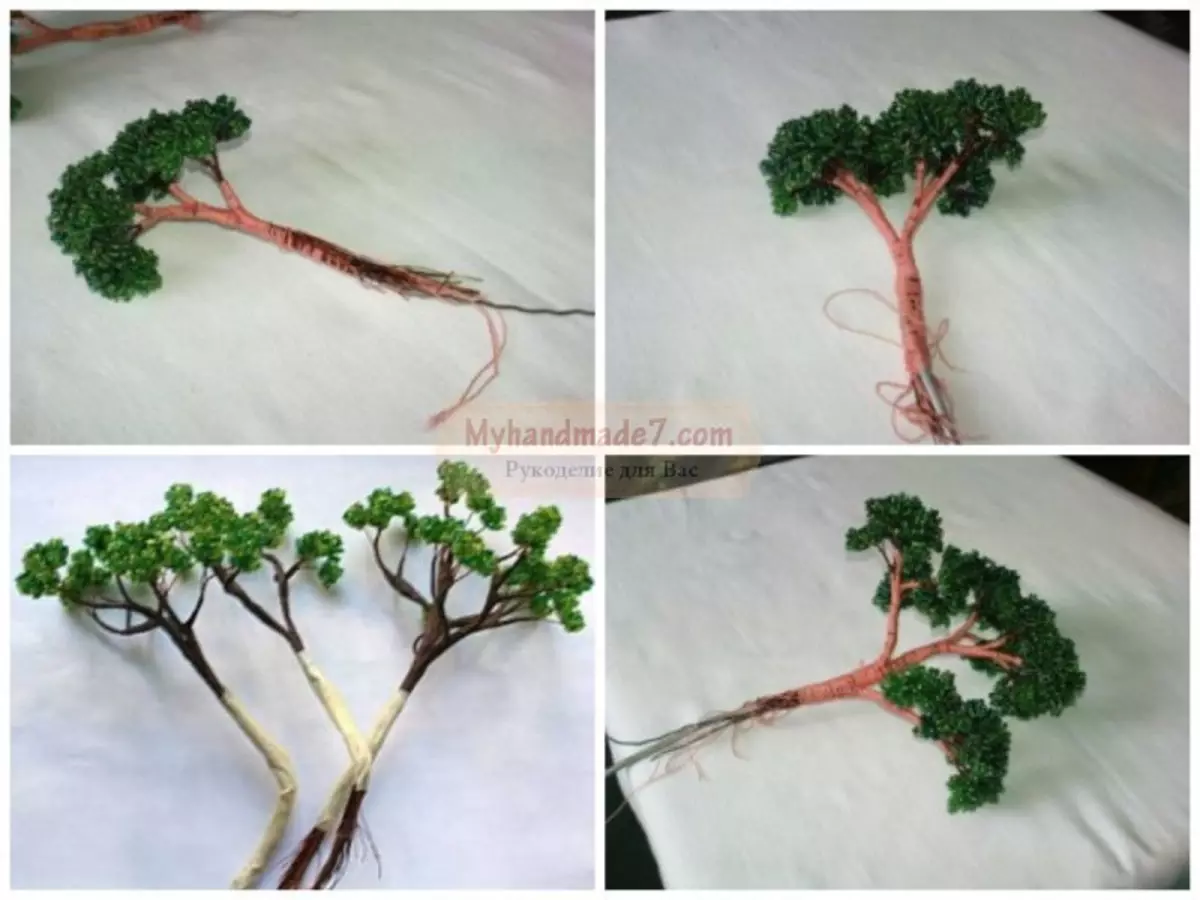
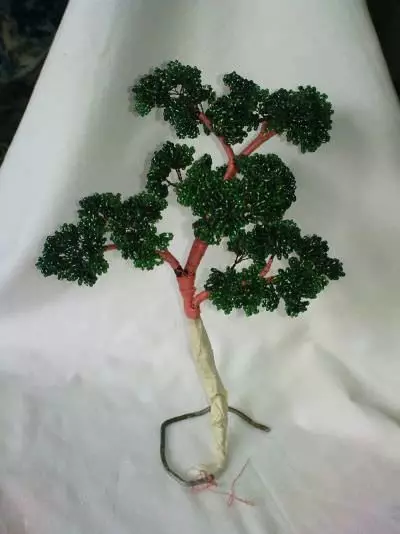
On this, the creation of miniatures does not end at all.
Assembly and decoration
Now you need to roam the bonsai and add it to the decor. This will help you with a small master class with a photo.
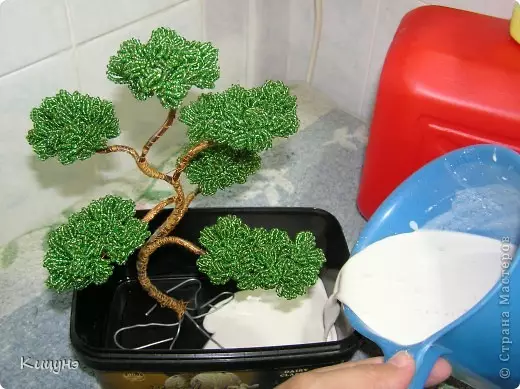
For landing, you can use both the traditional low rectangular pot, and create a small island from alabaster.
To make an island, select the tank of the appropriate size and check it with the bottom of the polyethylene sachet. Divide the alabaster, place the base of the tree in the pot or shape and fill with the solution. Stick Bonsai until the gypsum grabs. Remove the thumbnail from the form.
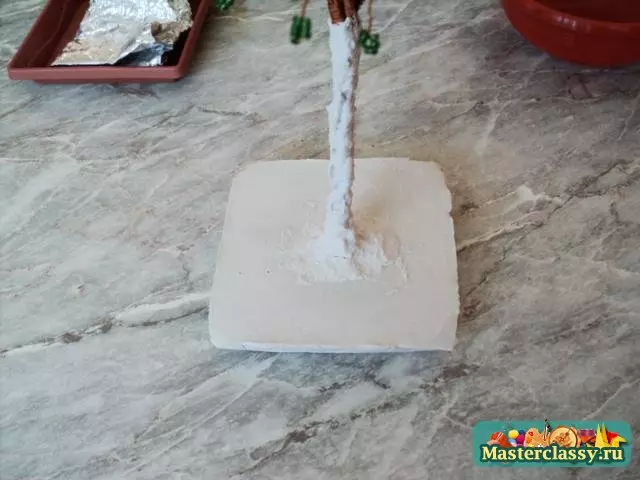
Now it's time to do the trunk. To do this, mix the alabaster with PVA glue and apply Cashitz on the barrel and branches. With the help of a wooden spit, make a bark by making small recesses.
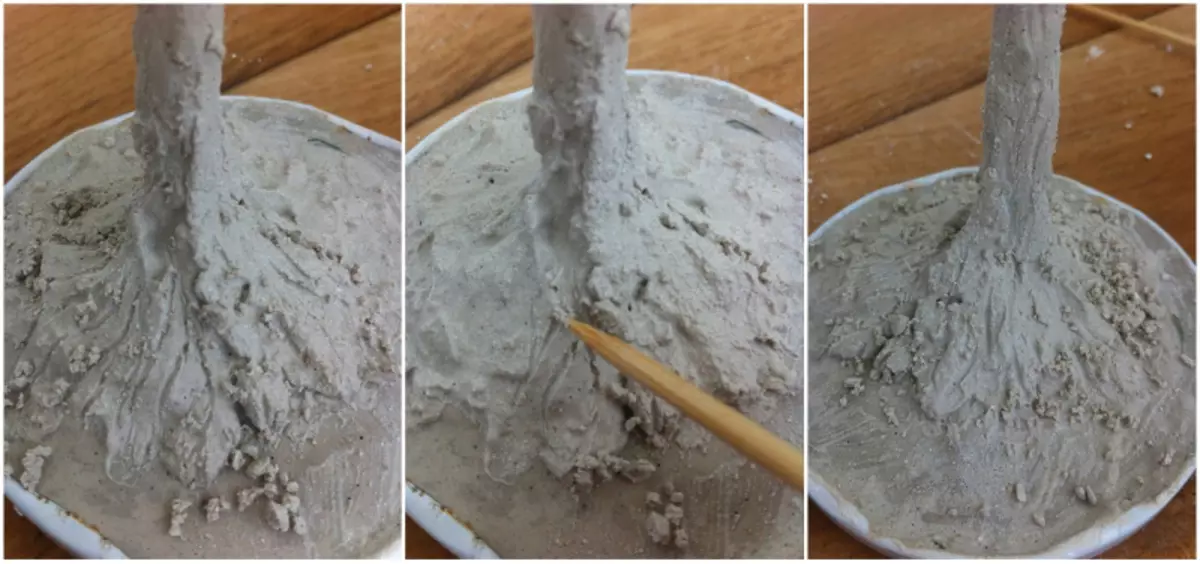
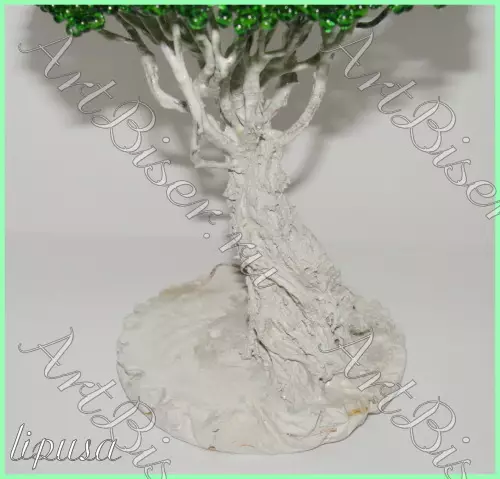
Leave the barrel to complete drying. As a result, it should acquire this kind:
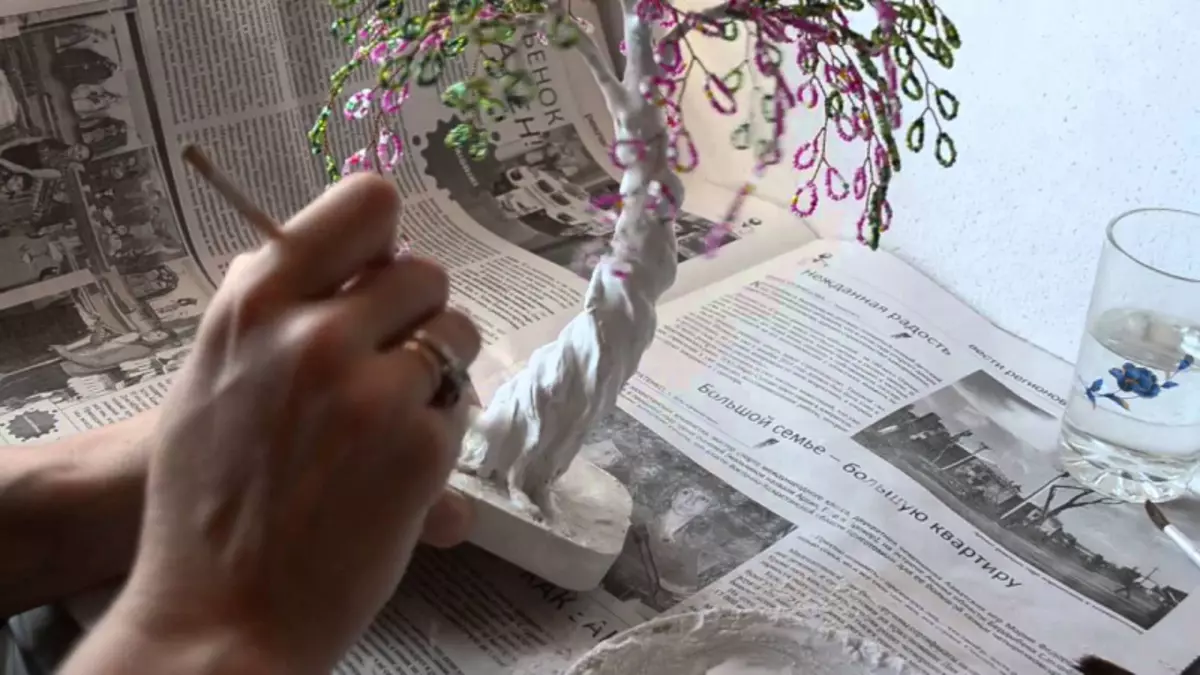
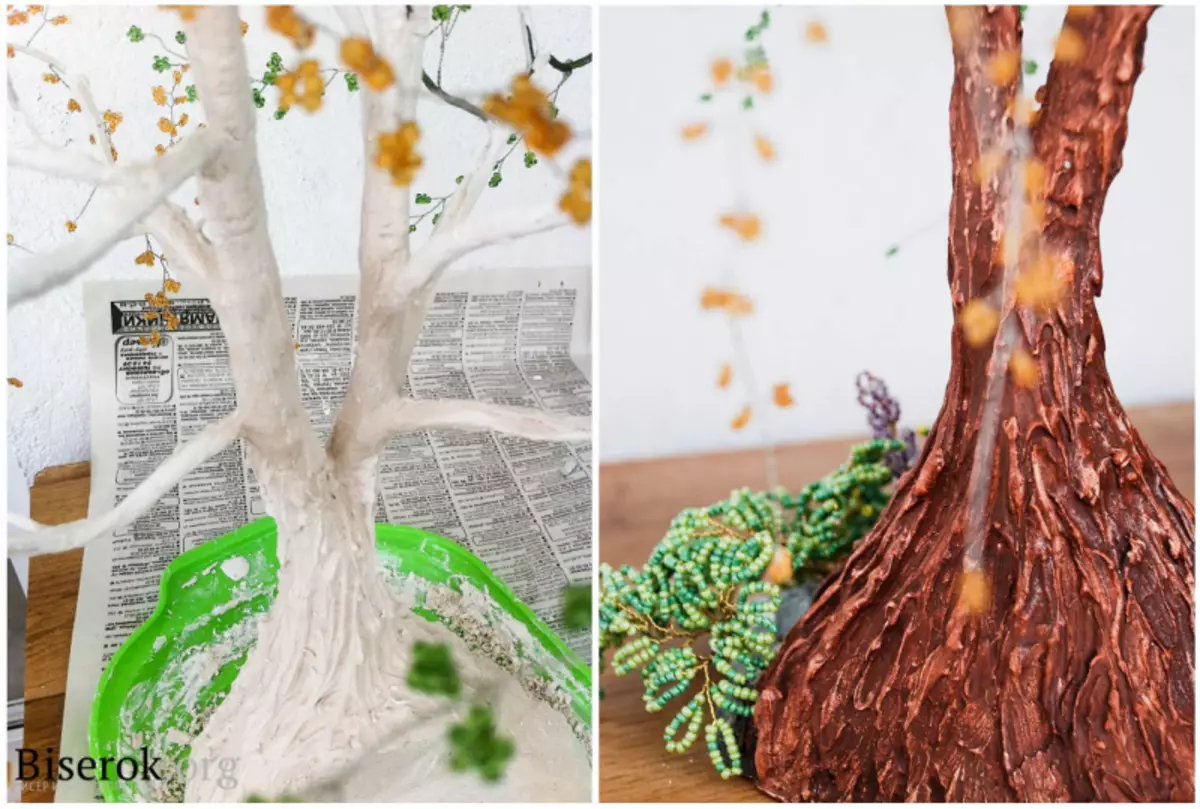
Use the gouache or acrylic paint for painting the trunk. Apply darker tones in "cracks", and from above the lightest shade. Come on a slightly moistened cloth on the surface, as if erasing paint. Paint the island to the desired shade, complete the decor and cover with varnish. He will not only give durability and facilitates the care of miniature, but also make paints come down and sue.
Bonsai beads ready! It will organically fit into the interior of your dwelling, adding a notch of refinement and the realization, and can also become an excellent gift for a loved one.
Article on the topic: Paper dolls with clothes for cutting
You can see ideas for design below:
Video on the topic
To familiarize yourself with the nuances of the manufacture of a beaded bonsai to help you will be helped by video lessons provided in this section of articles.