
Creating toys has a long history, since from such a material you can do almost all: from animals to furniture. Children love to play with such toys, as they are bright and interesting. This article provides the best ideas for creating toys from cardboard with your own hands.
Simple toys
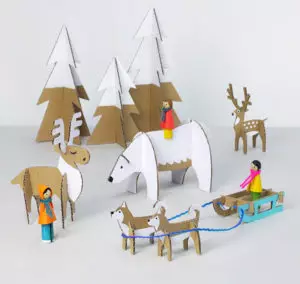
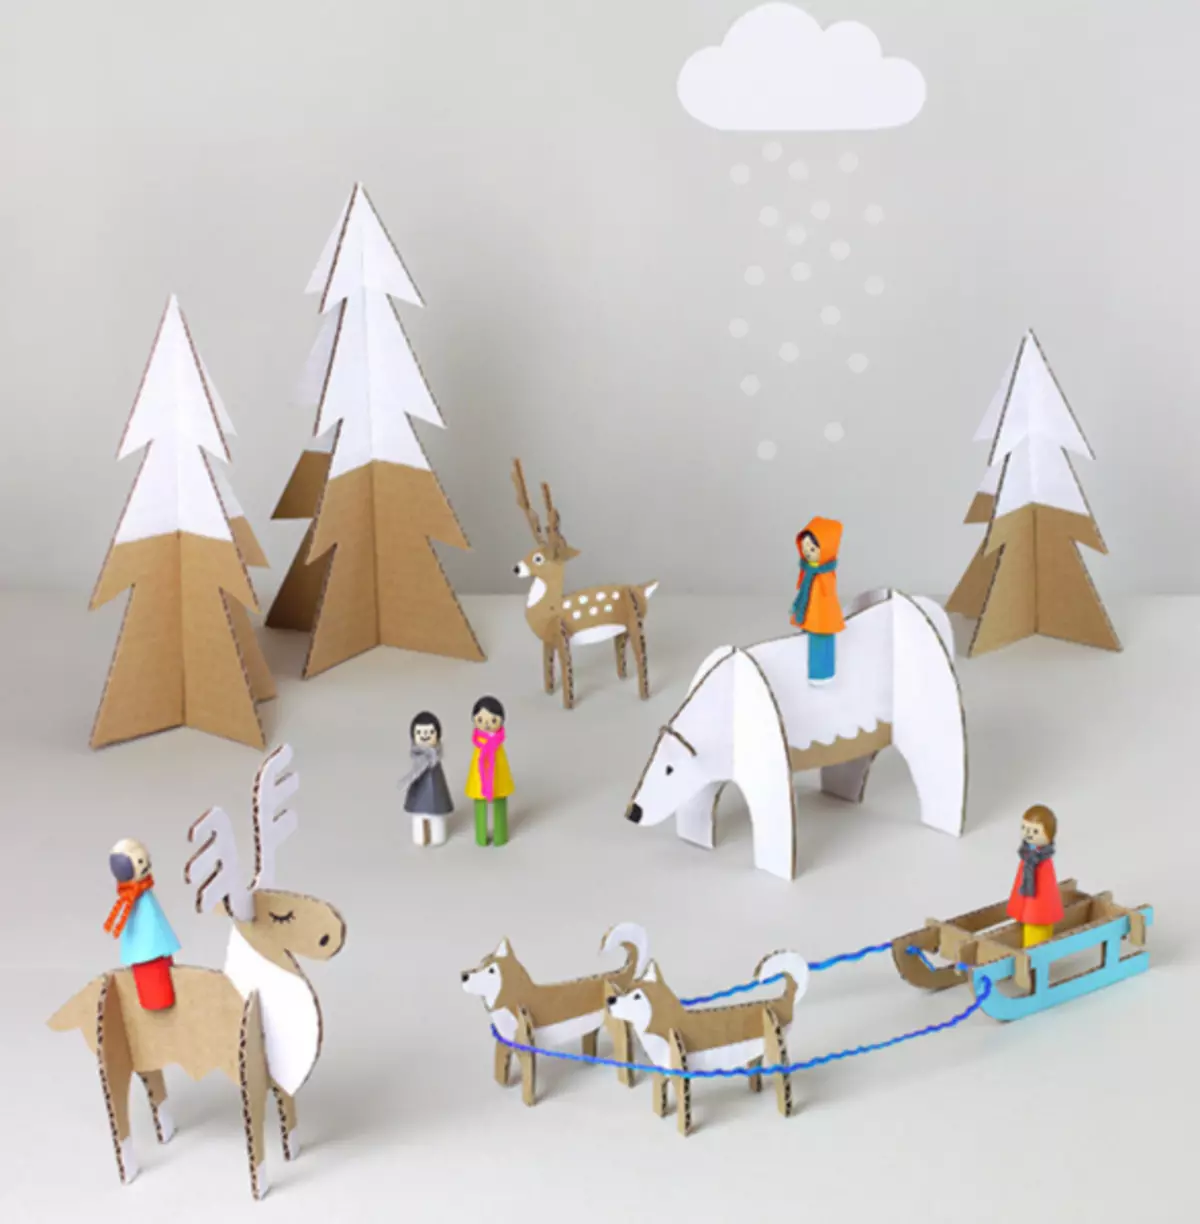
Let's first find out how to make simple toys with your own hands. An example will serve as a polar tale, but you can come up with something else. We will make several toys interconnected by one story.
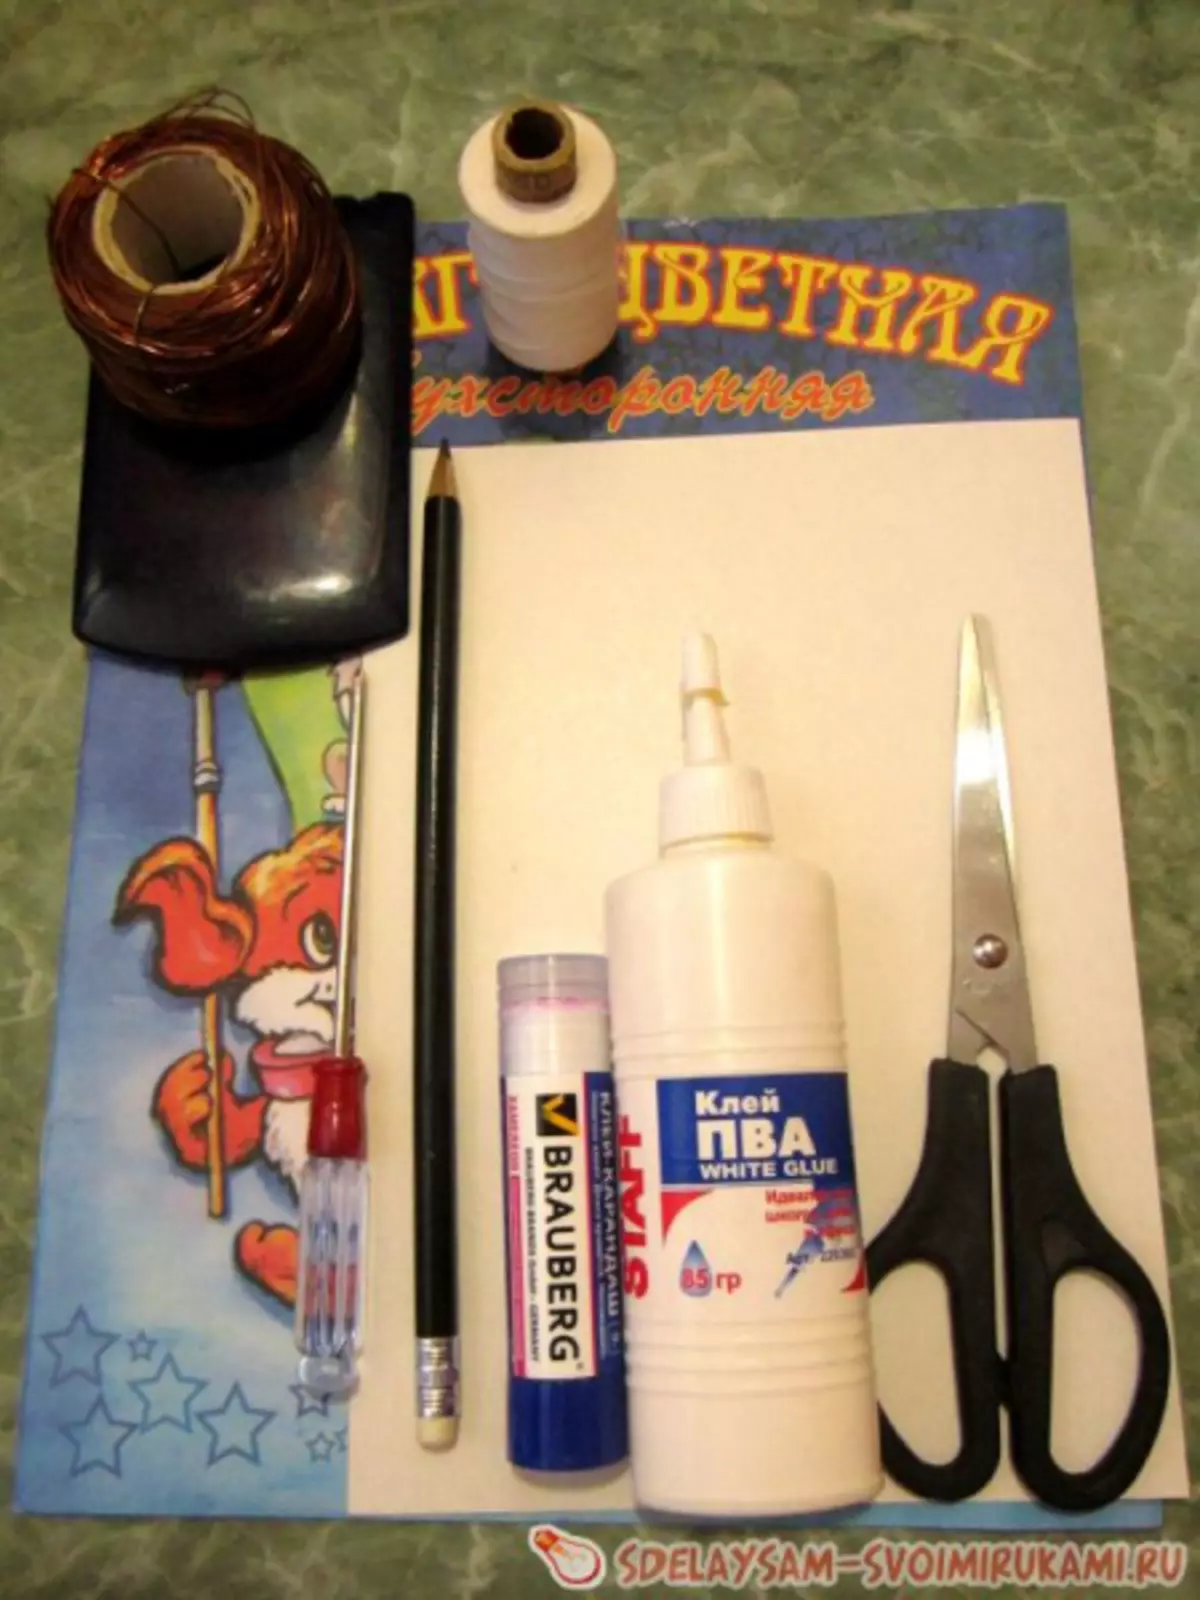
In order to make such toys, we will need:
- cardboard;
- scissors;
- glue;
- colored paper;
- threads;
- Black felt-tip pen (to draw eyes, mouth, nose).
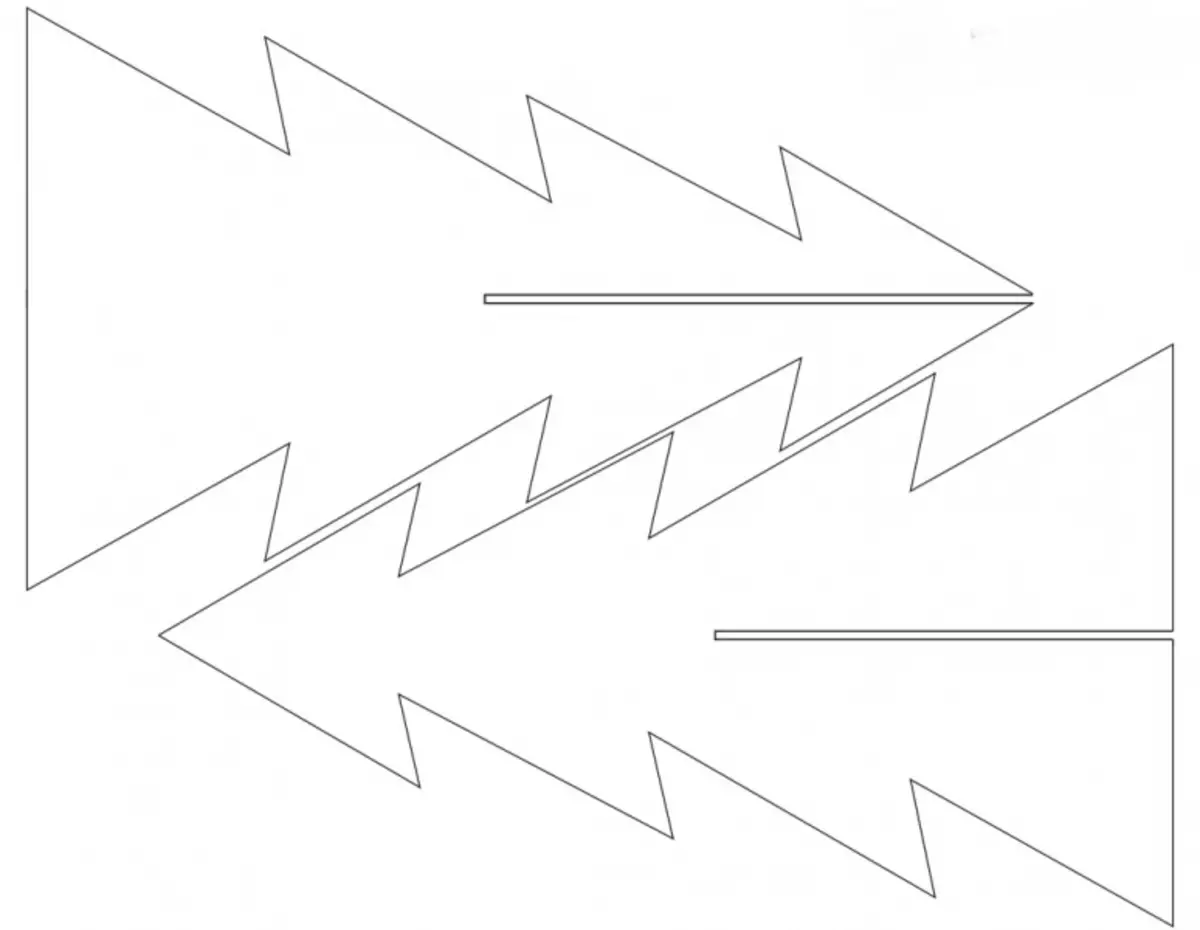
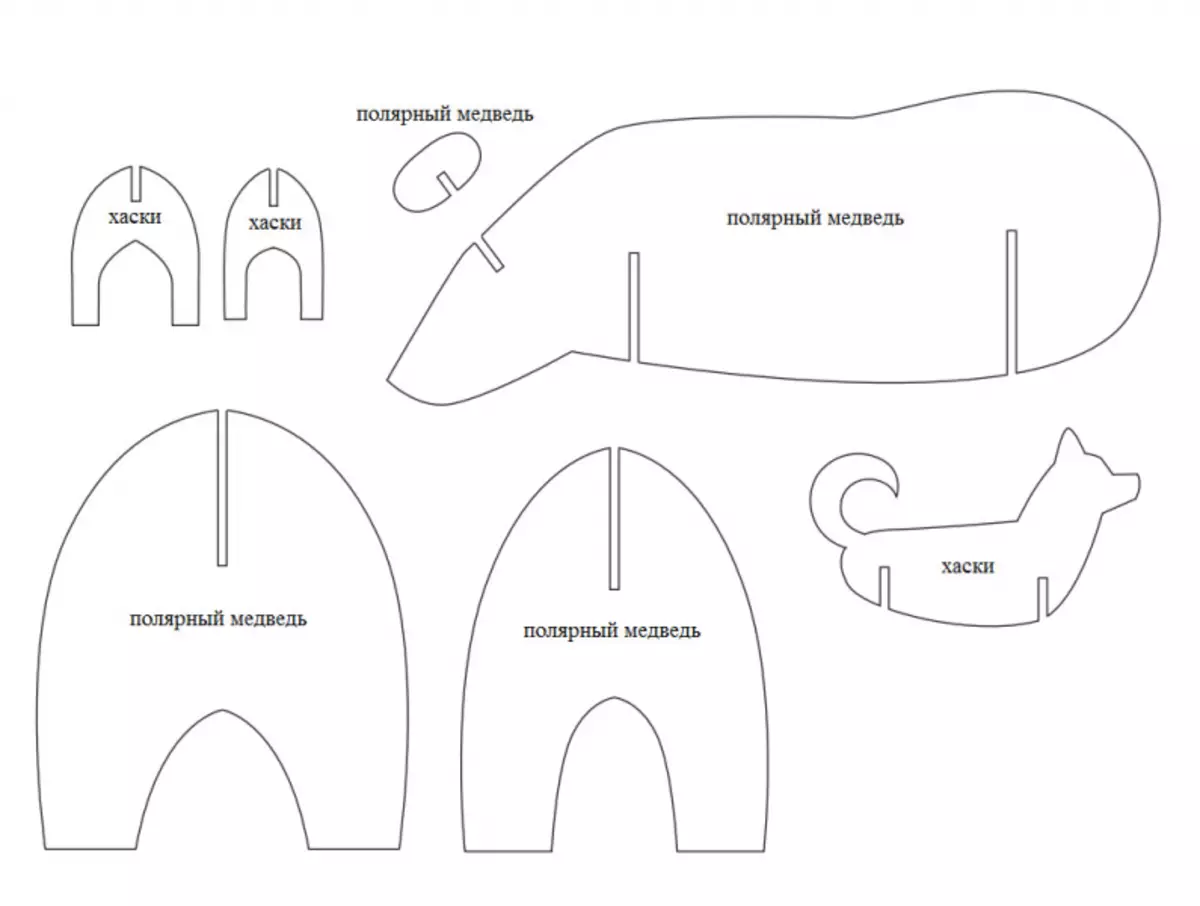
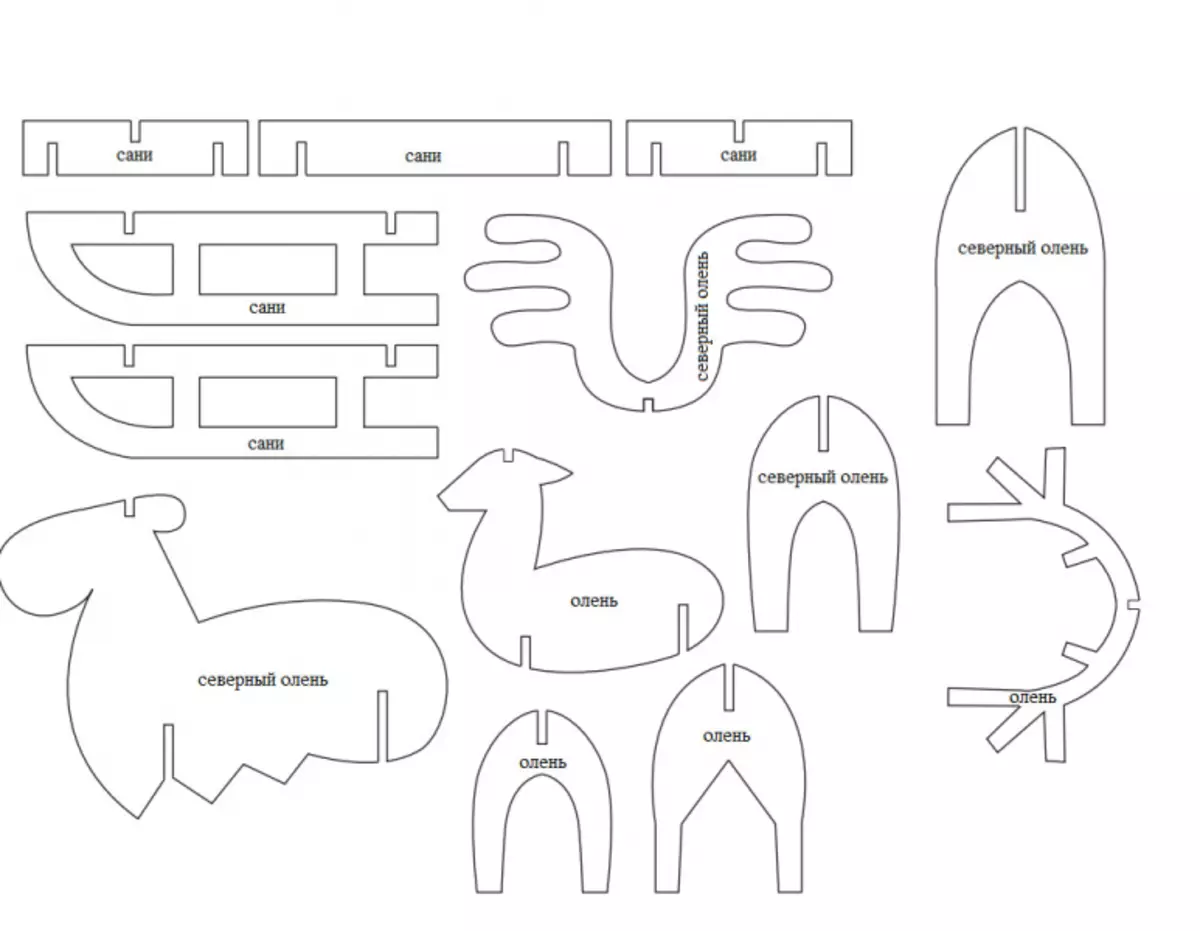
In order to start work, you need to transfer stencil cardboard, which are presented below in the photo. Or you can draw something that you want to do.
For the Christmas tree we use such a pattern.
And these templates are suitable in order to make a dog and a polar bear.
And of course, do not do without reindeer and sled.
Now it remains only to cut all parts, stick where necessary, white paper and combine all the details together.

Next, you can make figurines, also cutting them out of cardboard and engaging parts of the body. For a more beautiful view, you can draw clothes with colored paints or pencils.

Here is our fairy tale and ready!
Options with threads
Another interesting use of cardboard and thread can be in the manufacture of different toys that can be used for both playing with children and to decorate the New Year tree.
One of these toys can be an Hedgehog with Pompon.
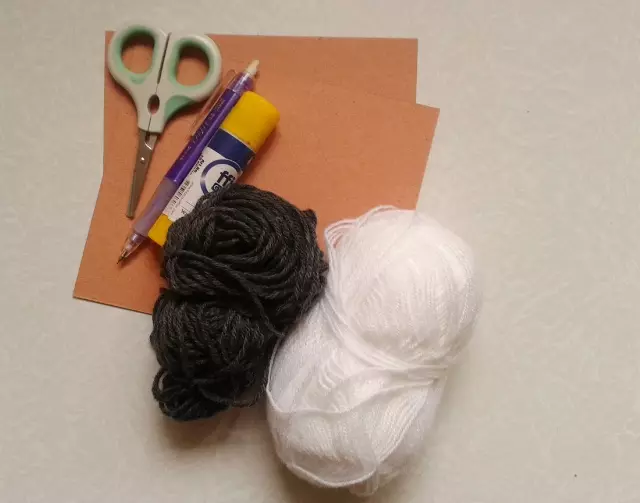
To make such a hedgehog, we will need cardboard, pencil, glue, scissors and threads for knitting.
Article on the topic: Applique "Autumn Carpet" from leaves and colored paper with photos and videos
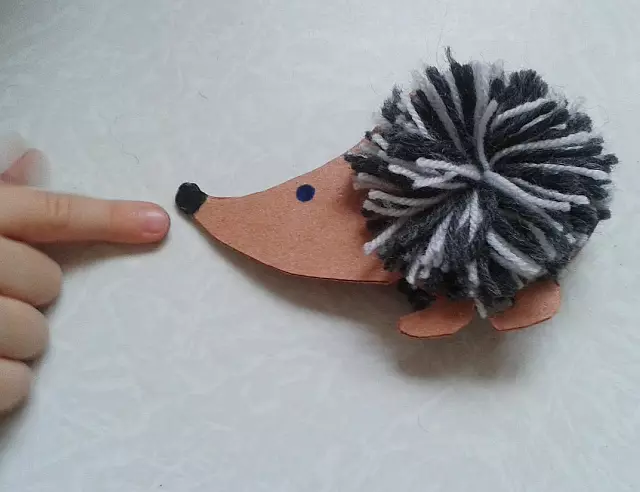
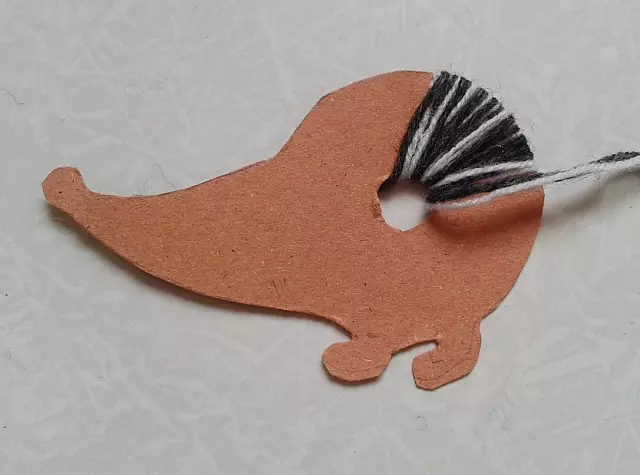
Next, take a pencil and draw the form of our hedgehog on cardboard. To the cardboard, on which hedgehog was drawn, we apply another sheet of cardboard and cut together along the contour. Where there are paws and head, you need to glue.
In the middle of the circle, we will make a hole and begin to wind threads as for the manufacture of pompon, but not until the end of the circle.
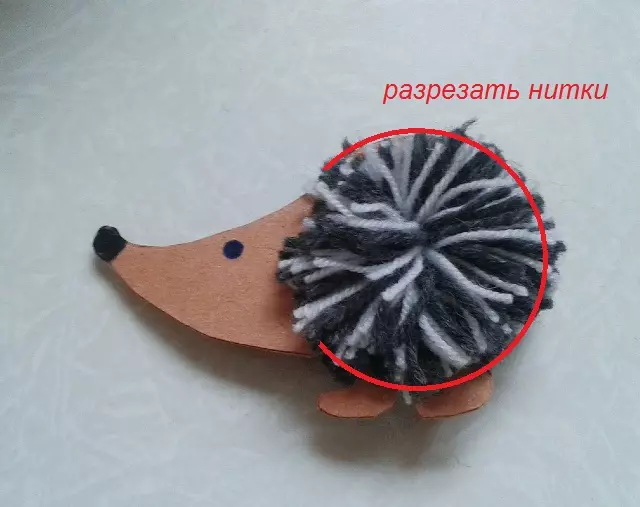
Then cut the threads at the outer edge.
Now we draw the hedgehog eyes and nose, and then we attach the rope to it so that you can hang on the Christmas tree.
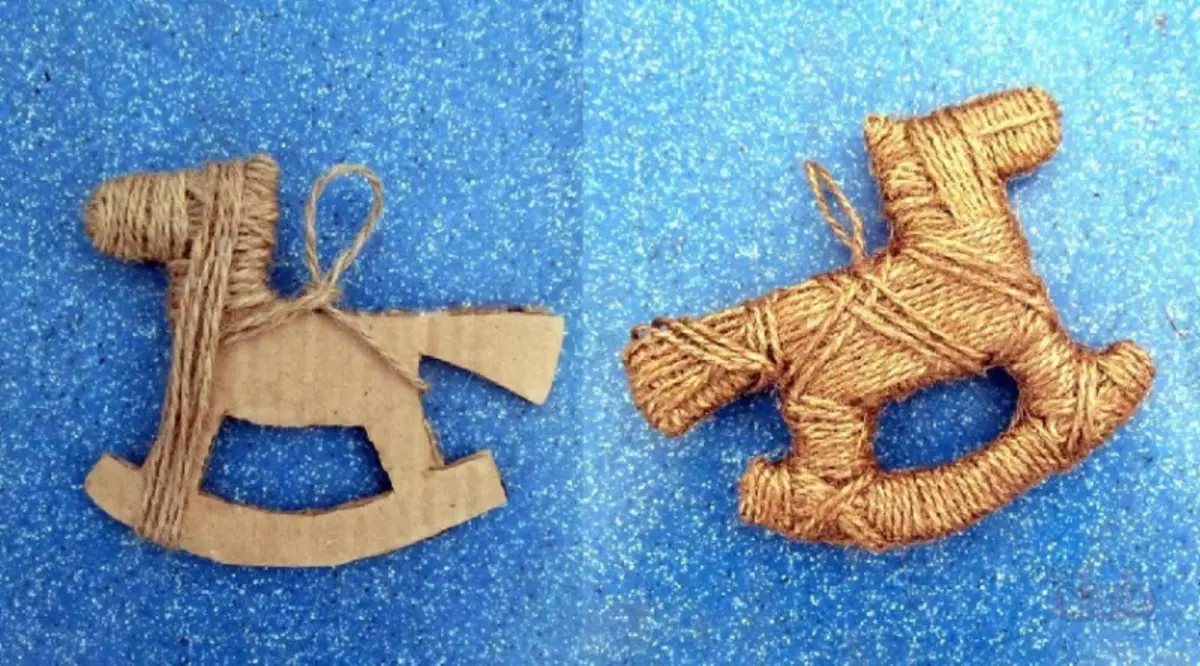
You can also use cardboard and threads, winding the carved figures, which looks amazing.
Bear and doggy
The most interesting toys of cardboard for children are moving toys. Make them a little more complicated than the previous ones, but still it is easy.
To make a moving bear, we will need:
- cardboard;
- colored paper;
- glue;
- scissors;
- simple pencil;
- wire with a diameter of 0.45 mm;
- awl;
- threads;
- Black marker or marker.
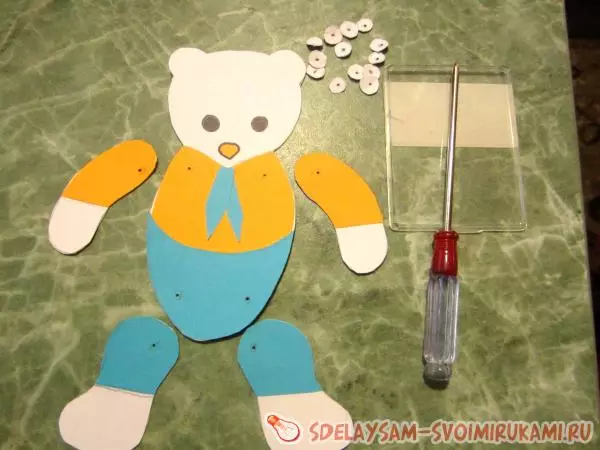
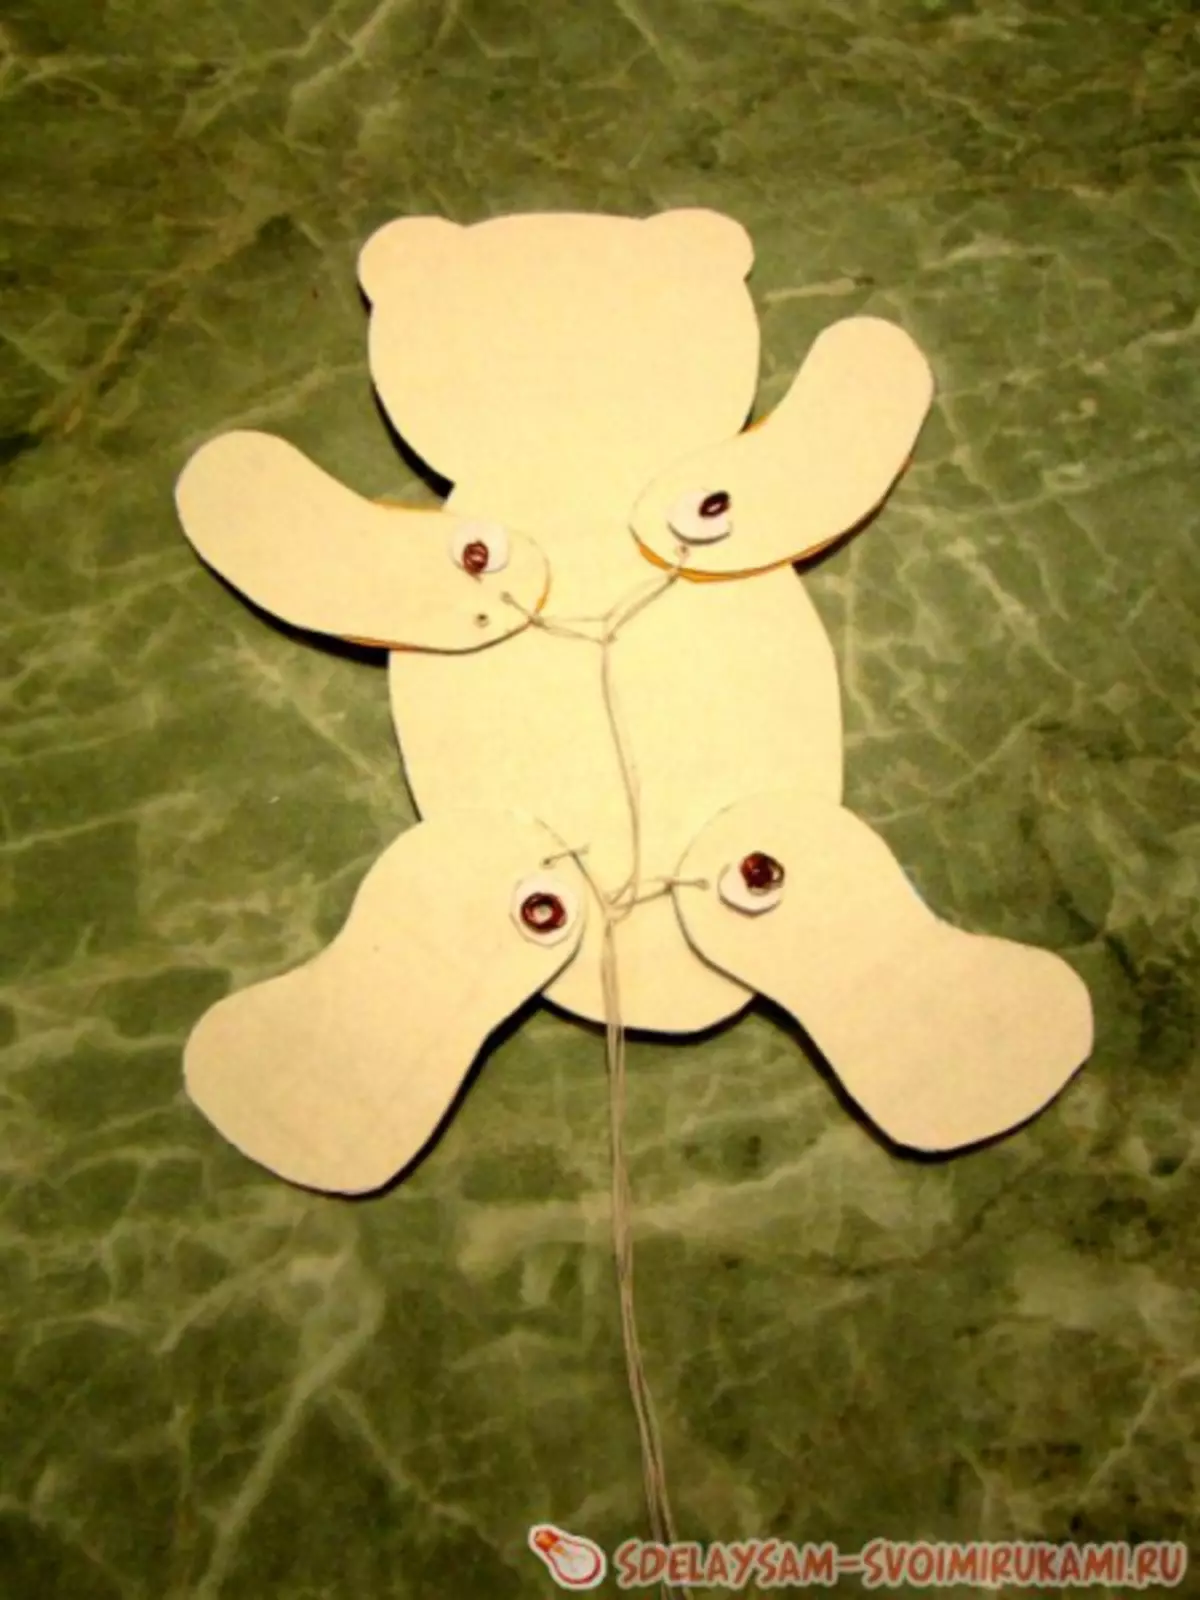
To begin with, we need to draw parts of our bear on cardboard and carefully cut them. A total of: head, torso, two front paws and two rear paws, buttons for fixing the wire.
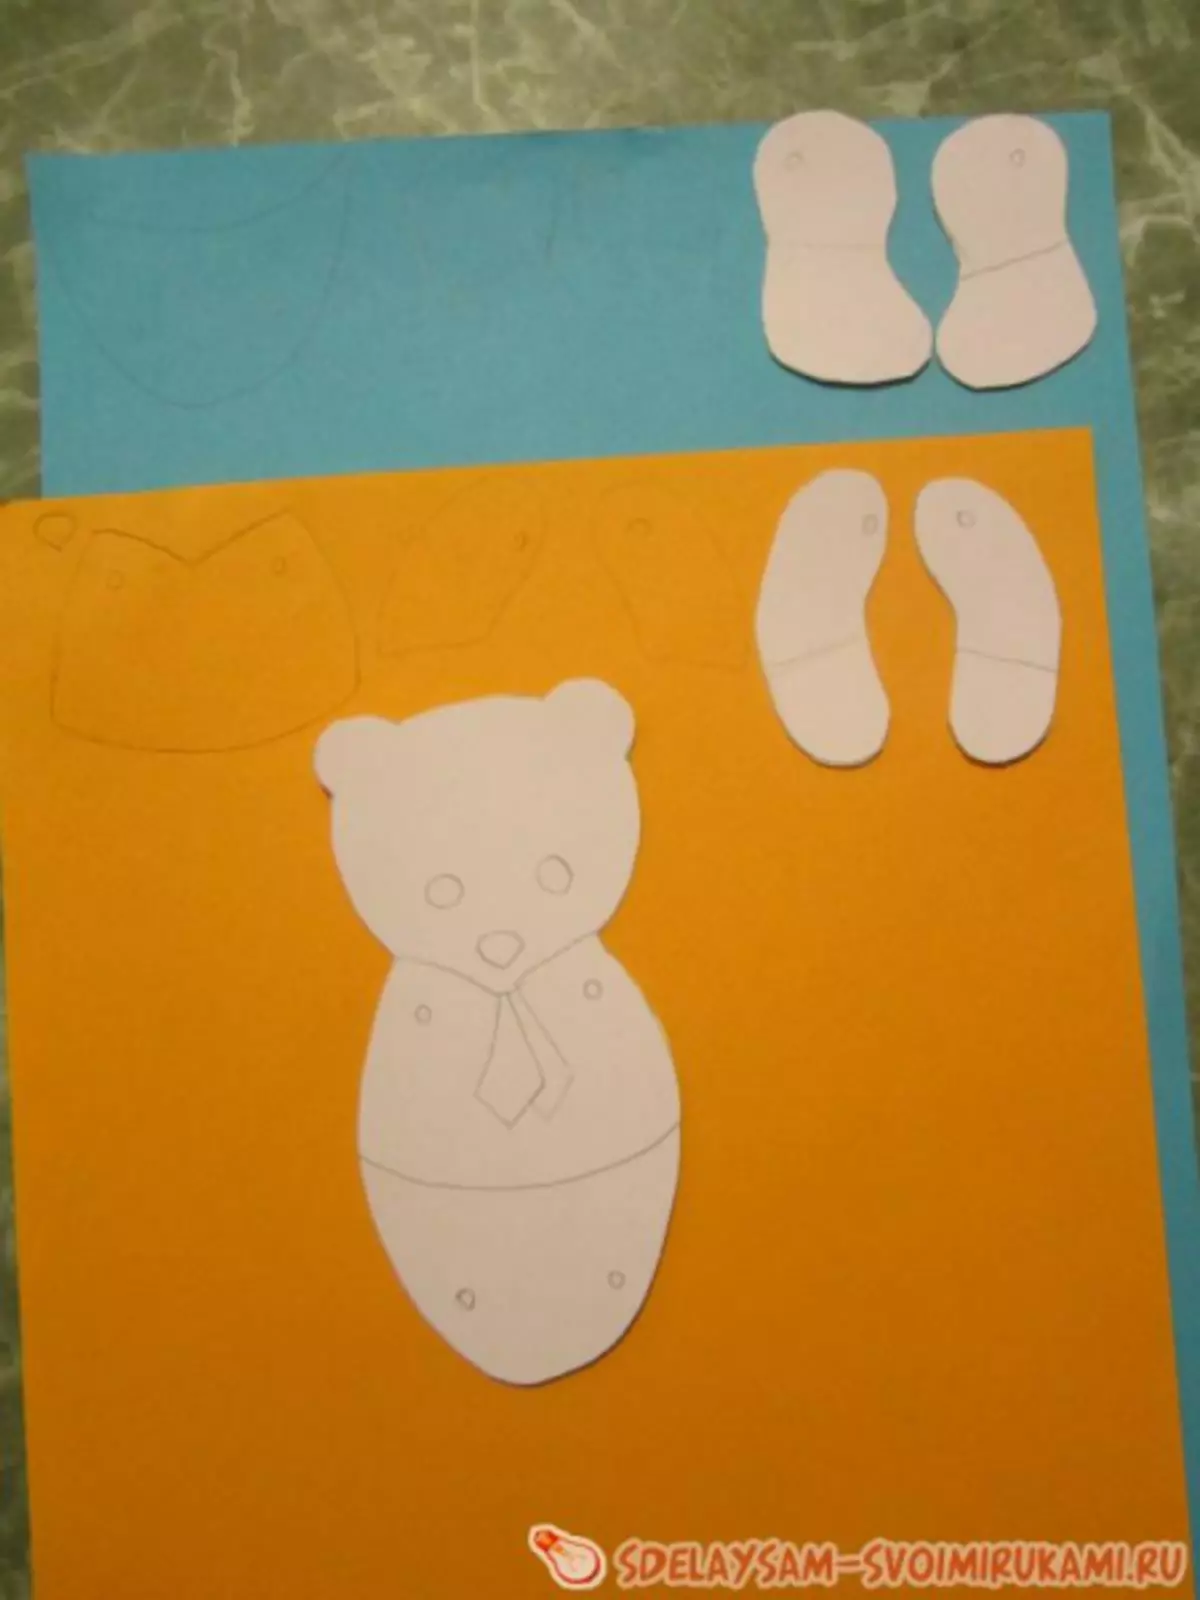
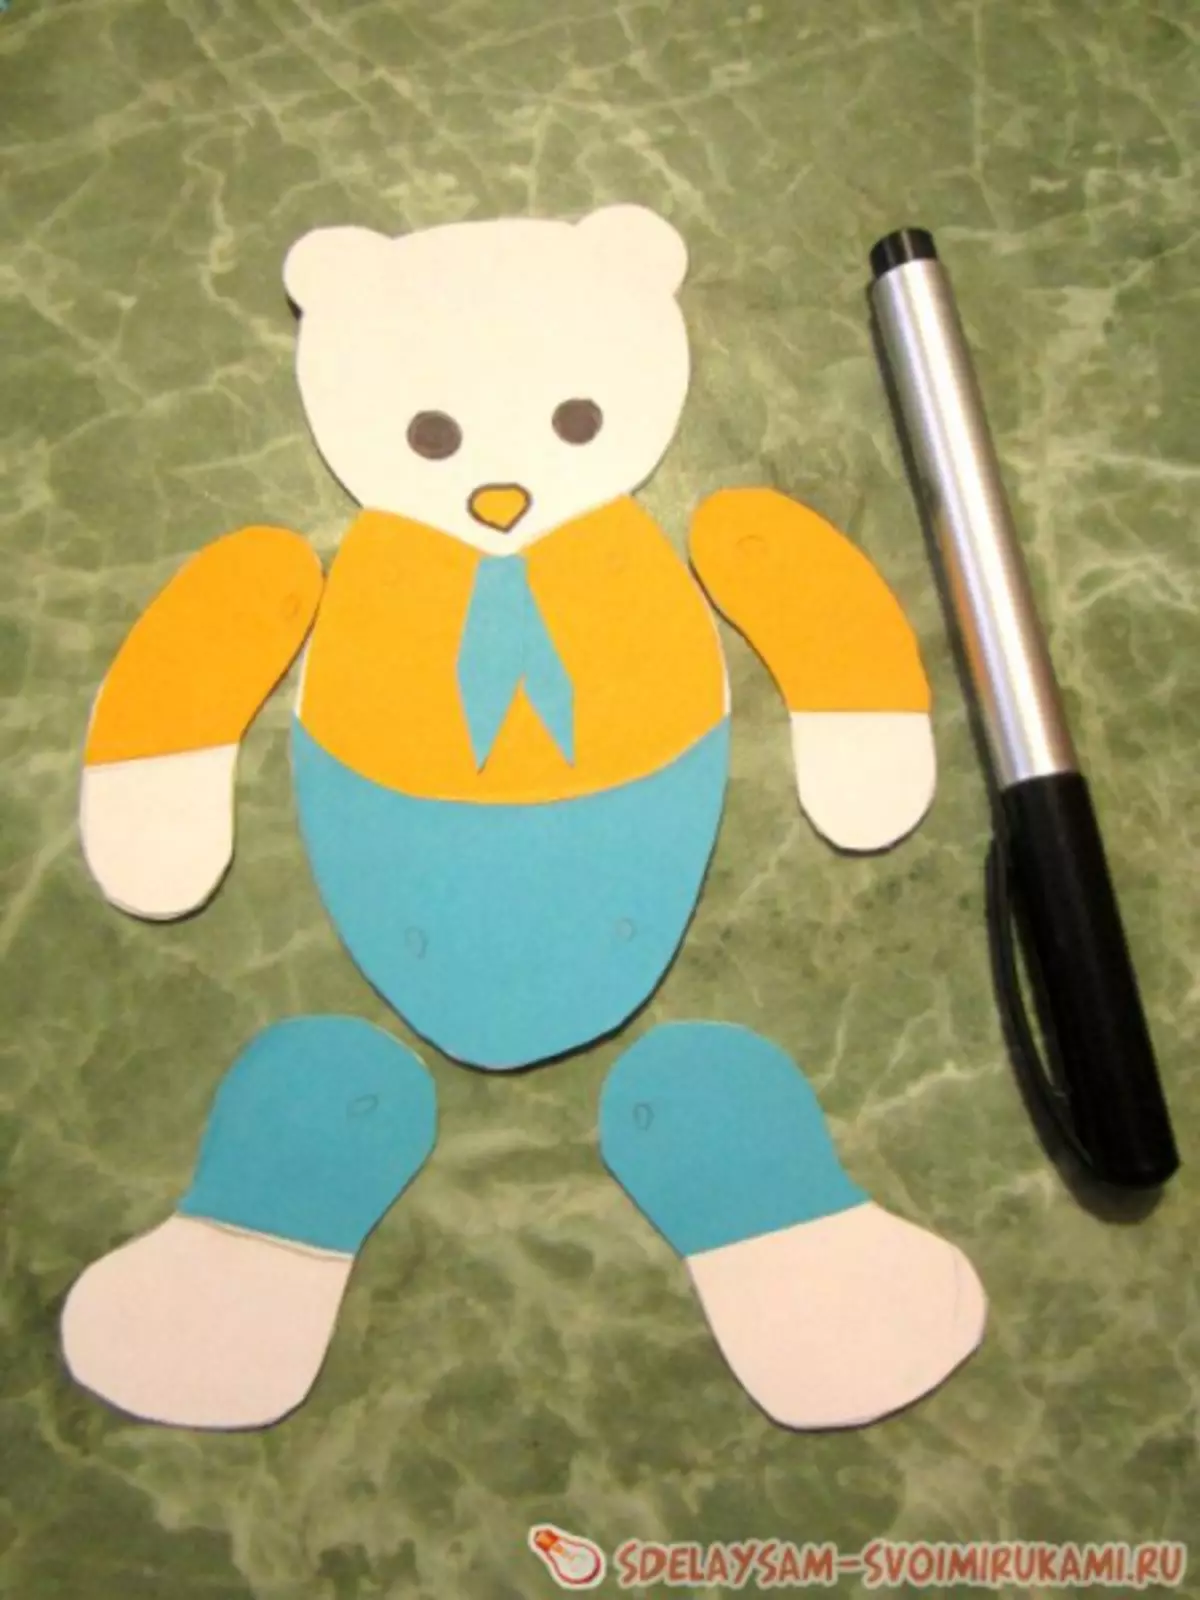
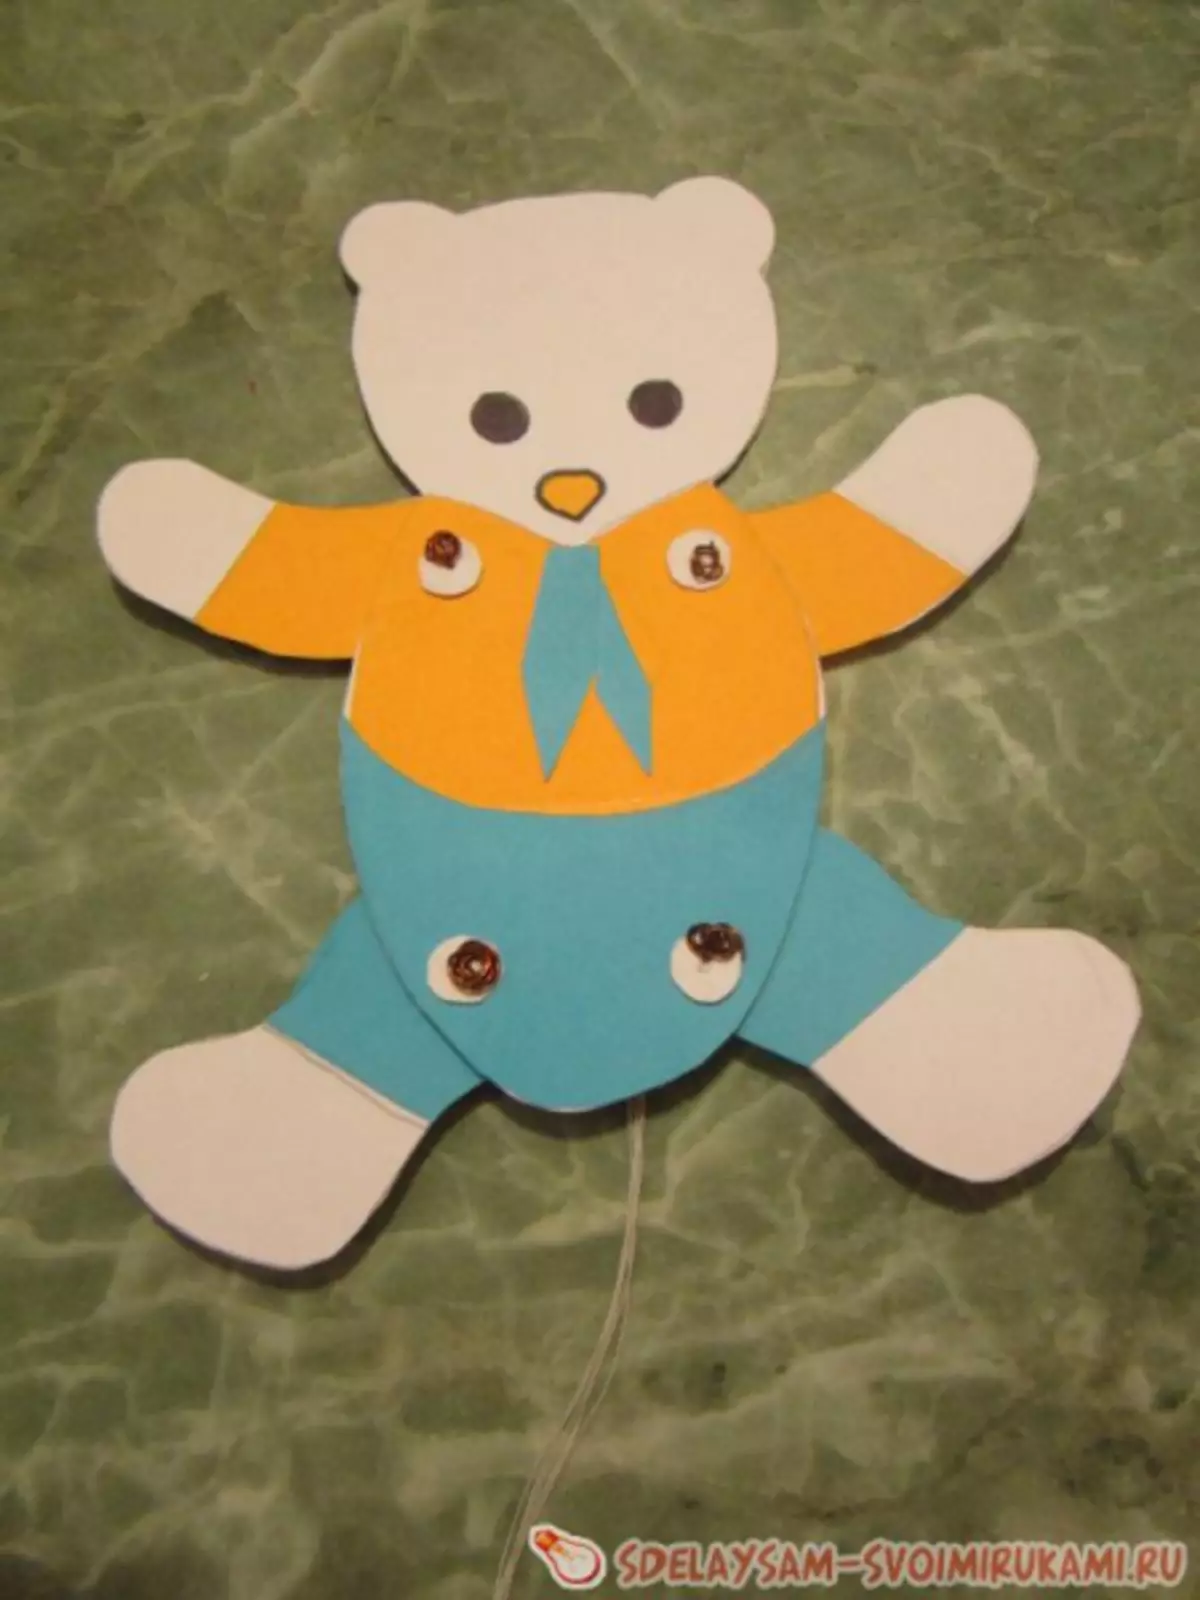
On the cut pattern on colored paper, draw clothes for our bear, so that the toy looks bright and attractive for the child. Also on paper, draw a bear spout to then stick it to the template.
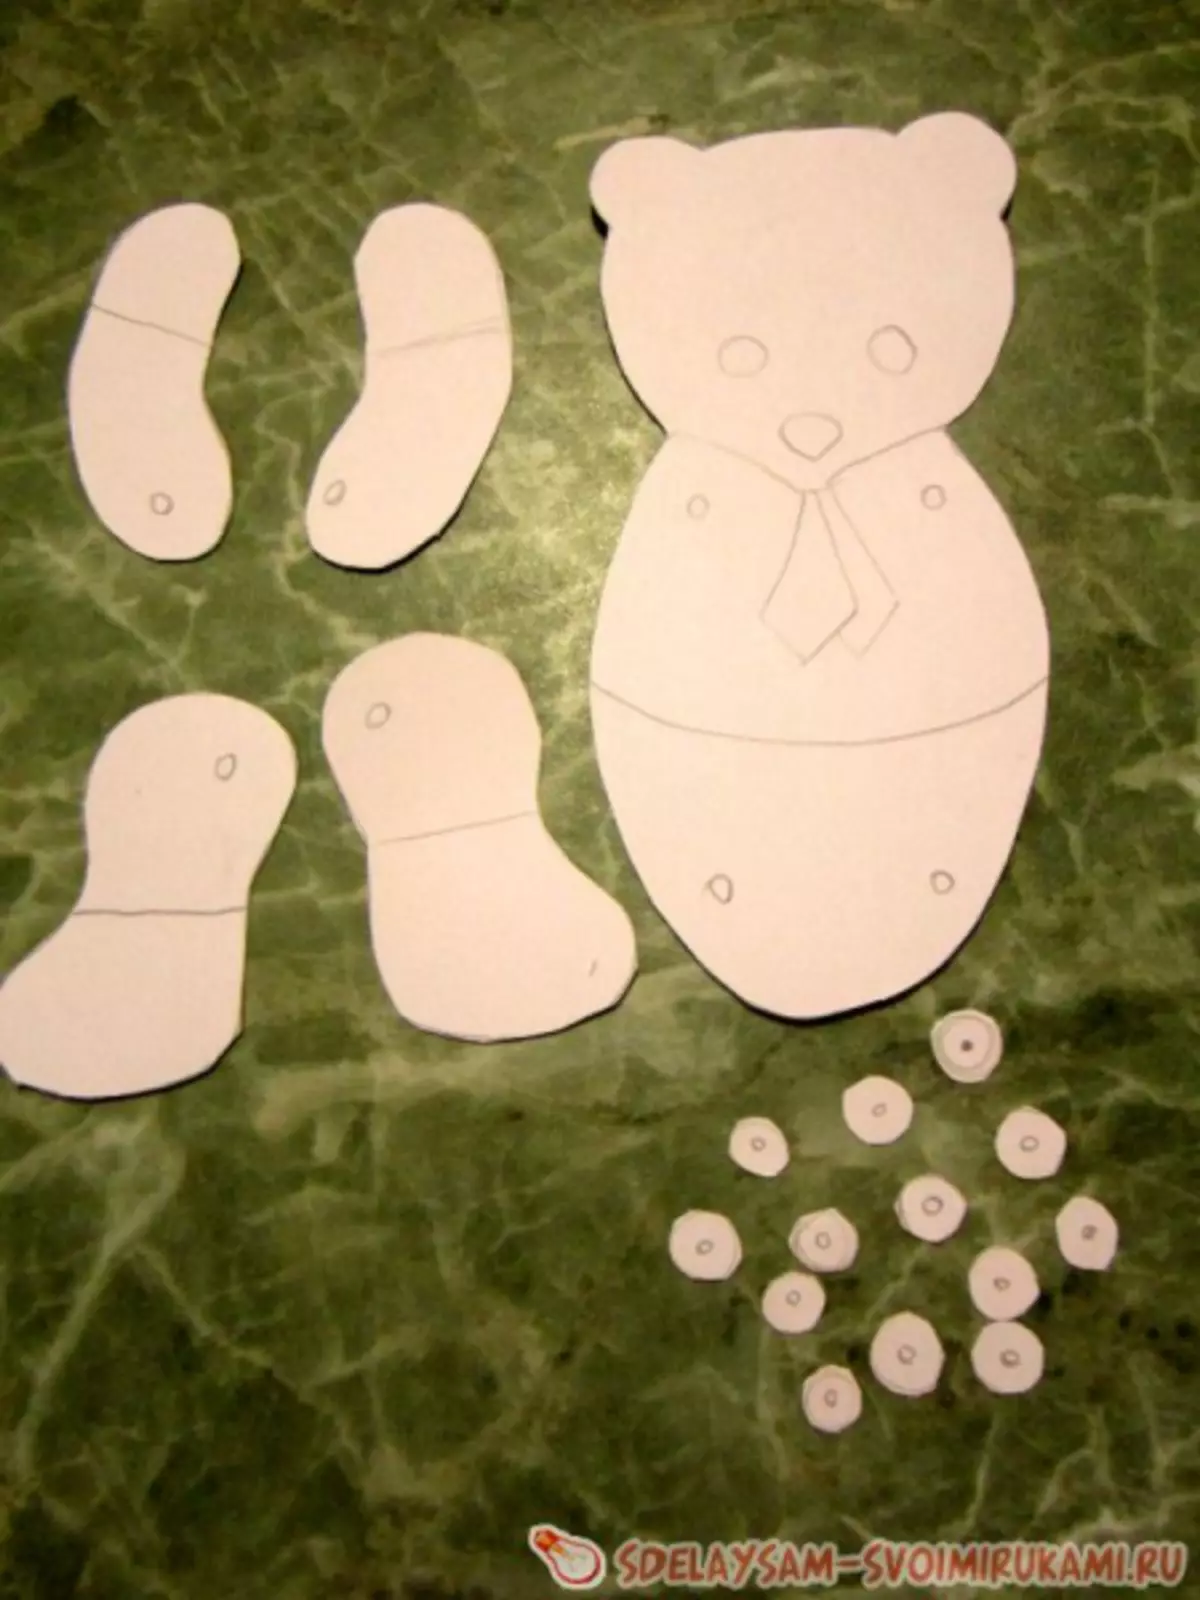
Cut all the details of clothes and glue them to the template.
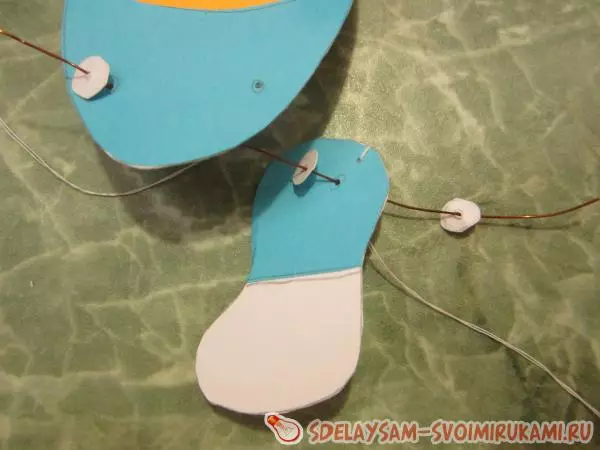
Next, we take shine and pierce the holes in every detail, as in the picture.
Now we need a thread. It is necessary to cut four parts long up to 20 cm and fold them in half for strength. Then to turn each thread through the holes in the hands and legs, tie them.
To make the details, we need the wire, seer and scissors. Slicing parts of the wire, we draw it in this order: Button, torso, button, foot, butt. Wire ends twist with sewing.
Article on the topic: Plaid Crochet Babushkaya Squares
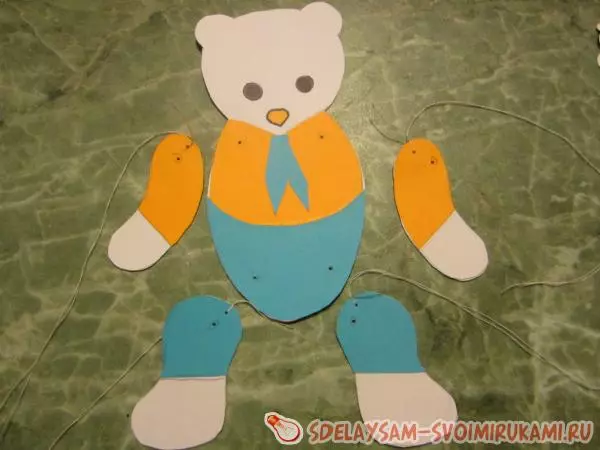
In this way, we attach all the paws to the body.
On the back of the bear bind the thread from above and below. Next, connect the binding the upper and lower threads with each other to make movements for the toy.
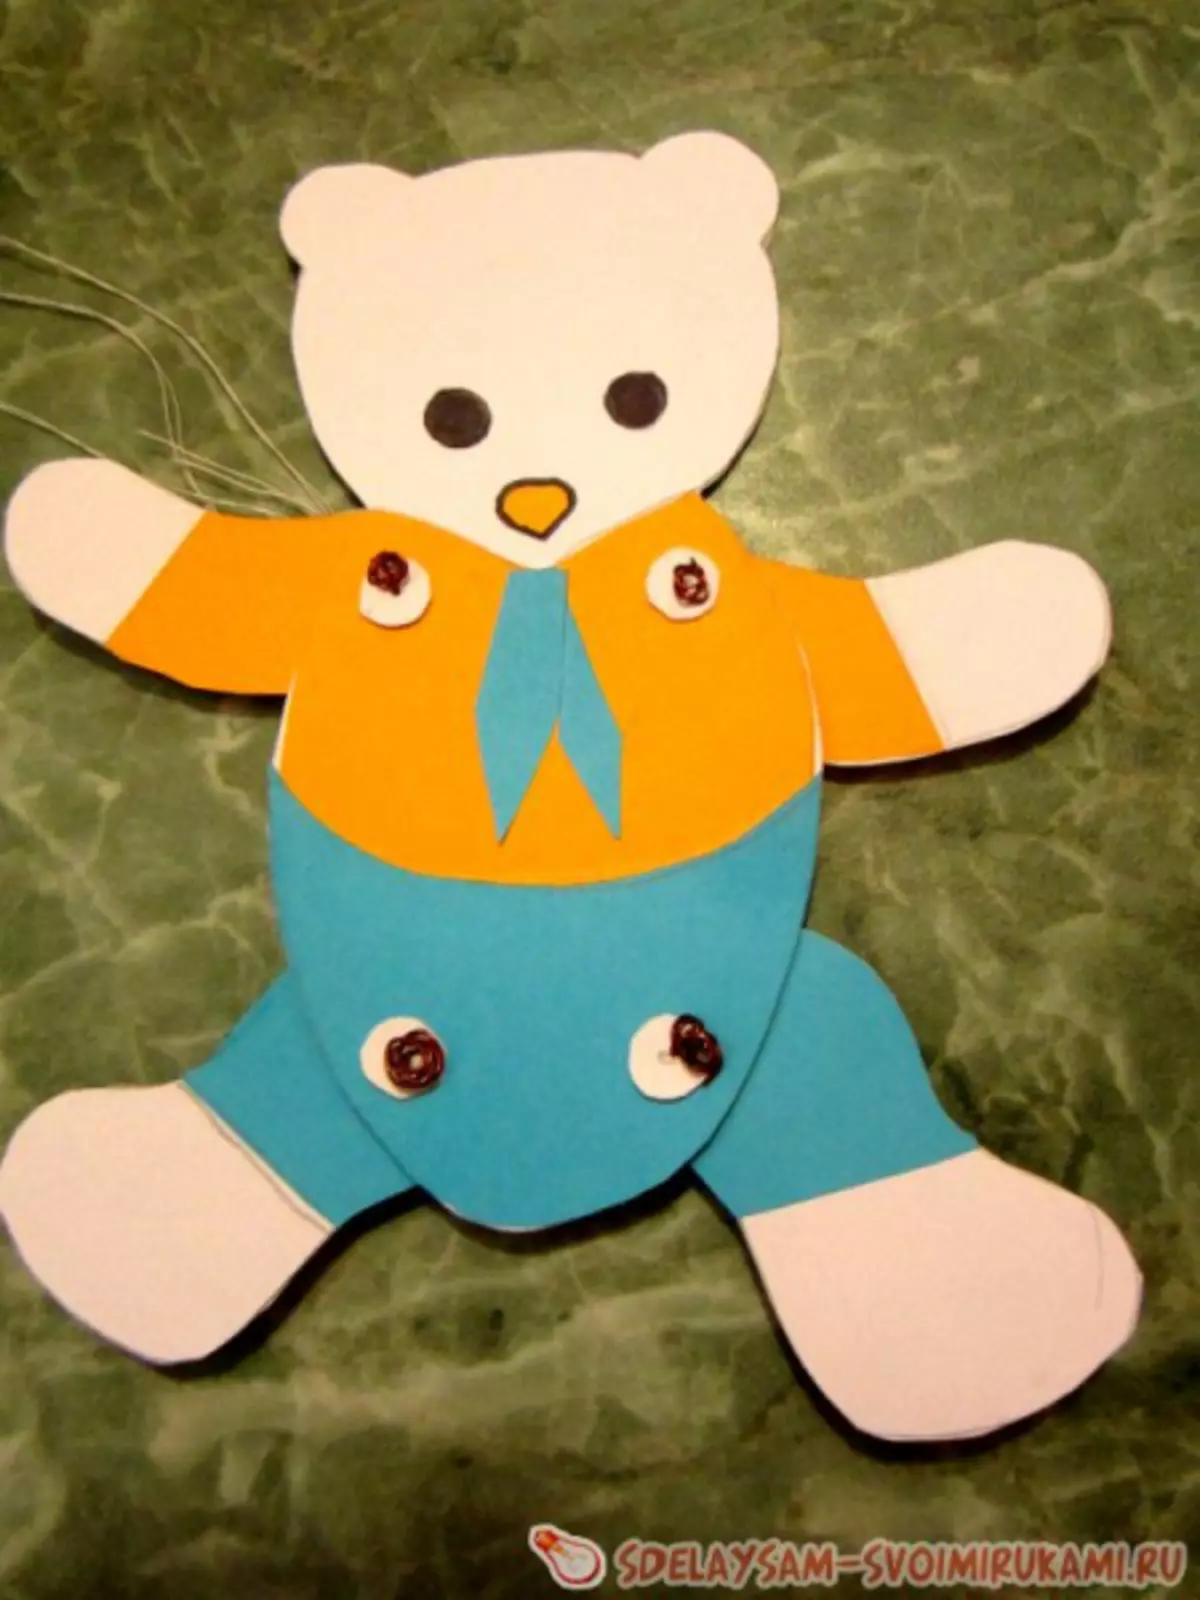
That's all, the toy is ready! We start to play!
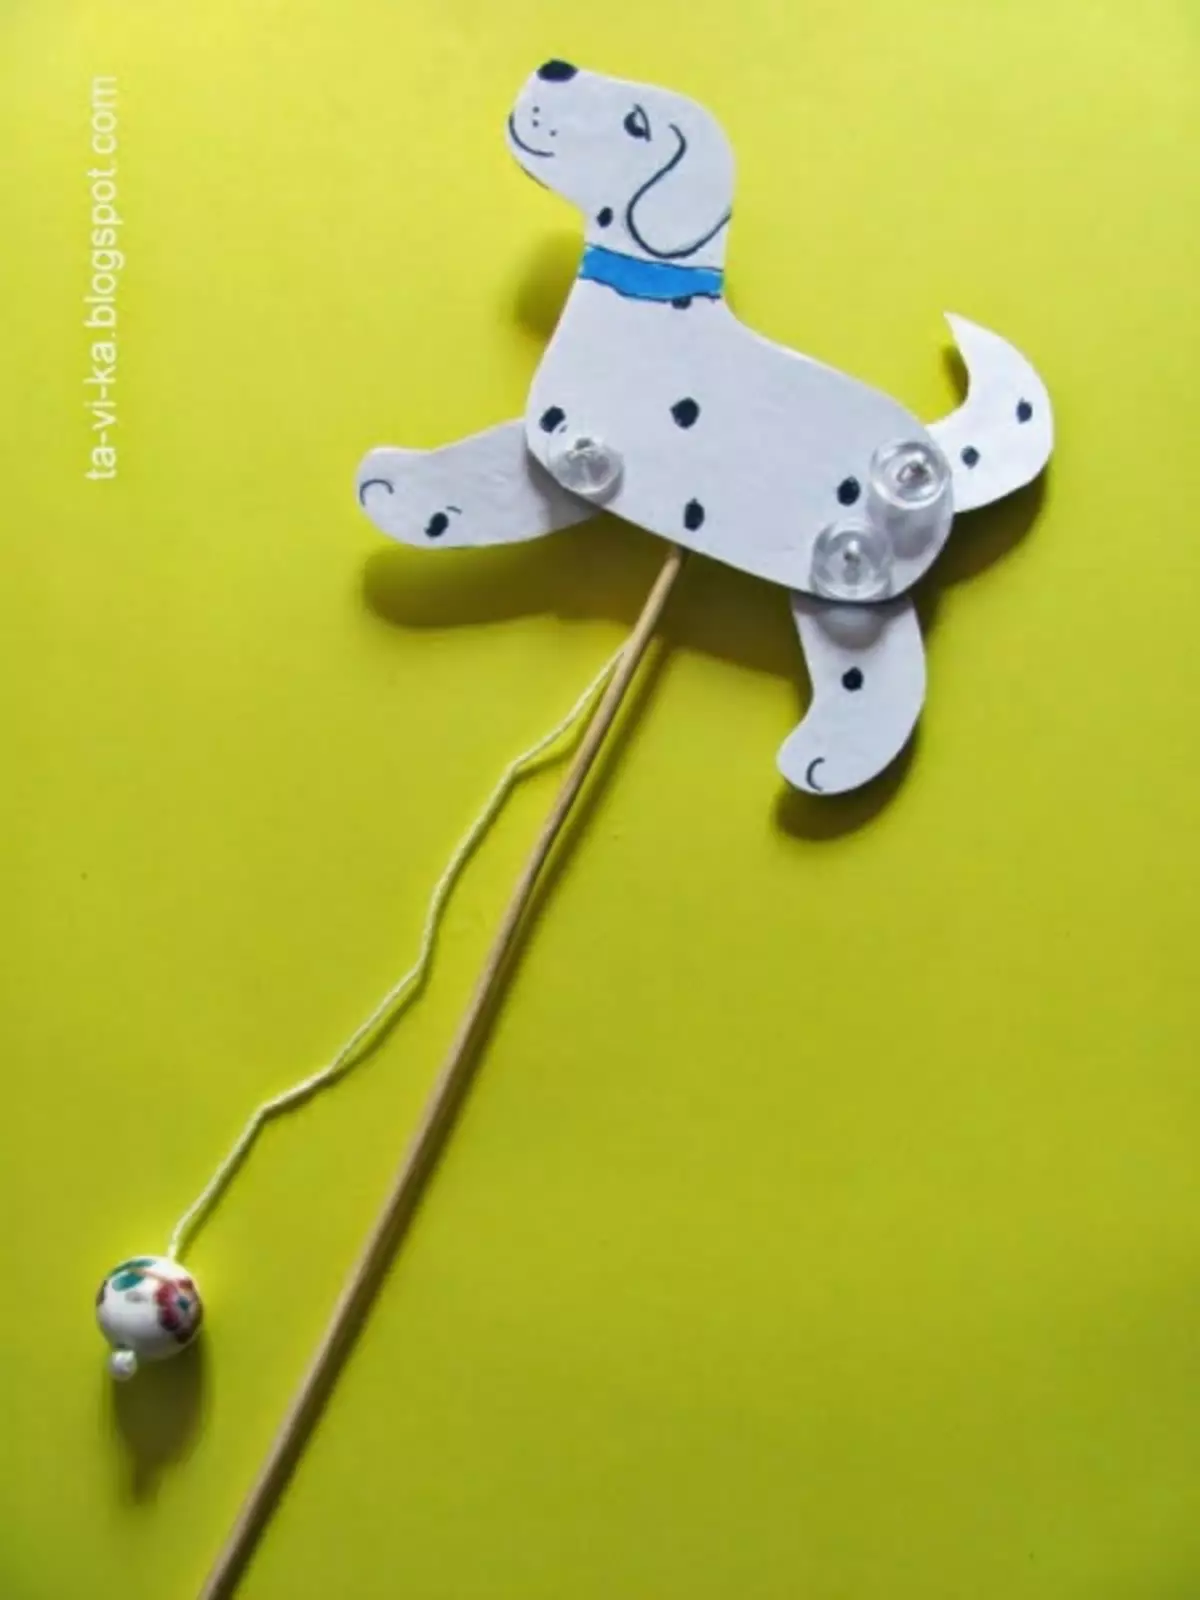
Now let's make a dog.
To do this, we will need: cardboard, scissors, glue, tape, wire, three small buttons, thread or rope, wooden skewer.
To begin with, we need to draw our dog - she will run from us. To not draw, you can print and use the template.
- To begin with, we need to cut all the details of the dog cardboard. We put the point in the right places and pierce their colil.
- With the help of buttons and wire make fastenings for foot and tail.
- We begin to ride on the attachments of the details: the body - limbs (we use those holes that are marked with a circle).
- We associate the limbs with each other with a thread, selling the remaining holes in this way: the tail with the rear paw, and the back paw with the front. By the middle of the thread between the paws, you need to tie another long thread so that later, pulling for it, you could move toy.
- After that, with the help of Scotch, we attach a toy to a wooden skeleton.
You can draw on the front side of the eyes, mouth, nose, well, and decorate at will. Now you can start playing, because everything is ready!
Video on the topic
Even more interesting ideas for making cardboard toys can be spacked in video: