
The gate and wicket from the professional flooring belong to the category of budget: not so much time and materials occupies their manufacture. True, if you choose the model of the usual swing gates without artistic additions. There are still options with forging elements, there is already the difficulty of work more, the costs are much higher. Simple swing gates from the professional flooring with their own hands can be made by even a wikner of a lover: there are few seams, they are simple.
Designs of sash
Even in such a simple design, like a goal sash or gate can be made differently, and there is a lot of options. First of all, the location of the jumpers is distinguished:
- diagonal;
- horizontally;
- crosswise.
Each method is verified and works, providing a sufficient degree of rigidity. Here you choose what it seems to you more correct or reliable.

The design of the gate of metal-milling with bodies
There is a difference in the design of the gate themselves - with a stationary frame (upper crossbar) or without. With the gate frame are more stable, but then there are limitations in height: they will not be able to drive into the courtyard high cars - freight or special equipment. With a competent strengthening of the racks (pillars) and normally made sash (with amplification at the corners), the gate without a frame will also be reliable.
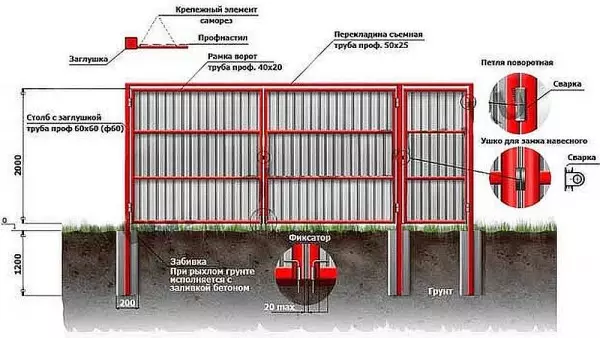
The design of the gate in the upper crossbar and transverse jumpers
When installing the gate with the frame, the metal consumption is greater - on the length of the jumper, but you can additionally be additionally inserted: the load on them is less.
Cross-shaped jumpers on metal rolls
In order to be more convenient to fix a professional owl, according to the outside (sometimes, internal, as in the figure above), the perimeter of the flaps welded a thin-walled metal profile width 1 cm. It must be taken into account when determining the size of blanks under the sash.
To make the design as hard as possible, so that it is "walked" and did not hurt in the wind, in the corners make an amplification. And again there are two ways. The first is to welcome the corners carved from sheet metal.
Strengthening of metal plates
The second is to put short corner bodies from the same pipe that the frame of the flaps was cooked.
Second way to strengthen the goal
There is a difference and during the assembly: with places of the joints of the pipe connected at an angle of 45 ° or just jack. Professional - under 45 °, easier - jack. Some assembly methods generally do not provide for the possibility of compound at an angle (if it is collected by one of both sash, and they only hung on the poles they are cut into two parts).
Article on the topic: How to take the readings of the electric meter
Different methods for docking pipes
Another subtlety, which depends on the number of snow in the winter. As you can see in the photo, the lower bar of the sash raise at different heights from the ground - somewhere on several centimeters, somewhere 20 cm and above. It depends on the height of the snow cover in winter: if there is a snow, and the gate from the earth itself, you will not open them. In order for the summer to this clearance, everyone lived in this clearance, after the resumes of snow, they screw the bar, and in the late autumn, it is rented again.
You can put automation on the swing gate. Then you can manage them from the remote and go under the snow and it is not necessary to rain.
Materials
For pillars, the profile weld 80 * 80 mm is usually taken, with a wall thickness of 3 mm. They are bought below the depth of the primer of the soil, it is strictly vertically and poured with concrete solution. Work on the installation of the gate begins after concrete scored about 50% of strength. If the temperature on the street is not lower than + 20 ° C, it will be needed 5-6 days, if colder is up to two weeks.
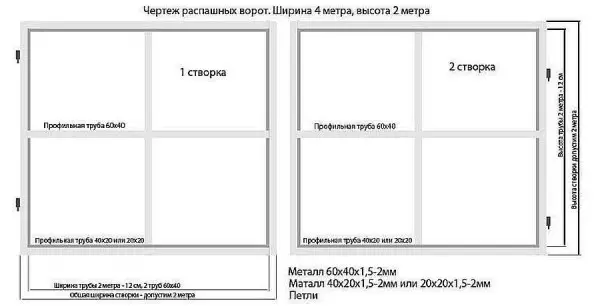
For sash, they use a profile pipe of different sections: depending on the strength of the winds and the span of the gate: there is an option 60 * 40 mm, there are 40 * 20 mm. Choose based on our own conditions. On jumpers take or such a pipe or a little smaller cross section, up to 20 * 20 mm. All these pipes can be 2 mm of the wall thickness, you can 3 mm. Thicatles are more expensive (sold per kilograms) - heavier they, but 3 mm metal cook is easier, which is important for beginners in welding.
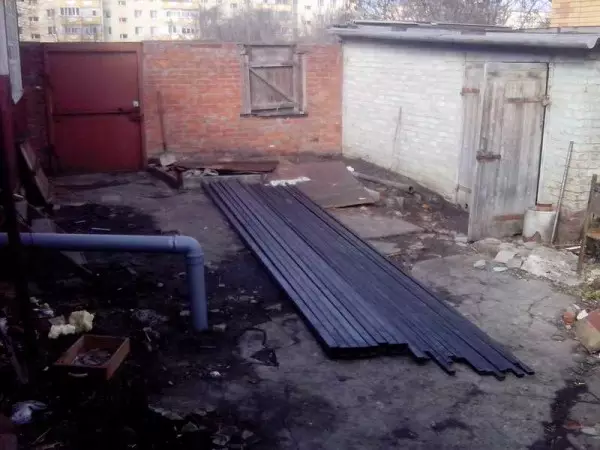
Metal prepared
Read about the welding of thin metal here.
The material for the gate take the same as for the fence from the professional leaf, they attain it to the same self-tapping screws. Before starting work, metal must be prepared: remove the entire rust (grumpo with a metal brush), to primar the "anti-fruner" and paint. After drying, you can proceed to work.
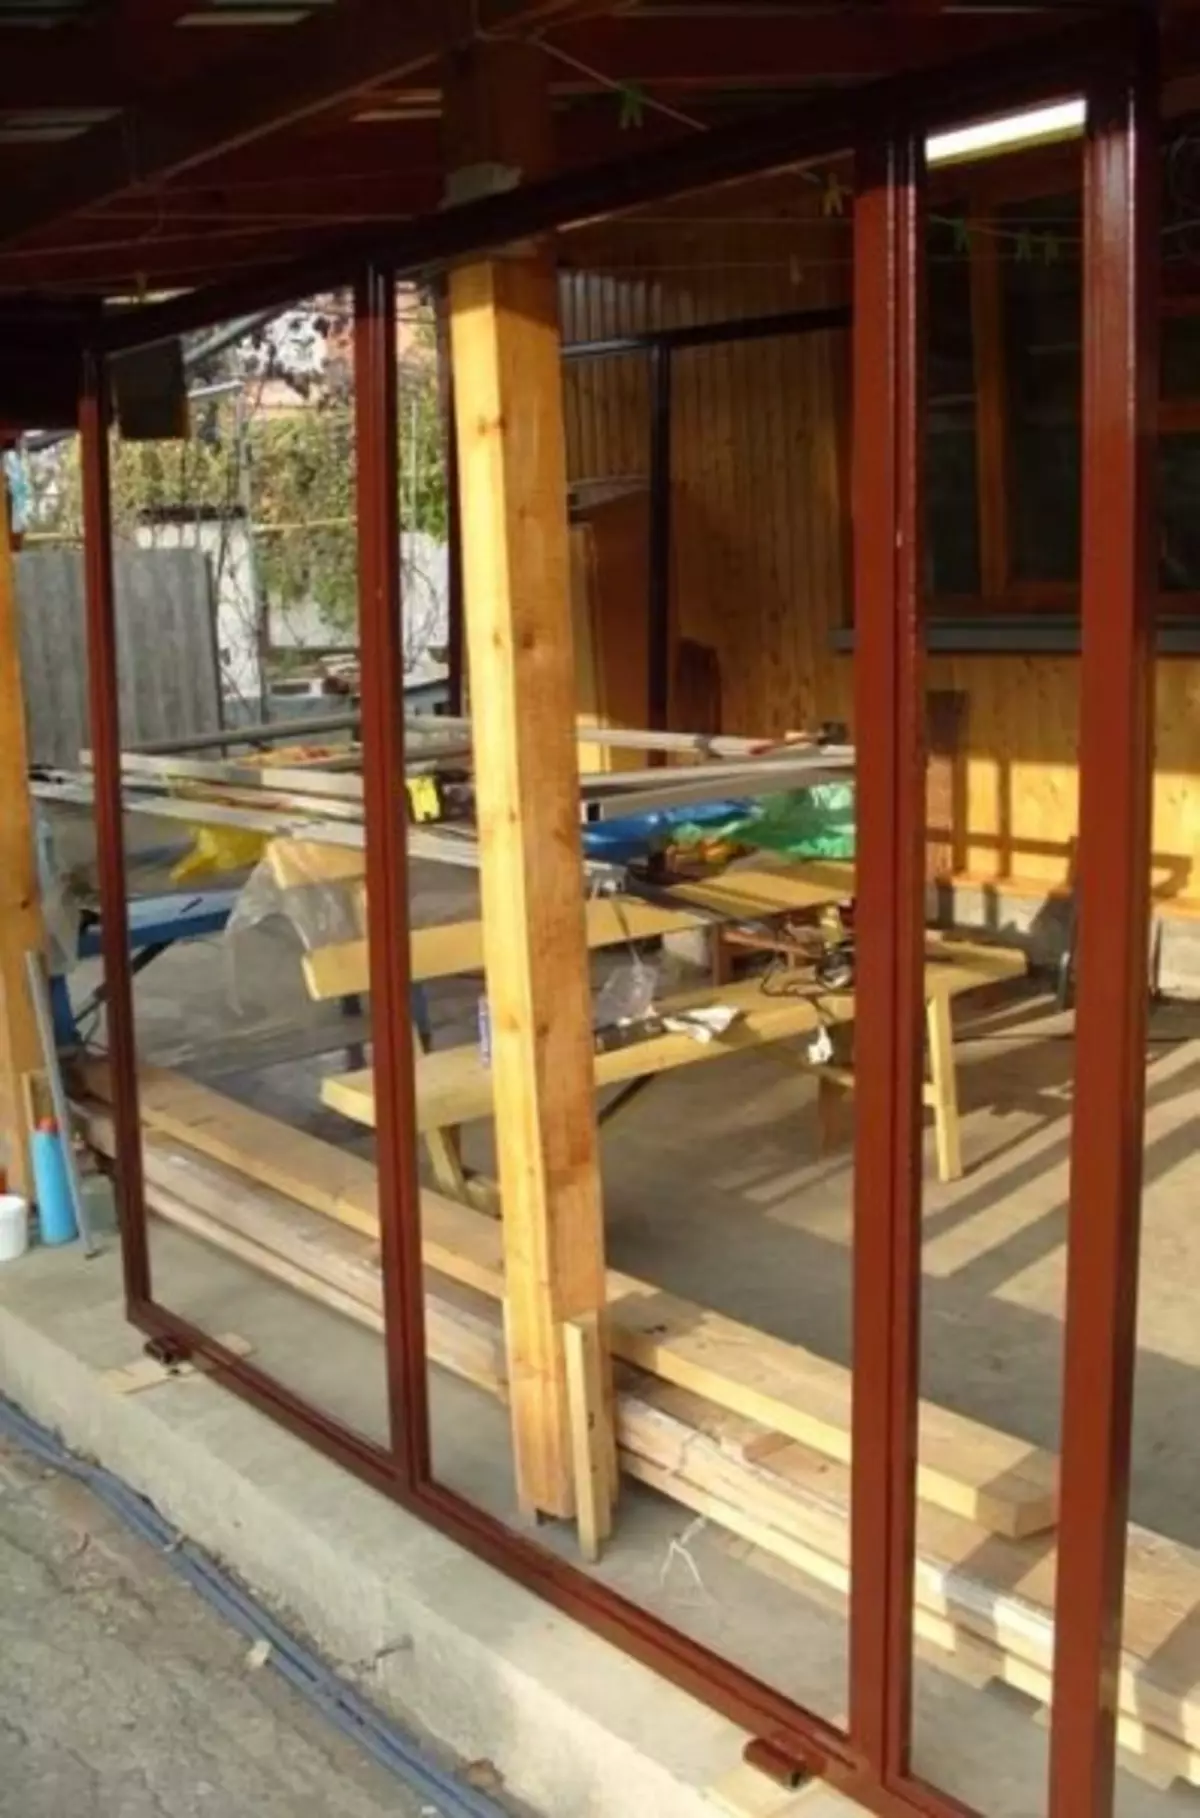
Photo report on the manufacture and installation of the gate
This is one of the options of how you can make the gate from the professional flooring with your own hands. Technology is not the best, but not worse: everything is functioning without problems for the past six years.
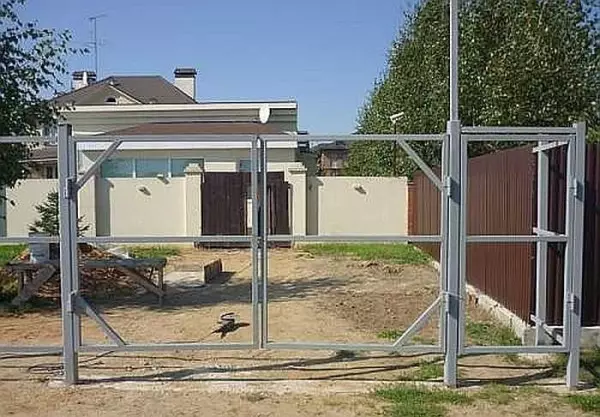
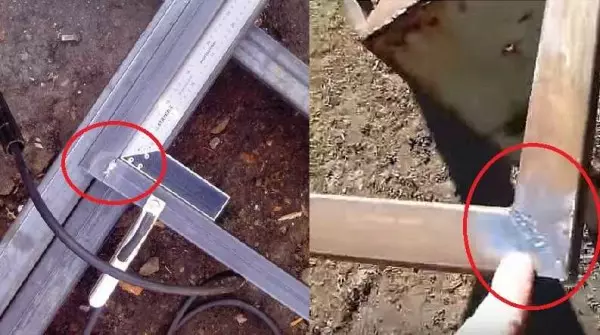
The hinges are welded to the installed 80-80 mm columns, the response parts are welded at the required distance on the vertical parts of the racks from the pipe 40 * 40 mm - on the right and left. Stands hang on the hinge on the post, put the layer between them and the pillars of the desired thickness and fix the clamp.
Article on the topic: Repair of the bathroom in Khrushchevka
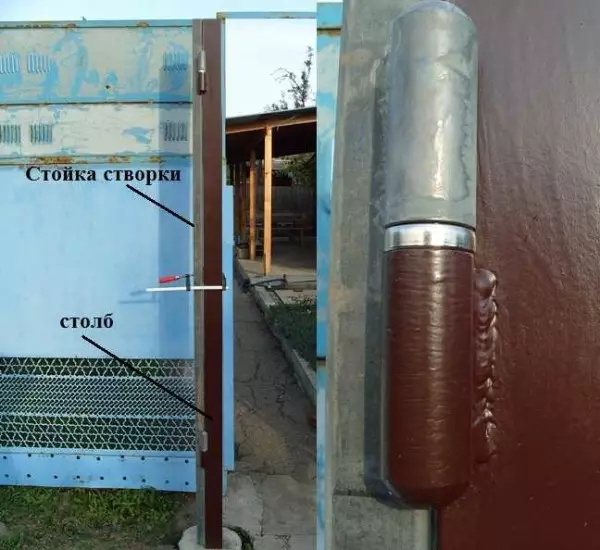
Turn the racks on the wielded on the poles
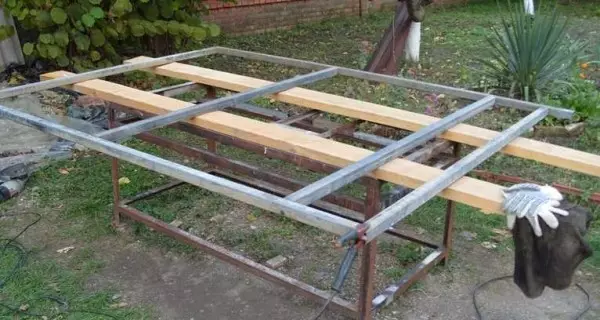
Measure the required height and cut the surplus, top to the racks, not to the columns, weld the crossbar from the same pipe 40 * 40 mm. Welding quality at this stage does not matter. We still grab the details without worrying about the care of the seam imposition - then we will bring it to the norm. The main thing is that everything is exactly and kept together. Because the points we grab in several places.
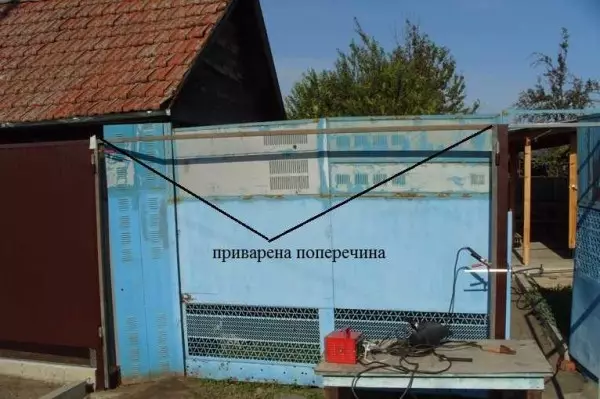
To the racks grotin welded cross
Similarly, we grab the pipe on the bottom.
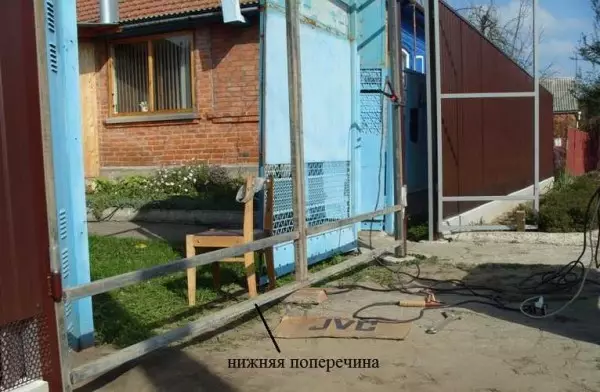
We weld the bottom tube
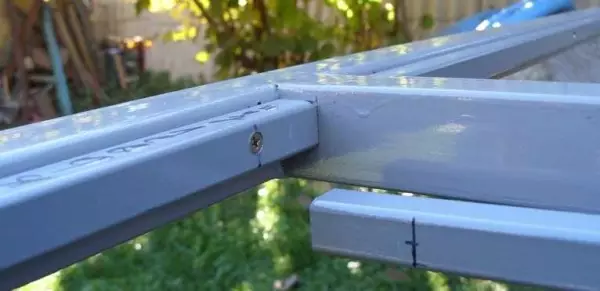
We find the middle of the transverse beams. From the middle of both sides, we postpone 3 mm. Make clear marks. We measure the distance between the upper and lower beam, cut off two segments, weld by marks (between two vertical pipes there should be a gap of 6 mm).
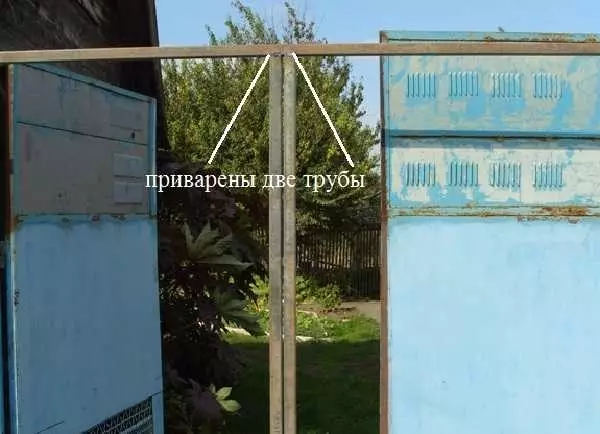
In the middle with a gap of 6 mm weld two vertical pipes
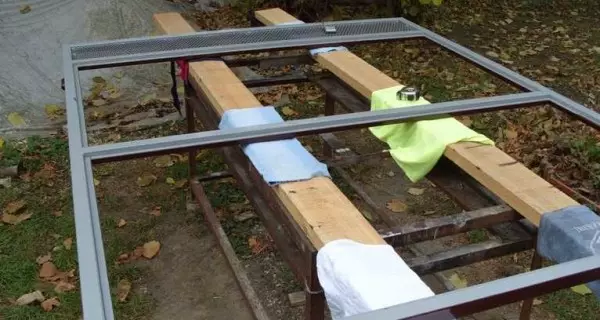
Measure the distance between two racks of one half of the gate. They must be the same, but it is better to measure separately. Cut pipes of the desired length and grab them at the desired height. If you need more across - install them.
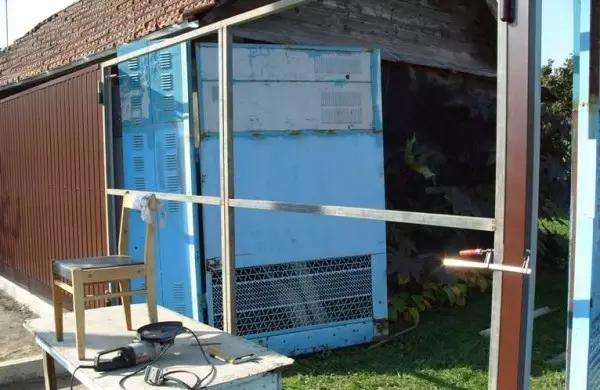
Welded crossbreaks to enhance stiffness
At the noted by the center of the grinder at the top and below, we make through feeds, separating the gate to two halves. So very simple we got the gate that will open and close without any problems.
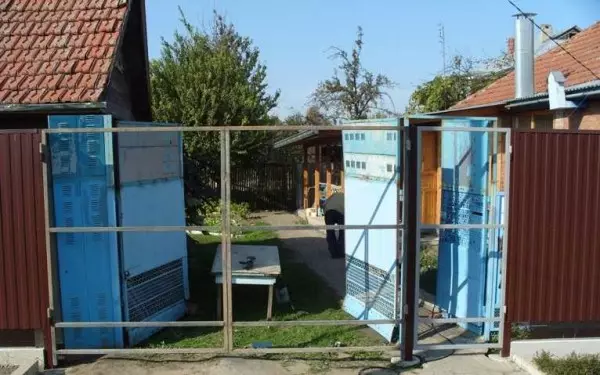
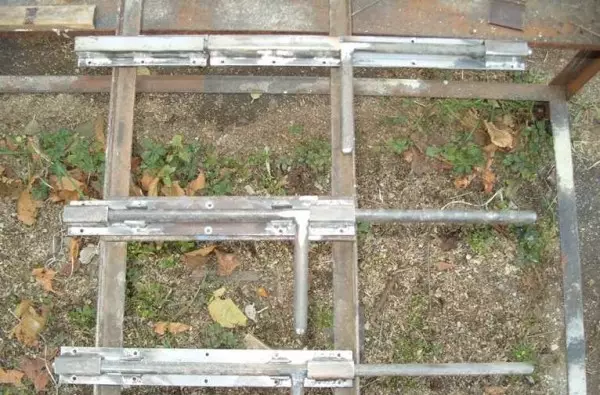
Collected halves of the gate
Gate Frame Frames. It is removed, put on a flat horizontal surface and cook the seams well. Here, the quality of welding is important, follow the filtering of the bath, we try not to burn holes. Finished seams cleaned, ground, paint.
Setting the sash to a flat horizontal surface we welcome all the seams
We proceed to assembling the support for fastening the profile sheet. To reduce the sail, it was cut into two parts, so the sheet is not solid, but a cut. To do this, use a profiled tube 20 * 20 mm. It is cut into segments of the desired length, so that you can fix on the inner perimeter.
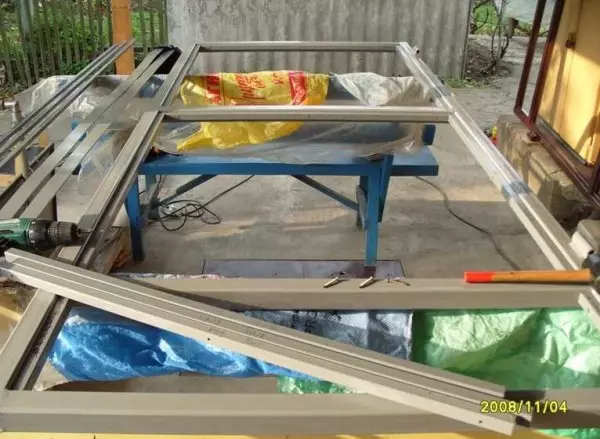
Cut the pipe 20 * 20 mm and screw over the internal perimeter
I exhibit them in the same plane with the outer part - the sheet will be screwed from the inside. Breeping on a self-tapping screw, pre-drumped holes for the required diameter.
How to mount straps for a professional sheet
It looks like a ready frame of a gate sash
The finished frame of paints - inside the light gray paint, outside - red-brown, to the tone color of the professional flooring. Leave to dry.
Article on the topic: Decor chairs - Decoupage and restoration
Painted frame
We proceed to the installation of the proflist on the gate. It is cut slightly smaller than the main frame - on the perimeter by 2-3 mm should be indented. They put on the prepared supports and fasten from the inside around the perimeter on the self-tapping screw.
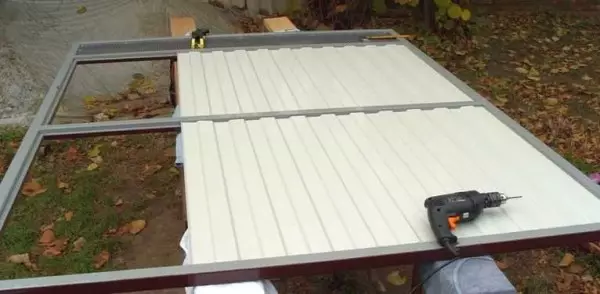
Installation of the proflift on the gate
You can take special, with hats and gaskets, but planted on ordinary.
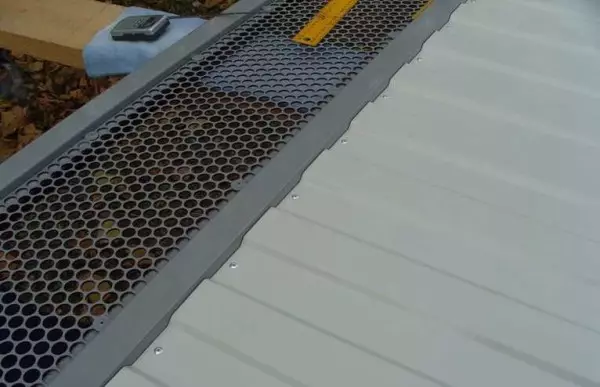
For savings used conventional metal screws
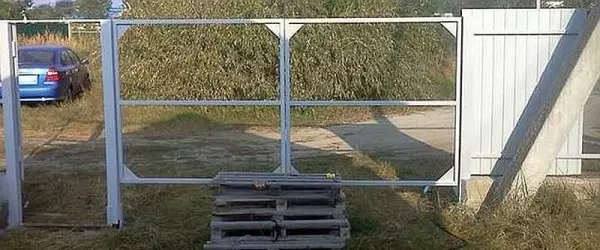
We can say that the gate is ready.
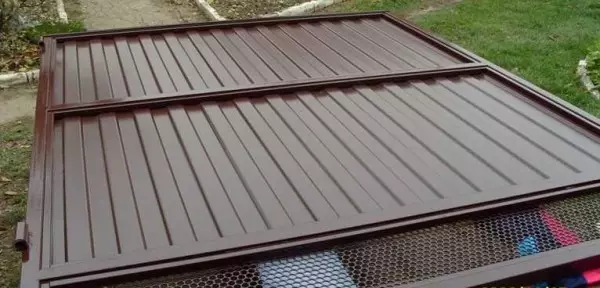
Virtually ready
It remains to establish constipation. You can, of course, embed the lock and handle, but the quality of inexpensive is very low, and to take the expensive - at the moment the incomplete luxury. Because of the residues of pipes and reinforcements were cooked. They are accurately working under any conditions.
Homemade deposits
One (top) is planted on a self-tapping screw with a retaliatory part on the sash, two lower ones are attached to the racks. In the soil in the right places, small wells are drilled, in which the segments of round pipes are concreted, the diameter of which is larger than the diameter of the rod. The wicket is made in the same method, only the lock is embedded in it.
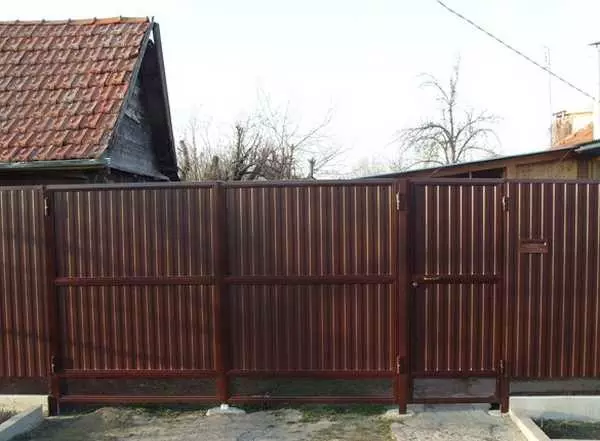
The finished gates from the professional flooring do it yourself
With this technology, the manufacture of the gate sash is guaranteed to open and close. If there were some skews when installing pillars, they are taken into account. With step-by-step presentation, the whole process does not look difficult, so it is. If you cook all parts separately, the geometry should be perfect, and it still has to ensure that the pipe does not behave during welding. Several different technologies for manufacturing the gate of the professional flooring, see the next section where video collections are collected.
From the proflist you can make a sliding gate and equip them with automatic.
How to make the gate of the professional flooring: video lessons
If the job is new, even after a photo report, questions may remain. Some of them can clarify video lessons on the topic. To begin with, the repetition of the technology described above: we collect the frame right on the installed columns.
The same technology, in the photo sequence.
The second video about how to properly cook the frame when connecting pipes at an angle of 45 °. Professional approach.
For those who have not come across the welding gate or doors earlier, questions may arise about how to privar loops. Not so simple, as it seems. Watch the following video tutorial.
A more accurate explanation of what movements to make during the welding of the carrier loops where the electrode and the rest of the nuances are sent in the following video.