
Plasterboard today is one of the most popular building materials, it has many positive qualities. This material is great for making an angle, both outdoor and inner. However, when using it, you need to pay special attention to the installation of the corners. The fact is that if such installation will be made poorly (negligent attitude to fastening or insufficient rigidity), it can most negatively affect the entire design, and the walls will look at least unattractive. Therefore, plasterboard angles are made in compliance with certain rules.
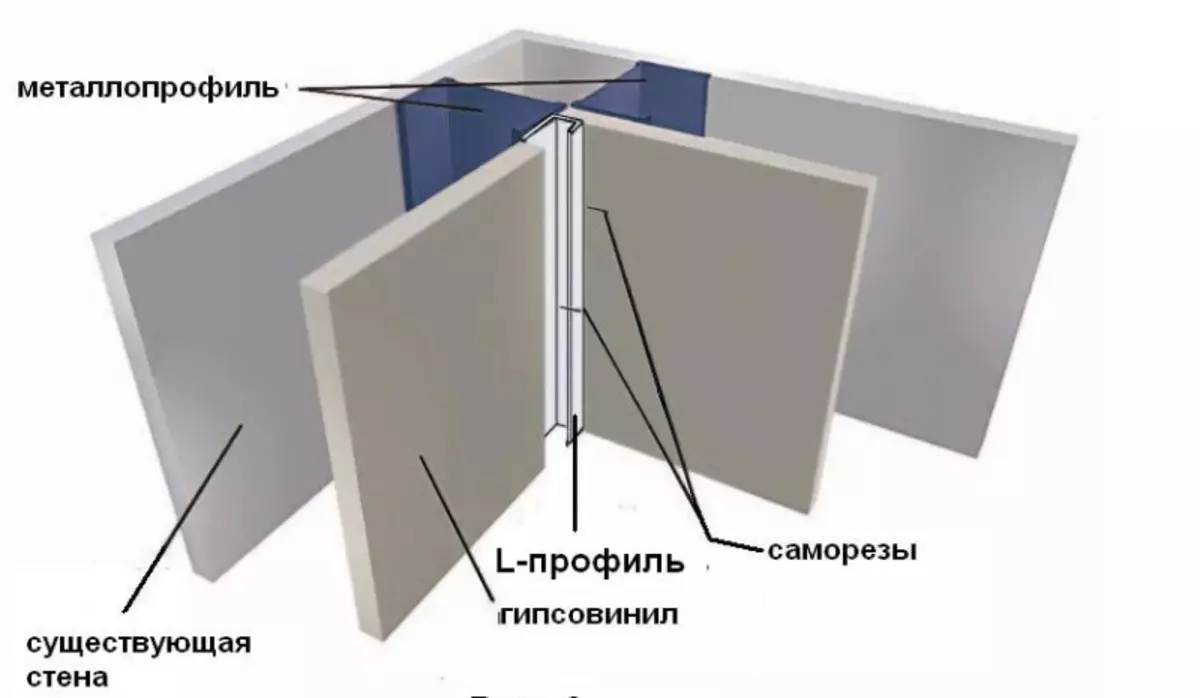
The installation circuit of the angle under plasterboard.
Making outdoor and internal angles of plasterboard materials are not so difficult, as it may seem, and the appearance of the room depends on it.
You can make them with your own hands in a short time, which is another dignity.
Walls that are decorated with plasterboard are always attractive, so they are doing more often. This material has the most diverse positive qualities - it does not burn, does not highlight harmful substances, it can be installed in the room where there are allergies, since the material does not cause allergies. There is still a very comprehensive plasterboard, it can be given any shape, while not required some serious skills when working with it. And the last but very important advantage of such a material is a relatively low price compared to other construction materials.
A modern renovation cannot be submitted without the use of drywall, which is not surprising - only this material provides absolutely smooth surfaces, on which there are no cracks, and impeccable angles are made. And such material is necessary when you need to change the design of the rooms or their acoustic properties, increase the fire resistance of the room, and it also hides electrical communications.
Article on the topic: Use on loggia and balcony panoramic windows
How to make internal plasterboard angles
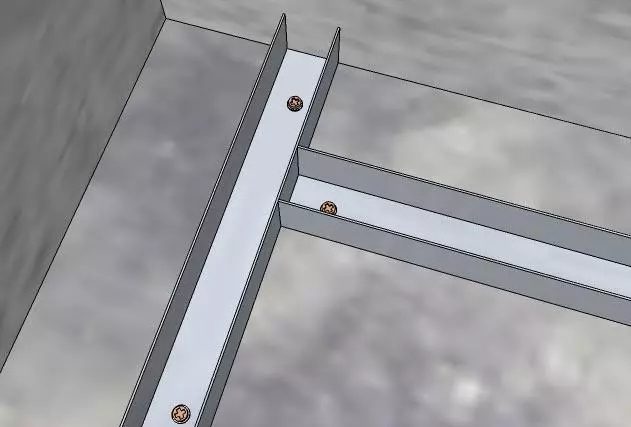
The starting profile is installed on the markup. One end comes down the other.
In order to make internal angles, the framework is performed first, and the metal, and it can be different species depending on which installation is expected. For internal angles, it is best to use the base where the CD's rack profiles or PS are used, without such profiles not to do. It should be noted that without a high-quality profile, the finish in the sooner will deteriorate - the walls will begin to be covered by cracks. For mounting two profile segments are connected. For this purpose, metal screws are used, the length of which is about 9 cm. Moreover, they must be installed every 25 cm, and then the installation will be reliable. When the installation is performed, it is necessary to take into account that from the distance between the self-drawing depends on how much the base will be rigid, and the internal angles of drywall provide the base of the maximum stiffness.
Installation It is necessary to do on an ideally smooth surface - a sheet of plasterboard is perfect for this. Now you need perpendicular to half the outside of one profile to attach the side part of another profile. It turns out a rigid design from profiles, and now it must be connected to the PN-UD perimetral guide profile. The design of profiles can be performed in several versions, but this one is the easiest. To implement this, you need an angular profile that is set up by level, it is attached to the perimeter profile, used with the screws. When it is assembled from the selected material using such a simple reinforcing structure, you can not worry about its integrity. And yet - if the angle is made properly, the walls of the room will not be deformed, but the quality of profiles is not important. Inner angle can be considered ready.
Article on the topic: Cabinet in winter on the balcony
Installation of exterior angles from drywall
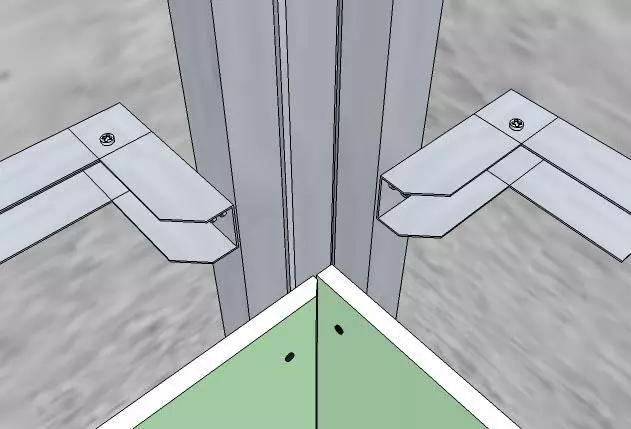
Tinning drywall first need to go to a smaller shoulder, then more.
In the manufacture of outer angles, you need to make a frame that is somewhat different from the one that is used for internal. If it is necessary to strengthen the outer angle, then there is no need to make the connected base, because the profiles thus combine difficult, and it will simply fail. However, without profiles, it is still not to do anymore - two profiles are simply exhibited near the two sides of the walls and are fixed using self-sufficiency to the perimetral profile. After the conversion of such a design with plasterboard, it turns out to be very tough and durable, the walls are not affected.
When performing the above-described installation, the sheets need to be chosen as follows - the uncut edges should be shrinkable.
And the spacure grip area with a drywall surface will be increased when the seams are closed. When the surface is attached to the profiles of angular frames by means of self-tapping, the distance between them should decrease. So make such work is easy, only limit care is necessary. After that, it is possible to fasten the structures and putting the seams, and then you need to do the finish processing of the panels, and then the angle will be high-quality.
It should be borne in mind that in the city housing, most of the noise is on top, therefore, when performing such works, it is necessary to take care of additional sound insulation. It is paved between the parts of the frame and plasterboard sheets.
The features of the design of plasterboard angles are also concluded in the fact that emptiness is formed between the overlap and the surface of the sheet, and here it can be used to pave sewer pipes and electrical communications and water supply.
Before doing this job, it should be remembered that the seams need to be used to primitive . To strengthen profiles, you need to pouch and more often screw the screws - the more often they will be screwed, the stiffness of the profile will be more. The profile is recommended to be fixed solely on the perfectly smooth surface.
Article on the topic: How best to issue a working area in the kitchen
In order to accomplish such a job, you will need the following tools:
- perforated aluminum corner;
- Fiberglass tape;
- putty knife.
How to put plasterboard corners
After the corners are made, they need to sharpen. You can also do this on your own, for this, the reinforcement tape is pasted on the corner, and the corners are fixed, and then putty are applied to them. Now you should wait a bit while the material dry, and move to the shtlocking of the corners. It is necessary to make at least 3-4 layers of putty. It should be borne in mind that the bending angles of the reinforcement tape must necessarily coincide with the drywall surface, otherwise the result of the work will disappoint and will need to make an angle again, including the new installation. And it should be noted that the walls do not tolerate frequent construction work too well.