
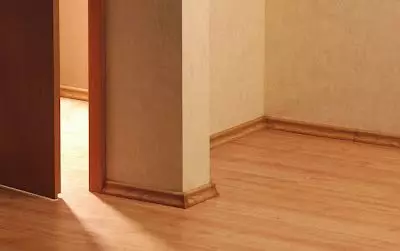
At the last stage of the interpretation of puberty, the question remains how to mount the plinth to the floor or wall. After all, this is not only a decorative element. With it, it will be possible to hide minor slots and disguise the electrical or telephone wires, remove the wired Internet cable from the view.
In this regard, the relevance of its application is constantly increasing with the development of modern technologies.
Types of plinth
Plinths are universal and for mounting carpet
Industry manufactures the following types of PVC profiles:
- Universal type. Suitable for laminate and wooden board, linoleum, natural and artificial tiles;
- For mounting carpet. Having the letter "g", presses the coating to the base of the floor, preventing it with twisting.
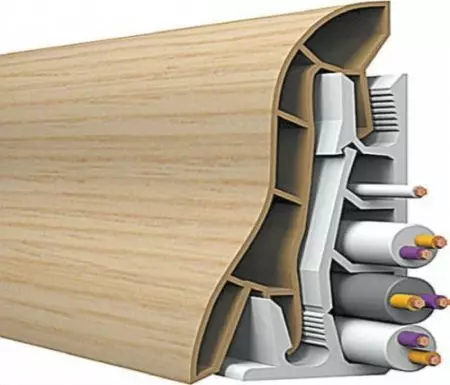
Hollow plinth contains communications
Depending on the materials included in its composition, three types of this plastic product are distinguished:
- Elastic, without voids. Produced from the foamed polymer material of polyvinyl chloride, is indicated as PVC.
- Hard, hollow. Differs in high strength. Suitable for finishing floors in any room.
- Semi-rigid. It has high flexibility, imitates the color of natural materials.
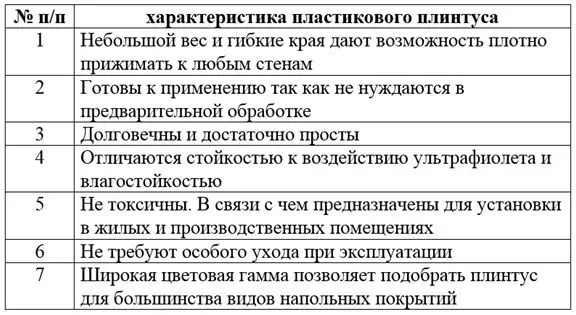
The table shows the brief characteristics of the plastic plinth:
Principal hard indications about choosing a particular model does not exist. It all depends on the target destination imposed on the plinth, and the characteristics of the price policy.
Methods of fastening
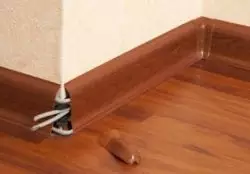
If the walls are uneven better strengthen the plinth dowels with a drill
Depending on the design features, the mount is carried out in three ways:
- With perfectly smooth walls, the mounting of the plinth to the floor should be performed using glue or liquid nails; In this way, it is fixed in the right place without the possibility of damage;
- Fastening outdoor plinths for special disposable latches; The re-attachment of the plinth requires the installation of new latches;
- Fastening the plastic plinth to the floor by screwing into screws to the wall through a dowel.
Article on the topic: Installation of MDF panels with their own hands (photo)

Fastening on glue allows not to damage the plinth
The last method of fastening makes it impossible to lay the wiring of various purposes under it.
This happens when there is no special plastic insert for the placement of wires.
However, if it has a special chute, then the heads of the screws will be covered with a decorative plank and the question of how to kill a plastic plinth will not arise.
The cheapest way to nail the plinth is to use selflessness or finish nails.
Fastening for glue or liquid nails
To start installation, it is necessary to have a hacksaw for cutting plastic, glue or liquid nails, as well as the required number of angular elements, spacers and shortcuts.Before mounting plastic plinth to the floor, the walls should be aligned with a putty. Installation work must be started from one of the corners or from the entrance to the room.
On a flat surface, glue or liquid nails are applied in the form of drops at a distance of no more than 5 cm. In this case, the glue composition should be applied both on the wall and the profile itself, after which the profile strip is applied to the prepared surface.
During operation, it is necessary to ensure that it fits tightly both to the wall and sexual coating. For this it is necessary to press and hold it for a few minutes while liquid nails or glue are sorcered. After checking the reliability of the attachment, you can move to the installation of the next segment.
The better the liquid nails or glue, the stronger the plinth will hold onto the place of its installation.
Fastening on clips
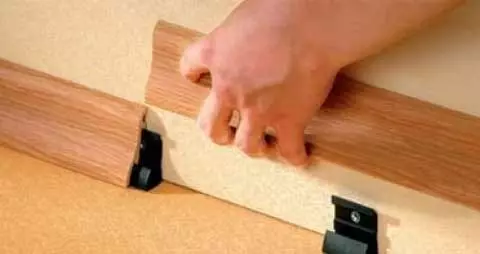
How to fix the floor plastic plinth? Many floor plastic profiles are installed using the clip. Despite the fact that this is the most time-consuming and expensive way, it allows you to reliably establish a profile, despite certain irregularities of the walls. For details on the installation of plastic plinths, see this video:
Article on the topic: Installation rules and installation of the LED ribbon do it yourself
After installing the plinths, attach plastic corners and plugs
During the work it will be necessary to reduce the distance between the clips. Before they are installed, markup placing places. Then, with the help of electric drills, holes are drilled to a dowel depth across all the places marked.
The hole is clogged with a plinth dowel, which screws up the screw when installing the clips. The plinth is snapped into clips, and the problem, how to fix the floor plastic plinth, solved. Between themselves, the segments of the product are connected by a spacer. At the end of the work, the elements of the corners and the lap the doorway are installed.
For high-quality attachment of corners and shortcuts, they are recommended to be attached to liquid nails.
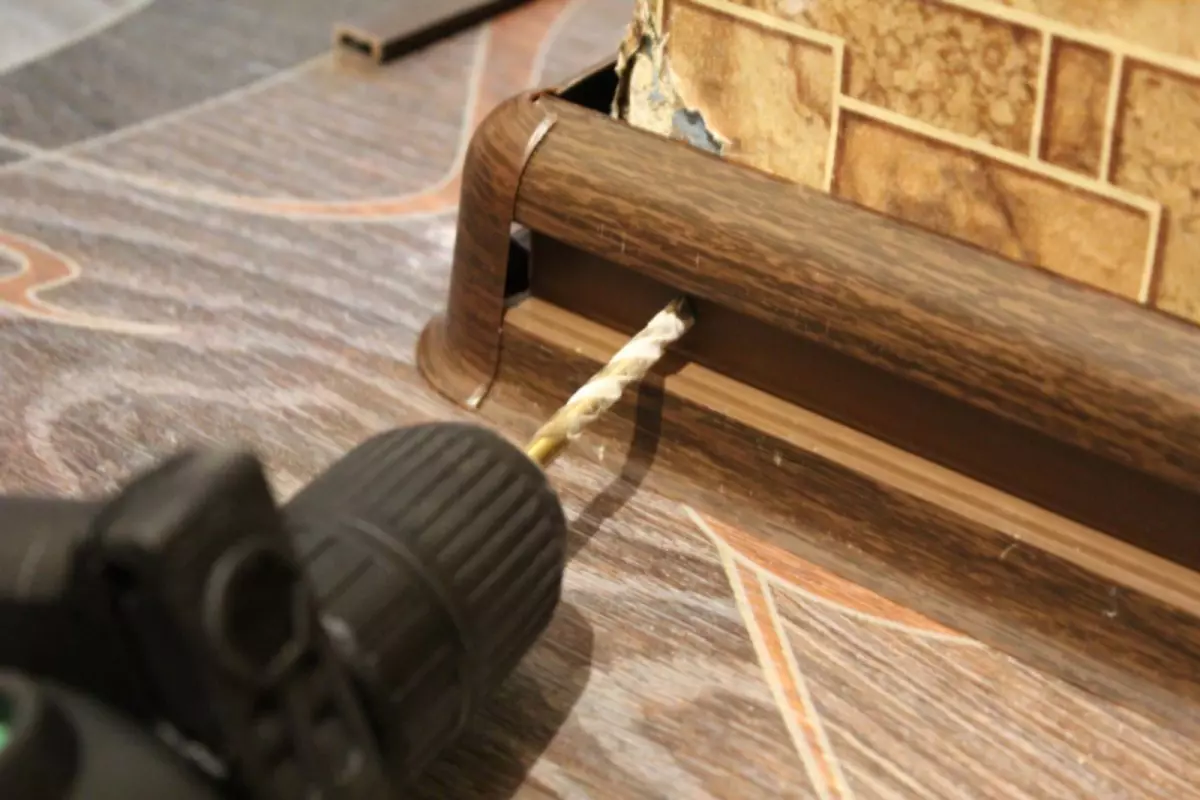
Mounting on a self-tapping screw
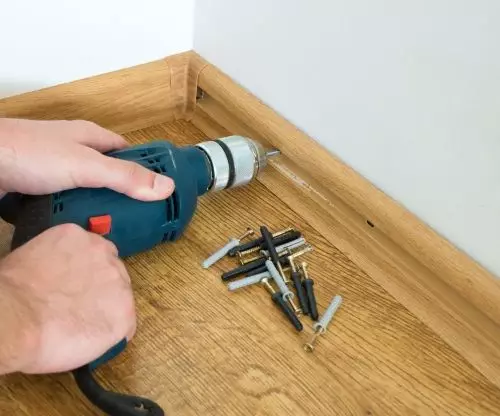
Holes are made on markup
This fastener assumes the execution of a certain list of actions:
- Before attaching the plinth to the floor, the presence of growth of the solution, other irregularities and sharp protrusions should be checked.
- Marking the places where the screws will be screwed. The distance between the attachment places should not exceed 40 cm.
- Using a perforator or drill to drill holes, in which before mounting plastic plinths to the floor, dowels are inserted.
- Screw the profile over the entire perimeter by self-drawing, connecting it with each other with spacers. The hat should drown completely. Nails should not be knitted.
- Self-tapping caps are closed with special caps.
This sequence allows you to answer the question of how to attach the plinth to the concrete wall, while spending the minimum of effort.
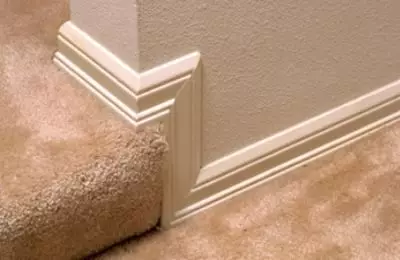
Installation of plinth on carpet
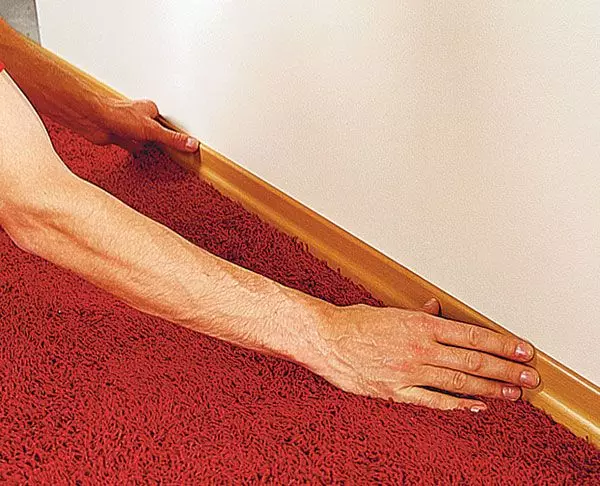
For tight grab plinth attach carpet tight to the wall
Plastic plinth for mounting carpet There are two types: with a rigidity and without that. The first should be fixed on the self-tapping screw, and the second - on liquid nails or glue.
So that it presses well the flooring, carpet must be laid tightly to the wall and not have folds. How to do it? By perimeter, the flooring is fastened to the base of the floor with the help of bilateral tape.
Article on the topic: Wallpaper in a children's room - 110 photos of the best ideas of design. Preparation and combination options.
To install the profile with the rigid rigid on the wall, it is pre-marked with screws of screws of screws. The holes are drilled, the dowels are clogged, in which they will be screwed through the plinth of the self-tapping screw. This is a more reliable way to fix the carpet on the basis of the floor. About how to mount the plinth on the carpet, see this video:
However, the screws of the screws will need to or paint the profile color, or close the specially acquired plug.
When using a product without a rigid rib, it will be more correct to secure it on liquid nails or glue.
To strengthen carpet or linoleum, plinths are used, having special notes in which the edges of the sexual coating are laid. These gaps allow at any time to replace the floor covering without removing the profile.
Plastic plinths have a beautiful view, a small cost and are easy to install, so they can be installed independently.