
Nowadays in stores you can see a large number of diverse lamps. They differ in material, shape and color. Now everyone really wants the material to be natural. It is natural and safe. Such lamps do with their own hands create a beautiful design in the room.

The lamp made with your own hands will create a pleasant and cozy atmosphere in the house.
You can change the interior of the apartment, making a chandelier from the rope with your own hands. The main thing is to have a desire and good mood. And the advice of specialists will help you with this. Make it can be easily, easy and cheap. Large material costs you will not need. You will need only the remedies that everyone must be at home. We will make our lamp from rope and glue.
What do you need for the manufacture of the lamp?
Materials that will be required for the lamp do it yourself:

To create a lamp, you will need an inflatable ball and a rope.
- The rope is waxed or hemp (the main thing is that it consists of natural material), size 15-20 m;
- Inflatable ball (can be a beach ball, a ball for fitness);
- transparent glue (so that it is not visible on the ball);
- Capacity for glue;
- latex gloves;
- newspaper;
- marker or marker;
- needle to descend the ball or pin;
- Latex paint.
When you all needed you collected, you can start work. It is better to work in rubber gloves so as not to fall out of your hands into the glue, as it is badly washed away.
Step by step description of the lamp

The size of the luminaire depends on the size of the inflated ball.
The surface on which we will make a lamp from the rope with your own hands, you need to make a newspaper in order not to restore the mess in the room. It is easier to throw out the newspaper than then a whole day wash apart from glue. Next, type full light air and influence the ball (or the ball that you have found). The size of the infllity ball depends on what size you want your lamp. The case will move faster if you have a pump.
Article on the topic: Kitchen transfer principles in the living room
On the infrete, the ball or ball need to draw a circular opening with a marker or felt-tip pen, with a diameter of 10 cm (if a ball in diameter is 40 cm). It will be needed to insert a cartridge with a lamp to our lamp. And it will be the bottom of our lamp. Thanks to this opening, the light will scatter throughout the room. To get a smooth circle, take something round and circle. Do not forget on the other hand left somewhere 2-3 cm free for cartridge with a lamp.
Now you need to moisten the rope in the glue. In unnecessary containers, for example, in a cut plastic bottle, dig glue. Muffle a thread around the brush and lower in the container with glue. After that, carefully pull it out and remove excess glue with your fingers. This rope in the glue is starting to wipe the inflated ball. Be careful, the round hole, which you painted, is not worthwhile, it is not worthwhile, because it is a place for a cartridge with a lamp. Watch the ball with a rope as much as you need. Do not try to do everything beautiful, rope chaotic will create an original pattern on the lamp.
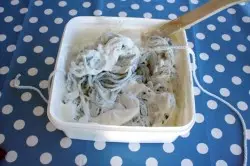
The rope is wetted into the glue, and then wounds on the ball.
If the rope dried during the wind, plunge it into the glue again. Do not forget to hide well and glue ends of the rope. The better stick the rope, the lamp will be stronger. When wrapped the whole length, let the ball dry. It will take out somewhere 24-48 hours.
When the ball will dry completely, take a pin or needle and burst it. Wait for the ball to reveal yourself, do not help him, otherwise you can break the design of the lamp. Then neatly get out of the round hole remains of the ball and throw them away.
In order for the lamp from the rope with their own hands it looks even more effectively, you can paint it with latex paint, as it is non-toxic, odorless and divorced with water. She will add product strength. Choose the color of the paint suitable to your interior. Run it in water (with proportions on 2 glasses of paint 1 glass of water). Lower the lamp several times in this solution every 3-4 seconds.
Article on the topic: Decoupage of the Children's Tool DIY: Preparation, decoration
Recommendations for the manufacture of the lamp
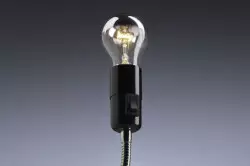
In order for the lamp to burn, it is necessary to attach a cartridge with a light bulb.
If you want to increase the diameter of the bowl of 10 cm (from 40 cm), then the diameter of the opening increases by 5 cm (from 10 cm) and so on.
While there will be a rope with glue, the ball may be blown away. And then the form of our chandelier will not be round at all, but oval. So that it is not blown away, carefully unjust the tail of the ball and blow the air. But it is necessary to do it when the ball is a bit. Tie the ball again, let it dry further.
Please note when the ball is heated, the air volume in it is greater than when the room is cool. So that the ball remains warm, you can put the heater in the room, it will raise warm air. Just do not overtake the ball, otherwise it burst.
Be careful: it is impossible to keep the lamp in the paint for a long time, because it can twist the adhesive base of the rope.
So got the lampshade. In order for it to turn into a lamp, you need to attach a cartridge with a lamp. It is easy to insert through a round hole. Hang the lamp on the ceiling.
The light bulb is better to use low power so that it does not heat the lampshade. Also, the lamp can be decorated with butterflies, which can be bought in the store, or flowers woven from beads or made of paper strips (in a queen technique) and so on. Fantasy no limit. Do not be afraid to experiment! Let it be in your apartment a little joy made with your own hands.