
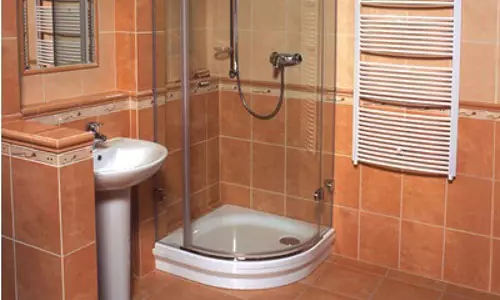
In the process of using a shower cabin, it may be necessary to disassembly and disassemble: for example, to transfer the cabin to another room, the renewal of the sealant layer, the installation of a new cabin, etc. If the assembly and connection of the structure is usually performed by qualified specialists, then disassemble the shower, using the recommendations below, you can independently save on the service of the Master. To do this, you will need a minimum set of simple hand tools and a little time. Before disassembling the shower, carefully read the information on how and in what order it is turned off and disassembling to prevent any errors.
Before proceeding to dismantling the cabin, look where and how it is connected.
Disconnecting the shower and preparation for dismantling
If you plan to independently disassemble the shower cabin, then prepare the necessary tools for this. You will need:
- Screwdriver (screwdriver set);
- sharp knife;
- Means for dissolving sealant.
First of all, the shower cabin should be turned off from electricity and water supply systems.
This work is done in the following sequence:
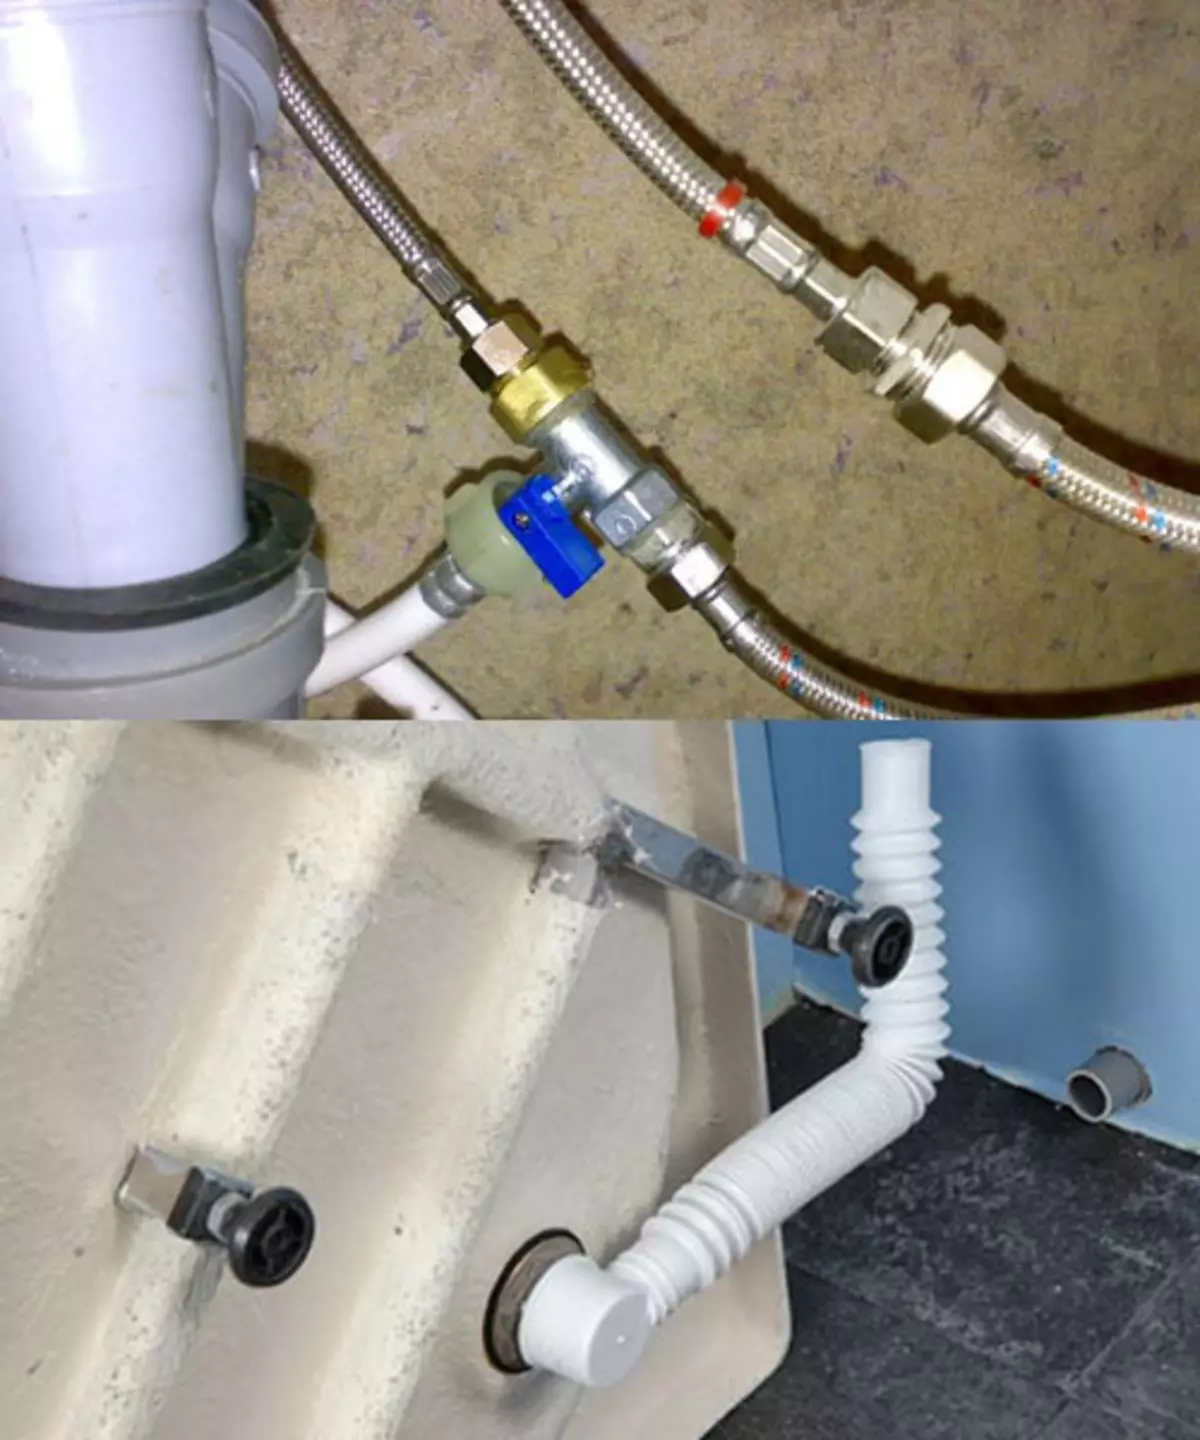
Before you start work, overcoat the water supply and disconnect all hoses from the cab.
- The shower cabin is disconnected from electricity;
- overlap the cranes of cold and hot water;
- Disconnect flexible water supply hoses;
- Turn off the shower cabin from sewage.
At the end, it will be necessary to disassemble additional elements (dispensers, shelves, towel holders, etc.).
Close the control cranes on the cold and hot water supply, then unscrew the filling hoses. Tees and cranes can be left. They will be needed in order to connect a new shower cabin. Even if you move, the shower cabin will be able to connect the following tenants without performing unnecessary work related to the insert in the plumbing system. Demonstrated tees and cranes you still can't use for a new insert, and you have to buy new ones.
Article on the topic: How to choose a program for a curtain design
Disconnect the shower cabin from the sewer system. If the installation was carried out on a double siphon, the dismantling is overrun only to the fact that the drain pipe is pulled out of the siphon. If the installation is made on the adjustable tee, then you should unscrew the clamps or threads, depending on the specific model of the shower.
Next, it is necessary to dismantle all the musical instruments and the shelves, if any. In addition, be sure to disassemble the shower mixer.
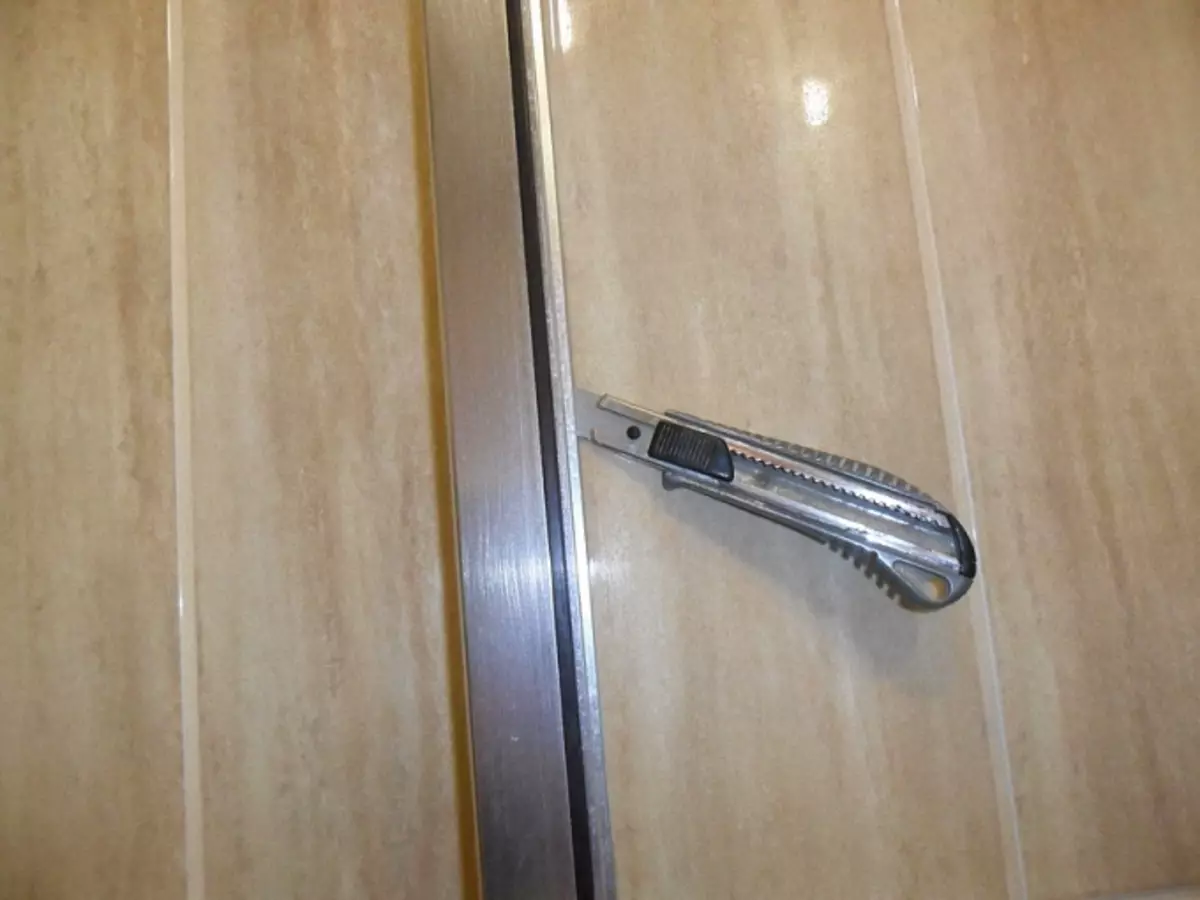
If there is no special, silicone remove with a knife.
Next, proceed to dismantling the shower cabin itself. First of all, with the help of a special means to remove sealant, all connections and joints are processed. Of course, the sealant can be removed and mechanically, for example, with a knife. However, after you figure out the shower, it will still be traces of silicone. It is much more convenient and more efficient to remove sealant using a special tool. Lubricate them all connections and joints, learn the time specified on the packaging of the tool, and start the fast pace to disassemble the shower cabin. If within 10-15 minutes you will not be able to remove all the details fixed with the sealant, then the chemical composition will have to be applied again. So try to do everything very quickly until the sealant froze.
Disassembly of shower cabins: phased instruction
Disassembling the cab is performed in the following sequence:
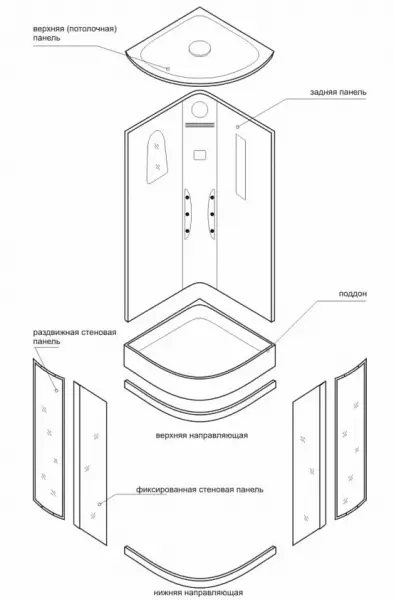
The main elements from which (usually) consists of a shower cabin.
- Removed doors;
- Side glass panels are removed;
- The framework of the frame;
- The pallet is dismantled.
The door of the shower cabin is hanging on the rollers, which, in turn, are inserted into the guides. You need to weaken the screw on the top rollers. This screw adjusts the level of installation of the door of the shower cabin and during the tightening the rollers in the guides are fixed.
Remove the lower rollers from the lower guides. The door of the shower cabin will hang on the top rollers. Raise the door up and remove it from the top guide. Do not forget that the doors are heavy enough, so it is advisable for this job with an assistant. Also remember that the doors are filmed inside the shower. When removing the door removed, you need to control its edges.
Article on the topic: Corner cabinet in the bedroom: types, filling, sizes, design
The next step is to remove the glass side panels of the cabin. Dismantling the sidebar is the most difficult stage of work. Fastening the panel to the framework frame is quite simple. On the one hand, the panel is inserted into the wall strip of the frame, and on the other hand is pressed by the central stand. From the bottom and above the panel is held using special fasteners.
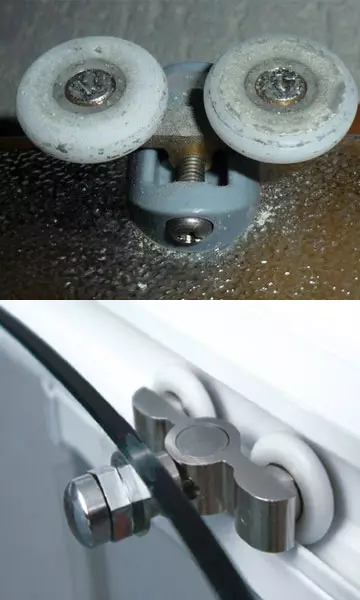
If the rollers are not removed from the door of the door, you need to unscrew the cloth fastening bolts.
It is them necessary to get out first. Having loosel out the central rack and removing the fasteners, try to squeeze the glass inside the shower. The work is complicated by one of the screws on the rack.
The fact is that the slots on the head head are torn, so it is impossible to simply unscrew it. Carefully shifting the rack in the side, free the 1 side of the panel. Sealing silicone gaskets during operation adhere to the metal. In view of this, remove the panel from the wall plank may not work, and it will have to just cut it with a knife.
The order of disassembling the frame and dismantling the pallet
First of all, you need to unscrew the screws, with which the frame is attached to the wall. After that, it is necessary to cut silicone using a knife (or remove it with a special tool). Remove the frame with the glass panel and put on the floor. The side slats of the carcass consist of 2 parts. One of them is the frame itself. The second, guide, attached to the wall. Removing the guides, you will see the screws, with which the frame is pulled. Unscrew them and you will get:
The pallet is successfully cut off, the base remained in the screed.
- lower and upper arc;
- 2 wall guide strips;
- 2 side slats of the frame;
- The central rack, which, as a rule, can be unscrewed, only putting on the floor.
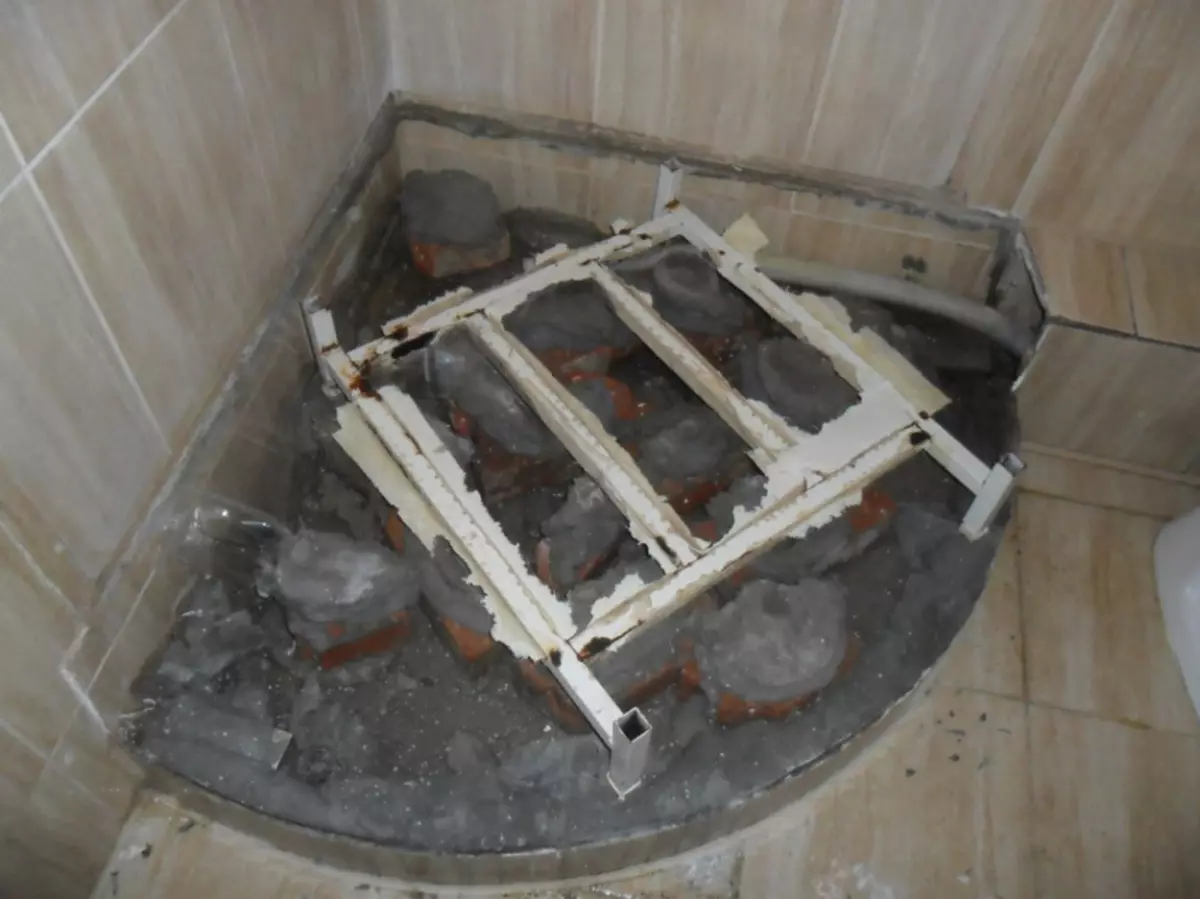
At the next stage you will have to dismiss the pallet of the shower. If the shower pallet is on the legs and stands directly on the floor of the bathroom, then it will be quite simple to remove it. It is much more difficult to dismantle a pallet, which is installed in a floor screed. In addition, the base of shower is often protected by a mosaic of ceramic tiles or a decorative screen. Therefore, if you want to keep the integrity of the shower of the shower, then its dismantling is best trusted by a qualified technician.
Article on the topic: Decorating the old cabinet with their own hands
However, you can try to do it yourself. Remove the protective tape around the perimeter of the shower pallet, remove the silicone around it. Check if it is possible to move it. If the pallet does not shift, take a couple of mounts and, applying the necessary effort, take it off. To tear off will be literally, from a metal frame.
Next, you will need to take a bump and release the pallet from the screed. Carefully, with the help of a knife or special tool, remove from the walls of silicone residues. Remove the remnants of glue and grout. After that, it is possible if it was planned to install a shower cabin.
That's all. Now you know how to correctly disassemble the shower cabin with your own hands. If the assembly and connection of the cabin for the shower were not for you, then with disconnection and disassembly, you will most likely be able to cope on your own. Good job!