
Sometimes there are models of hydroaccumulators with a non-refurbish membrane. This can be regarded as a certain guarantee from the manufacturer on the fact that it will remain unharmed at any working circumstances. If still some kind of trouble happens, you will have to buy a completely new device, since the replacement of the membrane in this case is not provided.
The aggregates used, as a rule, are equipped with a pear-shaped membranes, while powerful hydroaccumulators from 100 liters are equipped with a ganglet-shaped membrane, which has input and output.
Find a membrane in a free sale is easy, as it refers to the discharge of consumables. You can also apply for this spare part to suppliers or manufacturers of hydroaccumulators. Consider the factor that the membranes of one firm may not approach the device another company due to the difference in the diameter of the neck. However, there are also compliance, for example, the djilex membrane is great for the Zilmet hydroaccumulator.
Replace the membrane in the domestic pump hydroaccumulator is quite simple. First, you should turn off the power and reset the pressure in the system. Despite the fact that the membrane is spoiled, it is better to make sure that the pressure in the device is missing. Next, you should unscrew the bolts, remove the flange and remove the unsuitable membrane. To install a new consumor, you will not need neither gaskets nor sealant. Flexing the flange into place, pumped the air to 1.4 atmospheres. Now it remains only to fill the pump with water, connect to the network and pump pressure in the system. Use and do not forget to periodically check the air pressure in the device so that you again have not changed the membrane in the hydraulic accumulator.
Article on the topic: High-quality installation of a multi-level ceiling of plasterboard with their own hands
Replacing the membrane (pears) in the hydroaccumulator (tank). Visual instruction
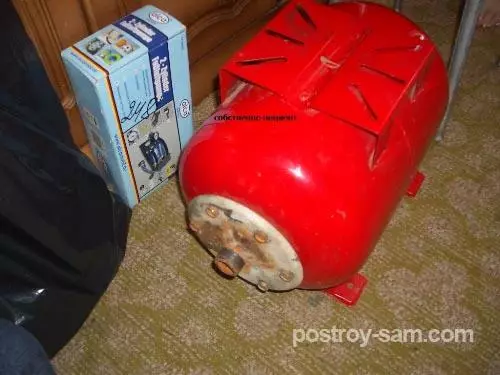
Let us consider in more detail the process of replacing the membrane in the hydroaccumulator. The following instructions are shown in the photo below.
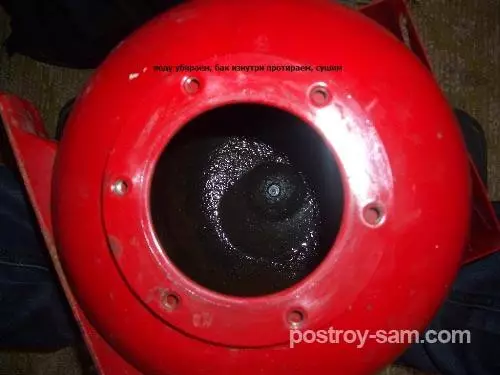
Here in this hydroaccumulator we will change the membrane.
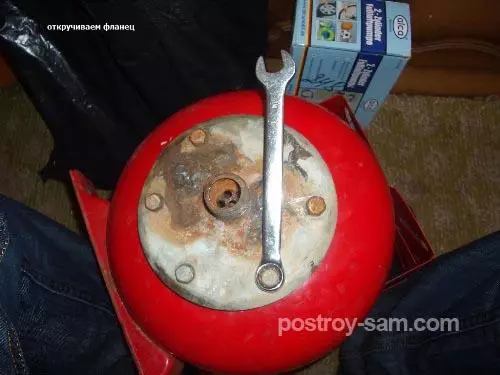
Remove the flange.
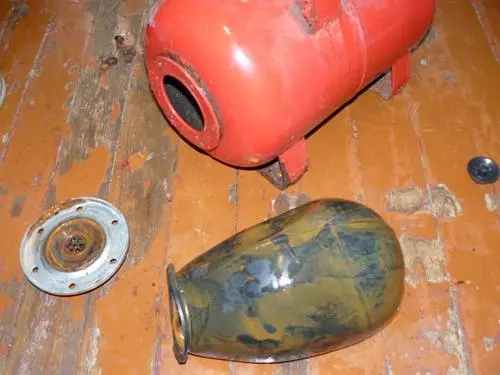
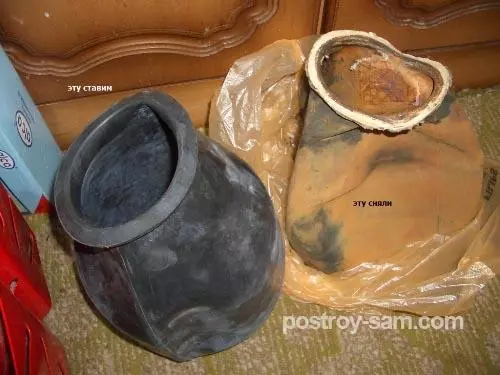
Old membrane. The view is not very beautiful.
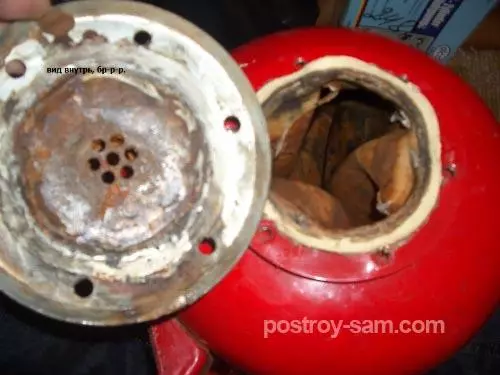
I pull out the old membrane. Pour the water residues, wipe and dry the inner space of the hydroaccumulator.
New and old membrane. As we see the difference is essential.
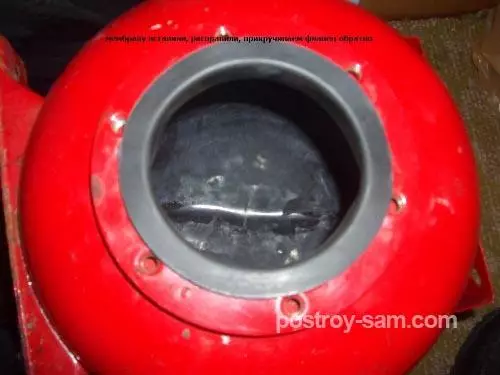
We put a new membrane into a hydroaccumulator, straighten it and screw the flange back.
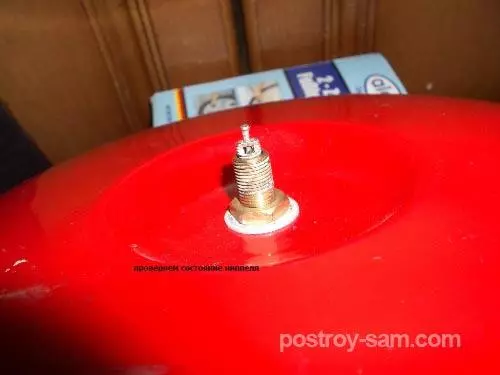
Check the state of nipple.
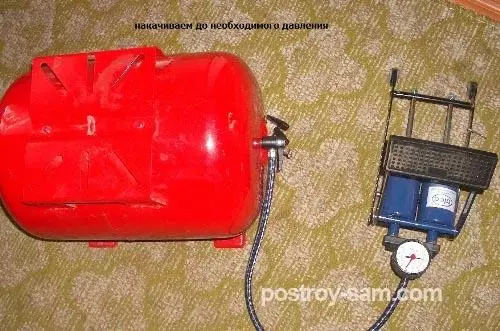
Pump the pressure in the tank with the pump.
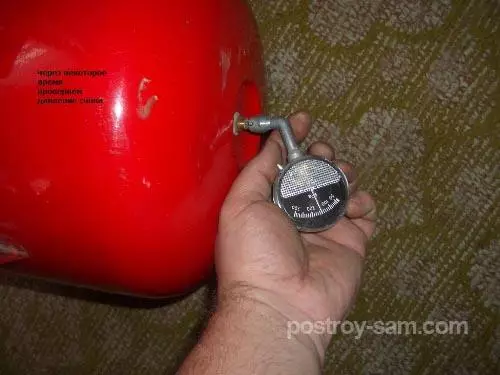
After some time, check the pressure.
Collect the knot back. If you need to replace some other details - change.

That's all. Replacing the membrane in the hydroaccumulator with their own hands.