
With all the existing quality guarantees and durability from manufacturers, the life of the mixer sooner or later expires even with the most careful use. If small repair or replacement of spare parts are not saved in such a situation, there is nothing to do - you have to replace the entire crane. In case of a corrected breakage for you, we have prepared a number of practical advice on how to disassemble the mixer.
Features of the mixers for the bathroom
The most running and familiar to everyone is two-fledged and single-dimensional cranes. Both products are characteristic only for them advantages, thanks to which buyers prefer them specifically. But, at the same time, its weaknesses are inherent in each type. They are most often broken.
More details you can read in our article on existing types of mixers.
Two-dense
Despite its respectable age, the instruments of this design are still very in demand. Mainly due to the smooth regulation of the flow and temperature of the water, as well as the variety of forms and design of valves and housing.
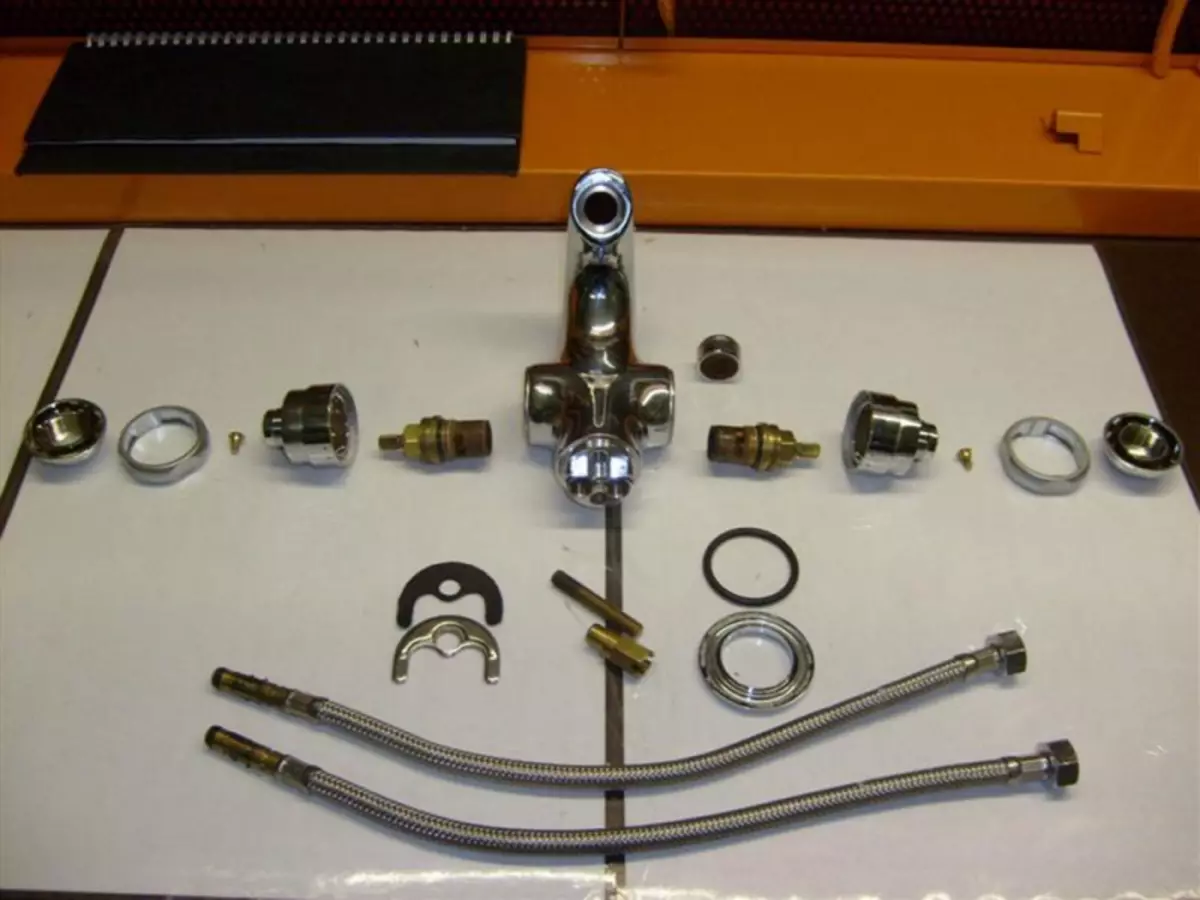
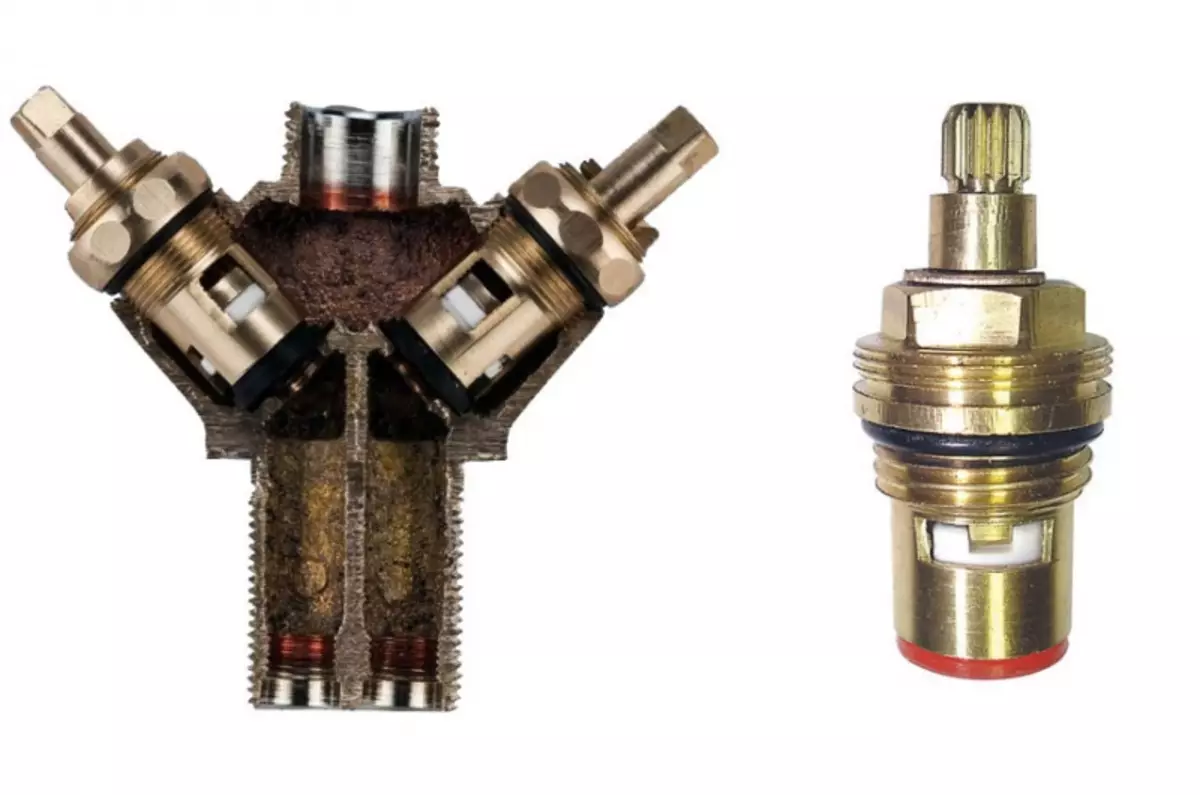
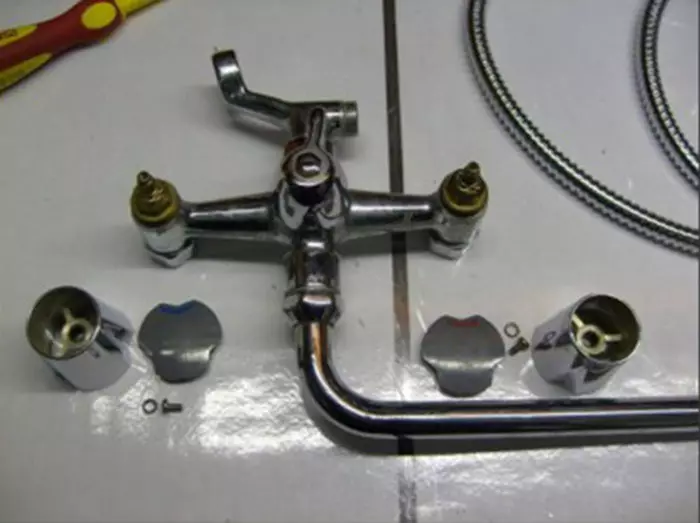
The housing of the two-fledged mixers is cast from brass or stainless steel. Channels under warm and cold water drilled inside it. The main work items are mounted in the housing:
- Crane-trays . They are driven by valves and overlap the holes in the mixing chamber placed at the ends with rubber gaskets or ceramic discs;
- Spool valve To switch the feed from the nose to the shower.
Already outside the hussak and shower hose on the appropriate holes. For rod, crane-trays dressed valves and are tightly fixed by bolts.
By means of connection, 2 types of two-fledged cranes are isolated:
- Connected through a tee (in the form of "Christmas tree");
- Connected through nozzles.
In the mixer of the first type, the crane-inks pressed to the saddles, closing the openings of 2 parallel channels. Those in turn are connected through a tee to the water pipes derived in the bathroom.
The configuration with separate nozzles is more simple and allows you to connect to the water supply through the hard tubes or with flexible hoses.
The main cause of faults in the two-fledged mixers is periodic wear of sealing gaskets and rings, which is why closed valves begin to pass water, there are leaks through precipitated nuts, etc.
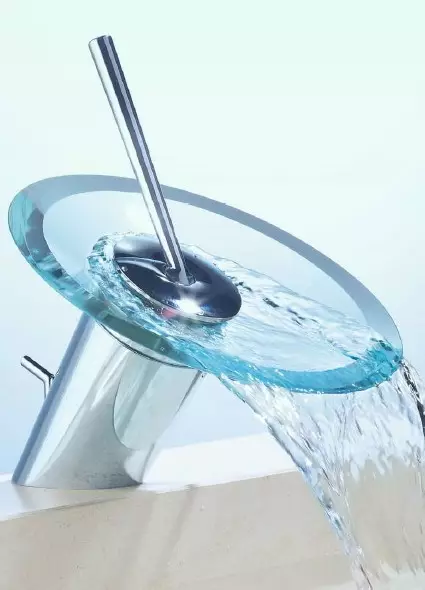
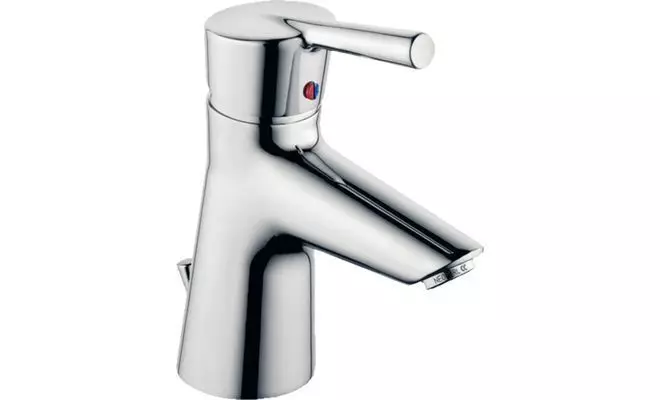
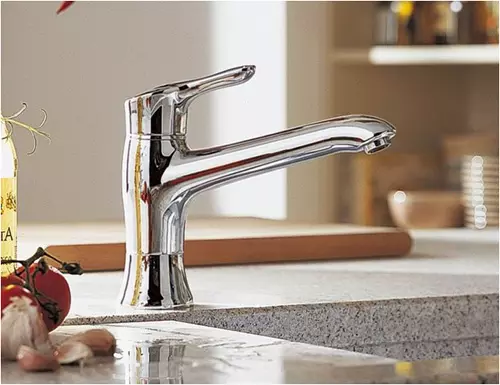
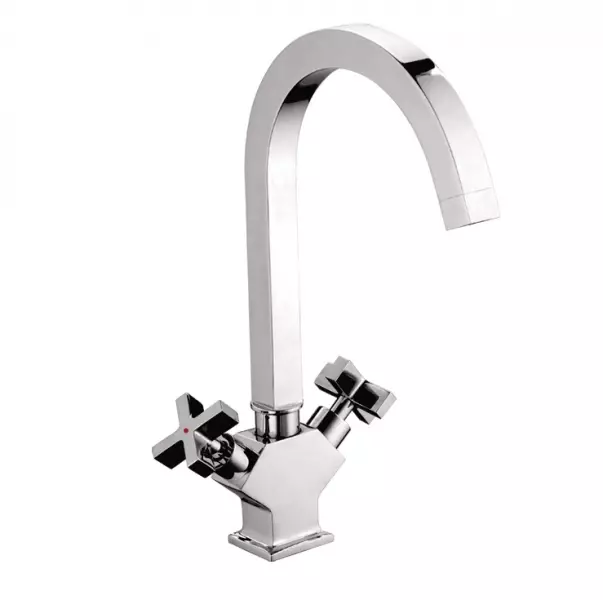
Single-art
These products have gained wide popularity due to modern design, compactness and simplicity of water consumption.
Article on the topic: 50 Ideas of gifts on February 23 with your own hands (35 photos)
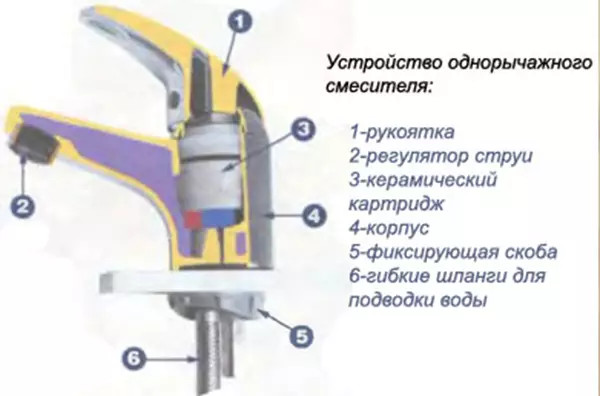
Let's get acquainted with the structure of a single-loader mixer.
It can select the following components:
- Body mixer;
- Regulating handle;
- Its lock;
- Top cover;
- Clamping nut;
- Replaceable cassette (cartridge);
- Sealing gasket.
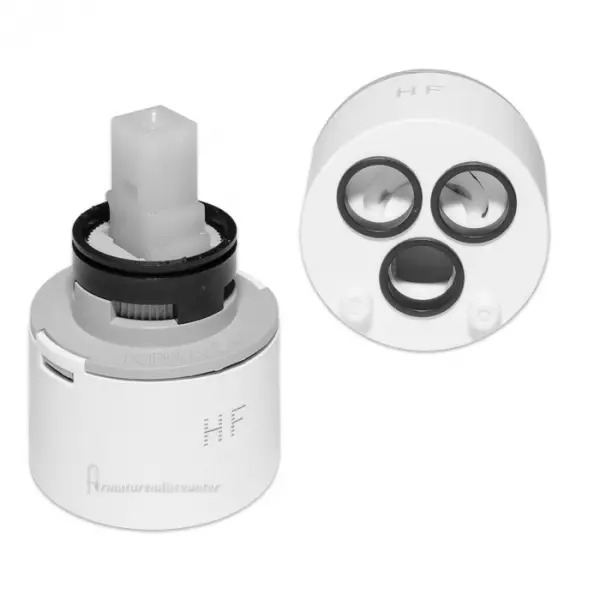
Inside this mixer can be installed cartridge in the form of a metal sphere or a ceramic plate.
In the first case, a hollow ball with holes are mounted in the mixer body, which is connected through the rod with the handle. The ball cavity is just performing the functions of the mixing camera: when the lever is raised, the duct is opened into it, and when driving, cold or hot water is taken to the side. The third hole in the cartridge comes out itself on the drawing of the crane and serves water into it.
Often around the inlets of the crane are installed Teflon seals.
Designs with ceramic cartridges are found both with a swivel and fixed nose. In all of them, the regulatory scheme is the same. There are 2 ceramic washers tightly pressed one to another. The rotation of the crane handle changes the lumen, which form holes in the plates and allows you to adjust the flow of cold and hot water. Handle lifting opens the valve covering the mixing chamber.
Modern versions of the cartridge have a restrictive washer to prevent only hot water on. Even in the extreme position for the supply of hot water to the mixer, there is some clearance for a cold jet duct.
Inside the surface of the openings of the cartridge is closed with silicone or rubber gaskets. At the bottom of the top washer there are small furrows or notches to extinguish sound oscillations and hydrowoods.
The characteristic breakdown in the mixers with a ceramic cartridge is a blockage between ceramic plates, which is why it is completely unable to overlap water. Due to the fact that the cartridge is intimidable, it will have to change it entirely.
We strongly recommend to remove the broken cartridge and take with you to the store to choose a new similar size.
Single-art cranes with a ball cartridge can be disassembled to clean the surface of the sphere and its seat seat.
Necessary measures before work
To independently eliminate faults, consistently prepare for work.:
- Set the exact leak, jam or break on your mixer.
- Compelate with experienced people or consult with plumbing.
- Before starting work, overcoat ball valves on the supply pipes and prepare absorbing sponges and rags to remove the drips.
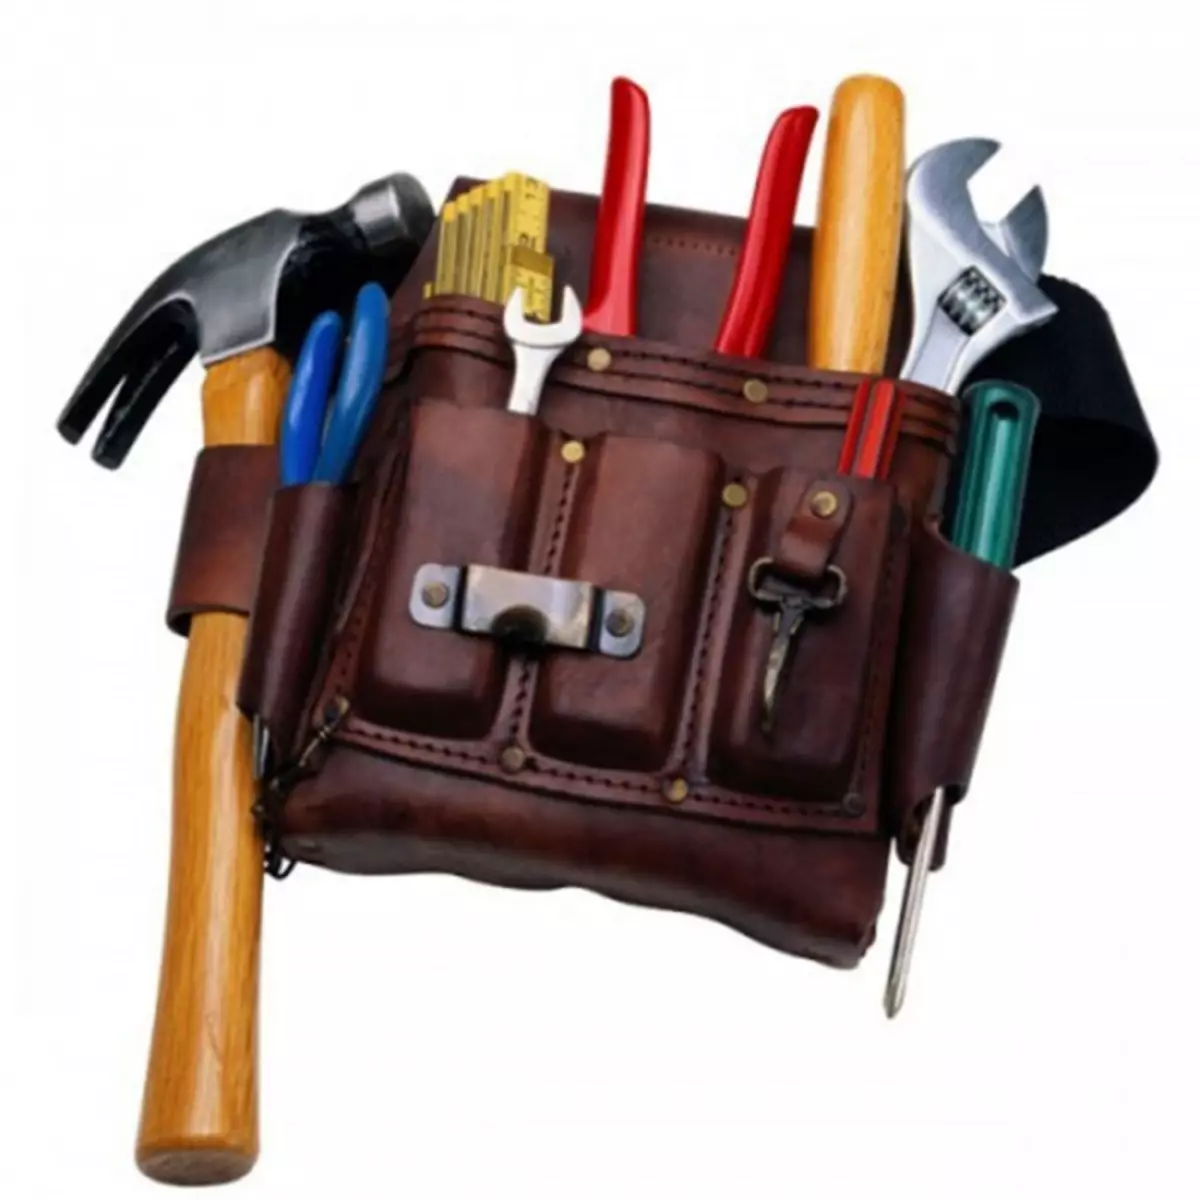
To remove faulty details and put new ones, we need the following tools and materials:
- Screwdrivers (flat and cruciform
- Spanners and adjustable keys
- Passatii
- Hex key
- New Replacement Parts
Article on the topic: Full things to decorate the interior with their own hands
Always at hand with plumbing work due to be a sealing winding (flax, palable, fume), spare strips of standard sizes and sealing rings. Also for gentle work, the keys always put the soft cloth so as not to leave scratches on the metal surfaces of the connections.
Replacing the cartridge in the lever mixer
Initially, the regulatory lever itself is removed. Remove the plastic lining at the bottom of the lever (on which are indicated, blue and red directions for hot and cold water). To do this, carefully pue it to a flat screwdriver. Then remove the connecting lever with the scroll of the screw and remove the lever.
A decorative cap will be located under the lever, which hides the nut fixing the cartridge in the case. It is easy to unscrew his hands, and if difficulties arise, then use the adjustable key. Note that the cap is quite fragile and efforts must be minimal.
Removing the cap, loosen and spin the nut. Remove the cartridge and, if you still have not purchased a new replacement, take with you to the market or to the store.
When you already have a new cartridge of the desired diameter, you can start assembling the mixer.
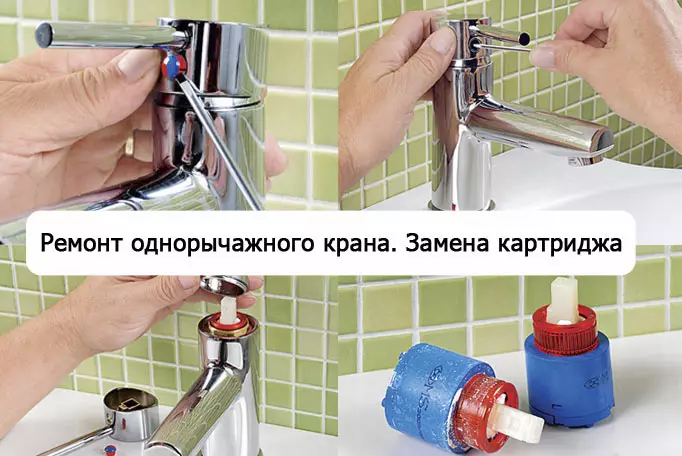
It is important to clean the landing space before installing, remove the limetones and other dirt.
The order of the assembly after replacing the cartridge occurs similarly, but in reverse order. Having finished work, open the taps on the supply of tap water and make sure that the mixer is working correctly.
Replacing parts in the valve crane
In the event of water flowing on the hussak, even in the closed position of the valves, you must remove the crane and check and check their condition.
The removal procedure is almost one to one repeats the removal of the lever mixer cartridge. First, remove the valve, for which you unscrew the pressed screw. The screw is also hidden by a decorative overlay. After that, we remove the cap covering the cap and the keys to spin the locking nut.
Selecting a crane, inspect rubber gaskets at the end. If they are worn out, then here is the cause of non-volatile water. Replace the worn gasket to a new one, and install all the details for your previous places.
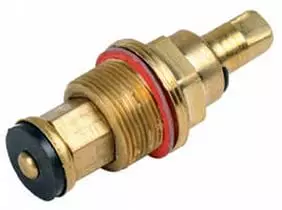
Please note that it is necessary to screw in place to the place of the crane-tap with the position of the stock "fully open".
If in the mixer, the closure and opening is regulated by semoculatory crane, then the problem with the leakage of water will mean replacing the entire part.
On sale ceramic or plastic discs for semoculating cranes are not found separately. It remains only to buy a new crane-tone instead of the failed. In order not to guess with the desired size, take the old detail with you.
Article on the topic: how to sew a curtain tape: step-by-step instructions
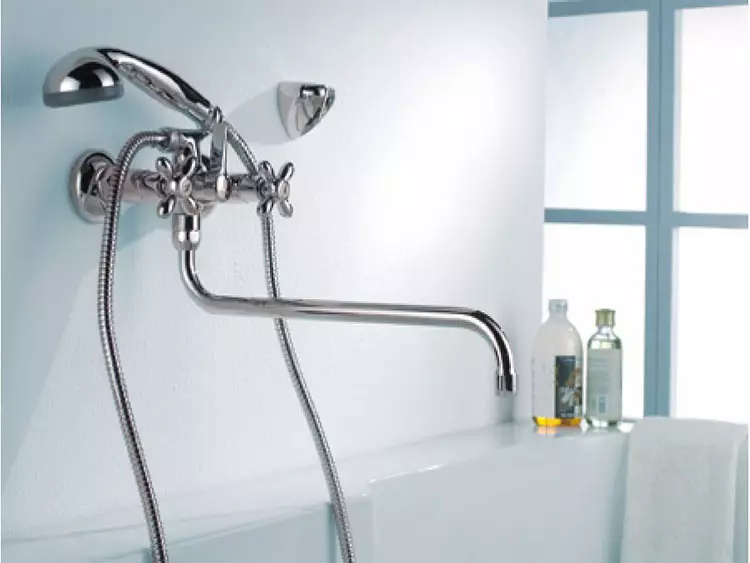
How to disassemble a shower fauce
The three-way shower valve can be mounted in the mixer in three ways:
- integrate into the case by the discernment method;
- integrate into the housing in an inconsecting method;
- Cold between the housing and the spill with the help of precipitated nuts.
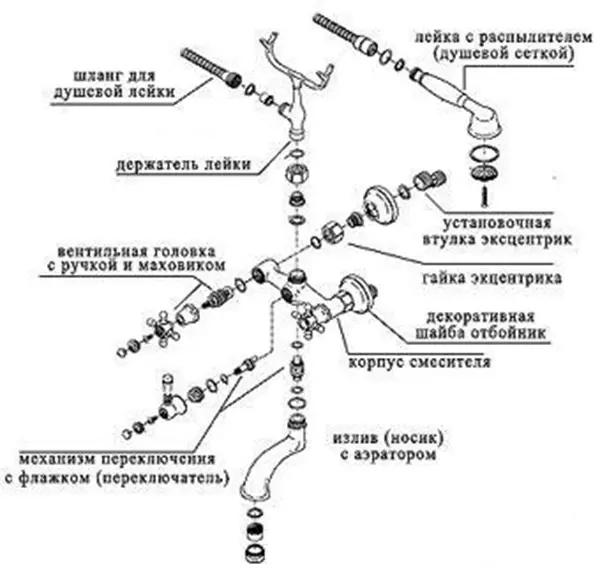
Built by pressing built-in cranes can not be removed and replaced. This is an attribute of cheap plumbing and the work of such a mixer is designed for 4-5 years at the best.
More thorough products often have collapsible cranes for the shower, they are not difficult to replace them.
If you take a switch installed on a movable hussak, then it can be changed, disassembled two cape nuts that fix it from above and below.
The head of the crane is to repair or change it does not make sense. Yes, it will cost inexpensively, but you will put it for you to suffer.
The switch, mounted in the housing, will be replaced not so fast, but the process is quite familiar. As with the replacement of the crane bug, the first thing is removed the switching knob, follow the protective cap. This will give us access to the crane of the switch. Depending on the kind of fault, you can replace part of the gaskets on it or remove it completely.
Useful advice
As words, we still have to give you some more tips:
- It is possible that on the old mixers, shut-off nuts move off the place will not give rust or long-time flare. Do not make it possible to demonstrate your power - Rather, the threads of the tight or face on the nut must be keys. Apply the WD-40 Spray Disproof Connections to remove rust and threads to be loosen without problems.
- Rarely, but it happens that the previous Council does not help. It remains one way out - cut the nut with the Turbine in half. Then it can be carefully removed using a filler key and passage.
- Make sure there is no damage to the cartridge and normal mobility of its rod, after the mixer has disassembled. The overwhelming majority of leaks caused by the defects of the cartridge.
- Take care of the aesthetic view of your plumbing and always put the fabric under the keys, disassembled chrome details.
- If you are the owner of a budgetary product, be prepared for the fact that the metal is fragile in them and may not withstand heavy loads during disassembly. Act with caution!
We advise you to read our inspector for the bathroom.