
Today we will talk about how to make a hatch for the cellar.
The cellar is practically in any private house, it is an indispensable place to store seasonal things and products. If it is equipped correctly, the low temperature is always supported in it and approximately constant humidity, which contributes to the good preservation of the inside.
When building a cellar, it is important to properly make the entrance hatch into it to save the heat and not disturb the interior of the room in which the entrance to the cellar is located.
You also need a well-thought-out system of stupors and shock absorbers so that the lid does not close when a person is at the bottom. If you only build a house and do not know where the entrance to the basement is located, then you need to pay attention to some nuances.
- He should not be close to the wall so that the hatch is easily opened.
- If he is in the kitchen, it is important that he is not there, where the furniture will be so that the raised cover does not hurt any kitchen accessories.
- If the input is in the corridor, the cover design must be enhanced, so that it can withstand human weight.
- Its logging sizes should be such that the person can easily fall into the cellar, take the necessary supplies from there and climb upstairs.
How to make a hatch for cellars?
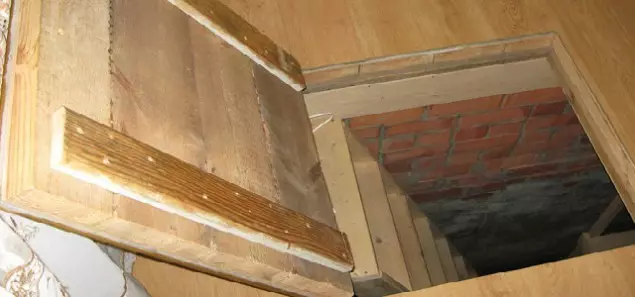
If you have a wooden board on the floor, then the hatch for the cellar should be wooden so that it is visually hidden visually. The whole design, in this case, will be easier.
The lid needs to do a little less Laza into the cellar, so that it can fly freely to the floor. The gaps between it and the floor should not exceed the half-meter.
- Initially, come from the side of the sample to the rough flooring from the board of 4 supports from the bar, it will be on them a lid.
- Split a sex board on the blanks, their length should be 80 centimeters.
- Cut from the plywood sheet square sizes 79 by 79 centimeters, one centimeter is needed on the gaps between the floor and the hatch, it will help prevent deformation if moisture or temperature changes.
- Remove the rails for the inner crate on segments of 79 centimeters, you can also make a crate of short speakes. All wooden parts cover the olifa so that moisture or fungus do not affect them.
Article on the topic: Concrete for the pool bowl: what to use and how to knead
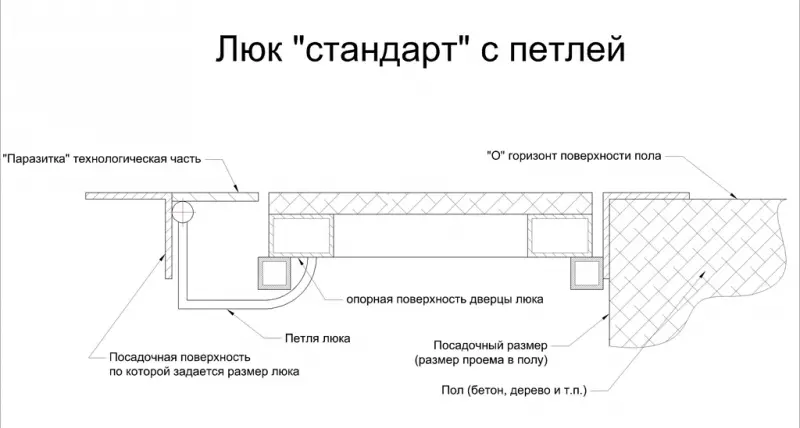
The height of the hatch should be the same as the height of the draft and finishing coating, so it should be multi-layered. The first layer must be plywood, a rake is stuffed on it, this is a doom.
There is a heater between the rails, this is the second layer, it is needed so that there are no drafts, the board is strengthened over the rail, this is a finishing layer. Material in thickness must match the floorboard.
The top of the hatch boards is better to nourish parallel to the floorboard so that the lid is not very highlighted. This is a rather lightweight design, so ordinary loops are suitable for it, attached from the basement, but it is better to use gas closers that the design is easier to rise. There is another option, it is a plastic cellar, it has the advantages over usual, but it is more expensive.
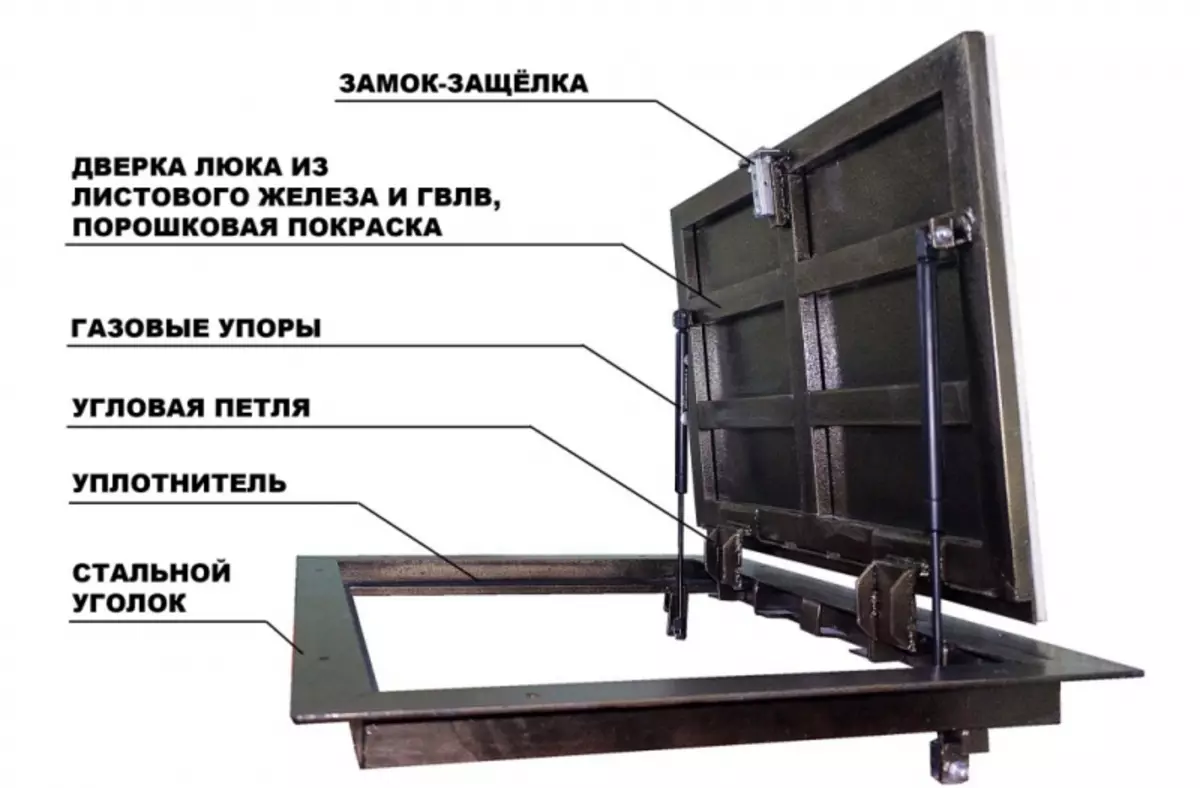
- Metal hatch is more reliable and tightly wooden, but such a cover will be harder to do. In order to make it, cut out the sheet of the desired dimensions, its thickness should not be less than 3 mm.
- On the perimeter steel, on the inside, weld the corner, it is better to screw the ribs of stiffness from it, and lay the insulation between them. The area of the cover will be divided into 4 parts, it is important to carefully keep welding work and clean the seams.
- The insulation should not be wider than the corner, on top of it, put a thin steel or tin, bend it and attach it to corners using self-tapping screws.
- Next, you need to make a log in to the vegetable store, to do this, cut the steel corner into fragments in the size of the hatch hole.
- Cook the corners with each other and attach the anchors to the concrete, one side of the frame will be the support of the hatch. To secure the sealer to the protruding edge to reduce the heat loss and protect the hatch from friction.
- The lid joins the frame with the help of reinforced loops so that the hatch is easily opened to install gas closers. All metal pieces of design trees with oil to avoid corrosion.
Article on the topic: Painting tiles in the bathroom - how and how to do it
The tile is the perfect material for the kitchen, this type of floor finish prefer many hostesses. Here are the same tools as in the manufacture of a metal hatch.
The lid is made a bit wrong, cut out of the sheet steel in the size of the hatch, it will be its bottom. On the perimeter of the workpiece, weld the corner so that it forms the side, inside them you need to screw the reinforcement, it forms cells.
The frame for entering the cellar must be boil from steel corners and drown in concrete in the width of the lid. The design is connected using reinforced loops. For more security, use a gas shock absorber, use hidden locks without visible elements in such a lid.
After making a design, you can start decorated it, knead the solution for laying the tile, you need to pour it into the lid and hide the reinforcing mesh, the tile is stacked over it.
The material must be laid so that the seams coincide with the floor tile. An important issue is also the ventilation of the cellar, for this it is important to provide all the necessary holes.