
If you know how to make air loops, knit simple columns, you will not be difficult to learn how to create a beautiful, cozy plaid of crochet squares. With this technology, you can recreate any pattern, unusual ornament, tie a sweater, a scarf or decoration for the house.
The knitting diagram of such a product is very simple, it is necessary only to take into account the features of the process. In this article, we will look at several popular knitting schemes from squares crochet, for the manufacture of which you will not leave much time. On their basis, you can come up with your option and hit guests and familiar with your skill.
Recommendations of experienced masters
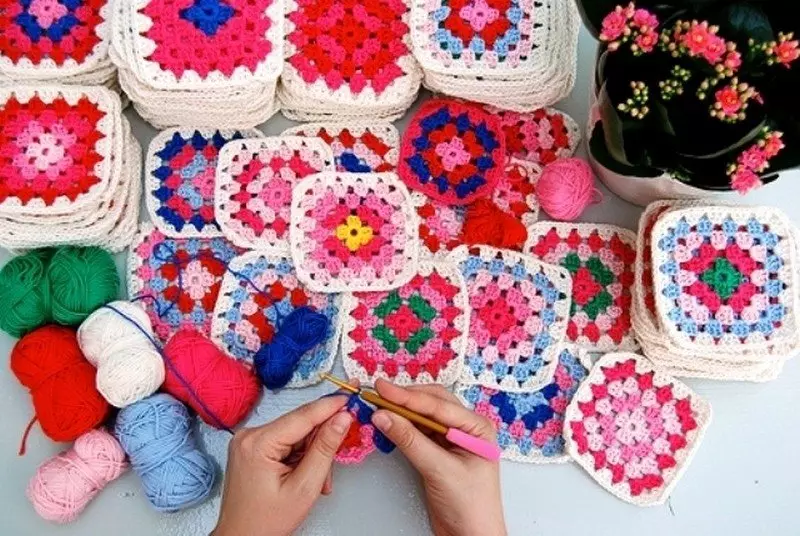
For beginner needlewomen, the advice of more experienced craftsmen have special importance. This rule refers to knitting of various decor items, small openwork blankets, pillowcases for pillows, toys for children. To date, one of the simplest knitting schemes is the manufacture of plaids from squares.
To make such a product with your own hands quickly and without unnecessary trouble, it is necessary to take into account the following recommendations:
- The main rule of knitting plaid from squares is that all parts of the composition must be of the same size (for this it is worth using a centimeter ribbon or ruler).
- Choosing materials for the future product, consider the structure and thickness of the threads. So, for the plaid with parameters of 90, 140 cm you need about 1500 g of medium thickness yarn.
- It is optionally to be limited to one tint of yarn, combine contrasting colors (white yarn in the composition with blue or green looks very effectively, and such a pace is suitable as a gift for both the boy and the girl).
- Most beginner schemes involves using medium-sized hooks (the best number 4 or 5).
- Plaid for a newborn must be made only from natural threads, it can be cotton or wool.
Article on the topic: Creating a unique collage from photos: execution options
What do you need to work?
On the Internet you can find a large number of knitting schemes covered from squares, it can be performed by any, even a beginner needlewoman. The main thing to learn to make air loops and enter a new thread in the process of work. To make the plaid of 120 per 200 cm plaid, you will need about 1,700 g of yarns (we recommend buying several motches of different shades of 300 g).
It is important that all selected colors are well harmonized with each other, which is why it is better to stop your choice on cold or warm colors.
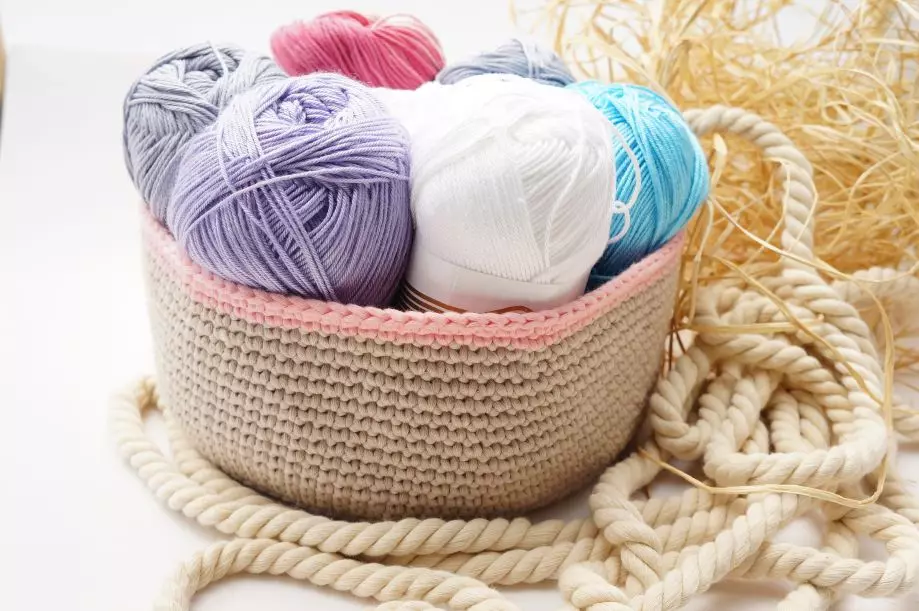
Most experts recommend using either a half-walled yarn, or acrylic, as well as a hook at number 4, 5. You can use sharp scissors and a few needles. Do not do without iron. This is the entire list of necessary materials and tools.
Classic Knitting Scheme Square
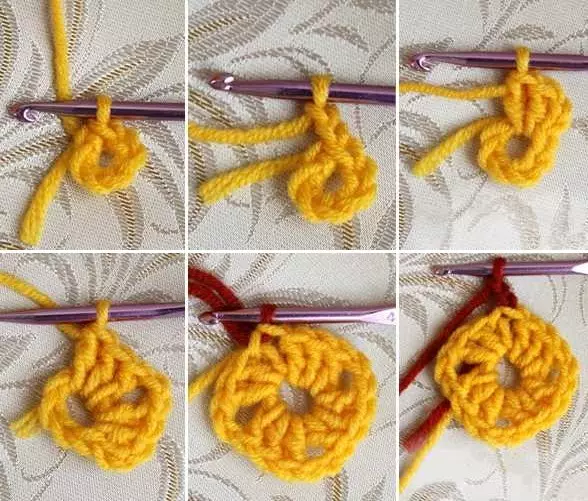
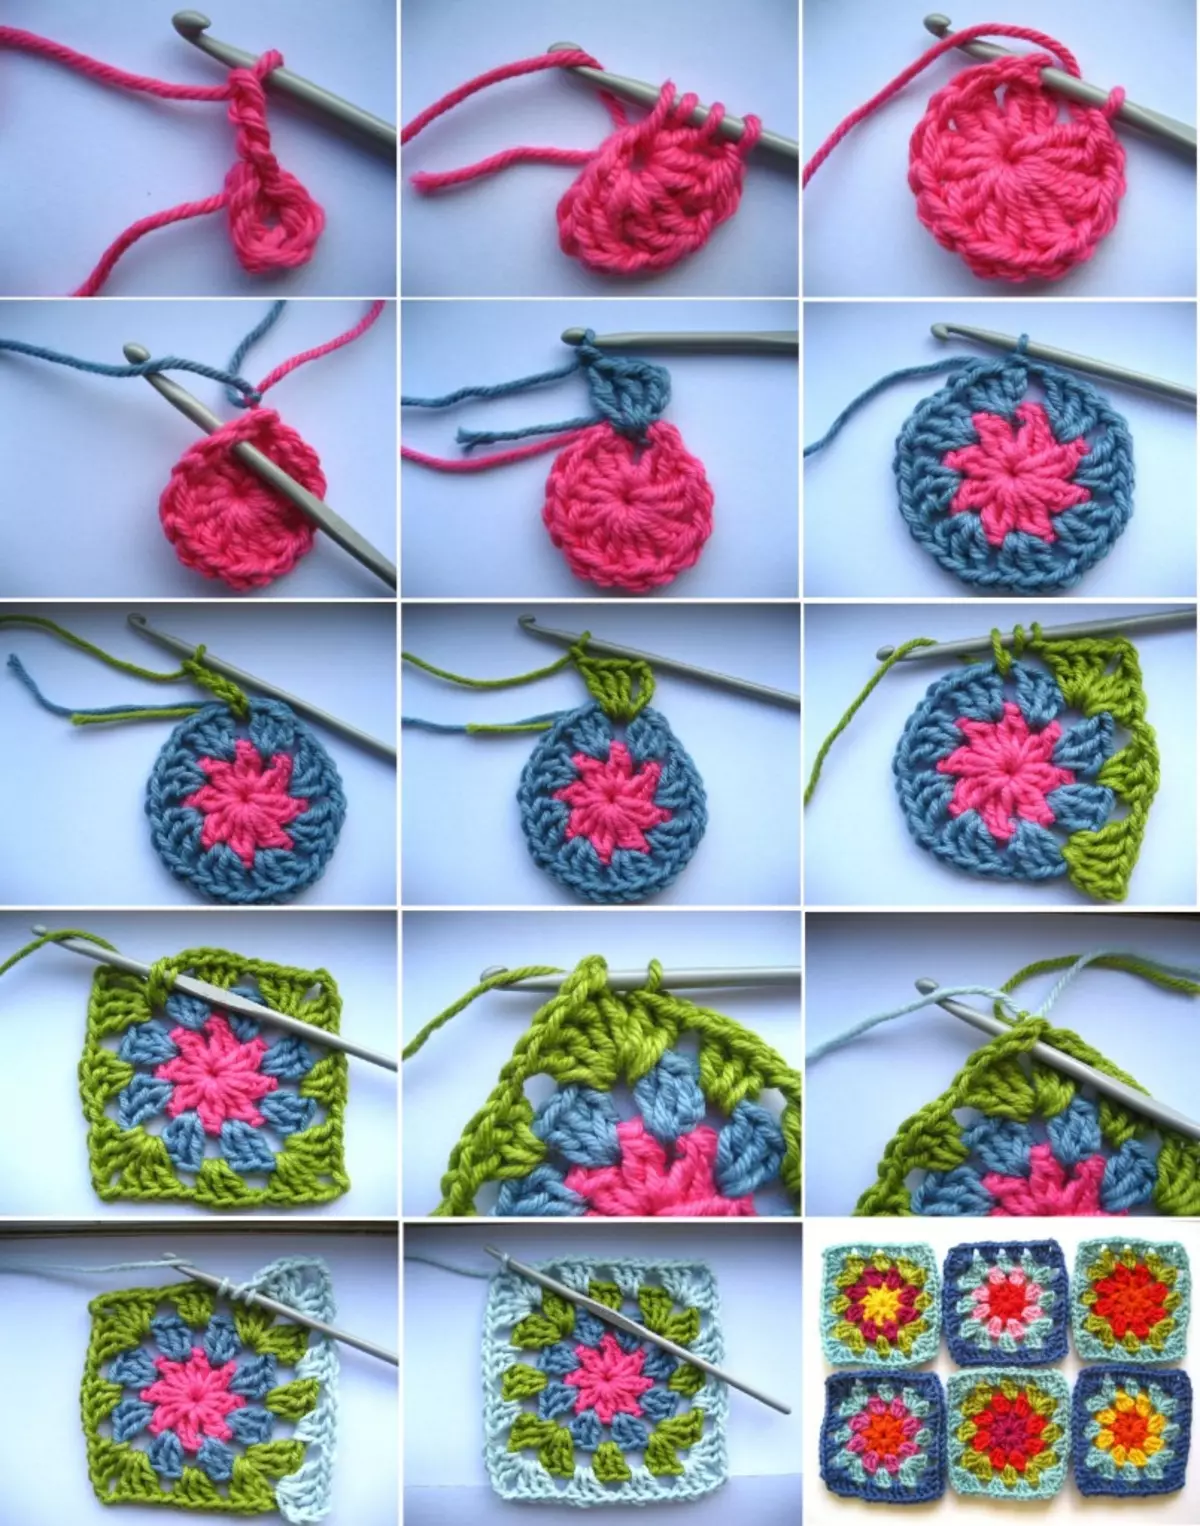
For one square you will need to make 8 air loops in a circle and connect the first and last special column. We need to tie the ring without a Nakid. Initially, 2 air loops should be associated with row and 11 failures for fastening the first and last loops.
Below in the photo you can see the finished knitted square crochet and the scheme to it, with which you will easily embody this masterpiece.
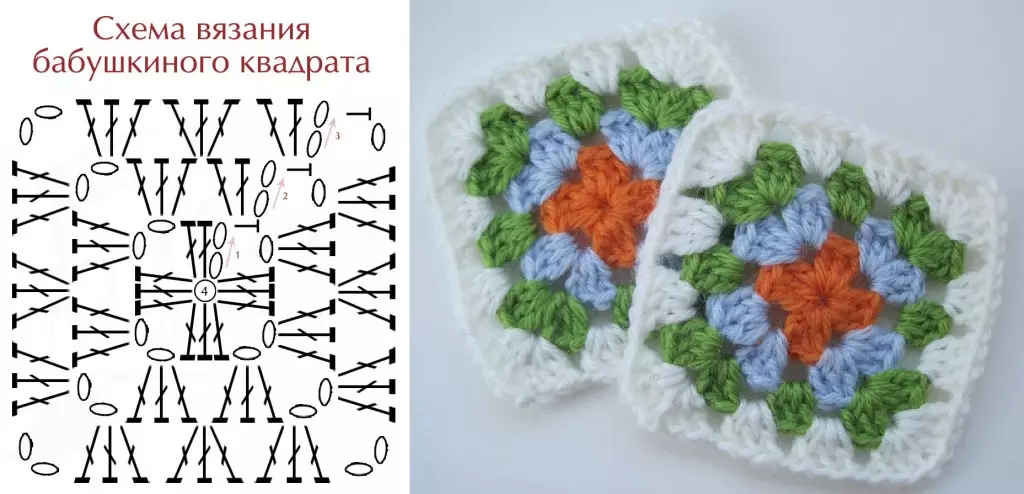
It is important to note that all subsequent ranks are created using columns with one Nakud. The second series involves a composition of 3 VP and 2 C1N (in each post of the previous series). Next, you must associate 2 VP for the corner of the square and alternate 3 C1N and 2 VP until the part is complete.
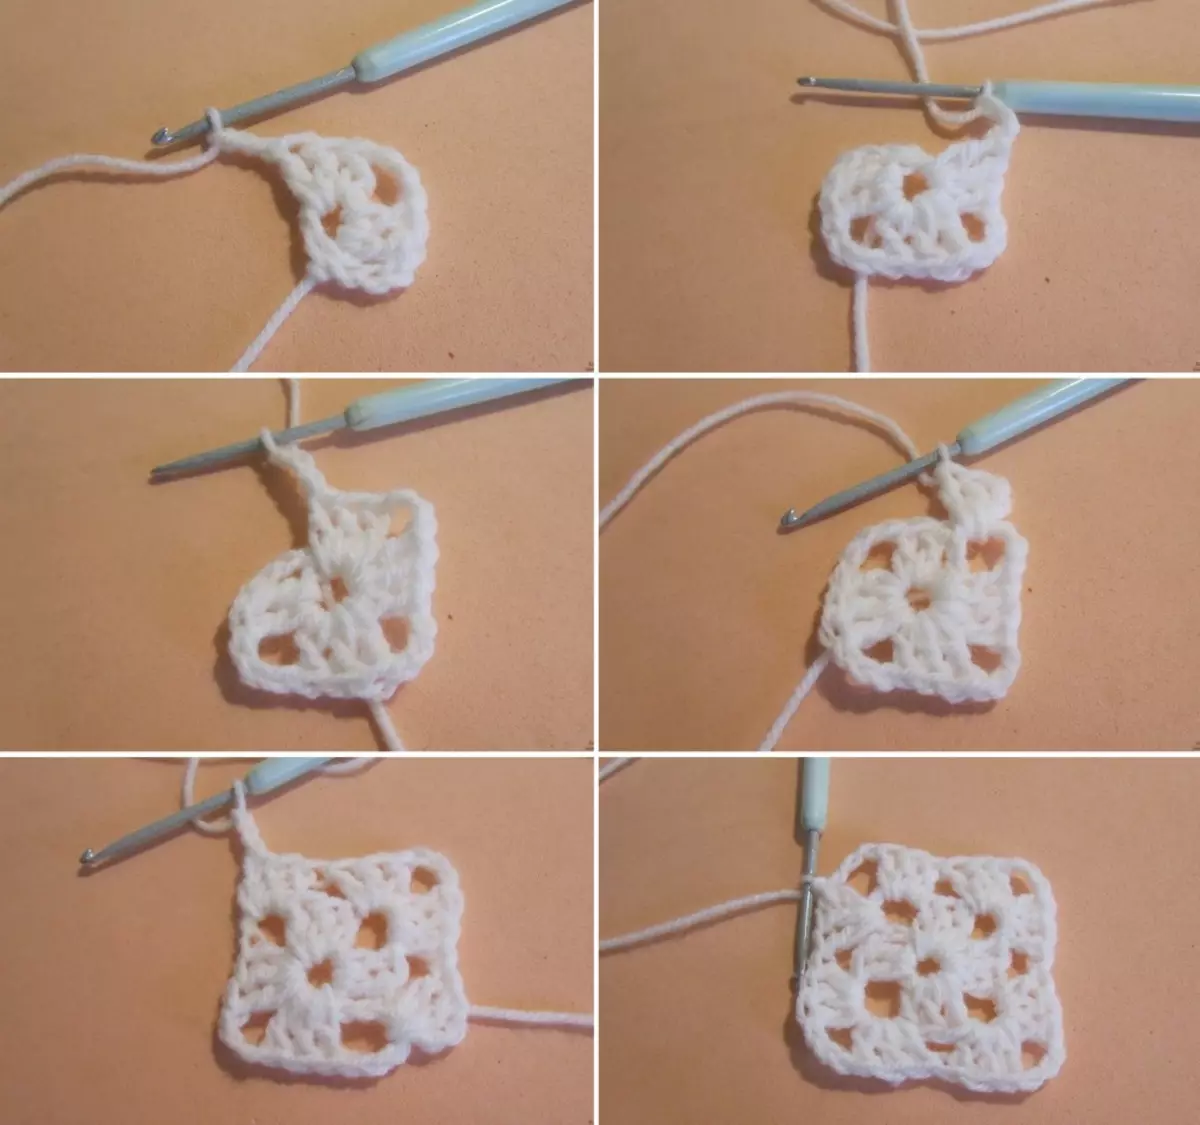
Above in the photo shows the method of checking connecting columns. It is necessary for the proper formation of a classic grandmother square. This moment is also important as the attachment of the thread of another color, which we will also tell.
How to tie a square of colored threads:
1. To form the first square, you need to connect the first and last loop. Before this, be sure to attach a thread of another color, then pull the loop and do the connecting column.
Article on the topic: How to make corners for photographs: 2 simple ways (ideas +35 photos)
2. So that you have a really beautiful square, watch the new thread did not break in the second row (this often happens if you attach it at the beginning of the next row).
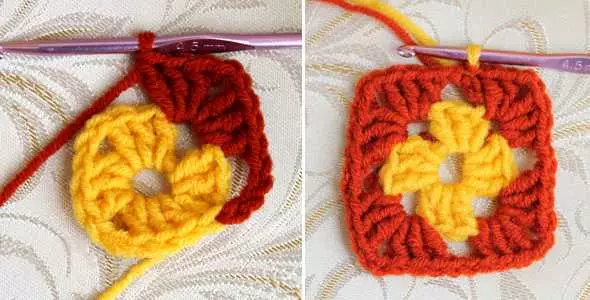
3. Go to the third row - three air loops and two connecting columns with one nakid enter in the previous row, then repeat the last action under the second row air loops and do 4 VP in the corner of the part (VE lifting) and once again 2 C1N under air loops second row.

4. The next stage involves the creation of three semi-solids, 2 SSN and 4 VP. This action is the most important and requires a responsible approach. Continue the operation as shown in the photo below. The fourth row is identical to the third, the only difference is to increase the number of columns in the corners.
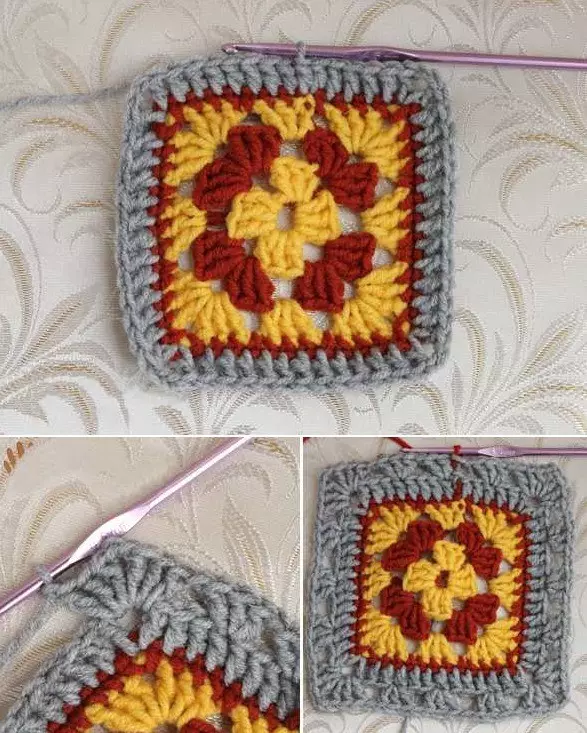
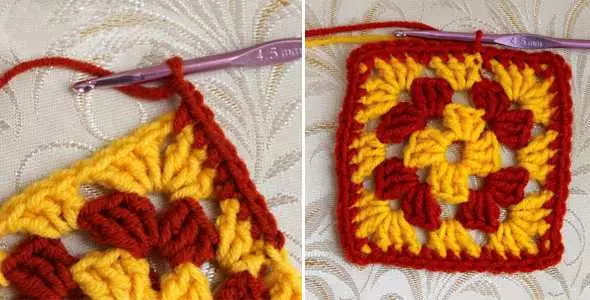
So we got a small square for the future knitted blanket, it remains only to tie his columns without Nakid. To do this, take 2 VI to lift plus a column without an inlets under the air loop, and in the corner, do 5 failures (or 3 SSS, depending on the type of the chosen picture of the grandmother square). Similarly, we make the remaining squares and proceed to the final stage - the connection of parts into a full-fledged product.
On video: simple crochet motif: Grandma Square.
Connection of knitted motifs
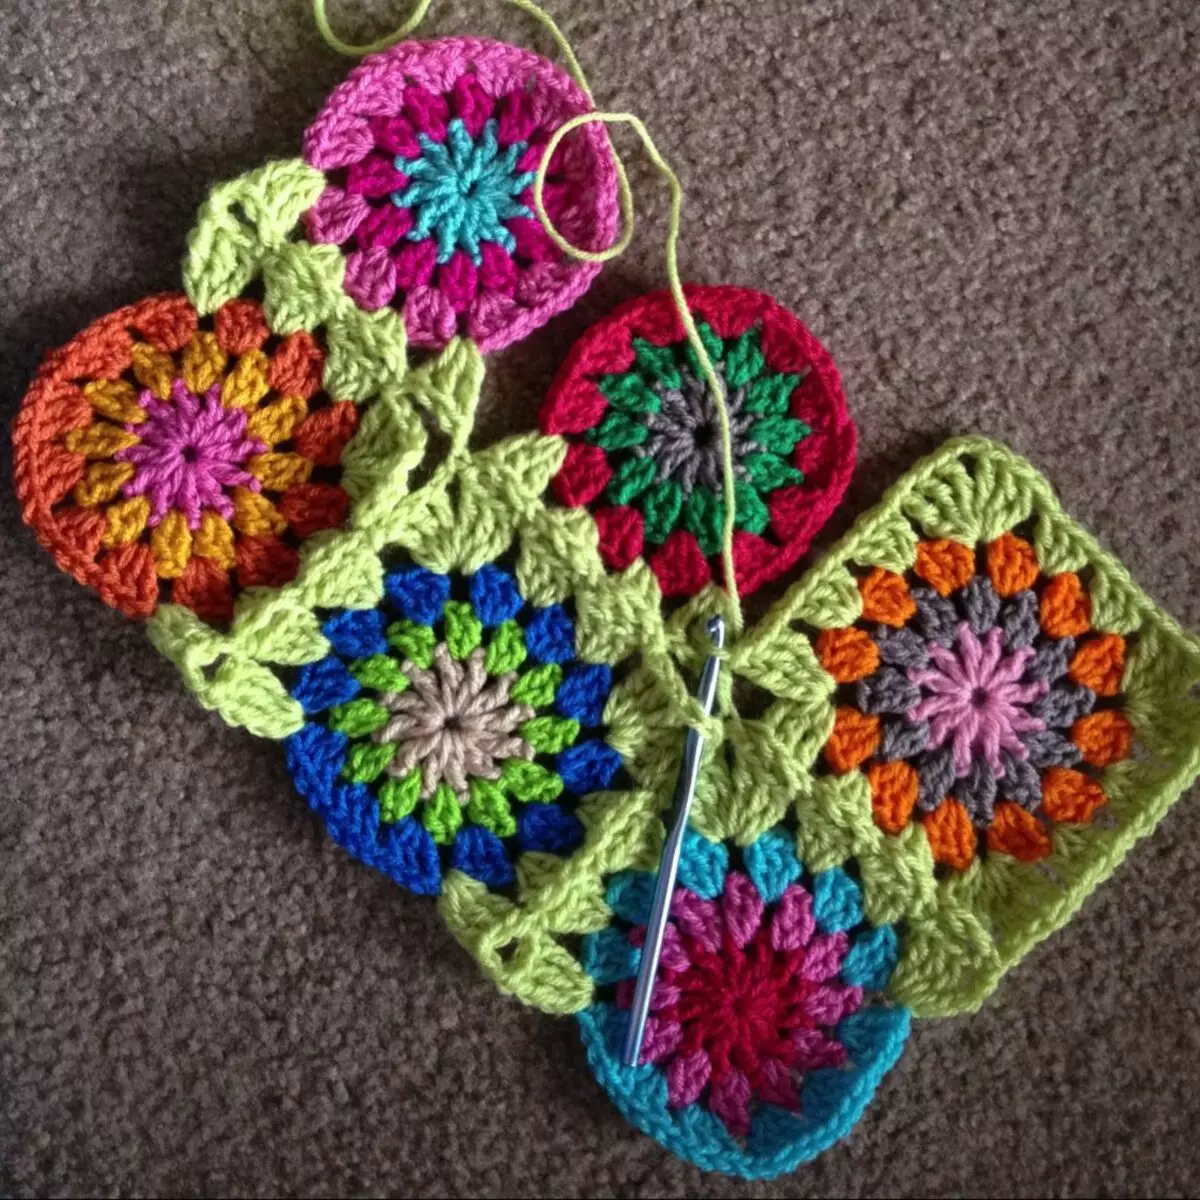
Depending on the size of the product, the method of connecting parts between them may differ. However, it is worth remembering that first it is better to cross small elements, and then large squares (everyone needs to try with an inside with an irrigation).
When crosslinking parts, follow them to be turned face inside. Connect them with a crochet (as shown in the photo) or sew needle with a thread.
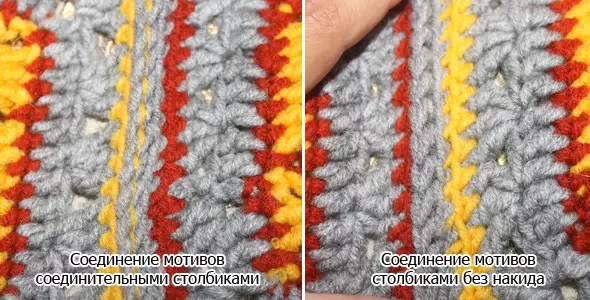
Next, it is necessary to oblige all the columns without an attachment, and the angles of 3 failures. Here it is worth clarifying the next step, the so-called rut of Ratchy step. To make it, you need to enter a loop from left to right. In the end, simply hide the thread tip and continue the procedure according to variable with every part.
Article on the topic: Army album - Memory of service and best gift with your own hands
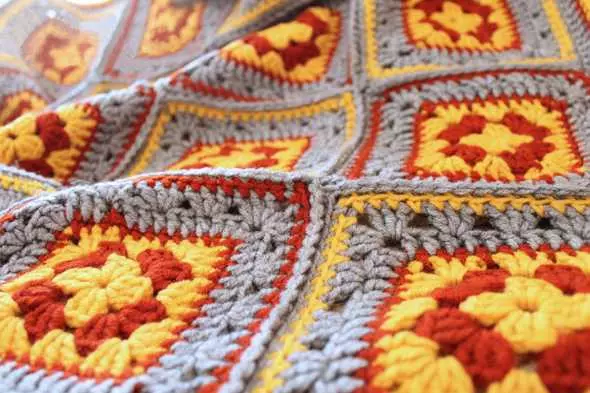
As you can see, tie the plaid from squares at all. It is much easier than messing with patterns or enjoy already frenzy needles.
Plaid Pattern "Babushkin Square in Circle"
Work can be performed both in a straight line and in a circle. The last option looks particularly effectively when combining various threads in the structure and color scheme. If you want to implement a classic example on the front of the Babushkin Square Crochet's blanket, then first of all you need to make a certain amount of air loops located one after another. After that, the columns knit with Nakida and without.
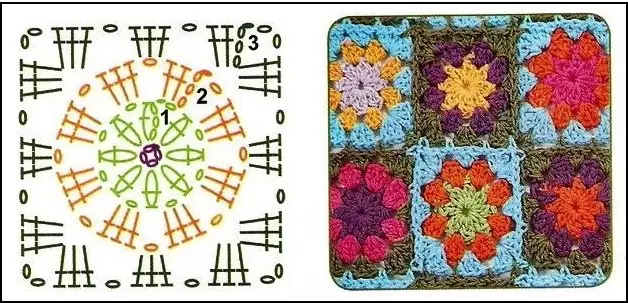
In completion, you need to flip the connected piece and repeat the same actions until the square motive is obtained. When knitting in a circle, the first few loops closer into the ring and make several columns with an inlet on the helix. As a result, neat square elements are obtained with the same number of rows on the corners of the square.
To connect the obtained quadratics, it is necessary to accurately measure each element and calculate how much it is enough to make a full-fledged knitted blanket with a conceived ornament.
All items need to be carefully pasted and prepare for binding, for this you can use the needle (then the seam will be completely immeasured) or other fixture. Increasingly, stitched blanks are tied with a red thread to give the product of conciseness. This method should be applied only if you correctly selected the color gamut transition for your plaid from grandma squares.
Made with your hands the plaid will bring comfort and well-being in your home, will decorate any interior. To make it, you will not need a lot of time and strength. The main thing is exactly accurate to adhere to the selected scheme. You can also leave comments so that other visitors do not make stupid mistakes at the beginning of work.
How to tie a square motif with a flower (2 video)
Different schemes and finished works (45 photos)


