
Dried fruits and vegetables are a storehouse of vitamins and pectins. So, if we make the stock of them in summer, you can enjoy in winter all these gifts of nature. Of course, you can buy fresh vegetables and fruits in the store, today it is not a problem, but a large number of dacms are trying their crop to reach the winter, canning or drying it. So, let's consider several design options in which you can dry through. By the way, we add that the dryer for vegetables and fruits with their own hands made is a reality.
General device device
It should be noted that today the dacms use three varieties of dryers, which are based on different principles of drying.
- Using the movement of the air flow. In principle, the device of this appliance is a box, inside which the grids are stacked one above the other, they are placed sliced fruits or vegetables. With a side of the box, one or two holes are made in which the fans are inserted. With their help and there is a blowing.
- Using the sun. This is a box in the form of a box, installed at an angle so that the sun rays always fall into pallets where fruits and vegetables are stacked. The facial part of the device is often closed with glass or grid. Experts recommend a metal case in this form dryer not to use. It is strongly heated under the action of sunlight and itself begins to exhibit greater thermal energy, which negatively affects the quality of dried fruit.
- Dryer with infrared heating element. In principle, this is all the same as the solar variety. Only instead of sunlight (free) there are ultraviolet rays, which highlights, for example, a special film connected to the transformer. Very effective design that dries quickly and efficiently. But from all the above described, it is the most cost. True, the advantages include the fact that the design of the dryer itself can be simplified to a minimum. It does not require a box or a camera, just put the mesh shelves and send UV rays from the heating element on them.
Article on the topic: A table for a laptop in a bed do it yourself: stages of work
Use for drying air flow
Production rules
Make a drying for fruit with your own hands. For this, any design that resembles a box is suitable. For example, it can be a wardrobe from a kitchen headset or an element of a wardrobe, you can make it from a refrigerator or a cooking plate, or rather, from its oven. And you can assemble a box of girlfriend: plywood, chipboard, fiberboard and so on.
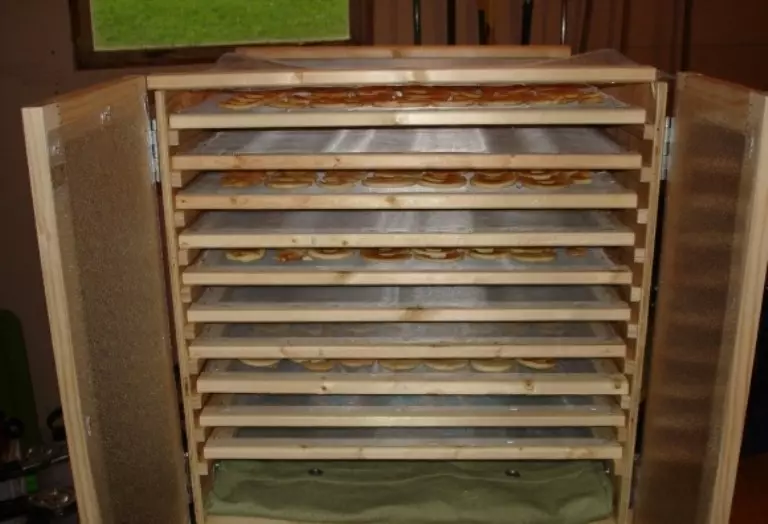
Let's look at the homemade dryer. This will require four identical sheets, for example, plywood, wooden rails with a cross section of 30x30 and 20x20 mm, self-tapping screws, mosquito net.
- First of all, a frame of a box is collected, for which it is necessary to combine brings of 30x30 mm in a design, which in appearance will be similar to the box.
- Then, from three sides, the frame is trimmed with plywood sheets, which are pre-trimmed under the sizes of the frame. On one of them, it is necessary to make holes (one above the other in the vertical plane), in which the fans will need to be installed. Installation can be done immediately or after assembling the entire design.
- On the fourth side, the fourth sheet is hung, in which it is pre-made a large number of holes with a diameter of 8-10 mm. The bigger, the better. The air will be shown through them, which drive fans. By the way, the wall with fans is installed opposite the door of the dryer.
- Now you need to make the shelves. They are made of 20x20 mm racks, they must be rectangular and in width a little less than the width of the drying equipment. This frame is hampered by a mosquito net using a stapler and brackets, a glue composition can also be used. The number of shelves is determined by the height of the drying unit. Between them should remain a distance of 10-15 cm.
- Therefore, given this distance, inside the device (across), guides made from the same 20x20 cm plates are installed. The shelves are stacked.
- It should be noted that in this design there is no need to set the bottom and the ceiling. Air from the fans should be discharged not only through the perforated door. By the way, the latter is hung on the loop and create its dense adjoining to the box of the box makes no sense.
- Now you need to install fans, connect them to the AC network, install the shelves, pre-laying out the sliced vegetables and fruits on them.
- Everything is ready, you can turn on the fans and wait when the laid fruits get sick.
Article on the topic: How to install a plastic window: from measurement before mounting
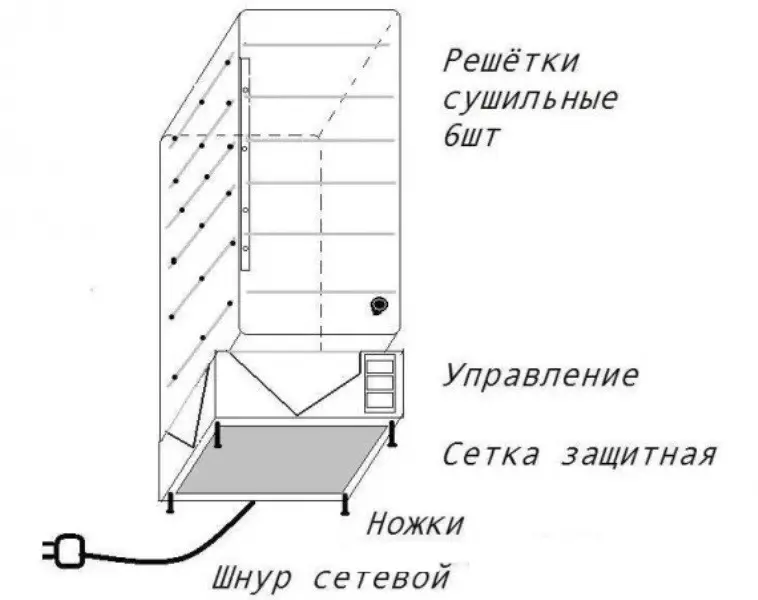
Dryer manufacturing scheme
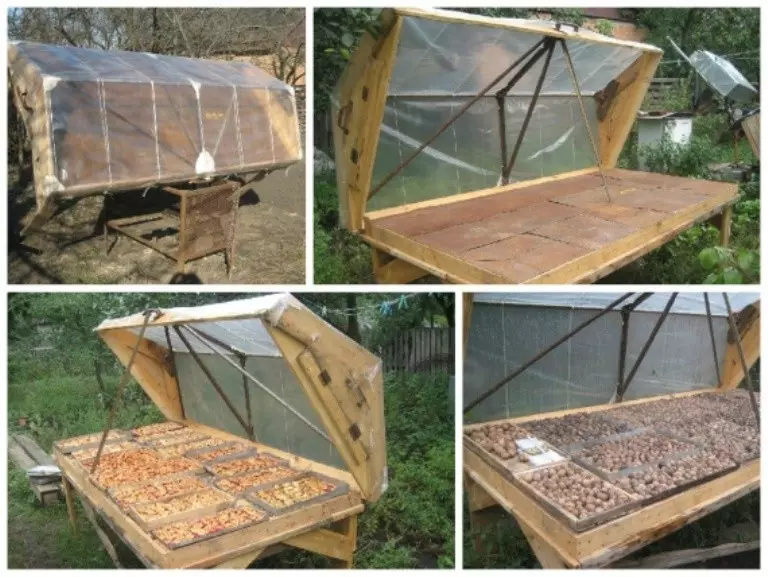
Assembling solar dryer
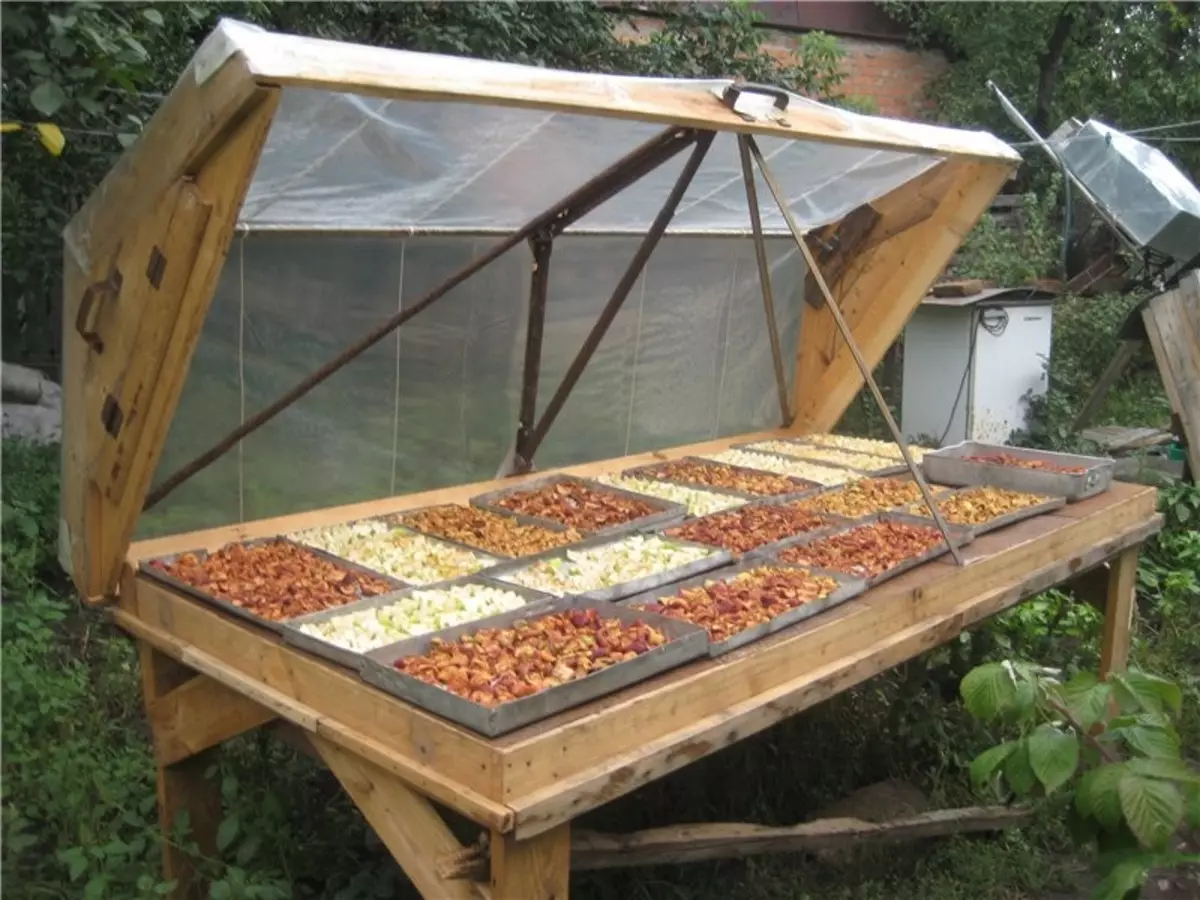
The solar dryer for fruits is an energetically economical option. Electricity or other type of fuel is not used here. But there is one point in this design, on which the efficiency of the manufactured process depends. This is the angle of inclination of the entire installation regarding the sun. That is, the sun's rays should maximize the volume in which vegetables or fruits are located.
Therefore, the usual box is collected first. This is all the same wooden frame, decorated with plywood or other sheets. Now this box must be installed under the tilt, putting it on the legs made from the same bar as the frame of the dryer. So you understand what we are talking about, look at the photo below.

Now we need to make the shelves. They are made in the same way as in the case of a fan model. The main thing is to correctly establish the guides in the box. Reiki must be covered horizontally.
In principle, everything is ready. You can install the shelves in the dryer and lay the sliced gifts on them.
Several nuances assembling solar dryers.
- In the ends of the box, the holes are necessarily made so that air passed through them. This is a kind of ventilation. The holes are necessarily closed with a mosquito net so that insects did not get inside the installation.
- The bottom of the device is best to close the metal sheet. It will heat up and emit its thermal energy, which will increase the efficiency of the drying process itself.
- All internal planes of the device must be painted in black. It is clear that it attracts the sun's rays, and the white pushes them.
- The front of the dryer must be closed with glass, can be polycarbonate. The main thing is that the material used is transparent.
Useful advice
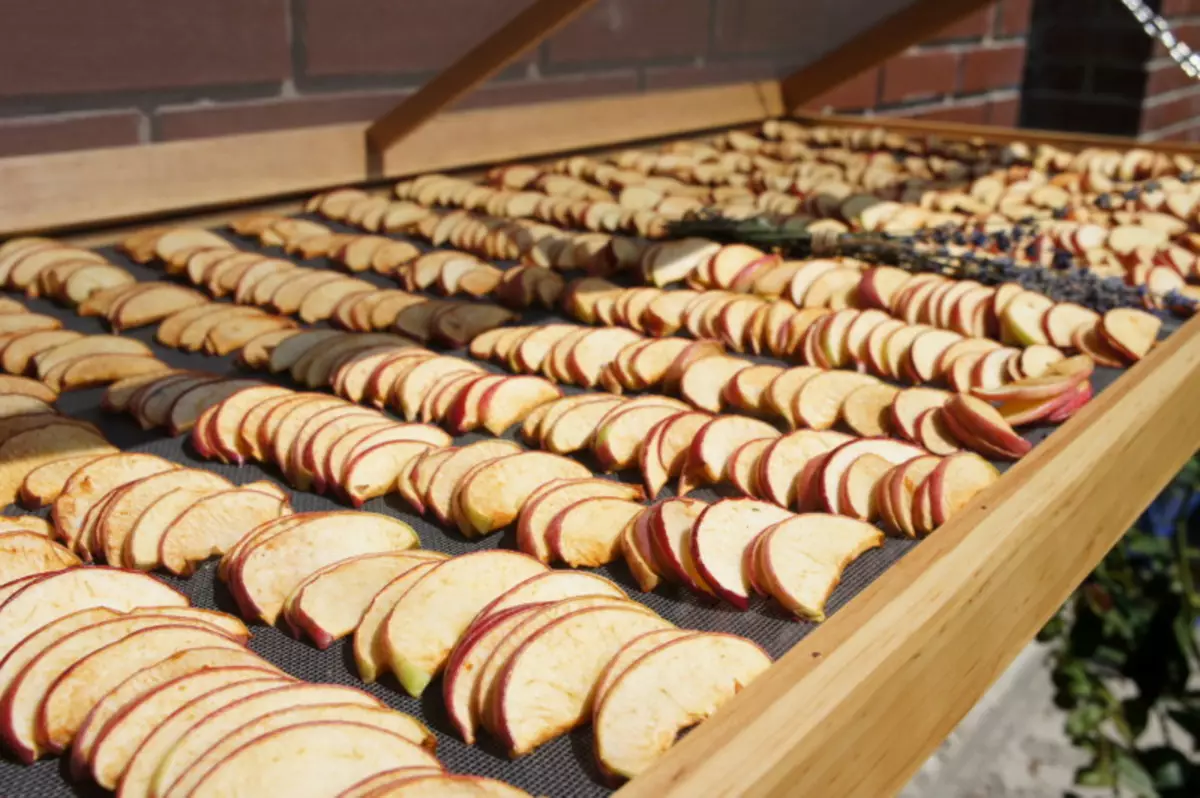
- Vegetables and fruits must be cut into small and not very thick pieces.
- If a fan dryer is used, then it is not necessary to turn on the air blowing on the air. It is necessary that cutting lay in the dryer 2-3 days.
- Temperature regime - here is the main criterion of the proper drying process. 40-50c is the optimal temperature in which the maximum of vitamins and beneficial substances will remain in the dried products. Therefore, some dackets cover the inner surfaces of the dryer with thermal insulating material. This is especially true if the device is made of an old refrigerator.
- Shelves should only be mesh. Just in the inner space constantly it should circulate air.
Article on the topic: Bicycle backlight LED ribbon do it yourself
As you can see, make your own hand dryer for drying vegetables and fruits is not so difficult. Used mainly construction materials used, so the cost of production is small.