The manufacture of Topiaria is a gust of creativity and ideas, as well as joy for the soul. Topiary can serve as an excellent decor of your home, a gift and just a hobby. Topiary can be performed using various kinds of natural origin and not only. Small in size, crafts will take not so much time and place. What is the great fantasy of a person, you can ask the question. We present to your attention the master class "Topiary of cotton disks with your own hands."
This type of Topiary is actively used at weddings. Wedding Topiary is something new and can be used to decorate the hall and tables. The form can be both round and take the outlines of the heart.
For the crown of wood, you can use all sorts of materials: corrugated paper, bumps, nuts, leaves, cereals, coffee beans, pasta, organza, satin ribbons, etc. You can also make a topiary from cotton disks.
Create at home
Today's master class is dedicated to how to make topiary from cotton disks with their own hands. Well, before starting work, you need to stock all necessary.
And so you will need:
- Paper, newspaper or napkin;
- Capacity for your Topiaria (pot, cup);
- Glue gun;
- Gypsum;
- Cotton discs;
- Stapler;
- Satin ribbons;
- Scissors;
- Pebbles, rhinestones, beads, ribbons (for which enough fantasy for decoration);
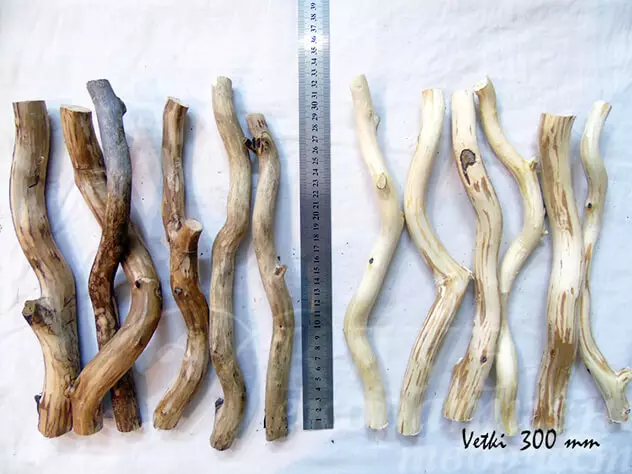
- Wood branch (pencil).
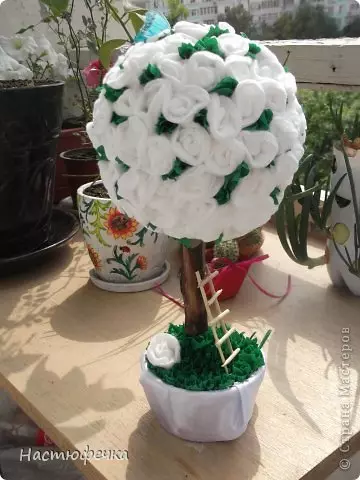
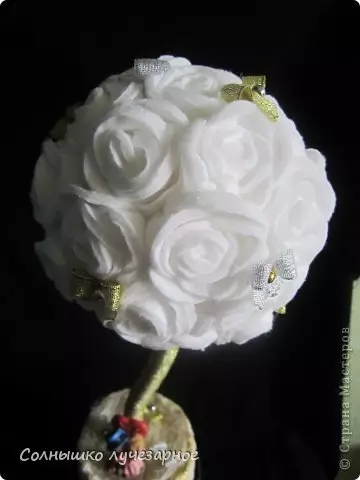
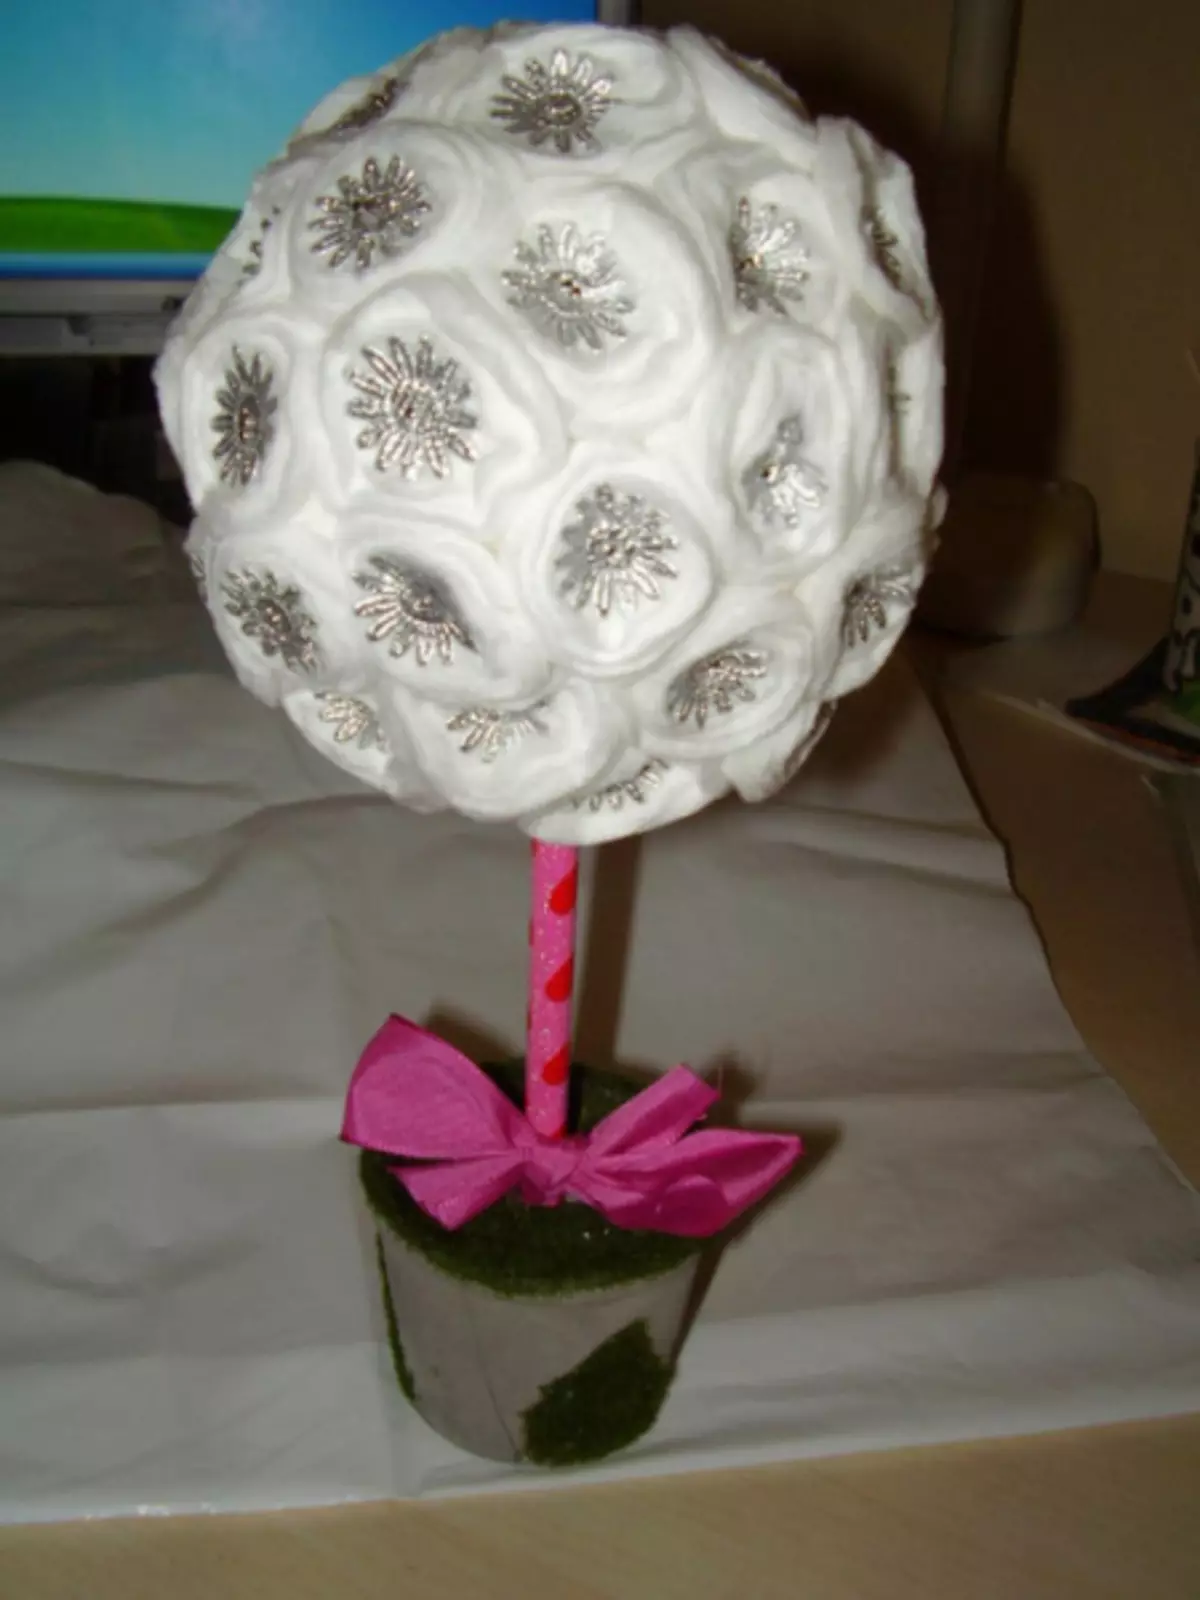
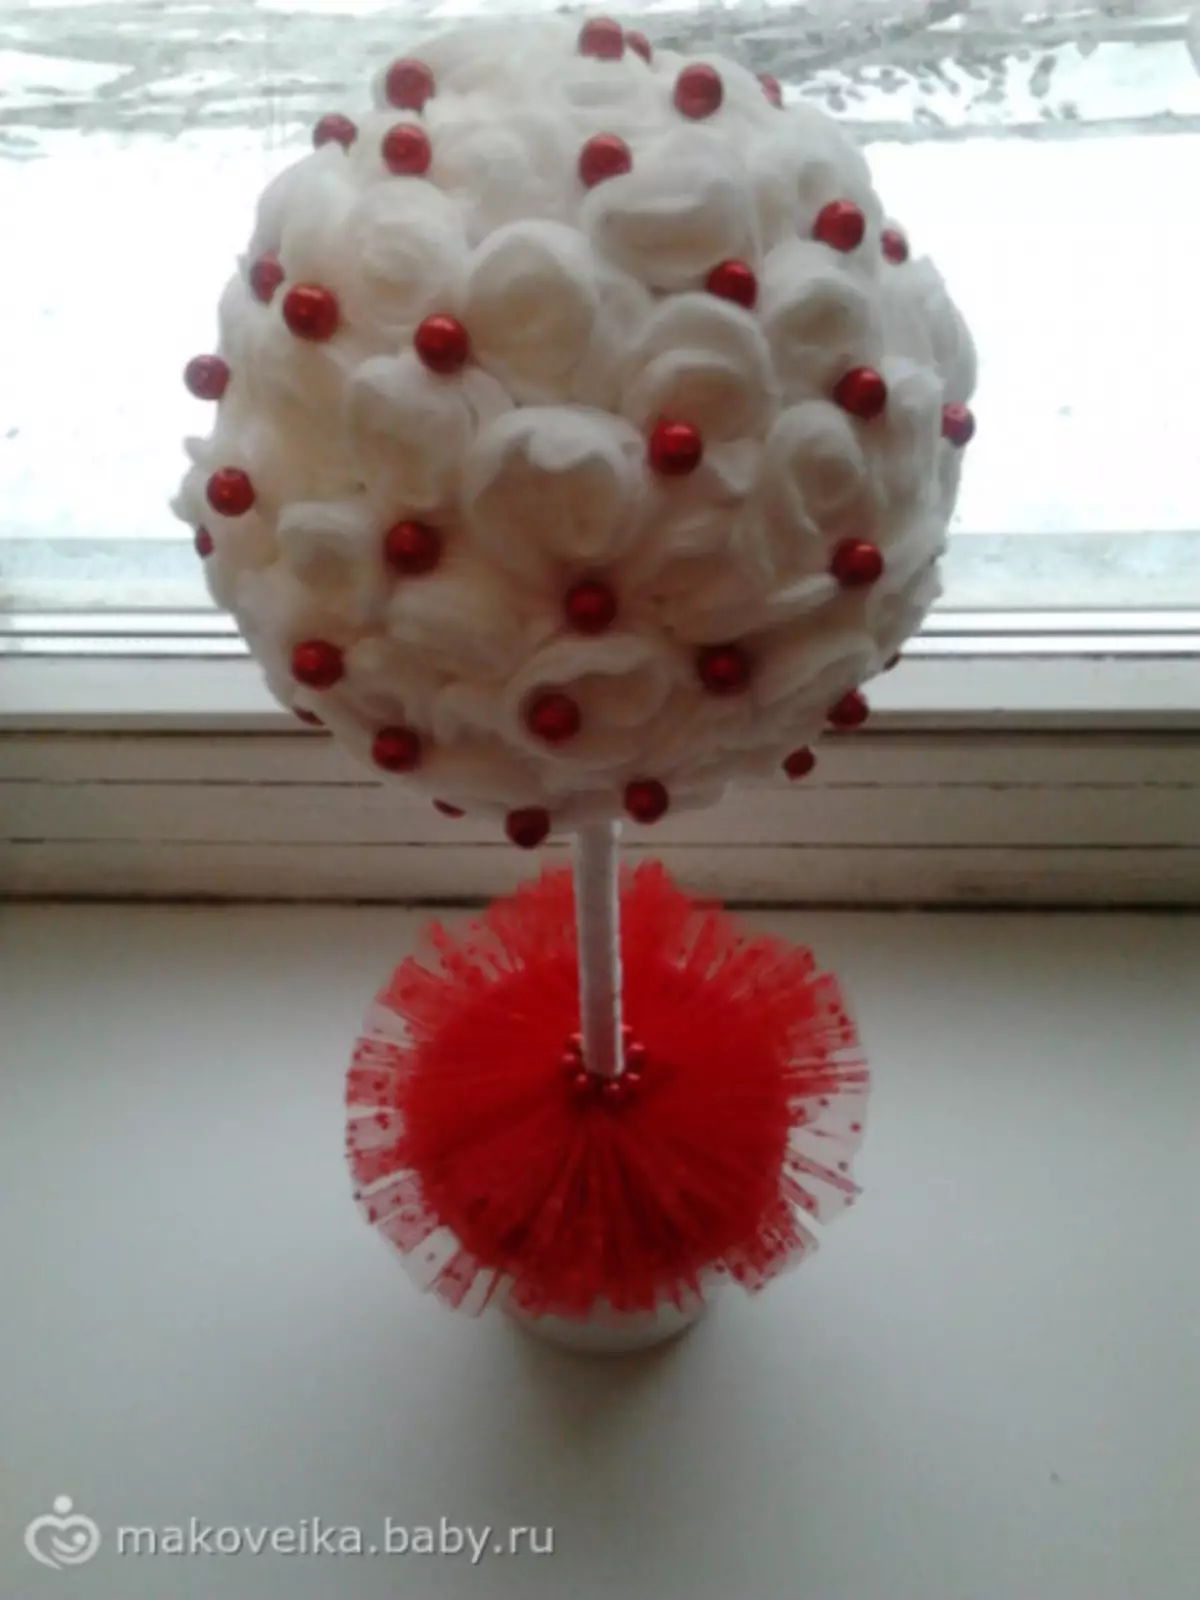
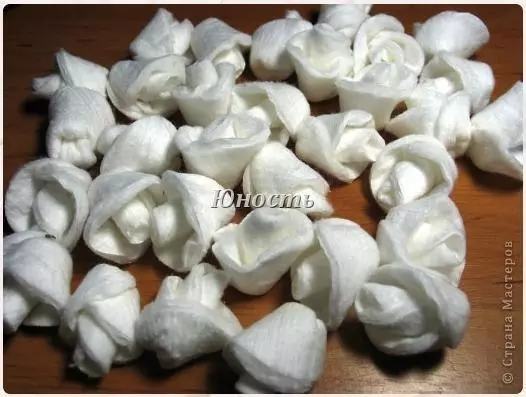
Very unusual material for the decor of the tree crown - cotton disks. But what can you do with them so that they have an aesthetic look and the result could only please the eyes?
Step-by-step instruction
In the photo, step by step is presented ways to manufacture a crown of wood from cotton disks.
You need to take a cotton disk. Beaging the edges so that it turns out like a tube, one edge must already be than the other. Where the side is already tied by white thread (so that there is in color with the material). If possible, you can use the stapler (so work will be careful and stronger, but you can choose both options).
Article on the topic: 3 ways to gently fold the shirt so that it does not get marked
Soak the wide edge, it turns out a rose. Everything is very easy - the core, and from a wide petal, turned out from the narrow edge. We continue to do so to the right amount.
The quantity will depend on the size of the ball bowl, which you subsequently glue your roses.

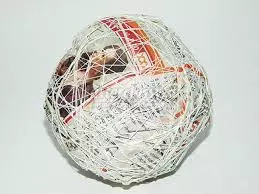
The next stage of the manufacture of "Happiness Tree" is a ball base. It sounds difficult, but there is nothing much more easier. We need a newspaper that we will argue, forming a ball. So that it was more accurate, wrap it with a wide scotch, or use threads. Try to make so that the ball does not have any not necessary bulbs, he must be smooth and smooth.
Next, it is necessary to prepare the barrel for our wonder-tree, they can serve both wood chopstick and a conventional pencil, sushi sticks, it all depends on the size of the crown of the tree. So that the trunk had a much more attractive appearance, we can paint it with aerosol or acrylic paint, wrapped with a floristic or satin thin ribbon, plane shiny paper or insurance. You can also leave the former type of stick, it all depends on your ideas.
The decorated Topiaria barrel is inserted into the hole-cut hole in the ball-based. But before you need to pour a small amount of glue into the hole and hold the wand until complete drying.
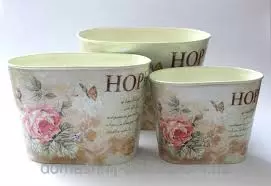
One of the final stages of manufacturing our tree is to decorate the container. A plastic cup, a pot, tin can act as a role. So that you do not choose, work is approximately the same. There are several options in order to decorate one or another container.
- Paint the usual paint;
- Plug with ribbons, paper, cloth;
- Decorate with rhinestones, pebbles, beads.
Here is your fantasy and opportunities.
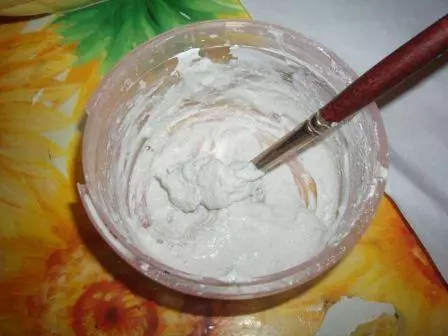
So how will the stem be kept in the bank? It's simple, we can use any mounting mixture (cement-sandy solution, putty, gypsum or alabaster) or the same floristic foam / foam. If the first option is more fiscal for you, we recommend using alabaster. It is very easy to use, easily prepares and does not crack.
Article on the topic: Envelope for a wedding with your own hands in the technique of scrapbooking with templates
The instructions for its use is very simple: For 1 pot or any other capacity, the alabaster will require about 1 kg of the mixture and about 3 glasses of water. It is necessary to wash the solution for several minutes. As soon as the mixture thickens to the consistency of thick sour cream, fill out the pot, install the barrel and hold it in the level position for 2-3 minutes. Leave the mixture to dry for 3-4 hours. If you chose the gypsum as a basis, then remember that it is diluted in water and in the finished form should resemble a thick sour cream. Time to dry out - 35-40 minutes.
Finish our work. Put the ball made by flowers, stick them tightly to each other so that there are no clearance. Next, we put the ball on the wand and finally collect everything in one whole, insert the trunk in the pot with a plaster.
Our Topiary is ready!