
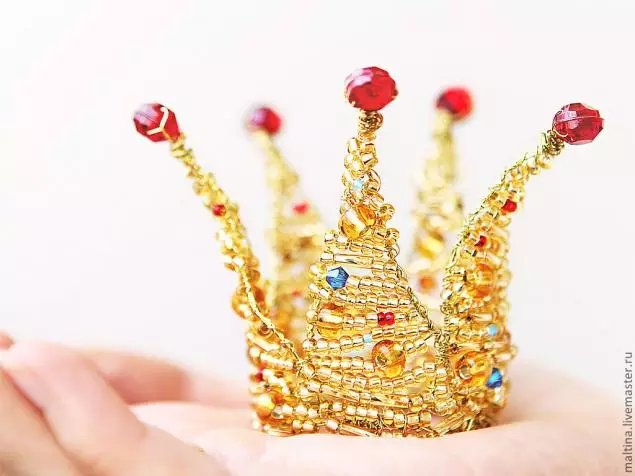
Costumed holidays are not uncommon for a child attending kindergarten. Several times a year, parents have to come up with new costumes for her beloved Chad. If for boys you need to pick thematic outfits, then girls are enough to put a magnificent dress, hoisting the crown, and all the princess is ready. In order to individualize the costume, you can create a royal accessory yourself. For example, the crown of beads do it yourself, looks spectacular and unusual.
Royal decoration
Create such a crown will help the subsequent detailed description of the work.
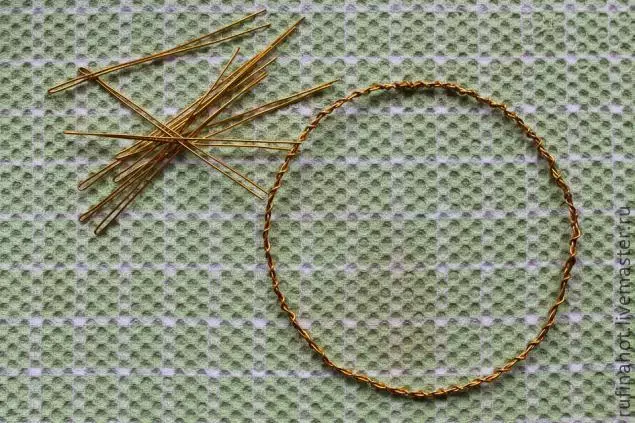
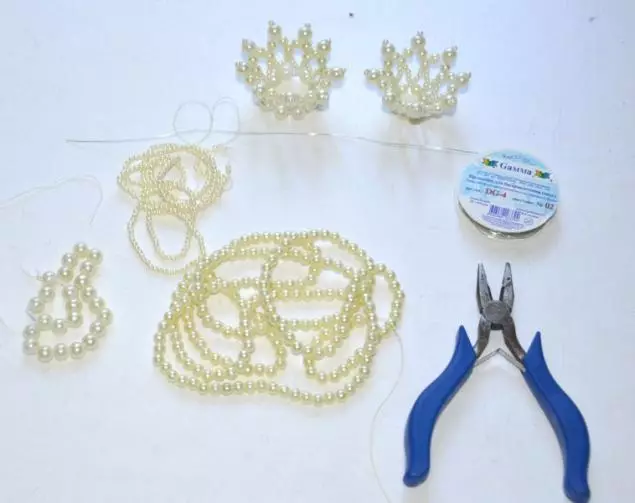
For the manufacture of the product will need:
- Thin copper wire (1-2 mm and 0.4 mm);
- big beads;
- medium-sized beads;
- large beads;
- Glass.
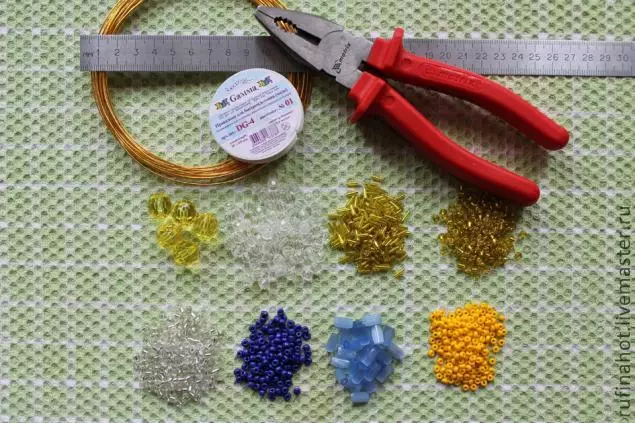
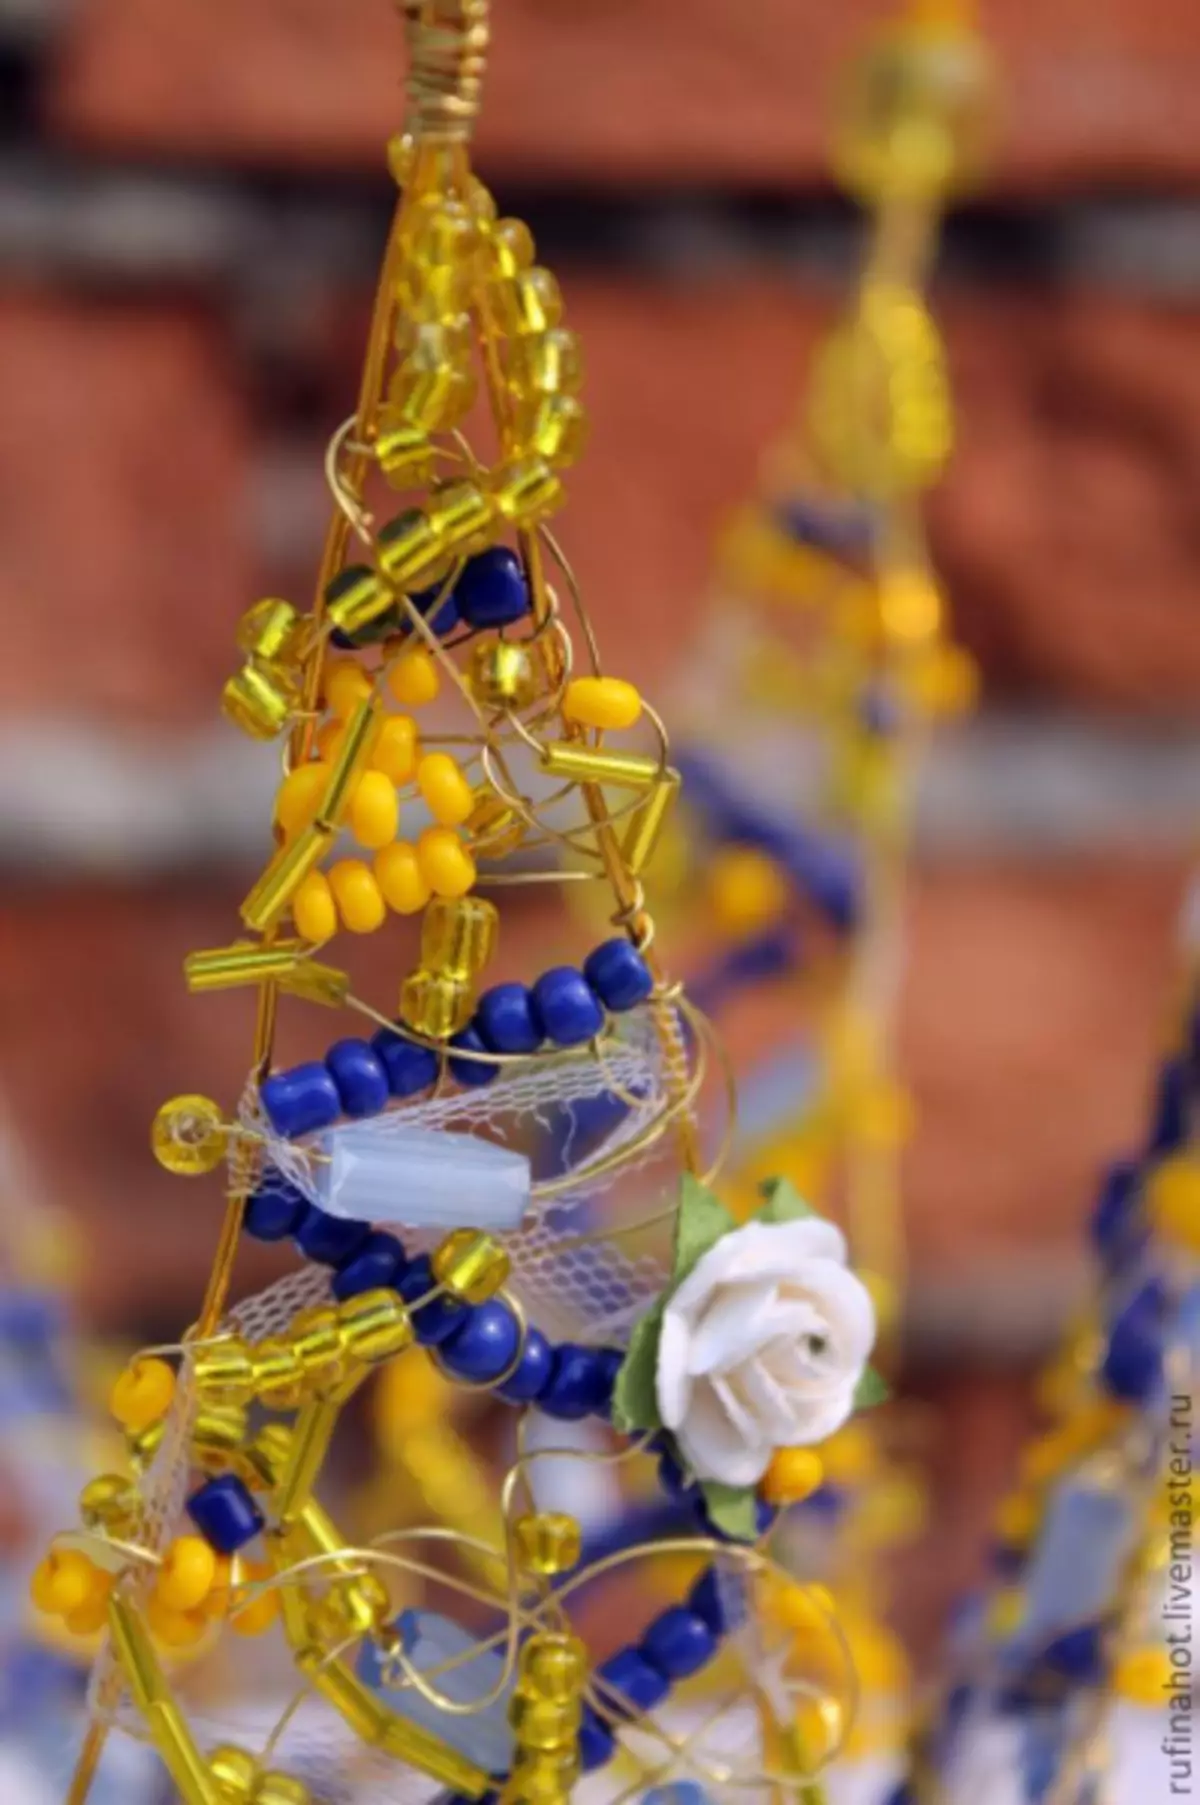
The color of beads and beads can be diverse. It all depends on the palette of the main costume, which is created to which the crown is created. The use of transparent elements in the product looks much more advantageous: glass refracts light and transparent parts sparkle as precious pebbles. Wire with a thickness of 1-2 mm is used to form a framework of the product. Other will be suitable in working with beads and beads.
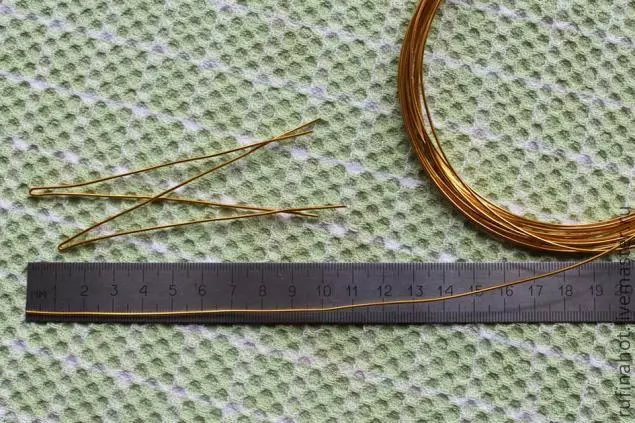
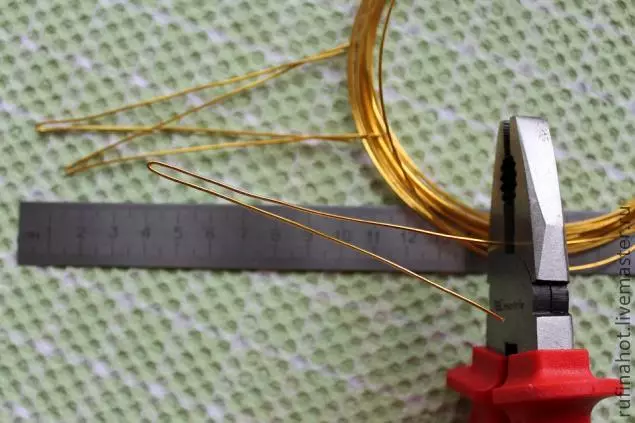
Using the ruler, the height of each triangular crown element is determined. Several pieces of wire cut off, the size of which corresponds to the double height of the links of the product plus 3 cm on the winding. The number of spiers of the crown is adjusted individually.
This master class provides 8 acute parts.
Separately, the base is formed, the diameter of which is 12 cm. For the strength of the frame in the form of a ring is wrapped with a layer of wire.
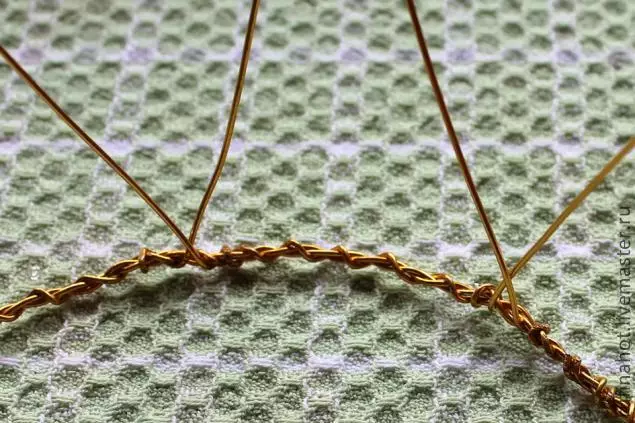
A wire circle is divided into equal parts, after which the prepared tops are fixed. So that the crown possessed good strength, it is recommended to fix the parts of the Vansel, as shown in the photo.
The next stage will be the fastening of large beads to the vertices of triangles. For this, a thin wire is taken on which a large bead is rolled up, then one bisperin. After that, the wire is bend and inserted back into the hole of the big beads. The billet is primed up with dense rings to the top of one of the triangles.
Article on the topic: Knitted shell cover with their own hands
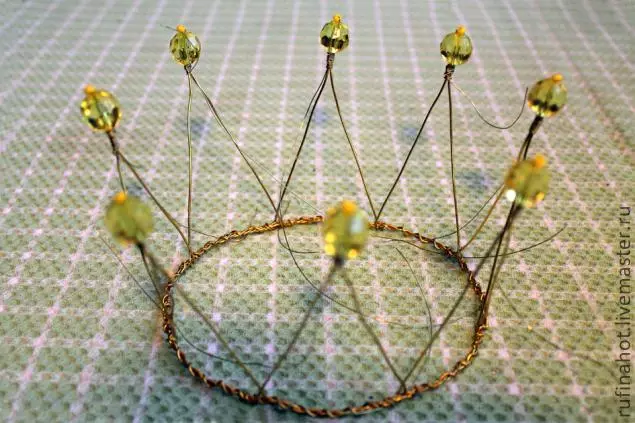
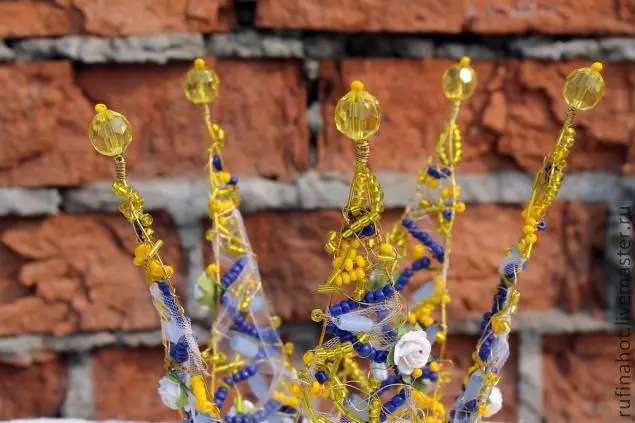
In this way, you need to issue all sharp corners of the links. The thin wire is wounded at the top of the triangle, and the two of its long end descend down. For each of the wires, prepared beads and beads are rolled. This is done in arbitrary form. After that, fantasy overlap threads with decorative elements wrap the triangle area before its foundation.
Below the ends of the wire are attached to a round frame.
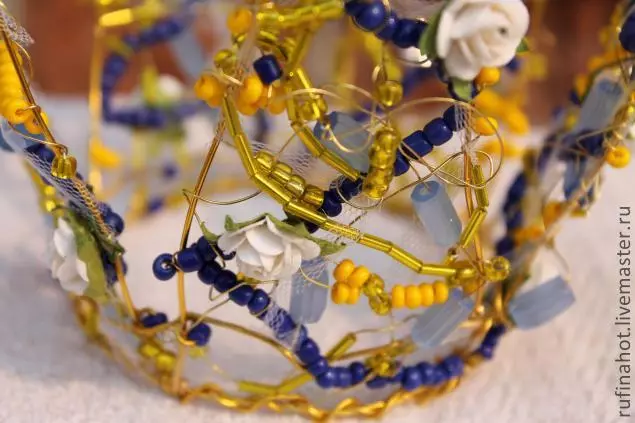
In the same way, each wire link is framed. Crown of beads and wire is ready.
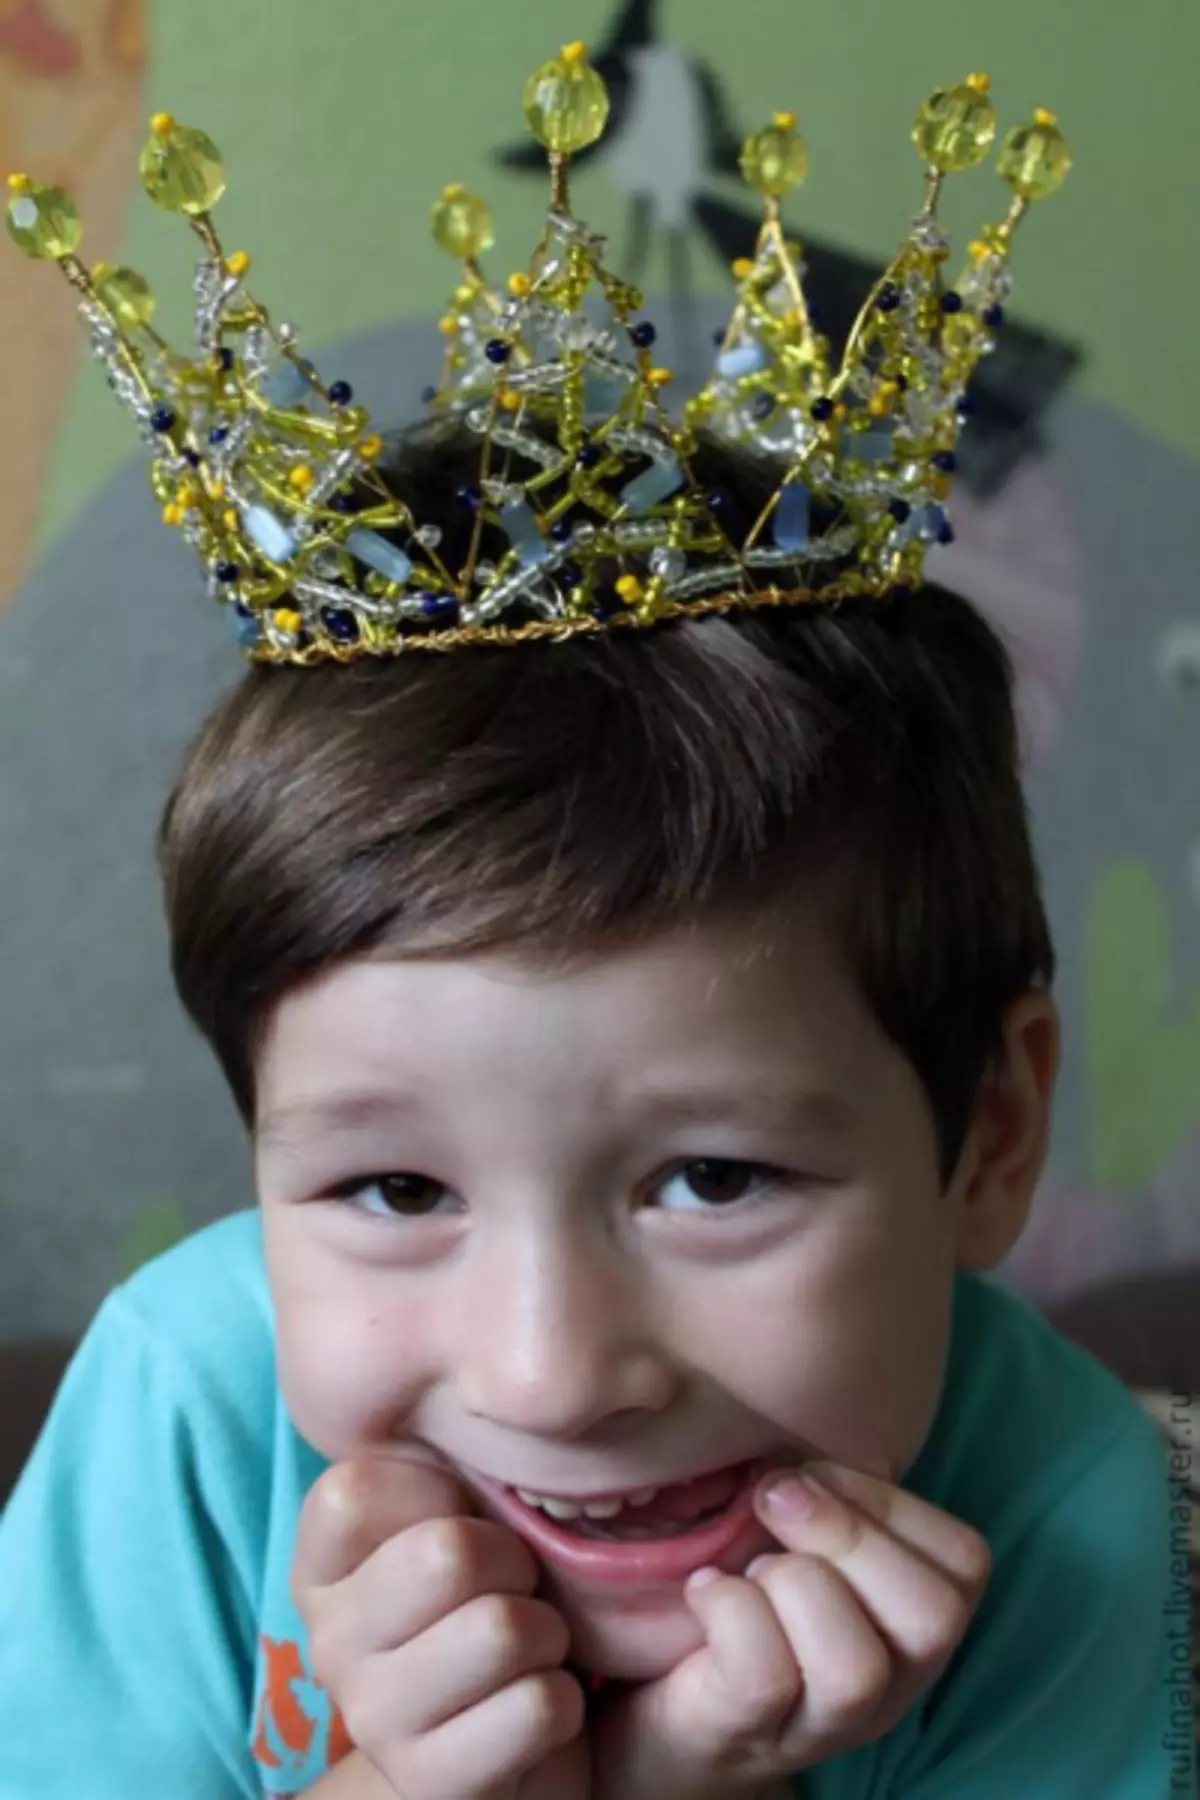
The crown is convenient to use not only for the carnival. Having created a miniature decoration and consolidating it on the rim, you can please your child with a new accessory.
Element for rim
Such a crown will help supplement the image as a decorative hair decoration at solemn events.
What will come in handy in work:
- Silver wire;
- pearl beads of three sizes (3; 5 and 7 mm);
- pliers.
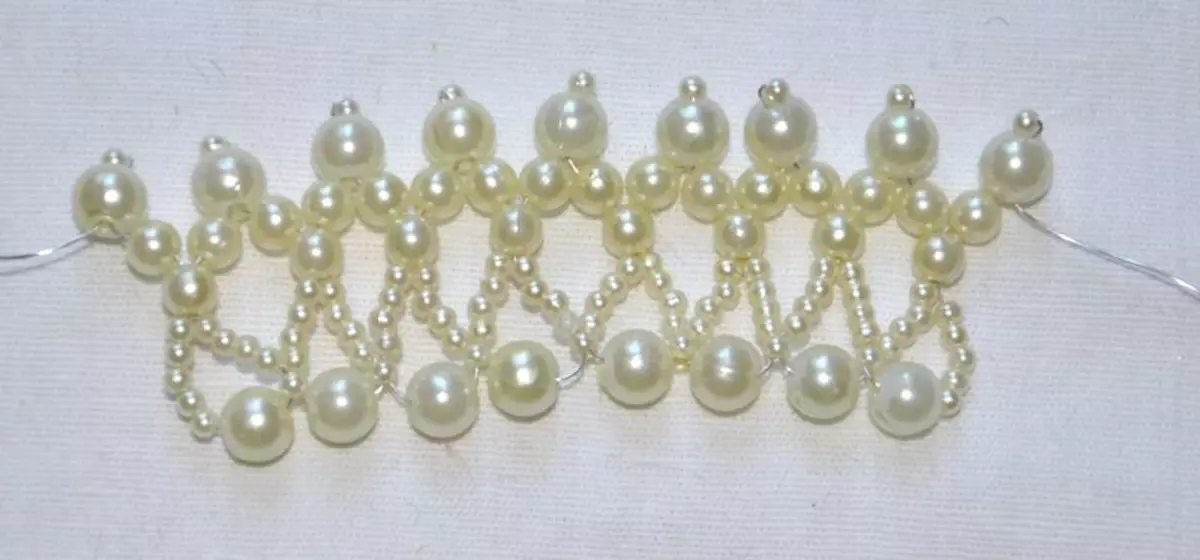
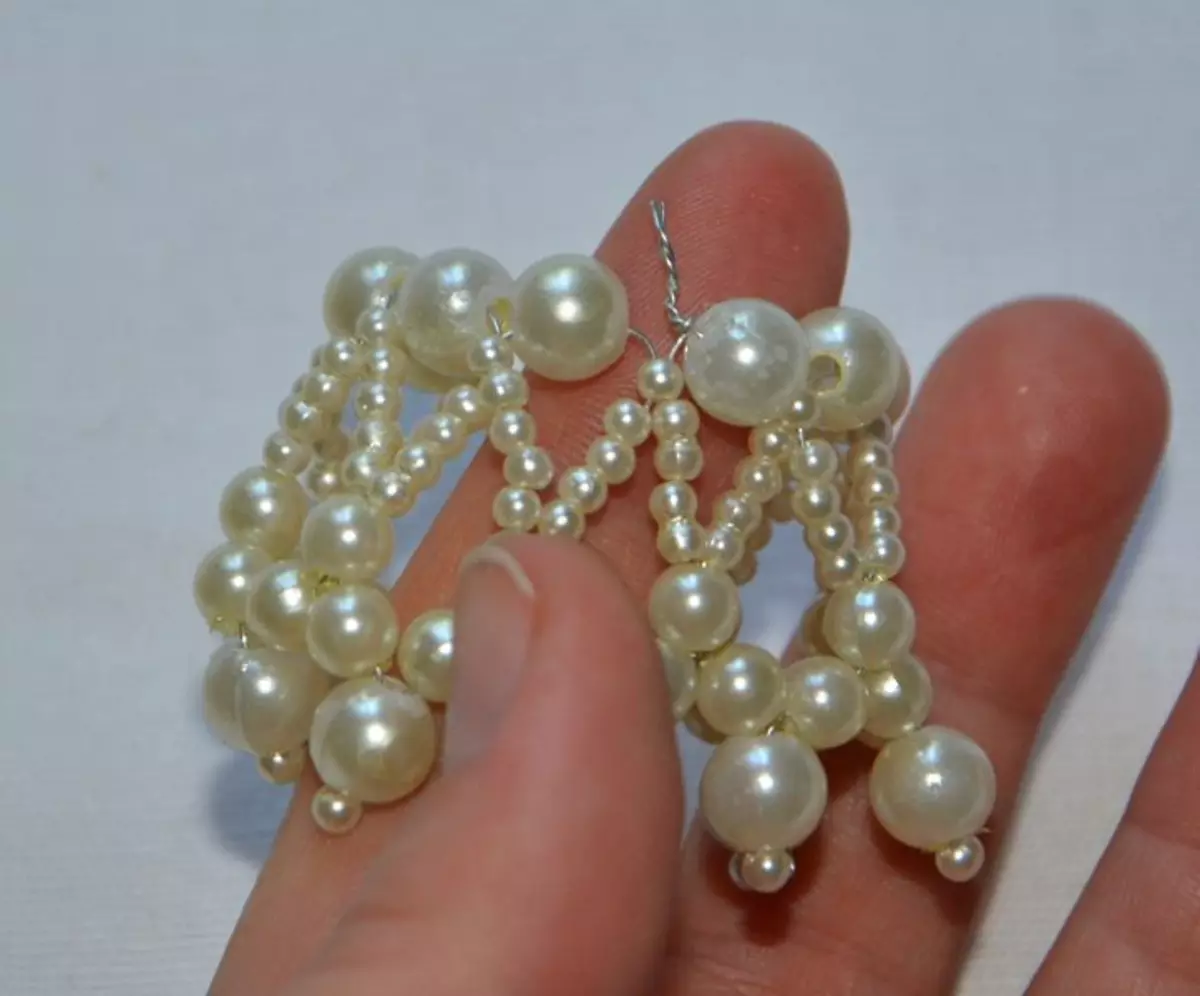
When using a predetermined amount of beads and forming 9 tops, the height of the crown will be 3.5 cm. The product frame diameter is 3 cm. The product is created by weaving. To understand the sequence of actions, a scheme of work on the crown is presented.
Cuts a meter of wire. There are beads in the following order: the top five, a couple of medium, one big and one small. Beads are located in the center of the wire.
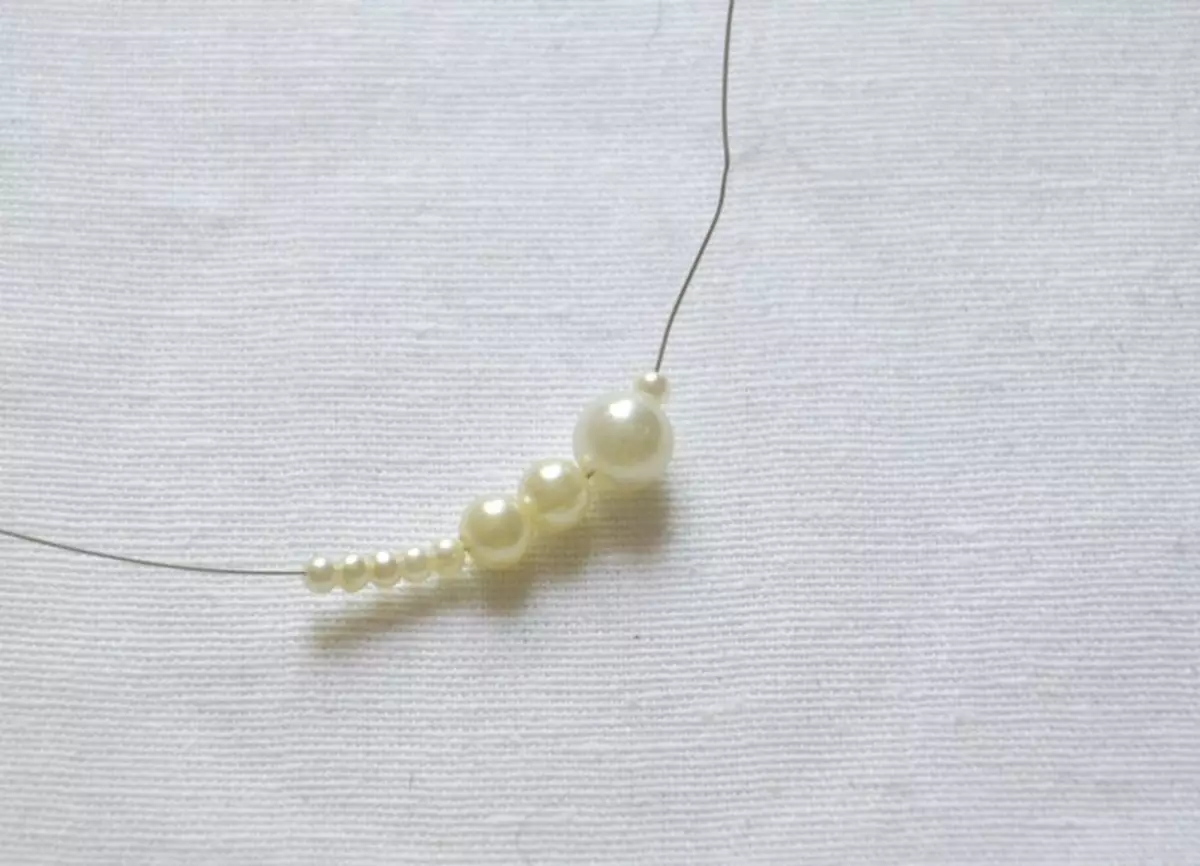
The thread returns through a large bead and is output through it.

Beads, repeating the patterns of elements on the adjacent thread, are not on the free wire, but the small should not be 5, and 4 pieces.
Wire stretches through the fifth bead of the next thread.
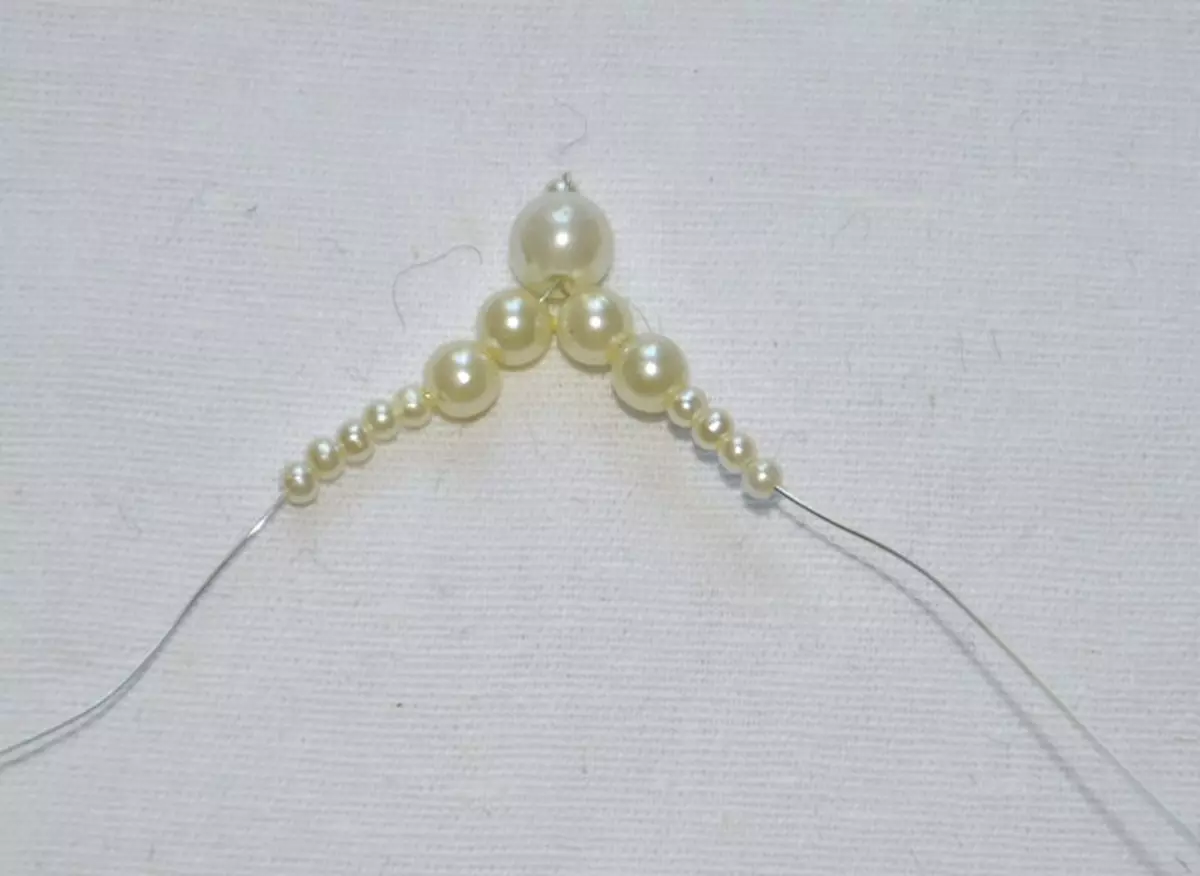
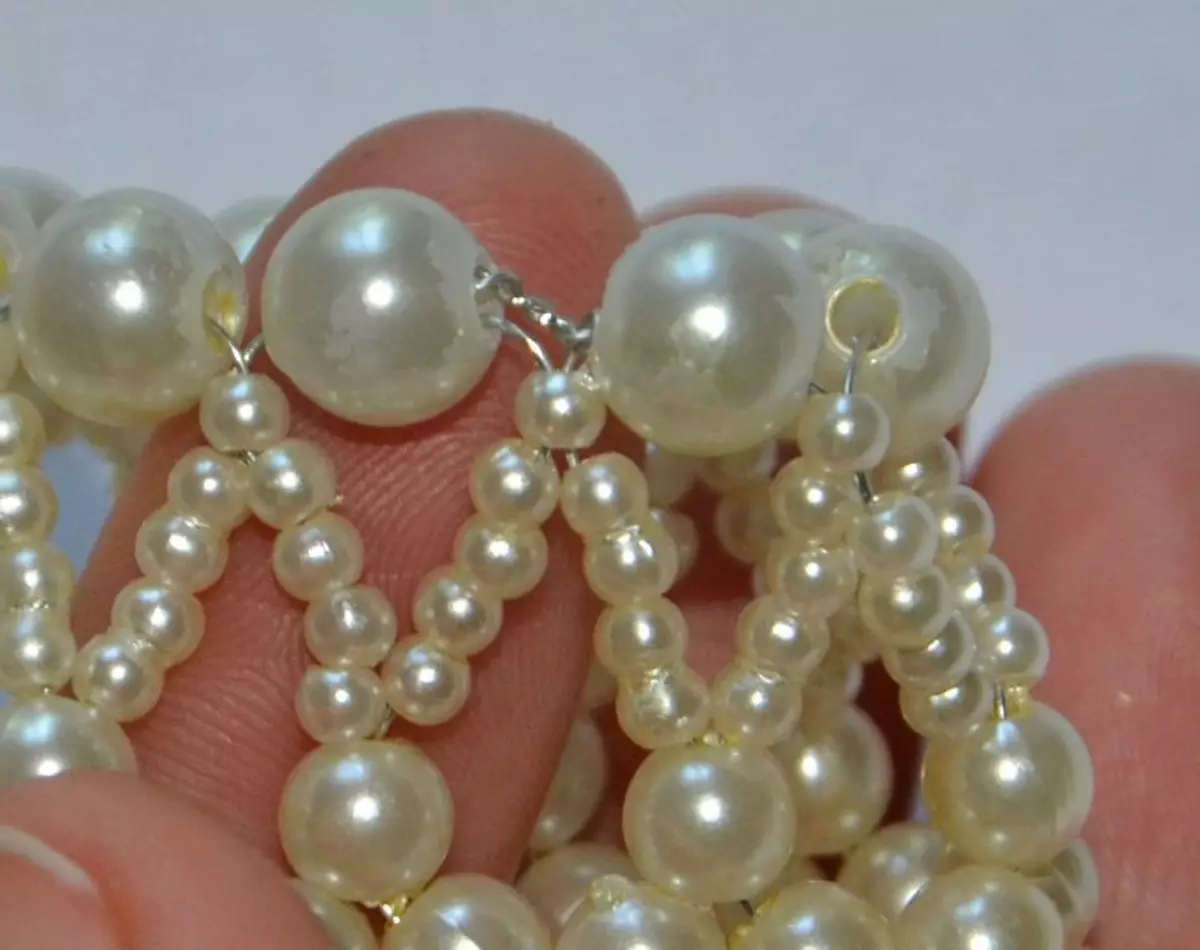
The central elite of the crown is performed. Work is divided into two parts. First, the teeth weave on one filament of the wire. After that, a similar process is carried out on the remaining free end.
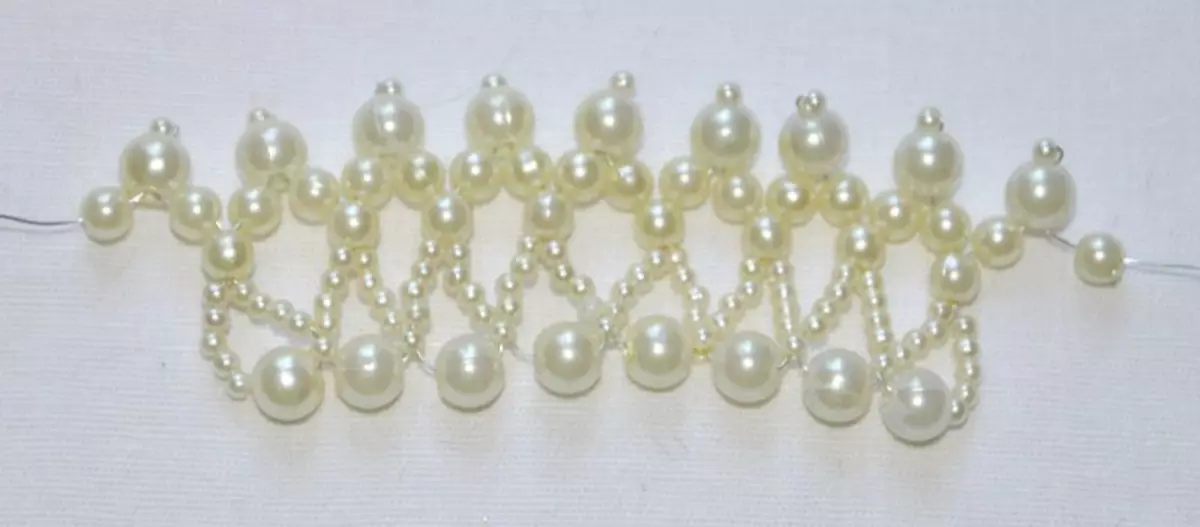
1 large and five small beads are rolled on one wire.

Its end is introduced into the opening of the second average beads of the neighboring top.
Article on the topic: Freddie Kruger sweater: Scheme with photos and video

The next clove of the crown fully corresponding to the previous one is formed.
Thus, weaving is carried out before the creation of nine peaks of the crown.
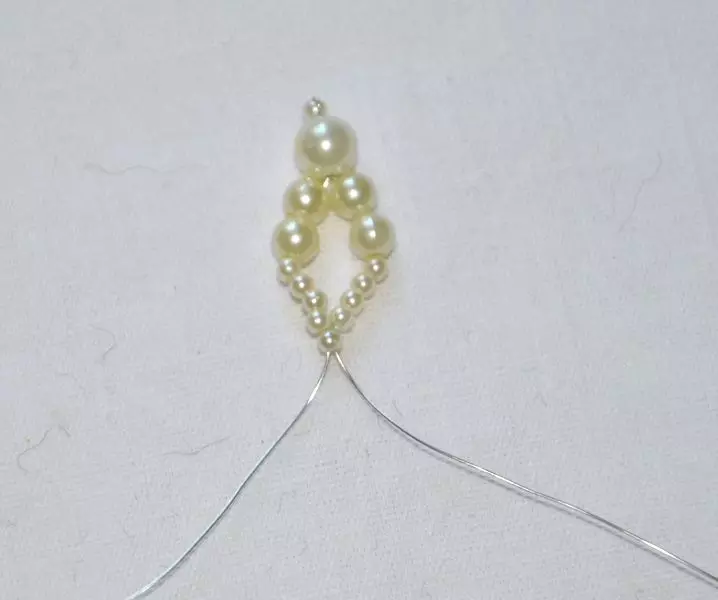
Next follows the connection of two parts of the product.
To do this, from each edge, it is thrown on one medium bead, after which both the wires of the wire pass through the next medium-sized bead.
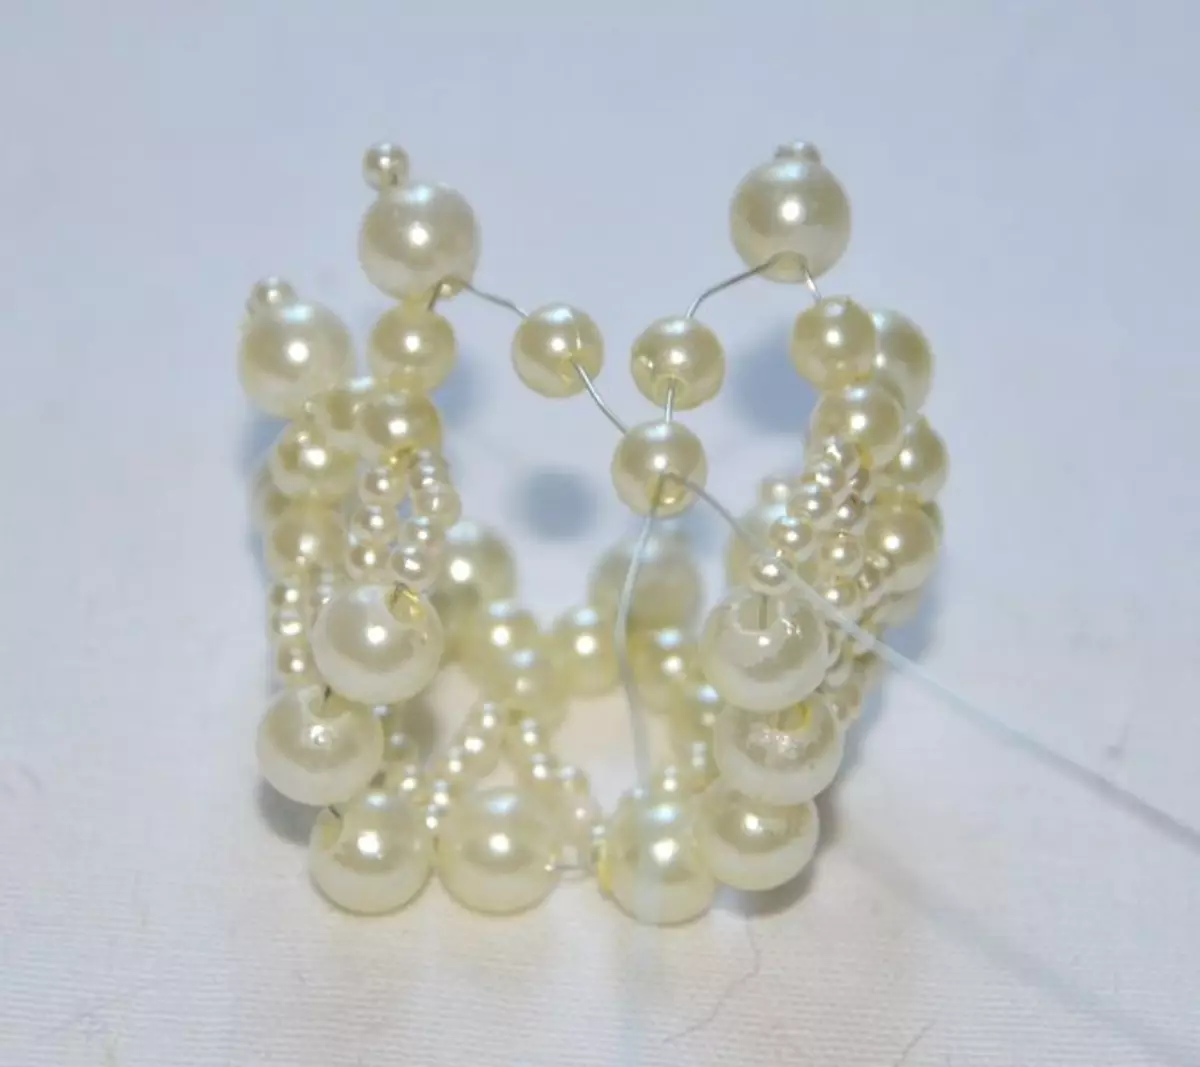

The ends of the threads are disconnected and each of them is rolled on the four small beads.
Each wire passes through small beads of neighboring edges at the base of the product.
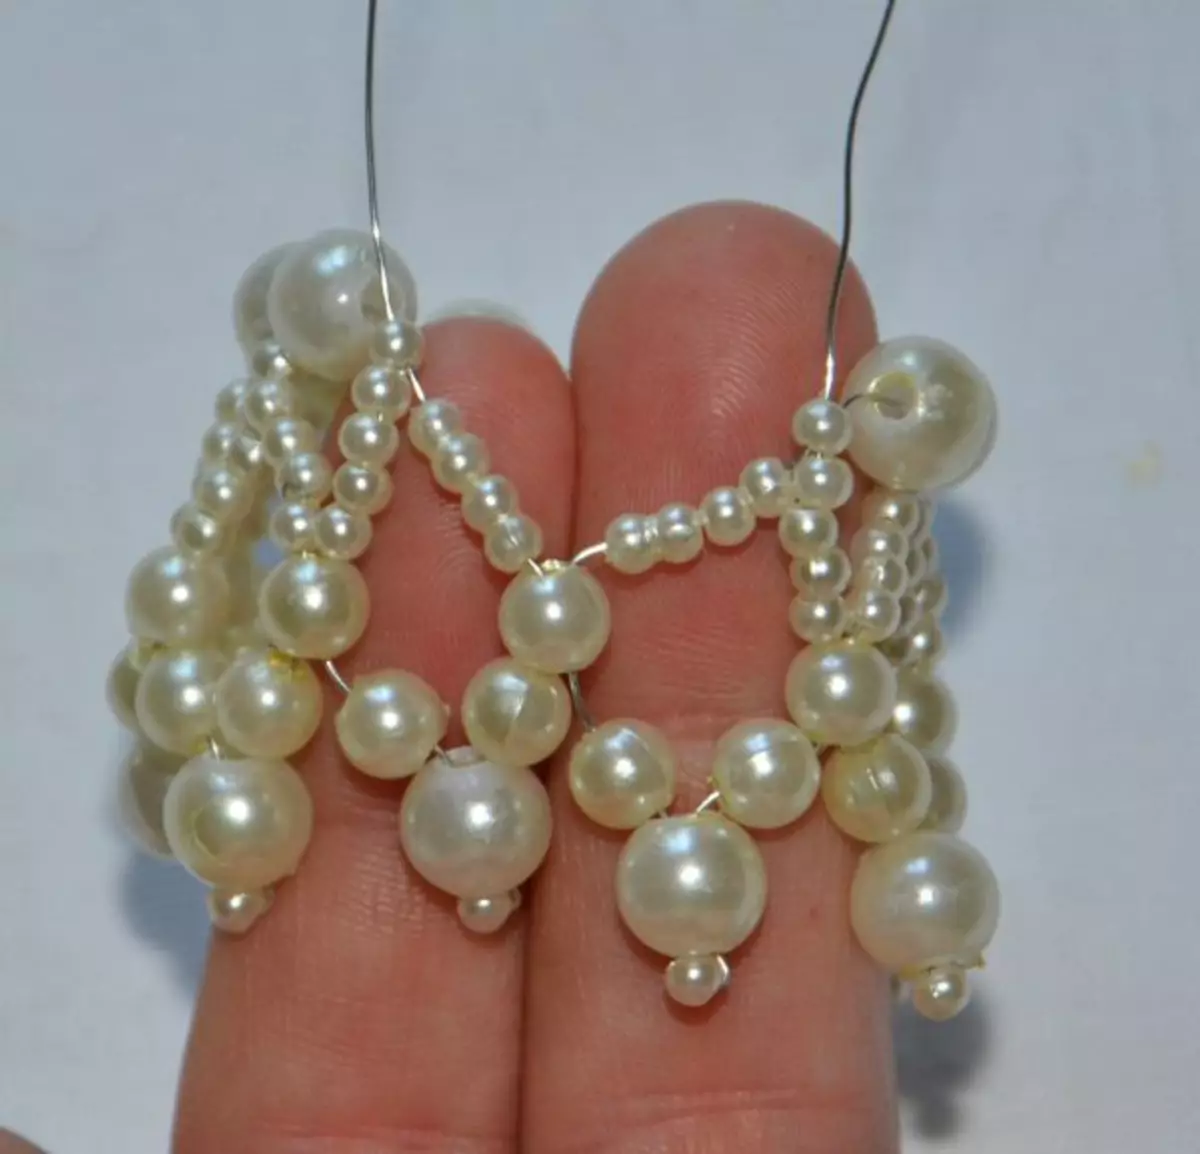
A large bead is thrown on one of the threads, and the wires of the wire are twisted with each other.
A twist hides inside a large bead.
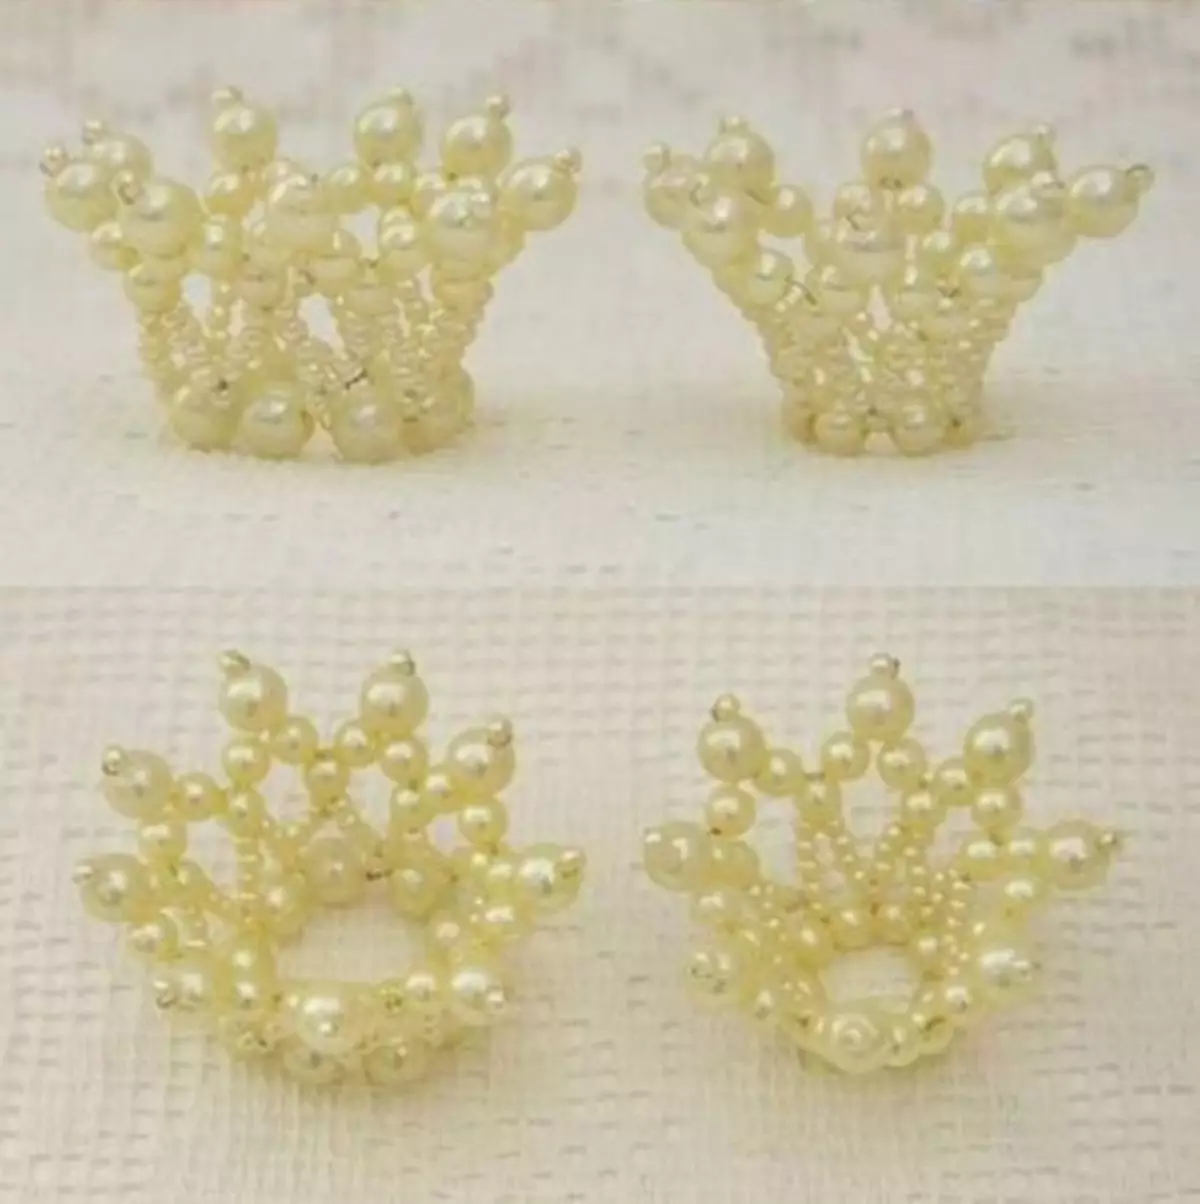
The finished crown remained to fix on the rim.
The small size of the product is quite suitable as an ornament for the doll. This idea will appeal not only to small girls, but also creators of collection dolls.
If you have a smaller beads to take beads, then such a crown will be in size and completely miniature dolls. Using this technique, really create a tiny accessory even for Barbie.
Video on the topic
This video selection contains the very useful information about the brown crown with beads.