The ability to make edging on the pillows will be a very useful reception in your sewing arsenal. This item will undoubtedly give the pillowcase with the completed look and makes evaluate the mastery of a man who worked on her. You can buy a finished edging in any specialized store, or make it yourself, guided by this article. After reading this project to create pillowcases with your own hands, you will learn how to make edging and learn how it is better to sew it to the fabric.
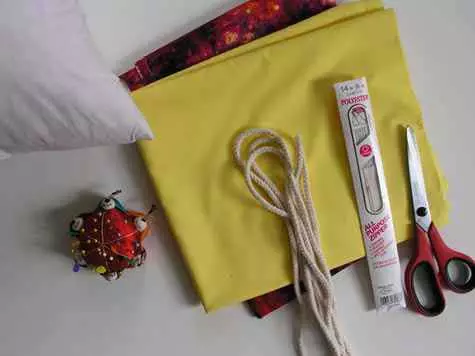
Required materials and tools:
- fabric (for the front, back sides of the Novolochka and edging);
- rope sufficient length to heat the entire pillow around the perimeter;
- zipper (a few centimeters shorter pillow width);
- pillow;
- scissors;
- Measuring Roulette (Rule);
- pins;
- sewing machine;
- iron.
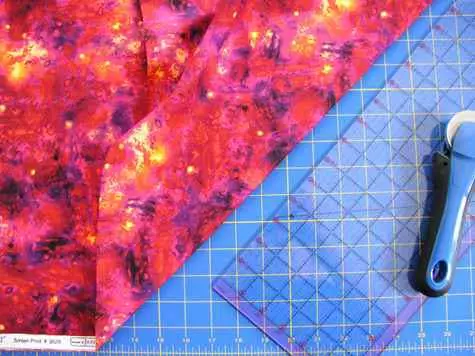
Cut the strip
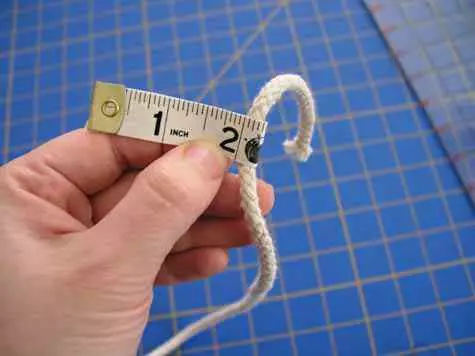
First you need to cut the strips of the fabric that you will turn the rope to make the edging. To decide on the width of the strips, measure the length of the circle circumference of the rope and add to this figure 2 more cm. Cut the required number of strips to, if you fold, they have enveloped the entire perimeter of the pillow with a small margin.
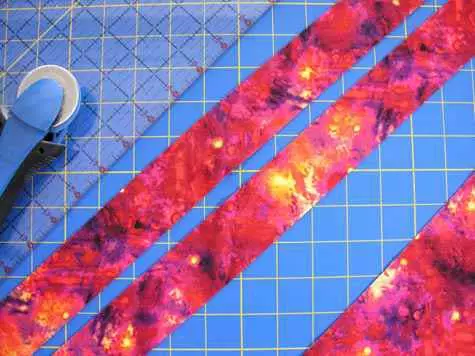
Making a long strip
To get one long strip of fabric from several, fold them as shown below. Put one strip face up in front of yourself. Position the second strip is perpendicular to the first, face down and align the corners relative to each other. Pull the strips at an angle of 45 °, laying the seam from the upper left corner to the right bottom. Cut an extra fabric by retreating 5 mm from the seam. Place the fabric and swing the seam. So you get neatly stitched under 45 & deg strips. Make the required number of the same connections to get one big strip.

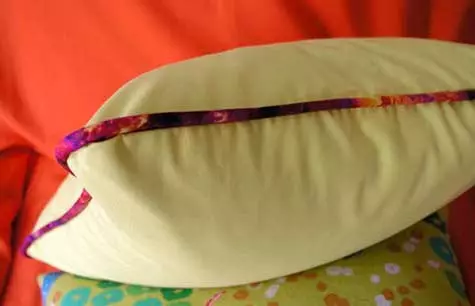
Edging is ready
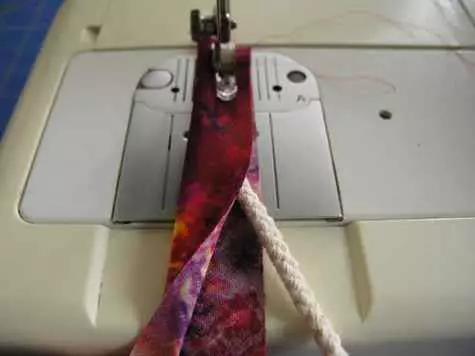
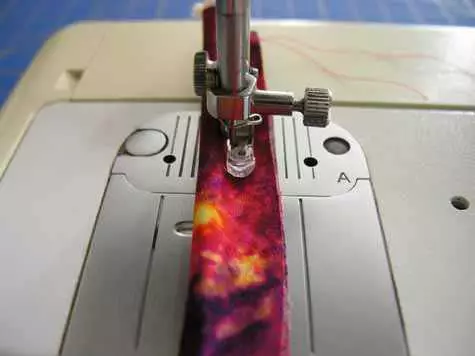
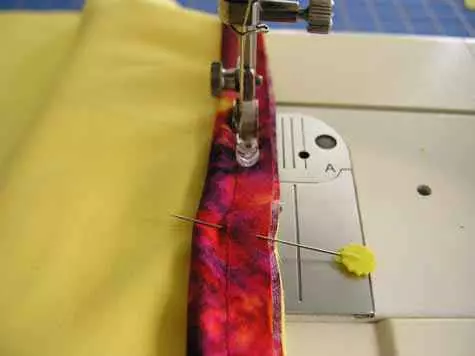
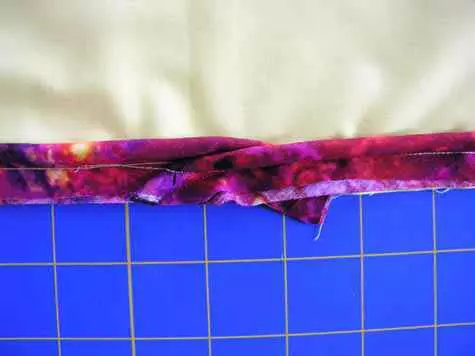
Wrap the rope to the cloth so that its front side is outside. Next, you will need to change the nozzle on your sewing machine, setting a special foot of the zipper stitching (use the instruction to the sewing machine, if necessary). Stretch the fabric as close as possible to the rope along the entire length. And edging for pillowcase is ready! As you can see, make it quite simple. Next, you will learn how to fix it on the pillow.
Article on the topic: Openwork knitting spokes blouses for women with a description for beginners
Send edging
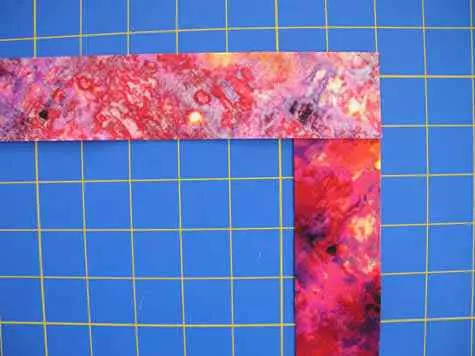
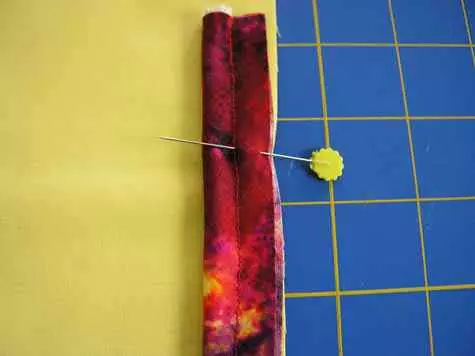
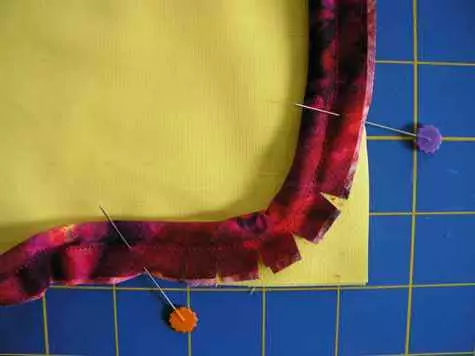
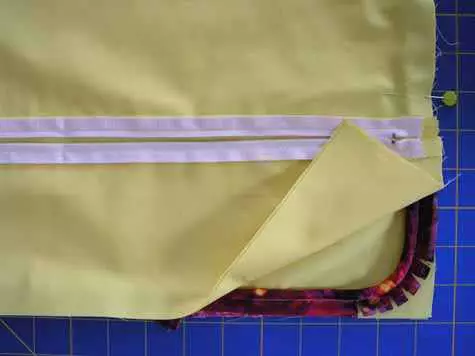
Cut the cloth with the same dimensions as the pillow + 1 cm to the length and width. It will be the front side of the pillow. Aligning the edge of the edging relative to the right edge of the fabric, pinch it over the perimeter of the front side of the pillow. At the corners, the edging should lie with the rounding. Make slots (not hike), as shown in the photo below. Still using a laptice for a zipper of lightning, take edging to the segment of the fabric around the perimeter, placing the seam as close as possible to the rope. When you get to the beginning of the edging, impose one end to another.
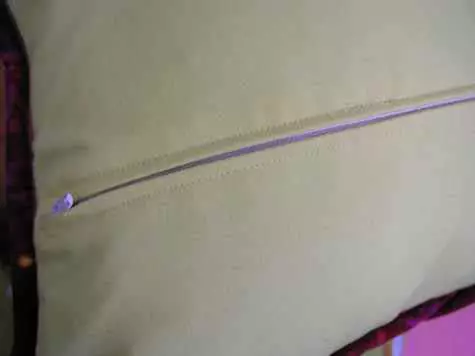
Zipper
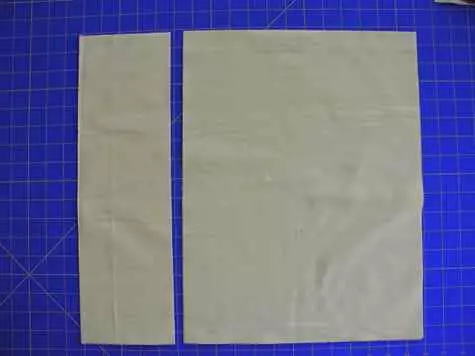
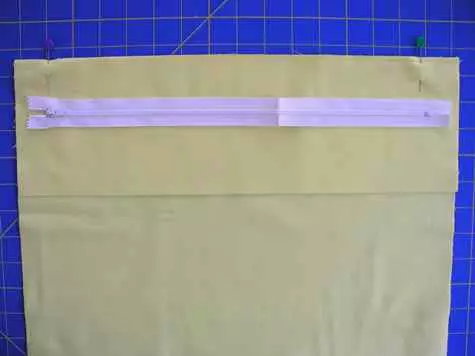
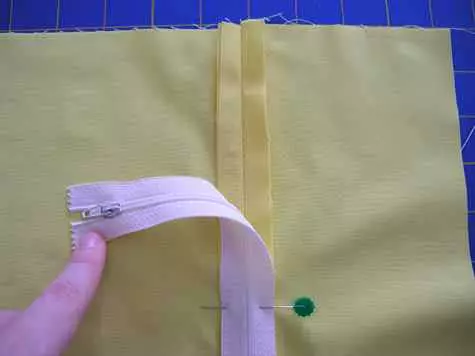
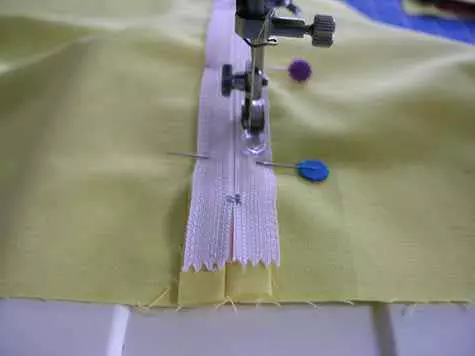
Cut the segment of the fabric for the back of the pillow. One of his side should be 1 cm more than the width of the pillow and 3.5 cm longer. Put in front of you fabric so that her long side lay horizontally, and cut it into two parts in a place departing from a short side at a distance of 10 cm. Now you need to add zipper. Put a small segment of the fabric for more so that they touch the front parties. Attach the lightning to the fabric and centen it. Then pin two pins opposite the terminal fasteners, closer to their inner edge. Carefully look at the photo so that everything becomes clear. After you can postpone the lightning to the side. By installing a conventional foot on your sewing machine, start the seam, making a centimeter indent from the edge of the fabric. When you get to the first pins (and it is located 3-5 cm from the edge of the fabric), turn on the reverse on the machine and take the seam in the opposite direction to strengthen this place. Then lift the needle and set the stitch length to the maximum to make the stamping seam until the next pin. When you come to her, again set the normal stitch length, make the same short seam as first, strengthening it with the help of a reverse. Beat a small segment of the fabric and join the seam of the seam iron. Attach the zipper in the place "face down", leveling it on the corresponding seam. Fix it with pins.
Article on the topic: Verba from beads with their own hands: Instruction with a weaving and video
Send lightning
Having installed a paw to stitch the zipper, set the fastener to the fabric. To do this, take the seam on one side of the zipper, turn the fabric and take the seam right through the teeth. Then turn the tissue and detect the other side of the zipper, moving in the opposite direction. After again, change the seam direction on 90 ° and finish the seam in the same place where they started. Turn over the cloth to the other side and remove the pumping seam.
Stitching
Now fold both sides of the pillowcase with the front parties to each other, align the edges relative to each other. Create both parts by pins and then sew around the perimeter, placing the seam right above that connects the edge with the front side of the pillowcase.
Ready product
Cut an excess fabric, making roundings and repeating the curvature of edging. Remove the pillowcase from the inside to out and put the pillow. Laying zipper, and ready!