
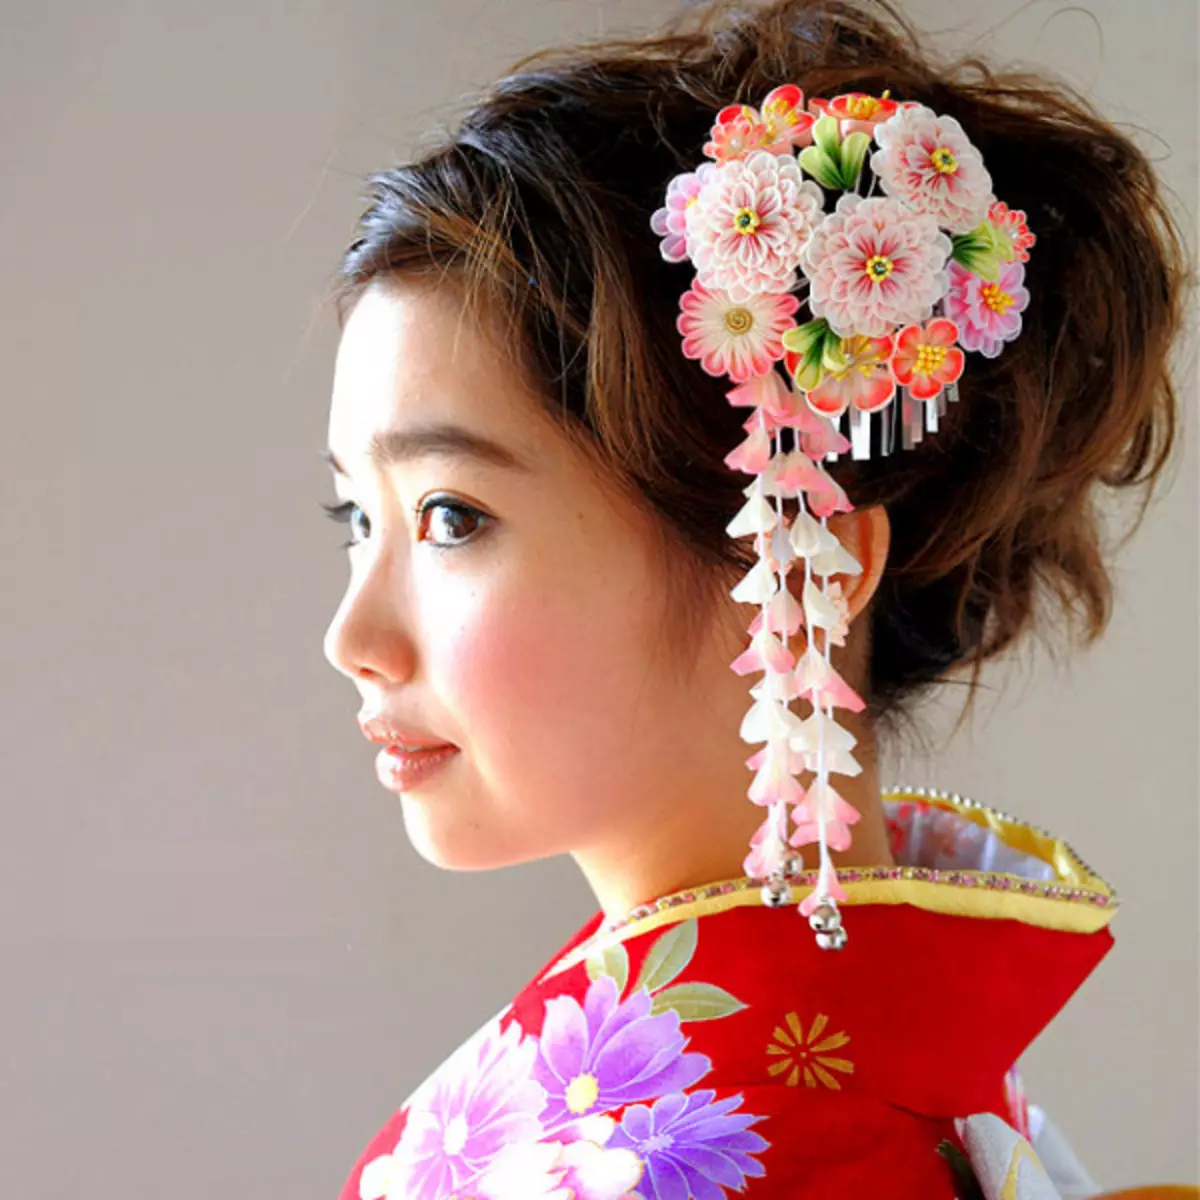
What will not come up with cute ladies to look bright, beautiful and unique? Among the huge selection of finished jewelry and accessories, many fashionists prefer to create incredible creations themselves and proudly demonstrate them. Kanzashi from satin ribbons for beginners are just as such creation.
Some of the first, who personally decorated themselves, were Japanese. They also became the progenitors of the art of Kanzashi - techniques for creating flowers from silk. A resident of the ascending Sun countries decorated their hairstyles of the colors that were made of natural silk themselves.
Ways to work in Kanzashi technique have become very popular worldwide. Needlewomen use the bases of Kanzashi not only for the manufacture of studs with flowers and leaves, as it was intended initially, but also to create paintings and cloths, figures of animals and birds, volumetric topiaries and trees.
Materials and tools with which masters worked in past centuries in Japan, also underwent changes. Previously, only noble and rich houses could use natural silk as the basis of the colors of Kanzashi, and all the details were glued to each other with the help of rice glue.
Now fashionables are available various types of fabrics, ribbons, as well as all sorts of methods for fixing and gluing blanks - with the help of conventional glue, soldering iron, lighters, threads and needles, liquid nails, etc.
One of the simplest, lungs and inexpensive materials for creating Kanzashi products is satin tape. This is the most successful fabric for novice needlewomen. It is easier to cut on smooth squares, and the edges are easier to fall over fire.
In this article, we consider several master classes on working in Kanzashi technique from satin ribbons for beginners. Let's make the hairpin and find out how to make a swan.
Article on the topic: Crafts from fabric for home with your own hands: Patchwork with photos and video
Barring from tapes
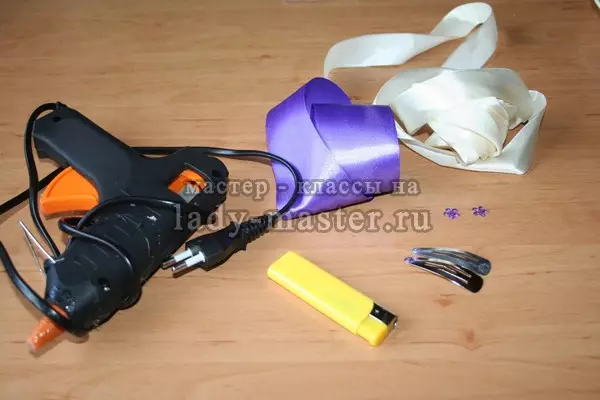
First of all, the satin ribbons of any colors, 5 and 2.5 cm wide; glue, and better adhesive gun; Fire source - lighter, matches, candle; cardboard; hairpins; Beads or rhinestones for decoration.
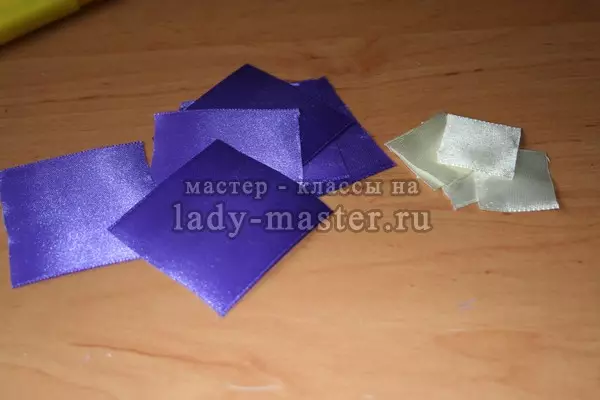
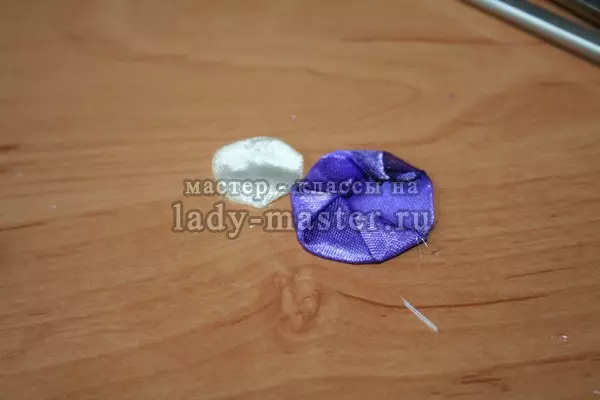
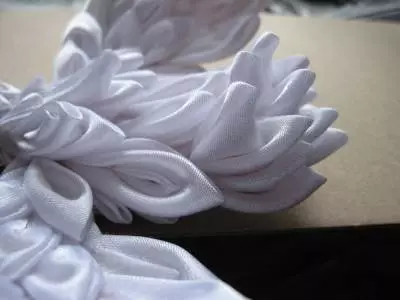
1) The first step must be cut into smooth squares from the tapes.
2) We start working from large squares - we make a cut of the tissue diagonally so that the purr side is inside.
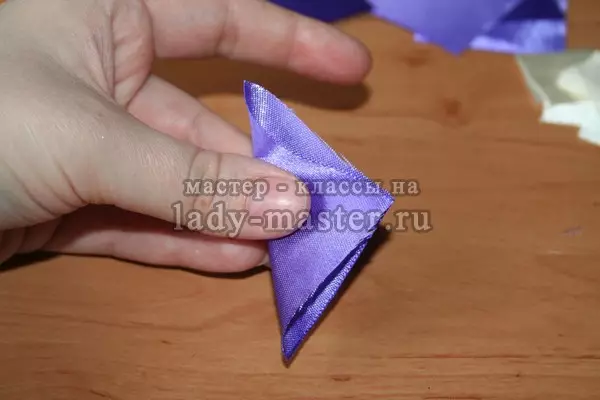
3) once again bend in half.
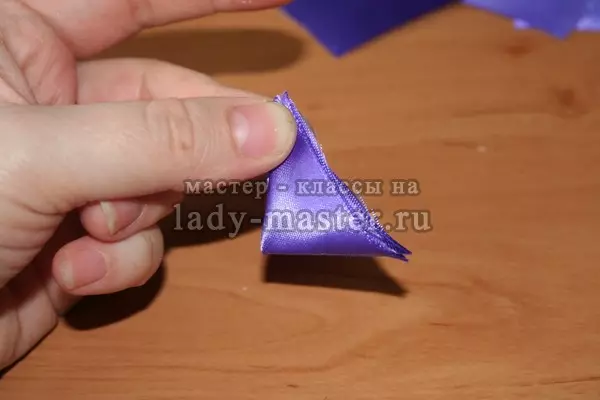
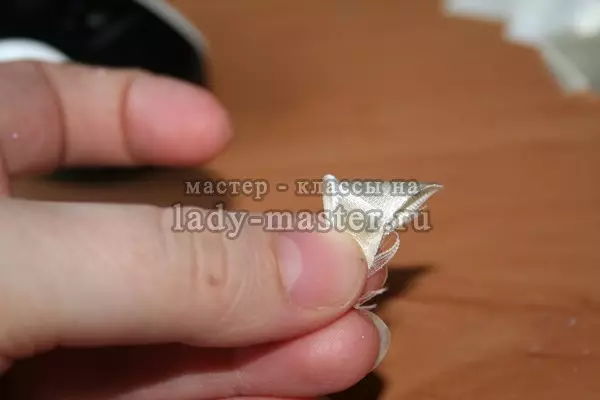
4) And once again we add, and in the end there should be a sharp petal.
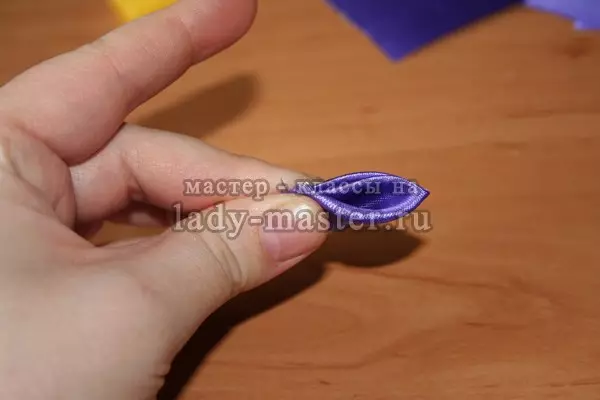
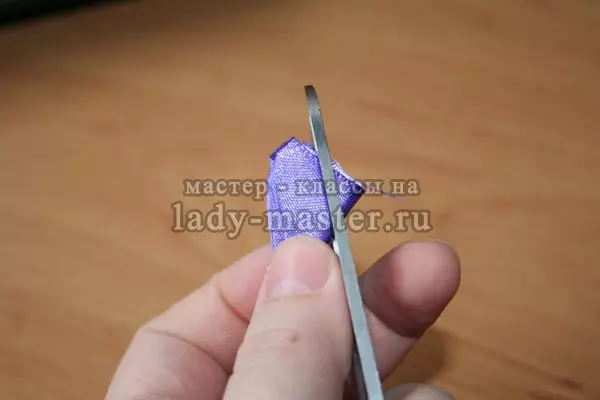
5) Now you need to fix it, for which, holding the part with your hands, cut the folded corners for several millimeters.
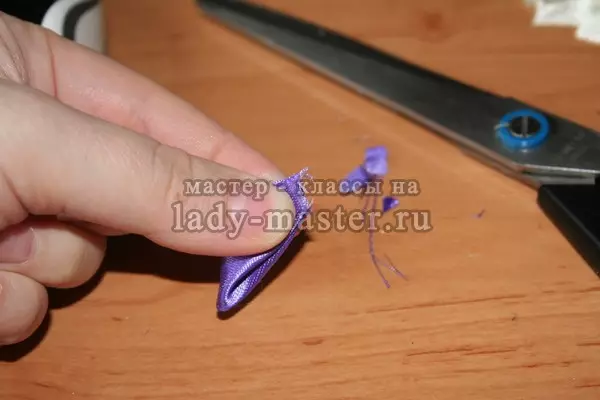
6) Sweep the location of the cutting over the fire, the petal should be fixed.
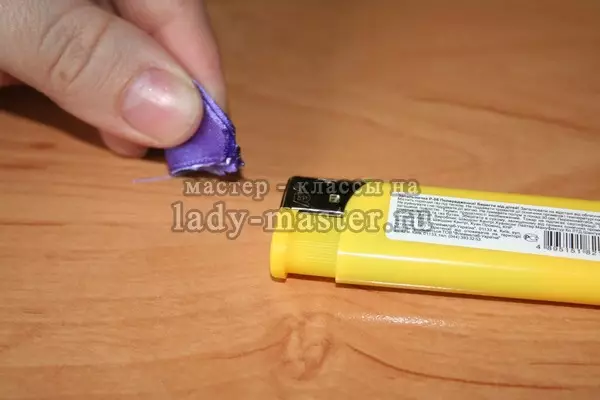
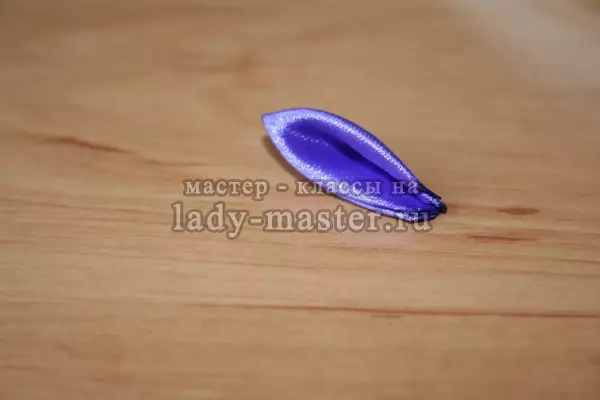
7) In order for the petal to look smoothly and neatly, it is necessary to crop the angle at the base and also fall off with fire.
8) Petal is ready, it is necessary for the specified scheme to saddle another 5 pieces.

9) Now proceed to work on small petals. It is necessary to repeat the first two past stages and twice folded in half the square.
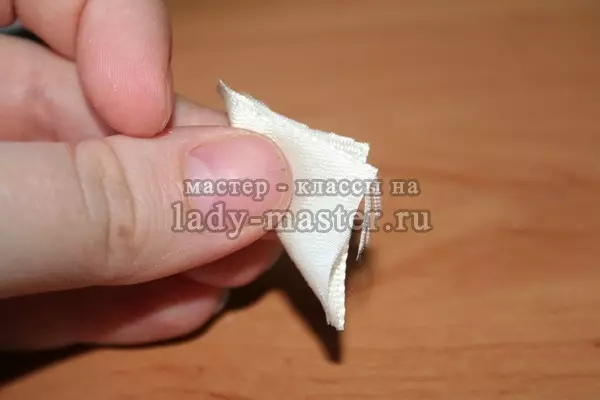
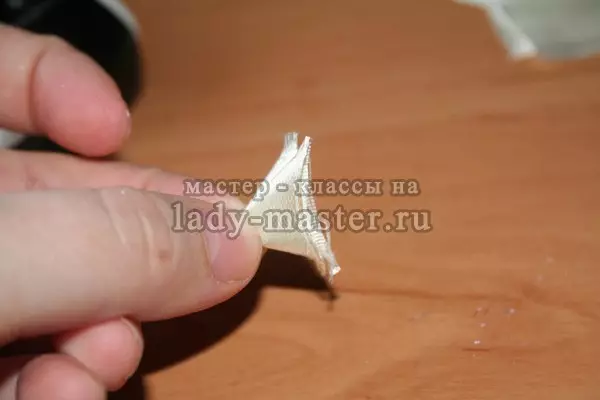
10) After that, you need to bend the corners to the side and also fix and fall out the base with the help of fire.
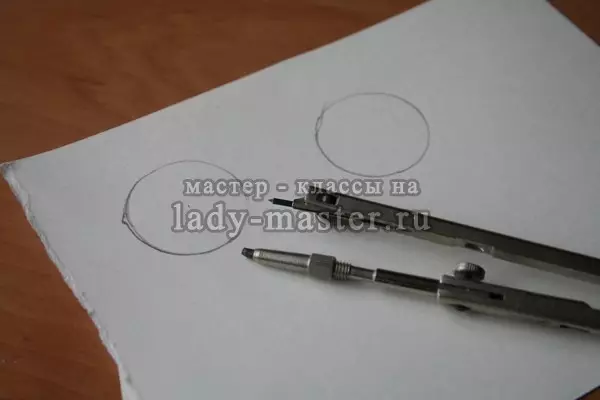
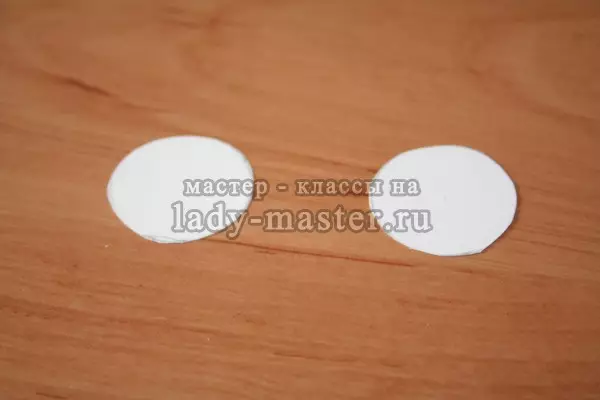
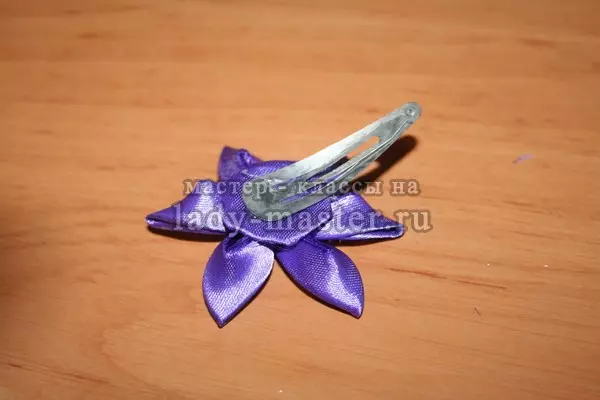
11) We prepare the foundation for the hairpin - cut out two smooth small circles from the cardboard.
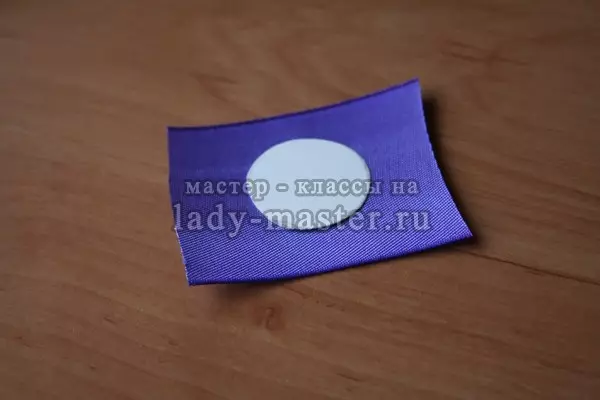
12) Cut circles need to be wrapped in the cutting of the satin ribbon and fasten the fabric on the reverse side.
13) Gently glue the petals with a glue gun.

First glue big sharp petals.
14) Little petals are carefully stacked inside the large petals.
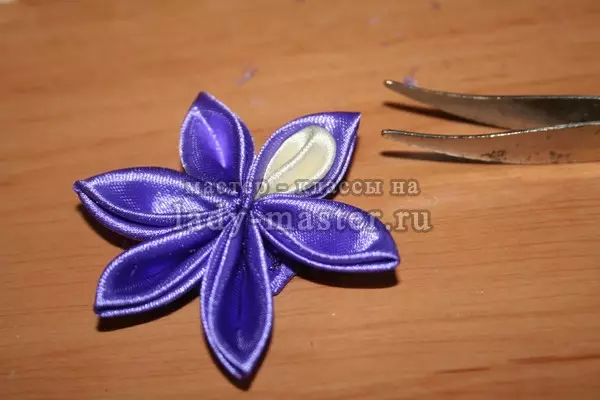
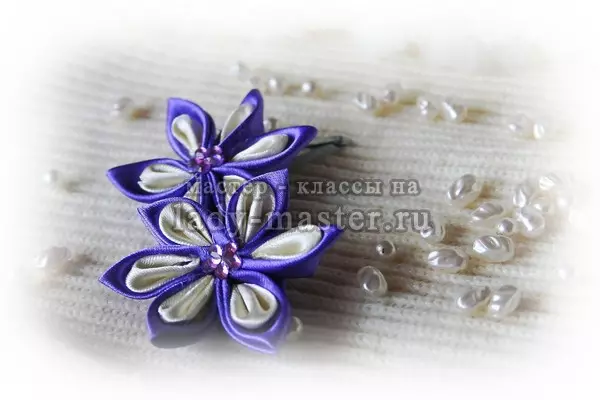
15) The flower center is better to decorate with rhinestones or beads, also by gluing them with glue.

16) The hairpin is ready, only the created creation remains to stick to the metal stud or clamp.
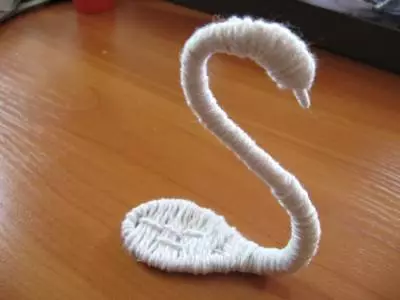
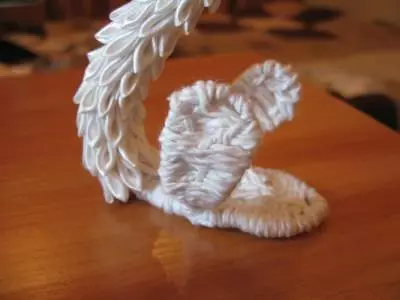
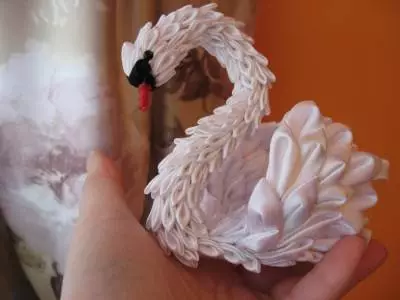
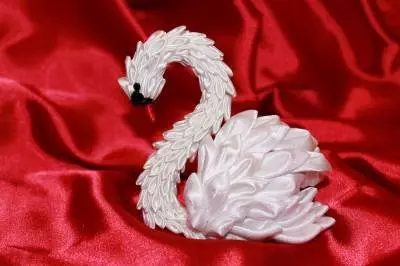
Swan Kanzashi
Steptedly disobey the method of making petals, you can make it possible to make a wonderful decor for the house - swan from satin ribbons. The creation of this creation will require adhesion and patience, but the result will exceed all possible expectations.
Article on the topic: Capper-Kubanka knitting needles: Women's products with schemes, photos and videos
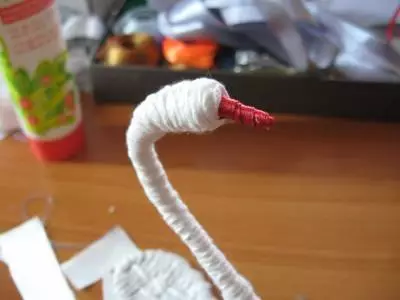
one) For work it will be necessary: Satin ribbons of white, red and black colors; Scissors, source of fire, adhesive gun and wire, yarn for knitting white.
2) First, it is necessary to create a basis for the future swan, for which the wire makes the frame and wrap it with the yarn.
3) Red yarn to highlight the beak, and with black threads or a piece of black satin ribbon to place eyes.
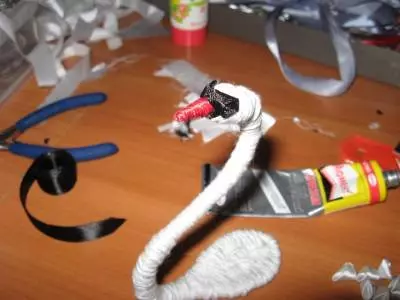
4) Then the most painstaking and long work begins - you need to make a large number of white petals according to the scheme described earlier, and then, starting from the head, stick them from top to bottom to the bottom of the neck.
5) from wire and yarn build wings and glue or climb the wire to the body of the swan.
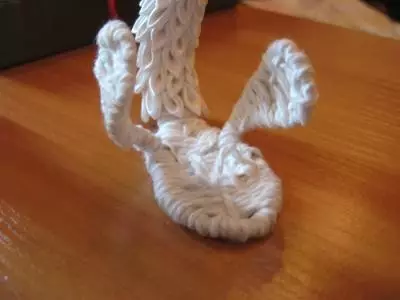
6) Next, we stick the petals again, it is best to approach the process of registration of the swan individually, that is, pick it up the items so that the swan look natural, and the petals were similar to smooth and even feathers.
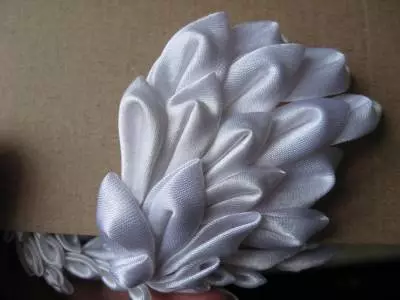
7) If large petals look poorly, then it is possible to fit smaller blanks - as it was considered above.
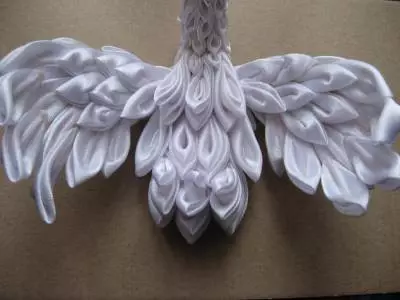
8) surprisingly, in this master class there is no definite final stage - the figure can be considered complete when the fantasy tells. If the swan has a magnificent tail, then it is necessary to stick more petals if the wings are small, then it is enough to stick several petals in one layer - it all depends on the desire and fantasy of the needlewoman.
Video on the topic
Even more video and master classes on the technique of Kanzashi satin ribbons in the following videos