
When us is a question of a gift, we always wonder how it is spectacularly present to surprise the person who is meant this present. Best of all, of course, it is to make it a beautiful packaging or a bright bow, which will attract attention. In order not to pay a lot of money on such a trifle, it can be done independently with beautiful paper, or as it is fashionable - with parchment paper, journal sheets or newspapers. And then still decorate the packaging with a beautiful bow, which can also be made independently. Therefore, today we will teach you how to make the origami bustle paper. This lesson does not take you a lot of time, but then this bow will be useful to you and more than once.
We try to start with a simple
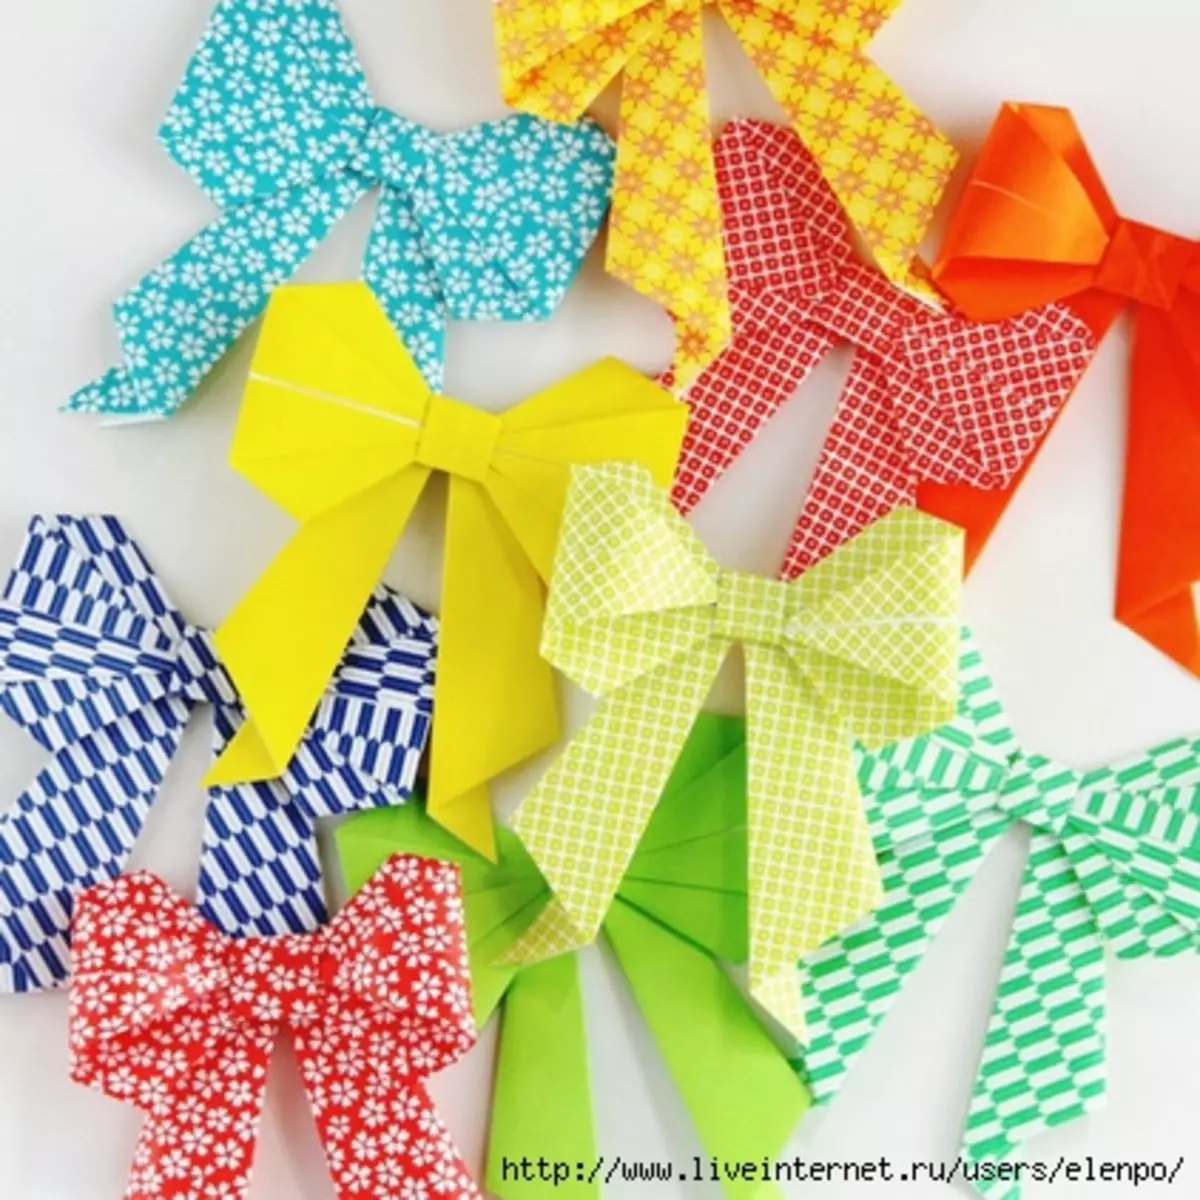
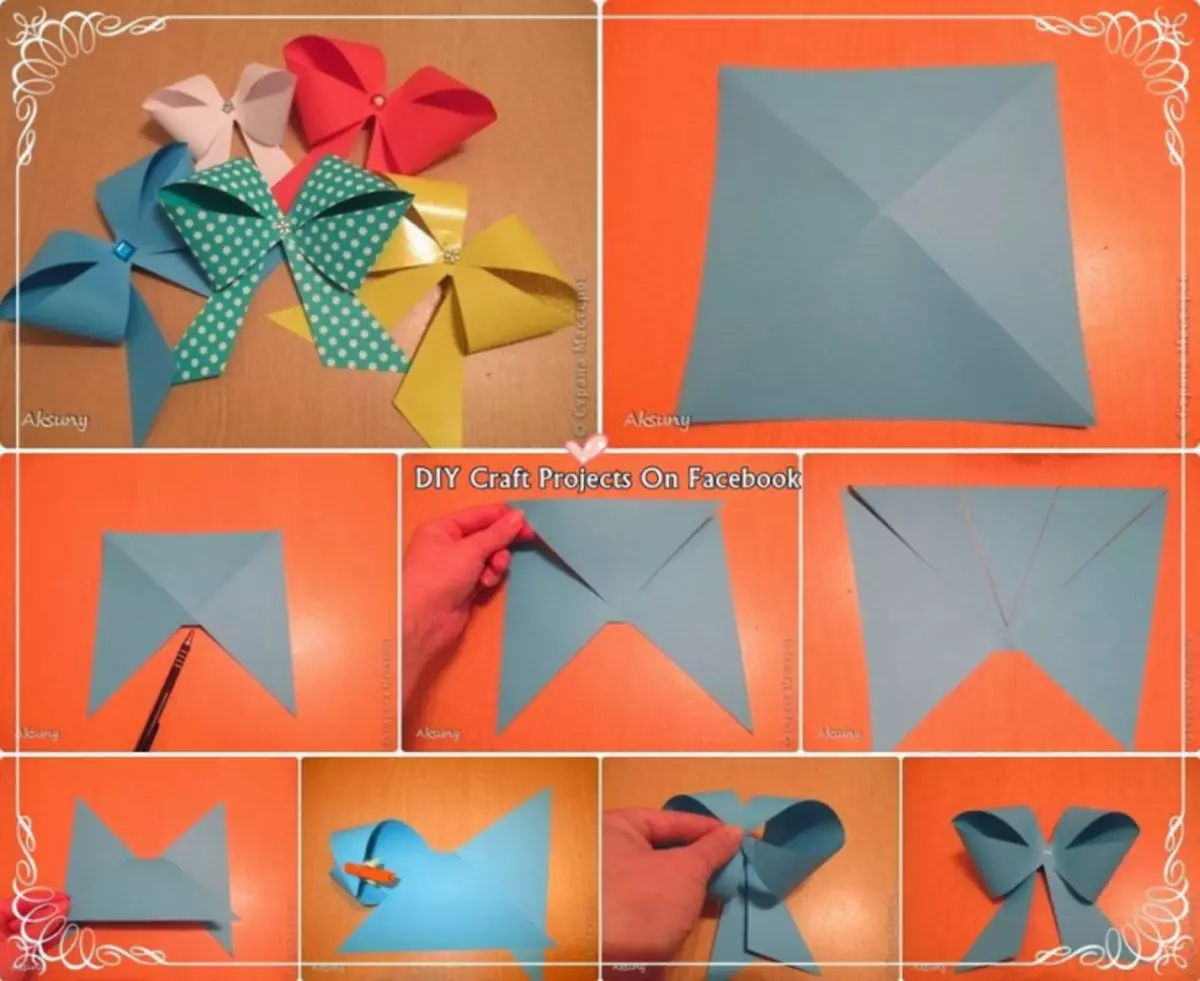
Today we will learn how to make bows for packing gifts in Origami technique. That's what they happen.
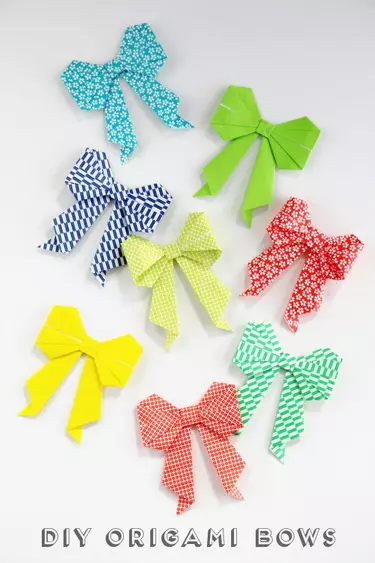
They are done almost the same, only have different ends and different colors of paper.
We choose the color that will suit our gift or to its packaging, but not the same color so that it does not merge with the package, and in another shade.
Let us turn to the assembly scheme of a bow:
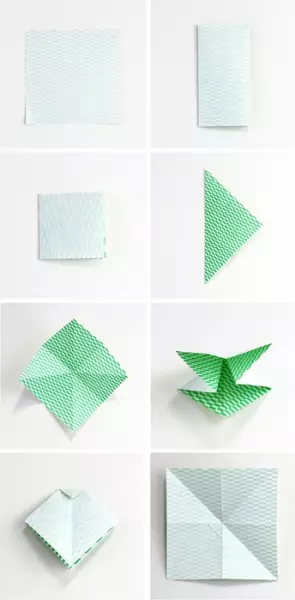
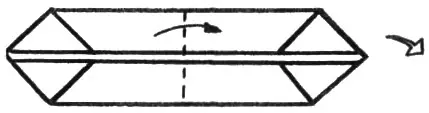
For this craft, we will need a square sheet of paper.
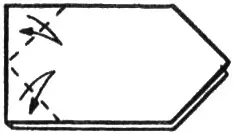
We put it down the main color, if it is not altooth. Fold it in half Only so that the drawing is inside. And now we put again in half. We declare it back, and now the pattern is outwardly we put our sheet of paper diagonally, we turn over 90 degrees and fold it again diagonally. And reveal back. Now we need to adjust the right and left angle inside as indicated in the scheme. We fold the upper corner so that it turns out a small triangle. And again we declare our workpiece, now a small square of the folds should remain in the center.
Article on the topic: Knitted blouses for newborns with descriptions and patterns for beginners
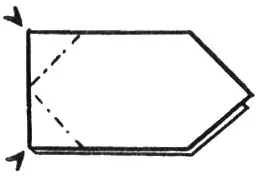
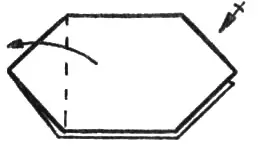
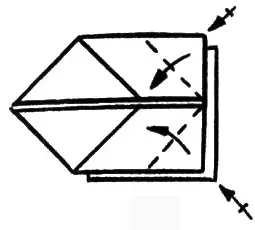
Then we need a small square, which is located in the center, straighten your fingers forward so that all sides remain a little behind. Next, bend the sheet as shown in the photo, only that this square is inside the workpiece. Now we need to bend the upper sides, as in the scheme, and then turn over the workpiece, and get the other top sides. And reveal our workpiece again so that the center is the square and smooth out very well all the folds.
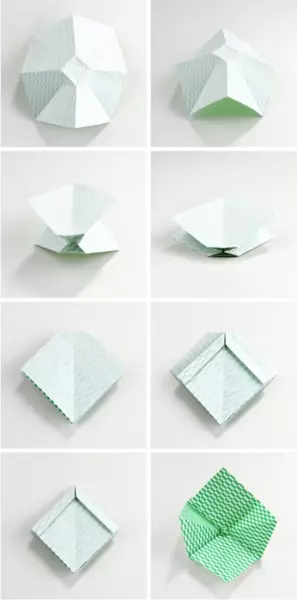
I turn over the workpiece so that the color side is down. We use scissors and make four cuts along the folds. Now you need to fold down the top outdoor fold, and the two upper angle are also folded down to the middle, these will be the tips of our future bow. Next, we run up both rhombus, and we only fold the lower corners to the midline. Now we need to lower down the double part in the form of a rhombus. And make a small incision, as is done in the photo, and adjust these parts.
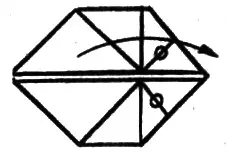
Now turn the bow to the face. Come in with two extreme corners to the center and insert them into a small square, which is located in the middle. Here is our gifts for a gift and ready. It can also be used for the decor of the room, the holiday, they can also be decorate a Christmas tree.
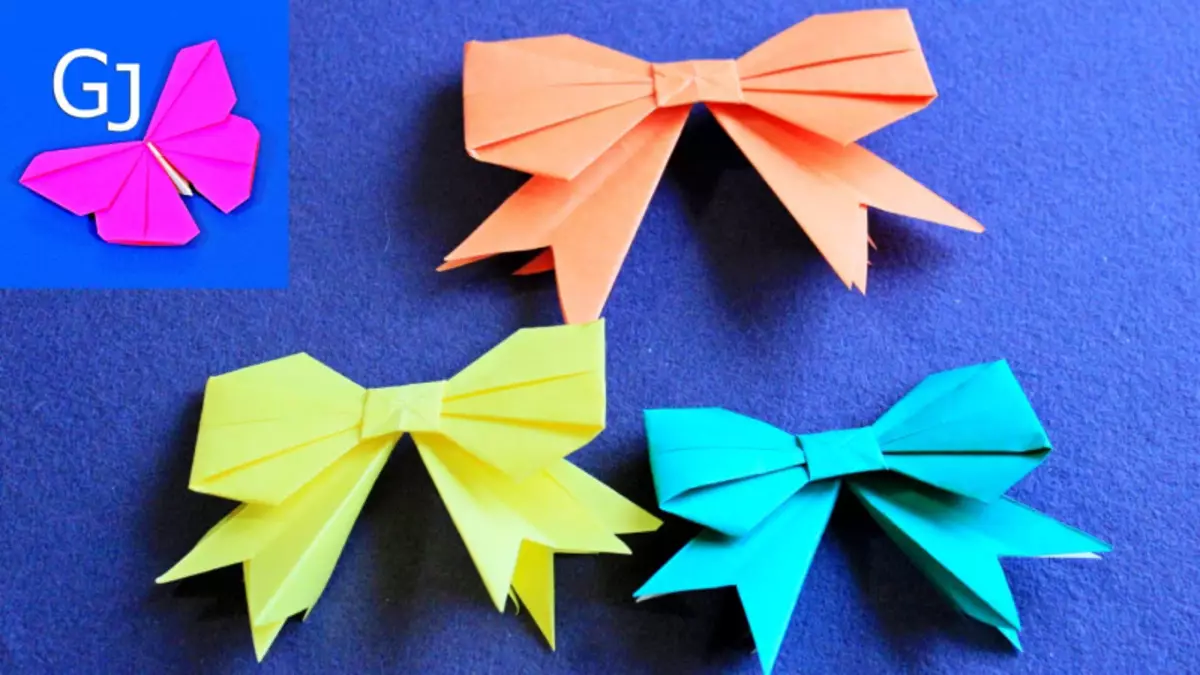
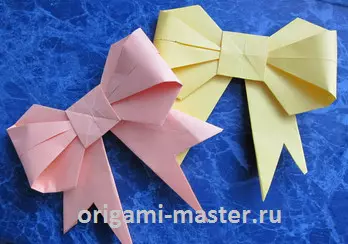
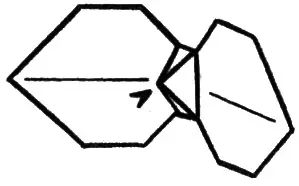
You can also make such a bow. It is much easier and faster.
Form butterfly
In this technique, we can make a bowtie bowl, which can also decorate any gift. Let's see what they happen.
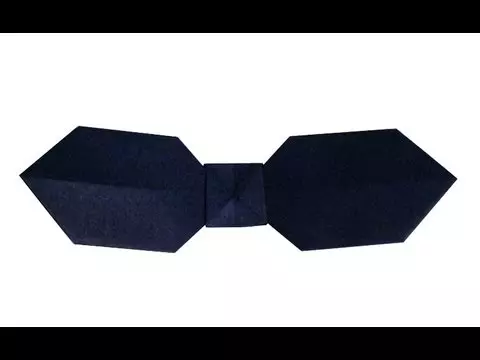
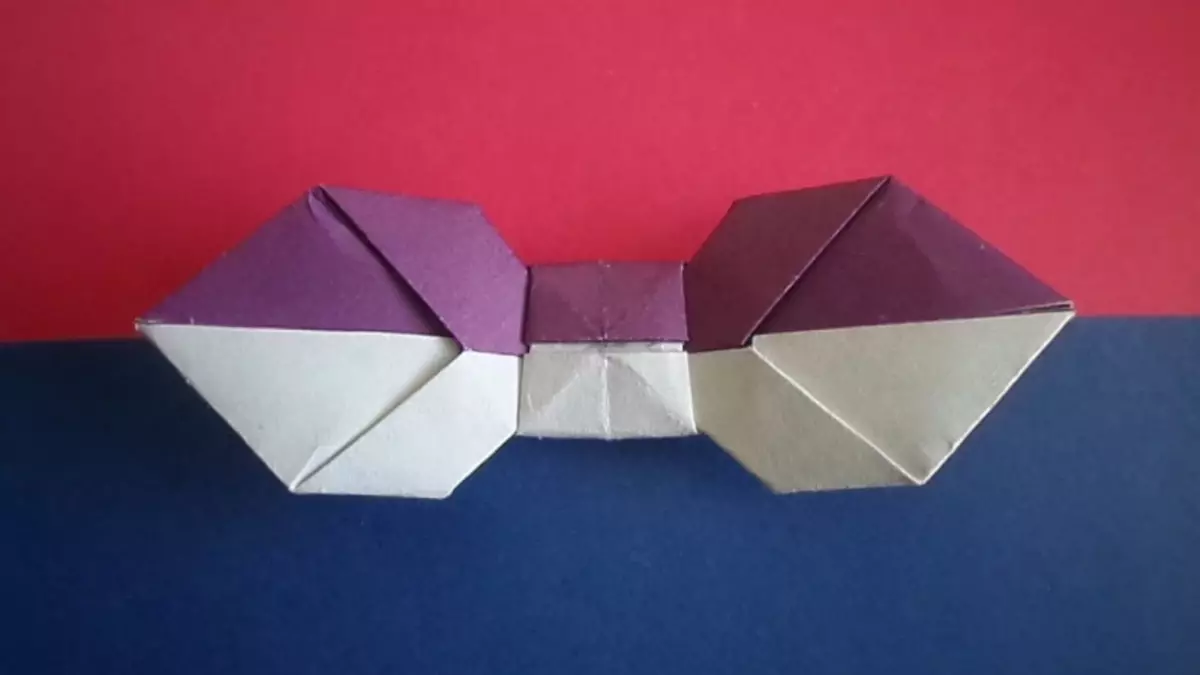
And now we turn to step by step instructions and start doing our bow bow.
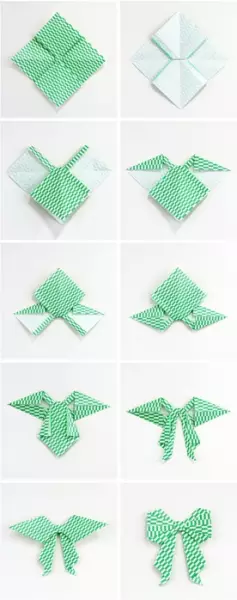
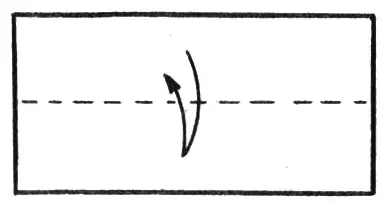
Take a rectangular sheet of small paper, about 20/8, but the size you have the right to choose yourself. I will drive it in half and distinguish back, while noting the central line.
Article on the topic: Electrovoebike do it yourself
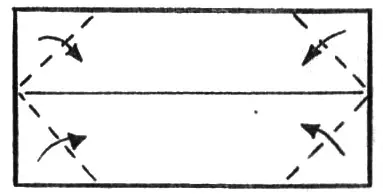
Now we add all four corners of the workpiece to the center line, as shown in the diagram.
We fold in half the upper and lower aspects of our rectangle to the central line.
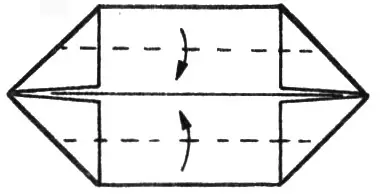
And now bend in half the whole workpiece.
On the other side, which remained smooth, we plan two angle from above and below.
These outlined angles bend inside.
Now this part of the workpiece bend on the left side. And repeat, too, with the other side.
Then you need to fold two corners to the center line, first on the one hand, and then on the other, all this is shown in the diagram.
And we fold two folds to the central line on both sides.
The place that is indicated in the circle scheme means that you need to keep it, you need to turn right.
And then bend inside, and here is our bow butterfly and ready. It can be folded with an ordinary white office paper, and then paint it yourself, but you can add right away with beautiful colored paper.
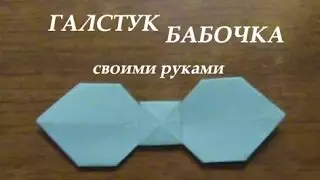
Video on the topic
Now we suggest you view a selection of videos in which it describes in more detail how you can make a bow and bow-butterfly bow.