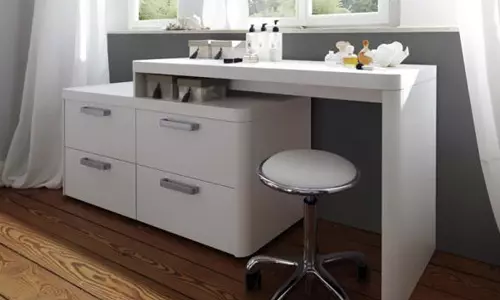
Photo
Without an elegant and comfortable dressing table in the bedroom can not do. Otherwise, where does the hostess put cosmetics and the necessary little things? And a large mirror is not a luxury, but a vital necessity. Of course, you can buy finished furniture assembled at the factory, or order the manufacture of an exclusive model in a specialized workshop. And you can collect an elegant, but a simple table with your own hands. This will require quite a little time, perseverance and skills in circulation with a joinery instrument.

Making a small dressing table is quite simple, you need only a few boards and carpentry tools.
Preparatory stage of work
Before you start collecting a table with your own hands, you need to create its drawing with the indication of all the sizes you need. Such a scheme will help in work, and you can avoid annoying mistakes and miscalculations. You can make a similar drawing yourself, inventing your own model of furniture, or to take a ready-made analogue for a sample. For example, a table circuit (Fig. 1) can be created according to drawings from the furniture catalog of the famous brand.
Of course, you can use your own sizes and change the design to your needs. It looks good for the dressing table, equipped with both one and two couches. In retractable boxes, you can remove the necessary trivia, and on the shelves - put cosmetics, home first aid kit and books. But you can redistribute places for storage to your own taste.
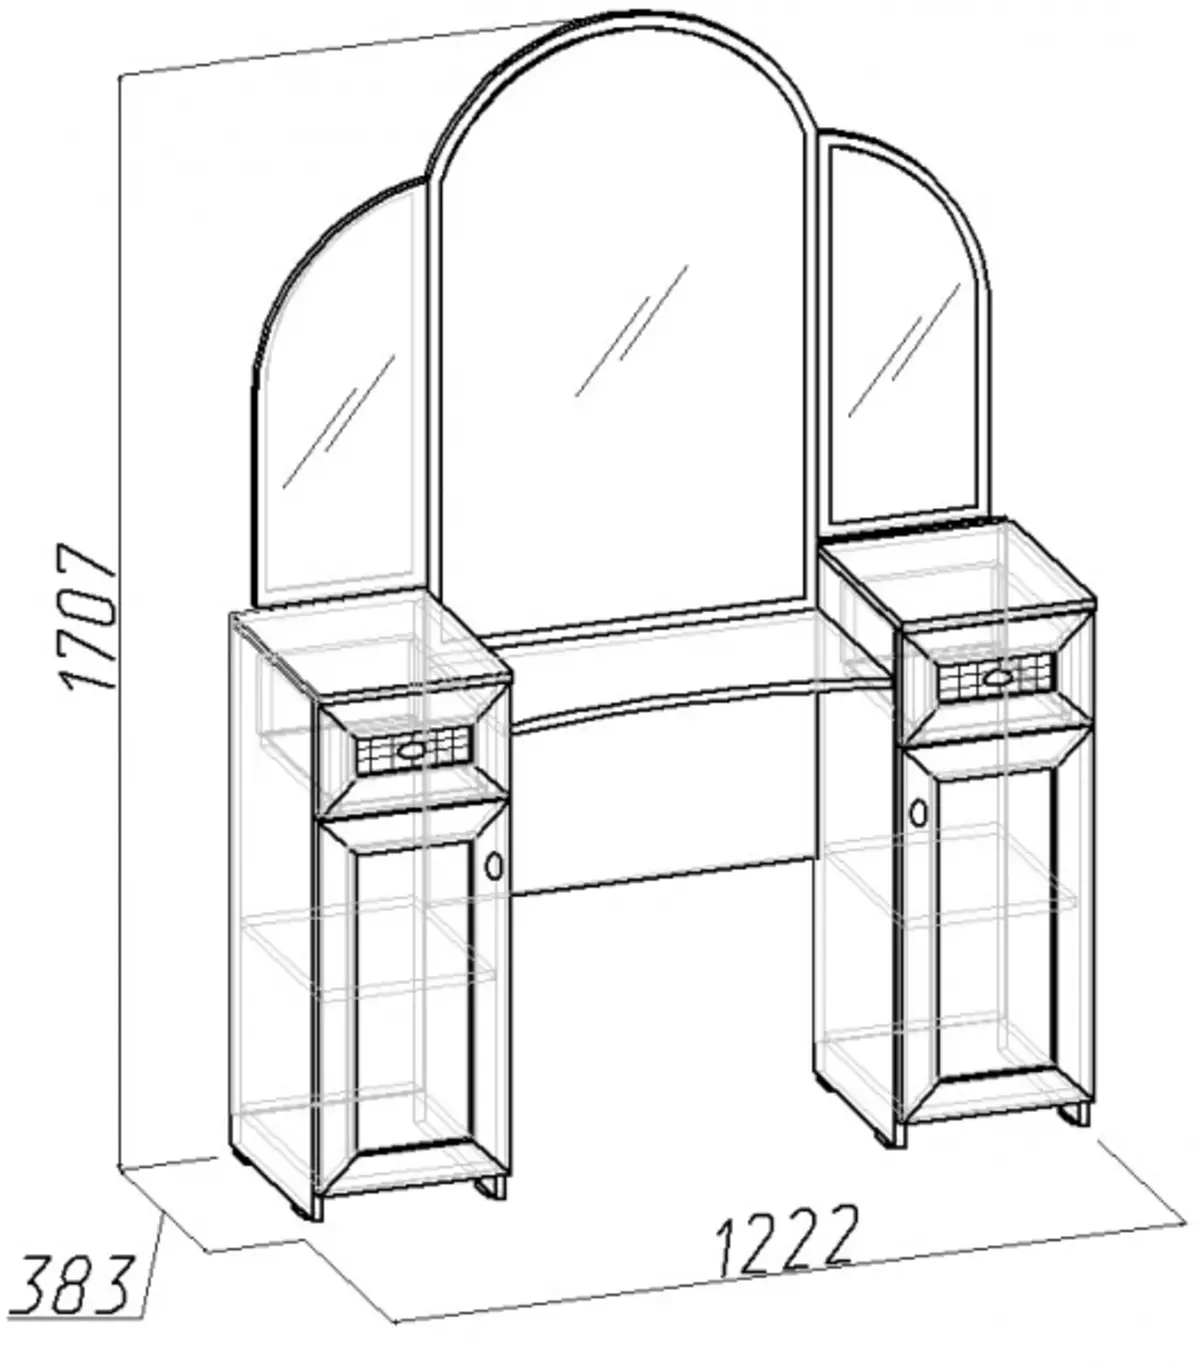
Figure 1. Drawing of the dressing table.
In any case, you will need the following tools for work:
- Electrode and a set of drills designed for wood work;
- screwdriver and set of necessary bits;
- Electrolovka or hacksaw with small teeth;
- A set of screwdrivers with various stamps and hexagon keys.
Do not forget to prepare tools for measuring: centimeter roulette, ruler, square and construction level. They will help you connect all items correctly. If you neglect checking the installation of fasteners, then the furniture may turn out to be deformed. For the required markup, use the usual pencil.
Article on the topic: Wallpaper in a girl room
Required materials for the manufacture of table
At the preparatory work, it is worth determining the location of the mirror. It can be made element table or mount on the wall. The easiest way to use the finished mirror. Then you will avoid time consuming and sufficiently difficult work on its installation.
It is also necessary to decide exactly how you will decorate the cutlets cuts. Homemade masters or simply grind them or put off and cover paint. But both of these methods are not too reliable. Experts advise to use the furniture edging ribbon (it is also called the end). You can buy it in stores selling products for repairing interior items. And for its installation you will need an iron or a construction hairdryer of low power.

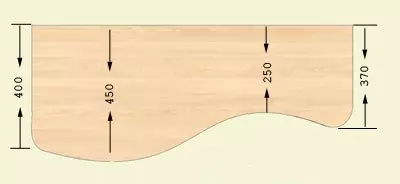
Figure 2. Scheme of the toilet table.
If you want to make a fantasy tabletop, it is easier not to drink it yourself, but contact the joiner's workshop. In this case, it is necessary to make paper or cardboard patterns of the surface in full size. The same service is provided in some stores selling chipboard and plywood. Specialists can help you choose the necessary shape of the table cover (Fig. 2).
Lastly, choose accessories. In addition to the handles, you will need furniture loops, canopies and guides for drawers. You can choose roller or ball structures. The advantages of the first are quite low cost. Ball guides are more reliable and more convenient in operation.
For fastening elements, self-tapping screws and Eurobolta are used (configmatics). All nodes can be more reliable and more durable if they are additionally punctured by the usual PVA glue. If you choose this method of fixation, then you will also need clamps for tightening parts to their complete drying. And to improve the appearance of the table, use special plastic plugs that cover bolt hats.
Article on the topic: Types and features of rafting structures
For the manufacture of the table you will need chipboard, LDSP or sufficiently thick plywood (a thickness of at least 16 mm). In addition, this subject of the interior can be collected from a solid carpentry shield, but then the furniture will turn out much more massive.
Build a dressing table

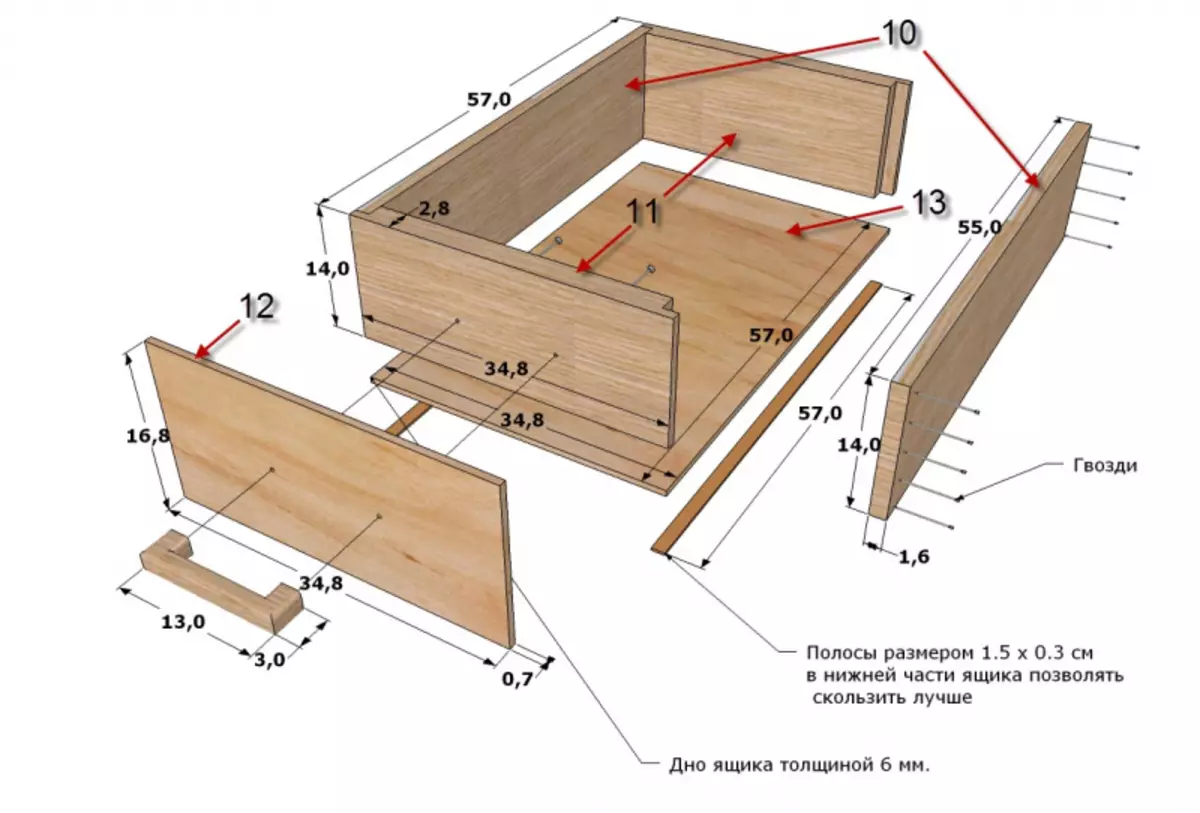
Figure 3. Toilet table assembly scheme.
Made a table with your own hands, first of all it is necessary to form a countertop. If you drink it yourself, then pre-take the surface of the sheet on the markup of construction paper tape. And then form cut over it. This will allow you to get rid of chips, chips and extra chips.
Next, you need to process the front edge of the lid. It is grinding the coarse grinding paper is gluing and ground with glue (a standard "moment" is suitable for this). The primer layer must be allowed to dry. Then you need to lubricate the surface once again with glue and only then install the ends.
Next, the tape must be glued using an iron. The temperature of the device must be exhibited on "cotton". In no case do not spend the hot surface along the tape itself. Ride between iron and furniture clean cotton rags. Excess the edges are cut using a stationery knife and cleaned sections. Similarly, the rack under the mirror is drawn.
Next, the sidewalls of the Tumb (pre-discharged according to your size) must be placed on the installation of the guides for the boxes. Determine the location of the box as follows.
The sequence number of the box (starting from the top) x the height of the wall + the height of the finishing edge = 25 mm.
If your drawer is the height, for example, 140 cm, and the height of the edge is 4 mm, then the following calculation is obtained:
- 1 box: 1x140 cm + 4 mm - 25 mm = 119 mm;
- 2 box: 2x140 cm + 4 mm - 25 mm = 259 mm.
Accordingly, the guide (its center) for 1 box is attached at a distance of 119 mm from the top cutting of the sidewall, and the second is 259 mm. After fixing the guides, it is necessary to collect the drawers themselves. Pay attention to the work scheme (Fig. 3).
Article on the topic: how to withdraw the green from clothes
In the side blanks of the walls, the holes are dried in the plane, in the front and rear parts form the same nests into the end. EUROBOLTAs or wooden wanners can be used as retainers. First, the walls are collected around the perimeter, then the bottom is fixed on them. It can be made of fine plywood or organic. Then the guides are fastened with self-sides. If you use roller structures, do not forget that for each side its guide is installed.
Final processing of the table
Next mounted the couches. Side details are joined upper transverse ties (bar). Then the bottom is fixed. Before installing ties, form holes in them for fastening the table top. Lastly, the table lid is installed, the facades on the boxes, fittings and doors to storage departments.
If you collected a table of laminated slabs, then on this work can be finished.
In the case of a chipboard or plywood, your product needs a final finish.
First of all, all sections and sleeps must be carefully sand and polished. Then the surface can be covered with mourn or paint.
In the first case, you can make the structure of the tree more apparent. And if you use a tool with coloring pigments, the table will look like a collected from the valuable wood. If you want the furniture to purchase a glossy glitter, then treat the surface with varnish. Otherwise, the table will remain matte. If desired, this subject of the interior can be painted.