
Hexahedron or cube is a polyhedron, all sides of which are squares. Love riddles and puzzles? This article will teach you how to make a cube of paper or cardboard. Consider such unusual products like a Joshimoto cube and a cube transformer.
From scan
Scratches are called schemes that allow you to make a bulk figure from paper or cardboard. First, learn how to build a scan. For its manufacture you need paper, pencil, ruler and scissors.
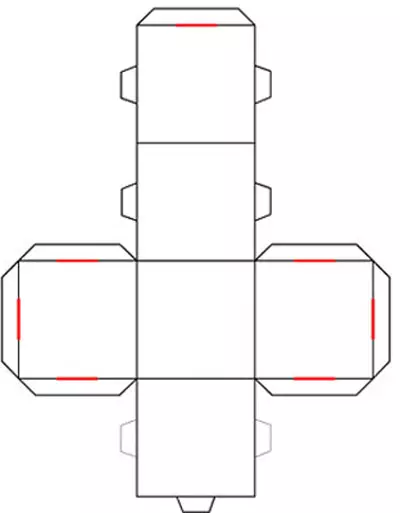
All sides of the cube are squares. It means that to start on a sheet of paper you need to draw a square. At the same time, do not forget about the rules of geometry - in the square, all parties are equal, and the angles are 90 °. Next, remember how many faces of the Cuba - six. That is, the scheme for gluing them must also be six. Around the central square draw four squares. Where else is one more? Just draw it on the side from one of the squares. The faces are in place, there is not enough allowance for gluing. They need to be drawn on three side squares. They make up 0.5-1 cm.
Do not forget to cut their corners at an angle of 45 °, so they will not interfere with gluing the figure.
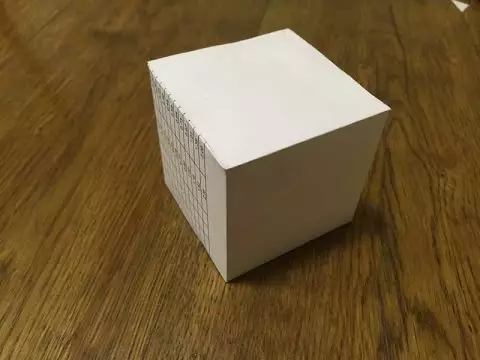
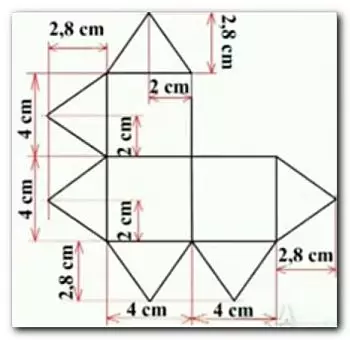
Scan ready! That's what you should get:

Now you need to arm yourself with scissors and glue and assemble the figure. Cut the scissor with scissors. Next, you need to bend all the edges of the cube, as well as the allowance. Lubricate the face with glue and connect the cube together. Volumetric Cube of Paper Ready!
Origami Kubik
Origami technique is very ancient. Her appearance is associated with the manufacture of paper in ancient China. Her secret was adopted by the Japanese, the art of origami originated. Previously, the figures, isolated from paper, wore a sacred meaning. They decorated temples, wedding and mourning ceremonies. The Japanese believed that sick balls suspended above their heads, folded in the origami technique, will help to remove the disease and evil spirits. Later this art began to wear not only religious, but also entertainment.
Article on the topic: Technique Enterlak knitting needles for beginners with description and photo
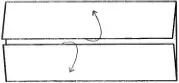
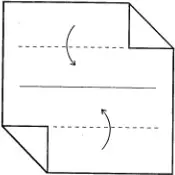
Most of the origami schemes occur since ancient times, but modern masters have made a considerable contribution to the development of this unusual type of creativity. We suggest you try to fold the cube in the Origami technique. To do this, take a square sheet of paper and make a fold in the center, and then bend the edges to the middle. Such an initial figure is called the door.
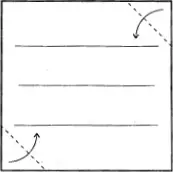
Next, expand the workpiece and bend the corners as shown in the diagram:
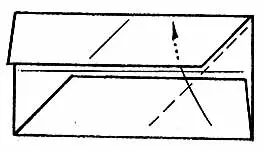
Fold the edges to the center and fill the upper and lower corners in the pockets:
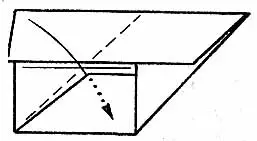
Turn over the workpiece and bend over the lines indicated in the diagram:
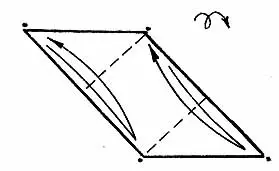
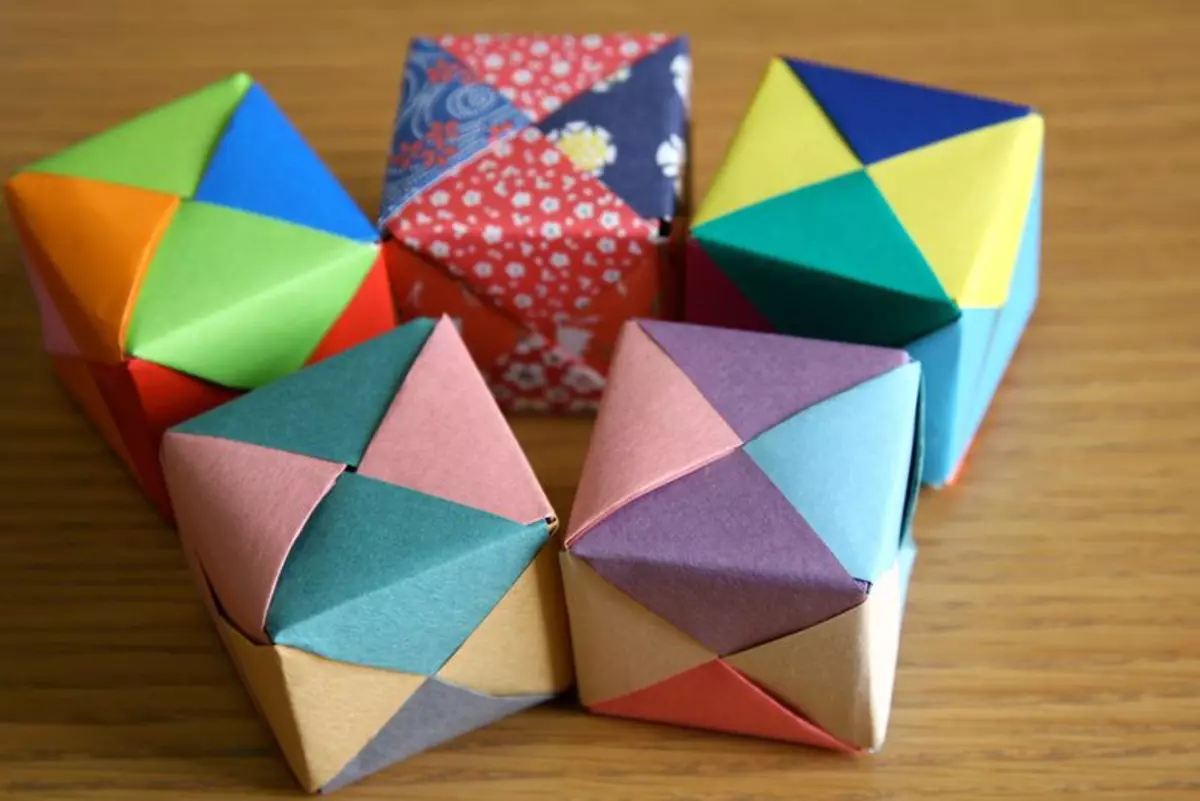
It turned out the module. To collect the cube of such modules you need six. There are pockets in each detail, adjacent modules are inserted into them. Connect the details according to the scheme:
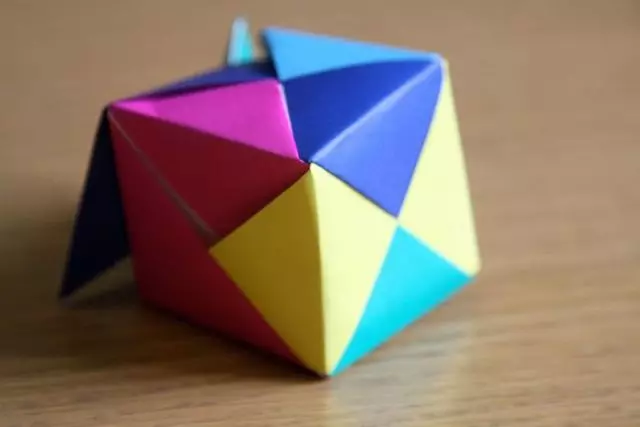
Origami Cube is ready. For beauty, you can make every line of paper of different colors.
Unusual puzzle
Want to please your favorite kids with an unusual puzzle or make an unforgettable photo album? Then you use a small master class to create a cube transformer. On each face of such a cube, you can arrange a picture or photo, and in still six more pictures.
For the manufacture of such a cube you will need:
- 12 pictures or photos;
- Glue;
- 8 cubes with 4 cm grain;
- Scotch.
Cubes can be taken the most ordinary children or glue to such a scan:
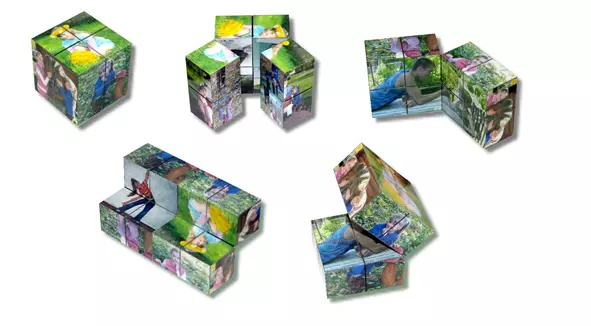
To begin with, look at the fastening of cubes:
It is important to understand! The entire secret of transformations of such a puzzle is to properly gluing cubes.
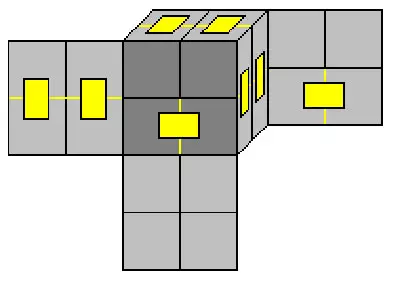
To make it more clear, consider this process step by step. First glue two pairs of cubes as shown by yellow stripes in the diagram:
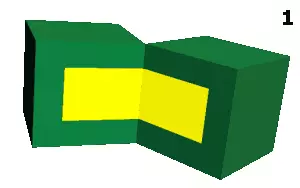
Place these four cubes nearby and glue in places indicated in blue:
Put the cubes as shown in the diagram. At the same time, the yellow gluing will be from the opposite red. Glue over red lines:
Article on the topic: Knitted cap for the boy Amigurumi

The photo needs to be located on the fourth of cubes. Photo size 8 by 8 cm.
It is important to glue the photo neatly, especially if you do it with glue. Otherwise, it is possible to glue those verses with a lacaround that are responsible for the correct transformation of the puzzle. So it is better to use hot glue or bilateral scotch.
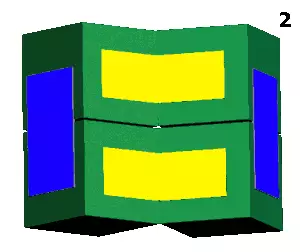
An unusual photo album from a transformer cube is ready! As you can put it and view pictures, you can see in the photo:
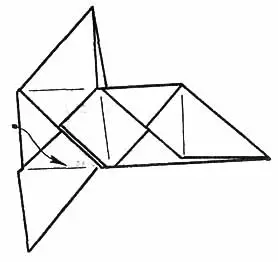
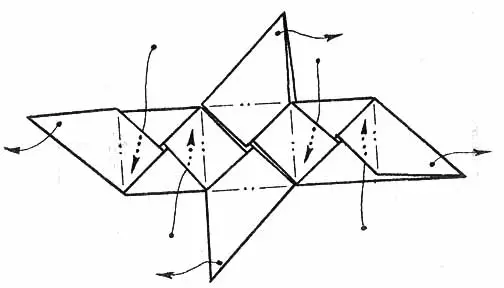
Japanese invention
This puzzle can be not only the Cube itself, invented by the Japanese scientist Naoki Yoshimoto in 1971, but also the assembly of this unusual product. According to this scheme, you need to collect 48 pyramids.
How to collect this wonderful handicraft and about its transformations, you can visually see in this video language:
Video on the topic
In more detail about the manufacture of cubes and puzzles, consisting of them, you can see in the selection of video suggested below. Enjoy your creativity!