
Geometric pieces of paper must learn to do everyone! After all, you never know what knowledge you can come in in life. Recently, the Origami technique is gaining wide popularity among children and adults. But before making a variety of crafts (animals, birds, plants, small houses), you need to start with simple geometric shapes. Such products are suitable for schoolchildren for a good visual representation of different figures.
Mastery cubic
So, for today's master class, we use paper, schemes, glue, scissors, rules and a little patience.

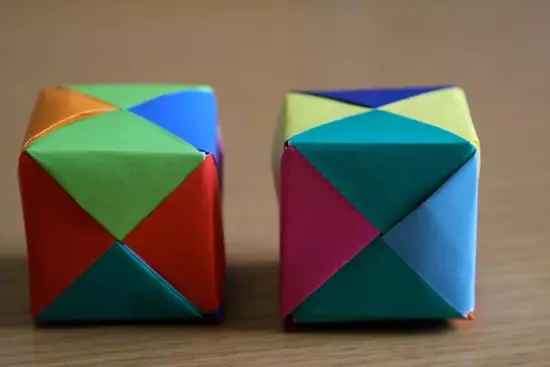
Cube is the simplest figure for origami, a simple polyhedron, in which each facet is a square. The scheme for creating a sweep can be printed on the printer, or draw yourself. To do this, choose the size of the faces. The width of the paper sheet should be at least 3 sides of one square, and the length is not more than 5 sides. Four squares in the length of the sheet, which will become the side of the cube. Draw strictly on one line, closely. Over and under one square draw one square. Dorisite strips for gluing, thanks to which the edges will be connected with each other. Our cube is almost ready!
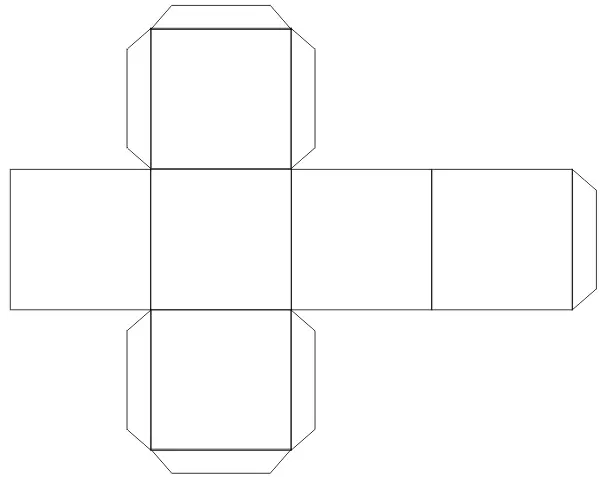
Next, the thin layer of glue is evenly smearing the connection places. To glue these surfaces and fasten for a while with the help of a clip. The glue will be captured about 30-40 minutes. Thus glue all the face.
Crafts are more complicated
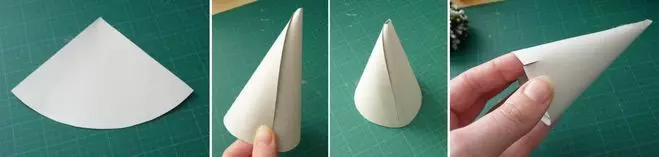
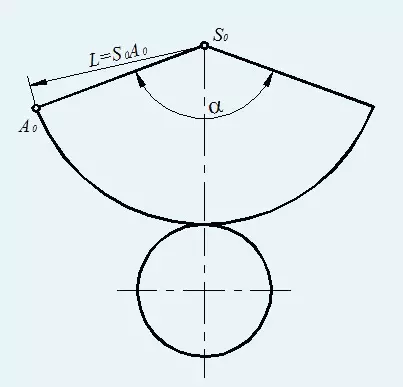
The cone is made a little more difficult. To begin with, draw a circle circle. Cut sector (part of a mug, limited arc circumference and two radius) from this circle. The sharpness of the end of the cone depends on the cut part of the large sector.
Glue the side surface of the cone. Next, measure the diameter of the base of the cone. Circle draw a circle on a sheet of paper. Then draw triangles to glue the base from the side surface. Cut. After gluing the base to the side surface. Crafts ready!
Article on the topic: Folding wool bags: Master class for beginners
Sophisticated parallelepiped

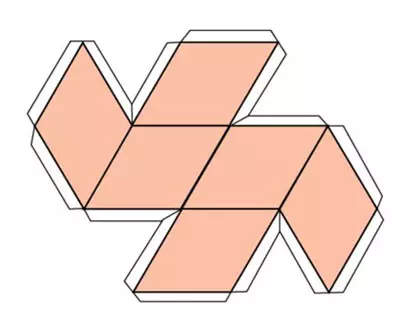
The parallelepiped is a complex figure of a polyhedron, in which 6 faces and each of them parallelograms.
To make a parallelepiped Origami technique, you need to draw the base - parallelograms of any size. On each side of it, paint side sides are also parallelograms. Next, from any side of the sides, draw the second base. Add bonding space. The parallelepiped can be rectangular if all parties have straight corners. Then cut the scan and glue. Ready!
Pyramid origami
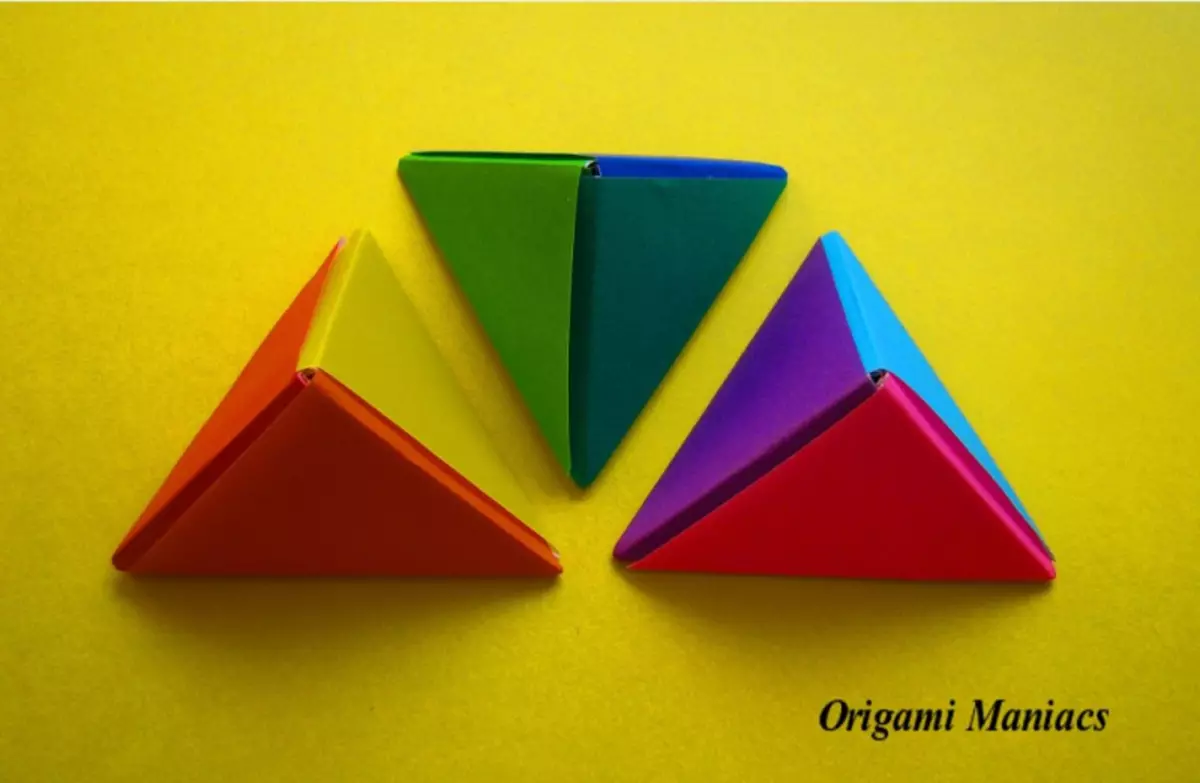
It's time to make a paper pyramid. This is a polyhedron, the base of which is a polygon, and other faces are triangles with a total vertex.
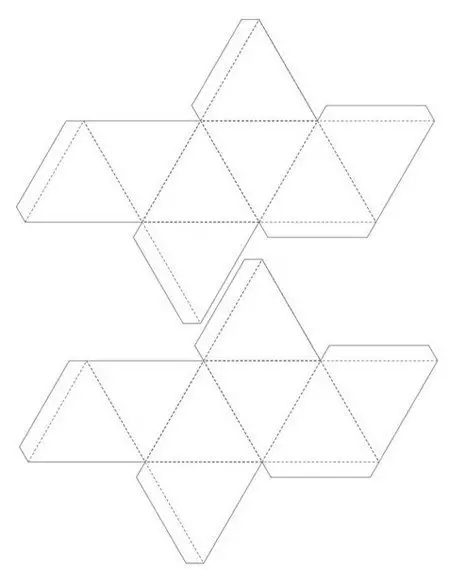
First you need to select the sizes of the pyramid and the number of faces. Next, draw a polyhedron - it will be the basis. Looking at the number of faces, it can also be a triangle, square, pentagon.
From one of the sides of our polyhedron, draw a triangle that will be the side. Then draw another triangle to one side to be common with the first triangle. Draw them as much as sides in the pyramid. Next, draw strips for gluing in the necessary places. Cut and glue the shape. Pyramid is ready!
Paper cylinder
The cylinder is a geometric shape bounded by a cylindrical surface and two parallel planes that intersect it.
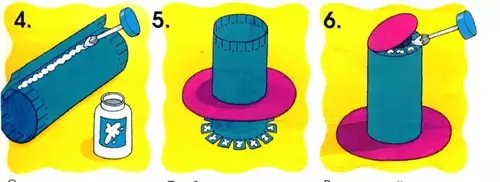
Draw a rectangle on paper in which the width is the height of the cylinder, and the length is the diameter. Geometry lovers know that the ratio of the length of the rectangle to the diameter is determined by the formula: L = nd, where L is the length of the rectangle, and D is the diameter of the cylinder. With this calculation, find out the length of the rectangle, which we will draw on paper. Dorisite small triangles for gluing details.
Then draw two circles on paper, diameter as a cylinder. It will be the top and lower base of the cylinder. Next Cut all the details. Glue the side surface of the cylinder from the rectangle. Give the details to dry and glue the bottom base to it. Wait again until driving, and glue the top base. Ready!
Article on the topic: How to weigh a wide bracelet from rubber stakeholder for beginners with video
