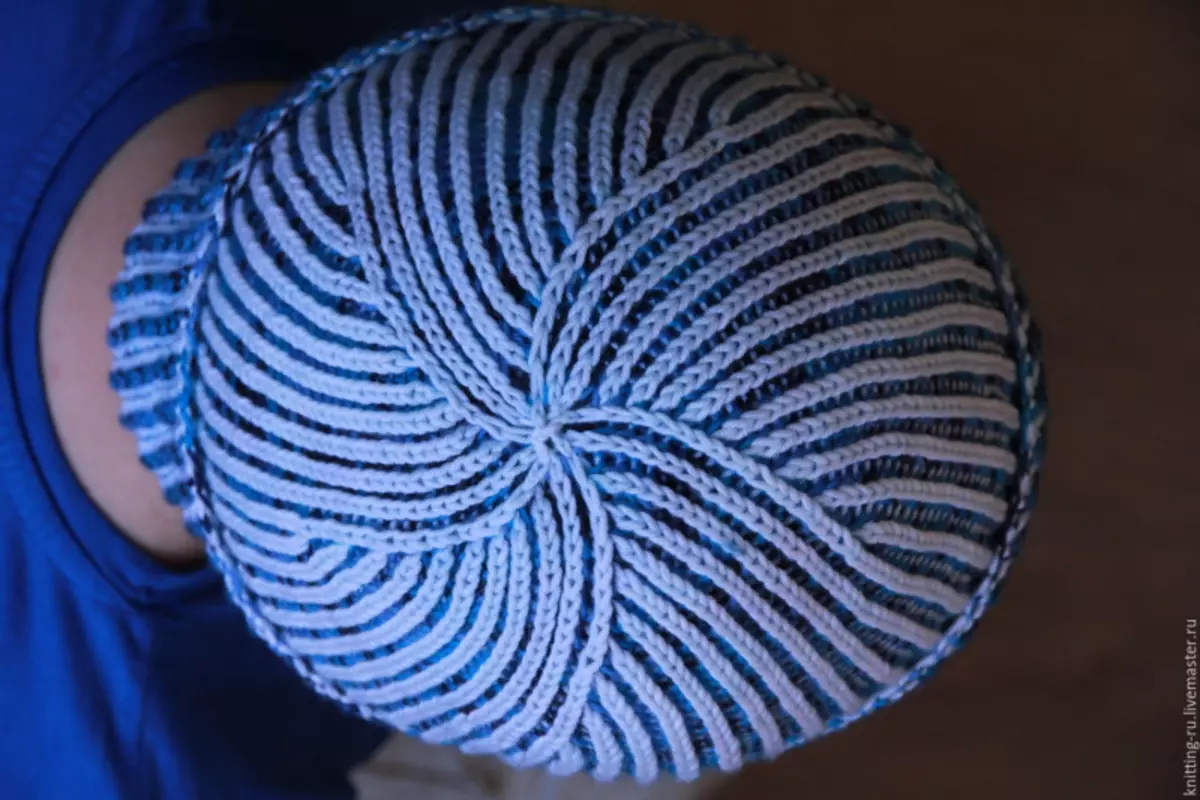
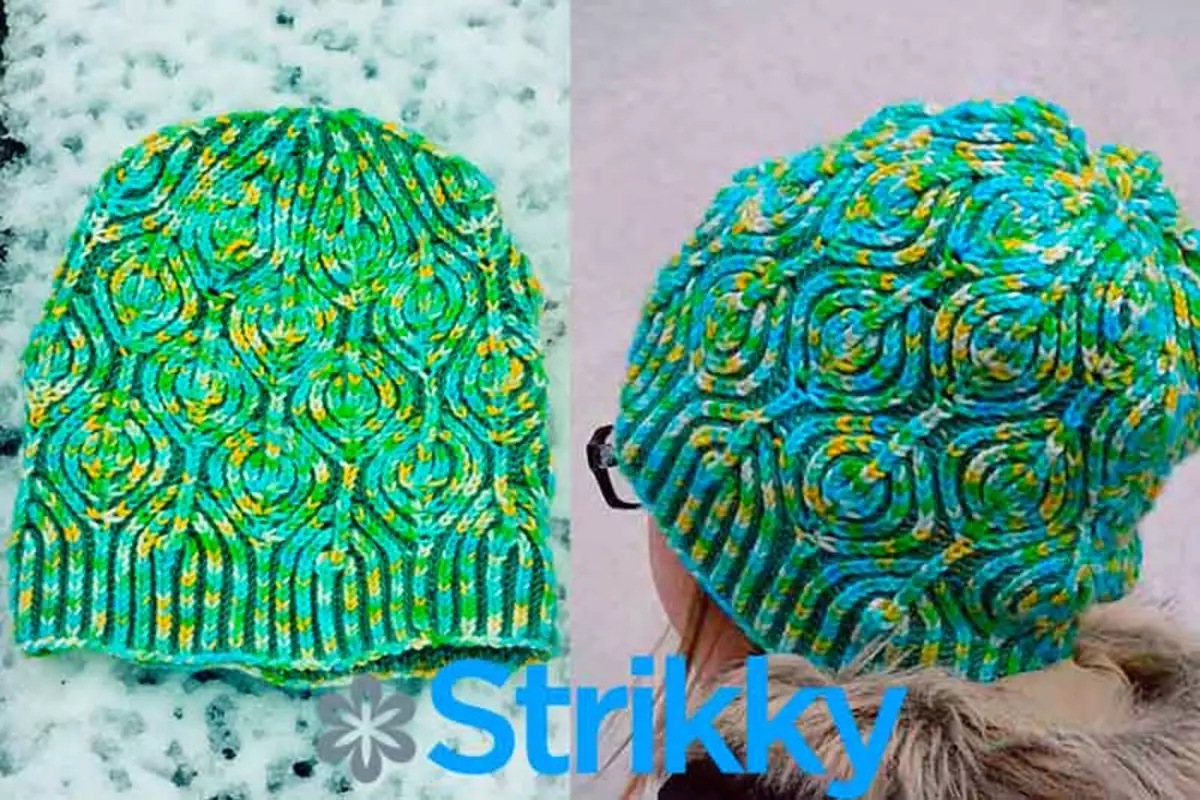
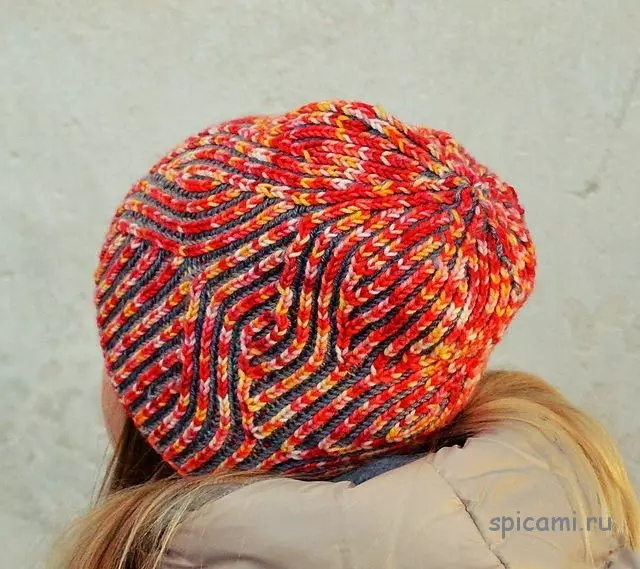
We offer you to master the new, popular and interesting knitting caps in the brain technique. Brioche is a swinging of an English or patent loop in various color combinations and in different directions. It has the same facial and irons.
Technique of two-color English gum on video:
Knitting scheme:
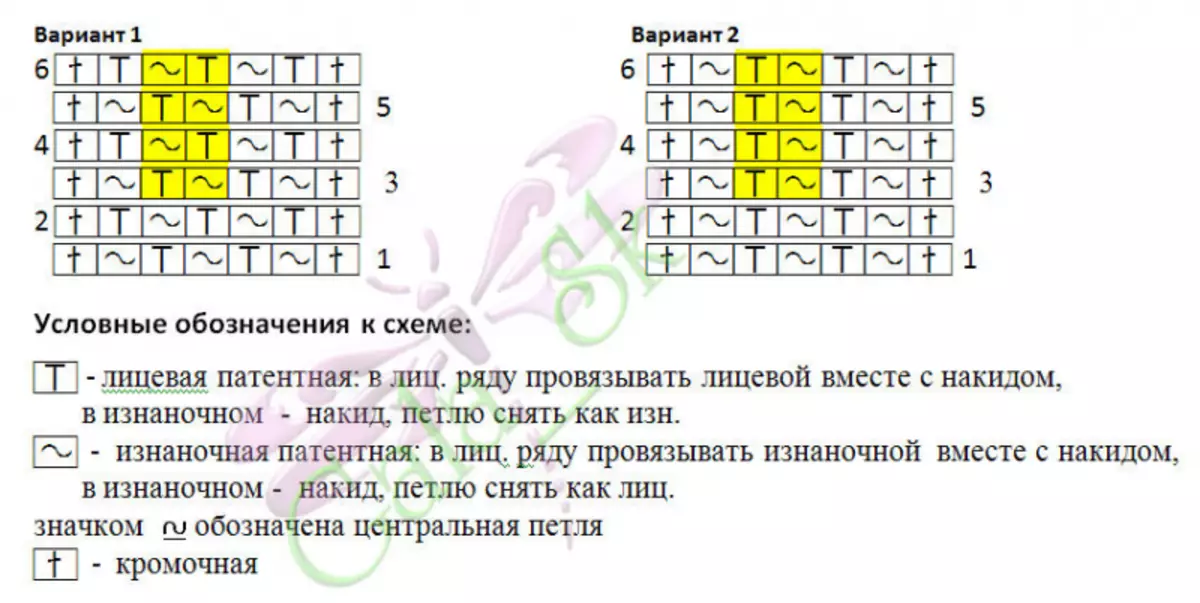
1st version of the scheme - bilateral knitting. 2nd option - knitting on ring spokes.
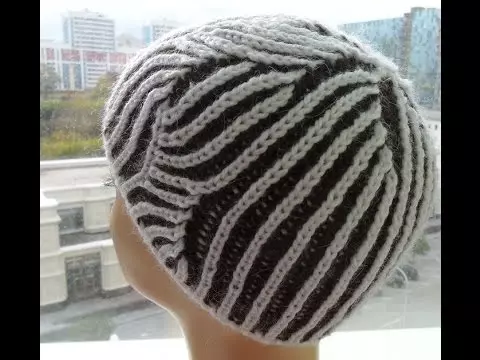
Depending on the combination of nakud, facial and invalous loops, it is possible not to simply knit two-color gum, but to make patterns. These patterns are distinguished by unusual and brightness, and the stuff-related things are well protected from the cold and are bilateral. If you wish, you can create your own patterns.
We master the technique
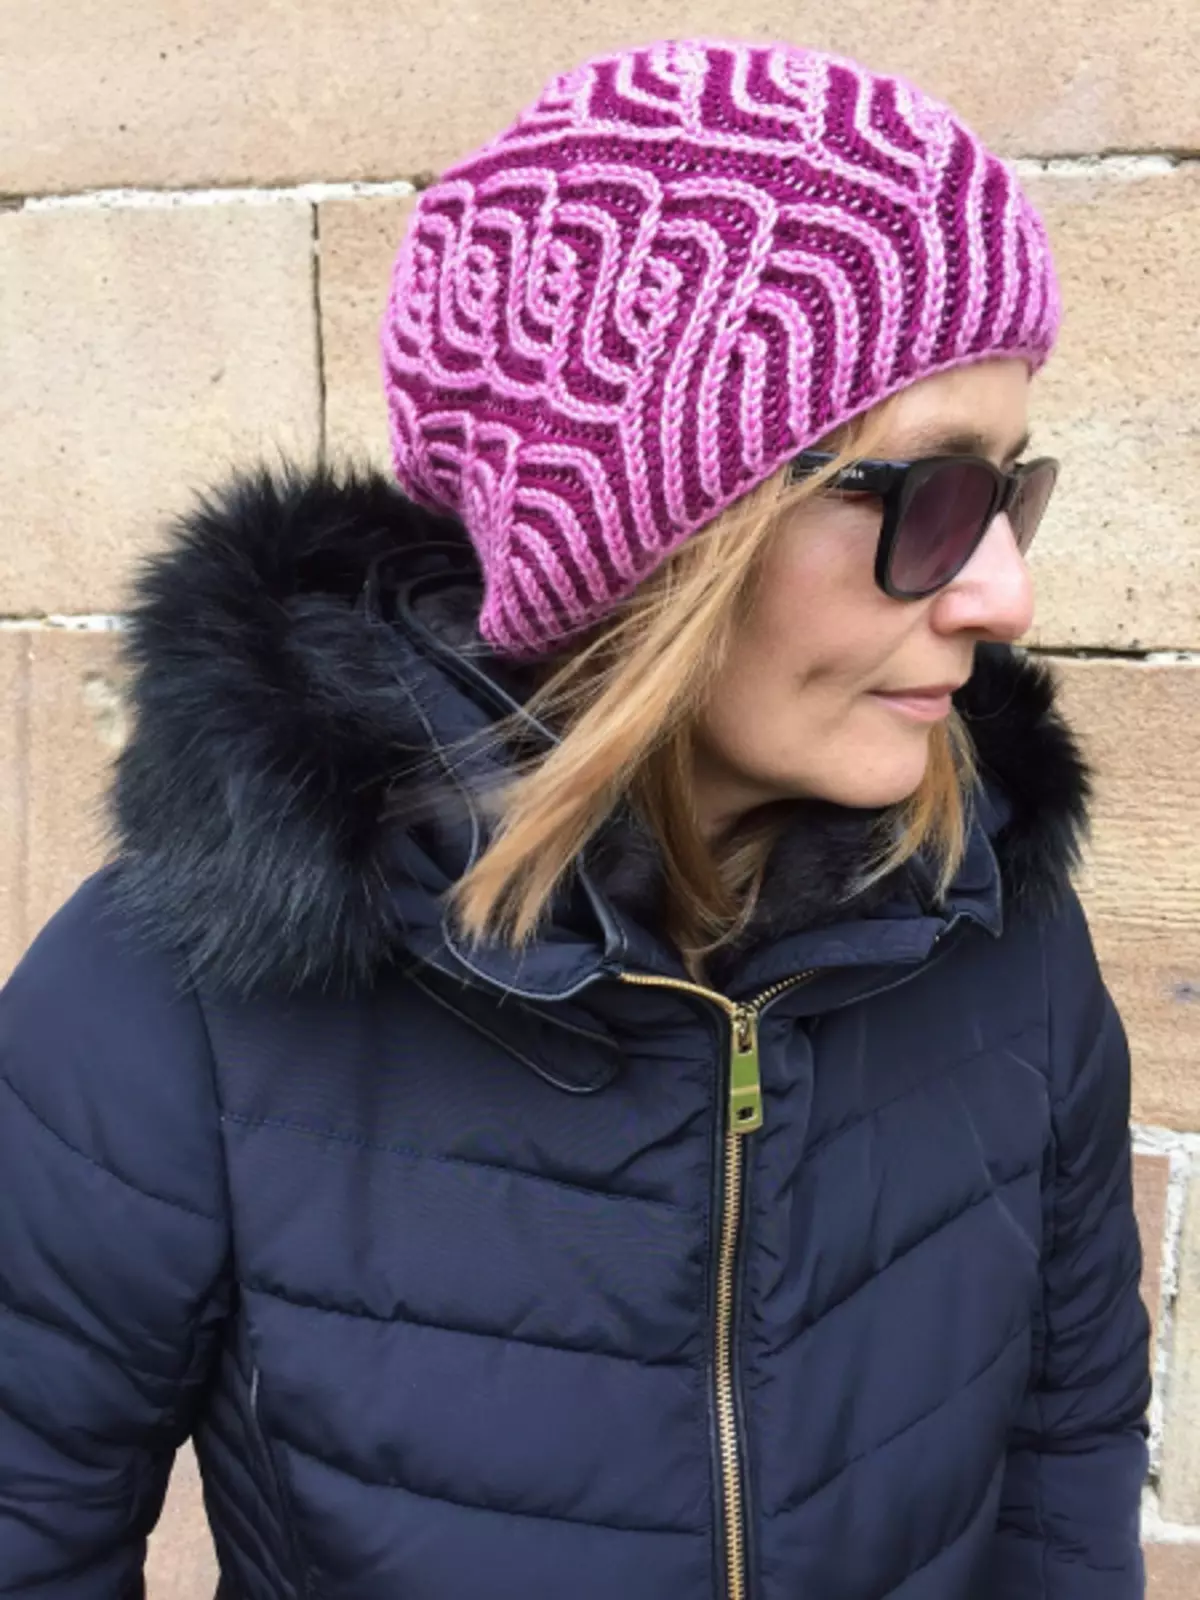
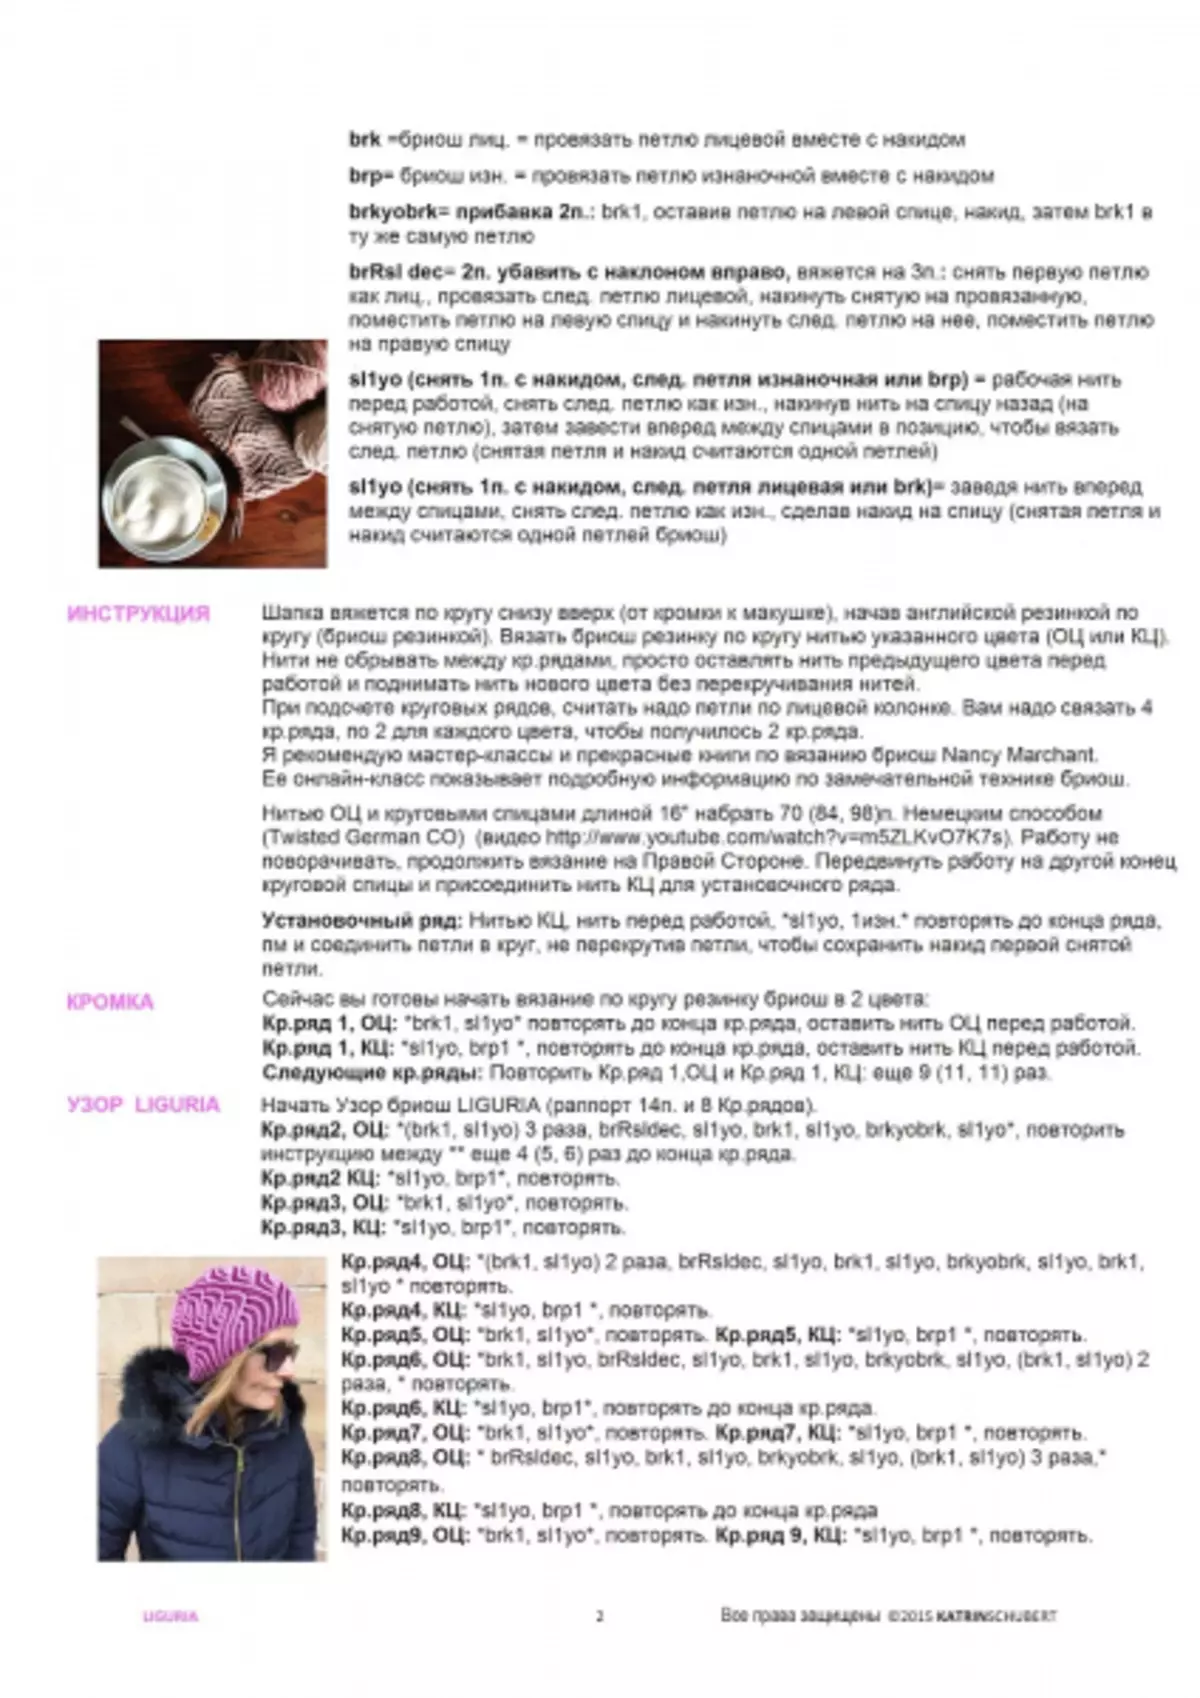
Before moving to the master class, there is a small remark. To work in the technique, Briham uses two colors, the yarns fit into one thread, but the pattern manifests itself from two sides of knitting in different color versions, thanks to this, brick hat can be put on one, then on the other side.
Please note that this technique requires a dense knitting, otherwise the drawing will not work.
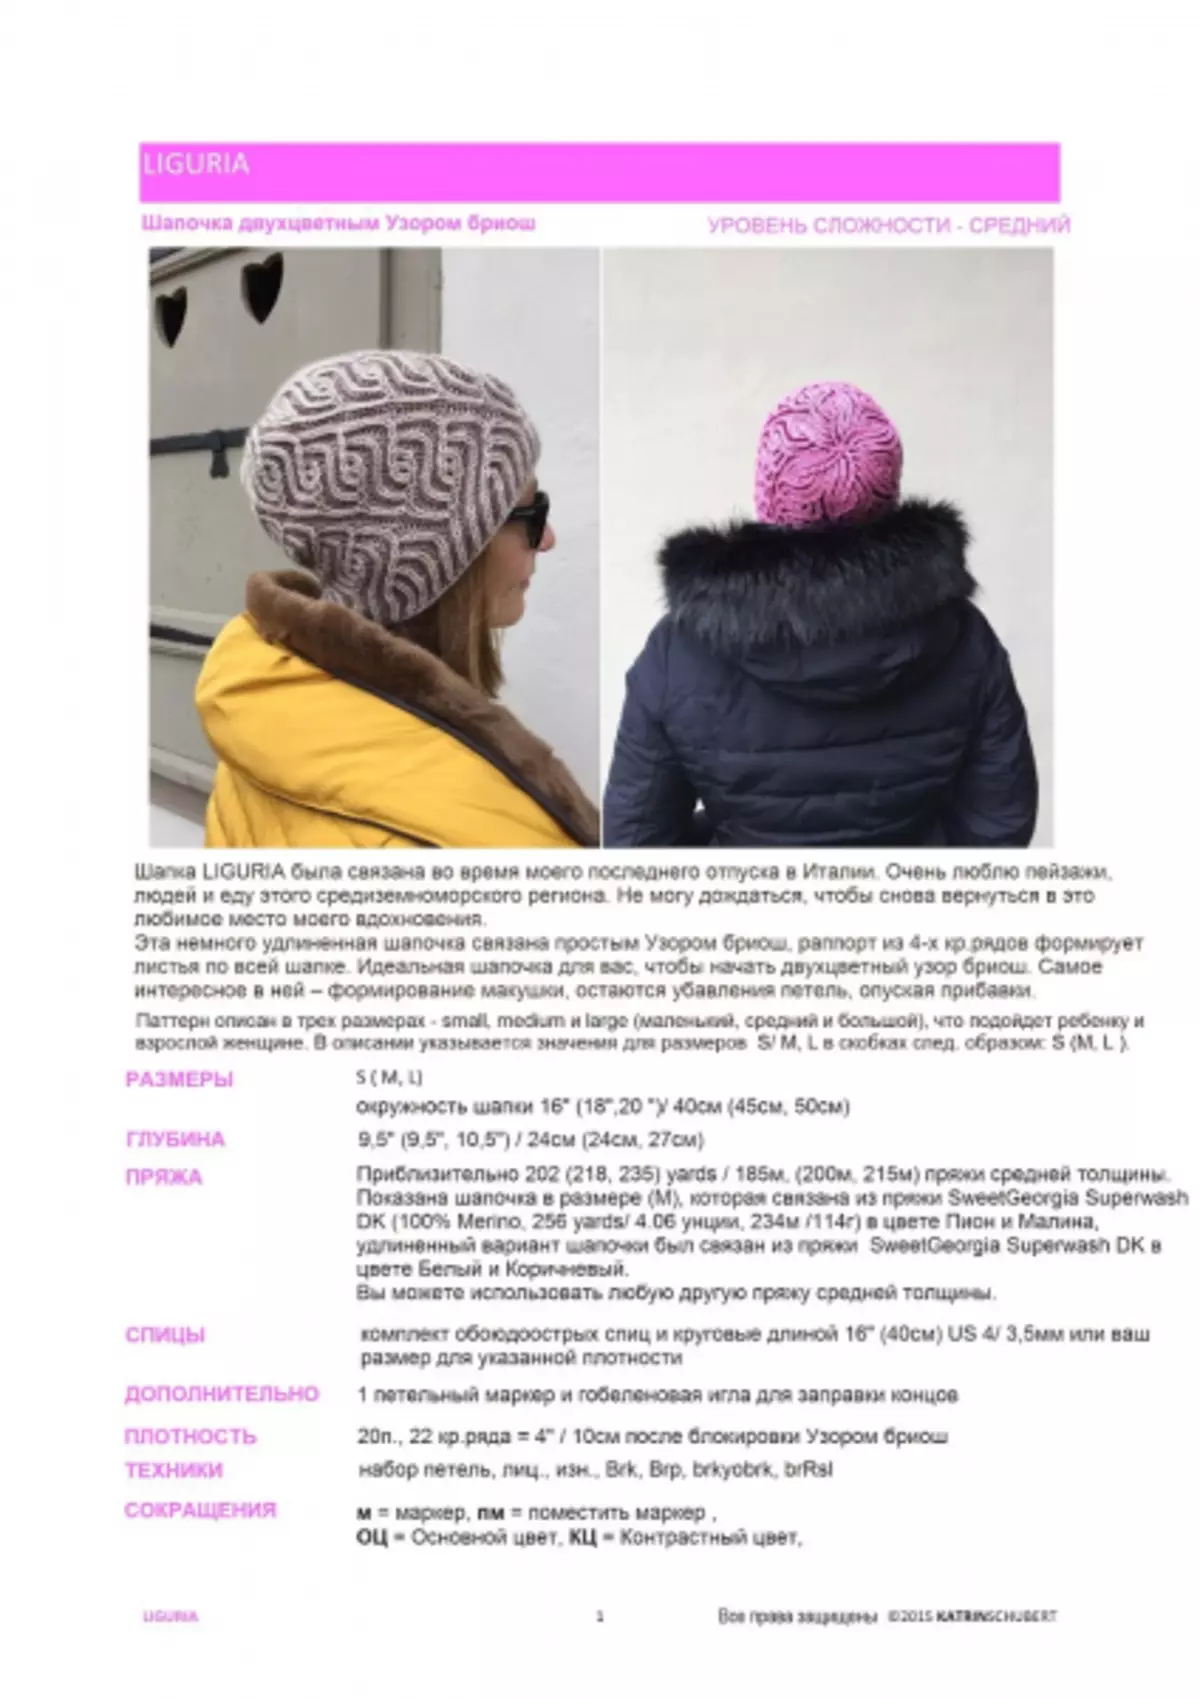
A simple pattern of this slightly elongated haood Brioche will even starve even beginners. The most interesting thing in the process of her knitting is the formation of the crown. The size M (medium) is presented in Figure: Circle - 45 cm, Depth - 24 cm. You will need: Middle thickness yarn - 200 m, straight and circular (40 cm) Spokes No. 3.5, marker or pin, tapestry needle. Knitting density: 20 px22 p = 10x10 cm after blocking.
DESCRIPTION OF WORK: The hat is tied in a circle from the lower edge to the top of the top, it begins with an English elastic band in a circle of the main color (OC) or a thread of contrasting color (CC). In the process of work, the threads are not broken, but remain before work, the thread of the new color rises without twisting. Calculation of circular rows is carried out on the front side. Tie 2 round rows each color (only 4 rows).
Article on the topic: Appliques from cotton disks and chopsticks do it yourself with video
Thread OC on circular spokes to dial 84 loops in German:
Knitting does not rotate, continuing on the right side. Move the work to the other end of the circular needles and attach the CC thread for the installation row.
Legend:
- Bl - briouse facial - to penetrate the face of the face together with Nakud;
- Bi - Brichine Pour - Put the Pavement Loop with Nakud;
- P2 - 2 loop: Bl, leaving a loop on the left spoke, nakid, then bl in the same loop;
- 2Punk - 2 loops. Dropped with a slope to the right, fit on 3 loops: Remove the first loop as the facial, to penetrate the next loop of the face, throw the removed on the rest, put a loop on the left needle and throw the next loop to it, put a loop on the right needle;
- Sopen - Remove one loop with an attachment, the next loop Invented or bi: Working thread before knitting, remove the next loop as an invalid, throwing the thread on the back of the back (on the removed loop), then start ahead between the knitting needles to knit the next loop (removed loop and nakid are understood as one loop);
- Copen - Remove one loop with an attachment, the next loop facial or bl: heading the thread ahead between the knitting needles, remove the next loop as an invalible, making a nakid to the needle (the removed loop and the nakid are understood as one brick-loop).
Installation range: CC thread before work, * Copying, 1 out. * Repeat to the end of the row, connect the loops in the circle, trying not to twist the loops to save the nakde of the first loop removed.
Head: knitting in a circle with a rubber band in 2 colors. Circular series 1, OC: * BL, Popen *, until the end of the row, leave the thread of the OC before work. Circular series 2, CC: * Popen, Bi1 *, to the end of the row, leaving the thread of the CC before work. The following circular rows: repeat the circular range 1 and a circular range of 2 11 times.
Article on the topic: Crafts from the flaps of the fabric do it yourself for the house with photos and video
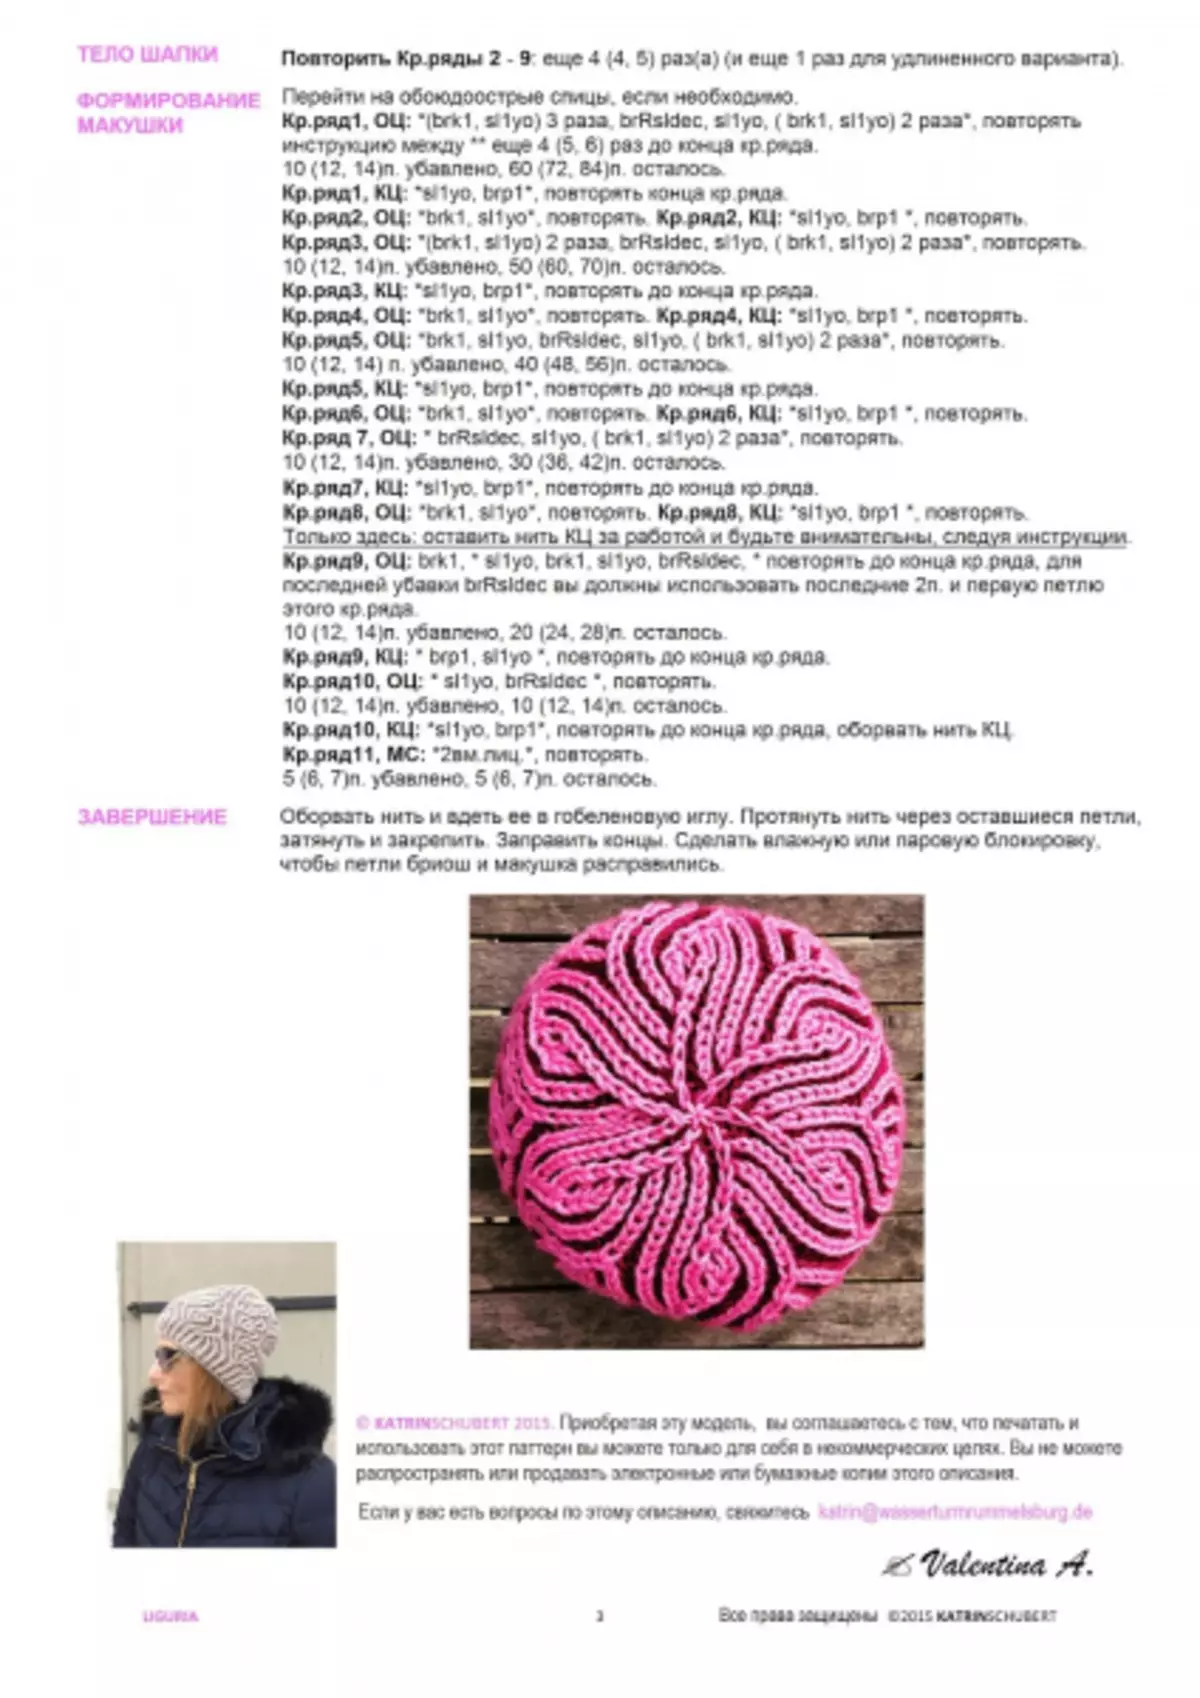
Liguria pattern: Rapport 14 loops and 8 edge rows. Circular row 2, OC: * BL1, Popen, repeat 3 times, 2Punk, Popen, BL1, P2, Popen * Repeat from * and to * another 5 times. Circular series 2, CC: * Popen, bl1 *. Circular row 3, OC: * BL1, Copen *. Circular row 3, CC: * Popen, bl1 *. Circular series 4, OC: * bl1, Copen, repeat 2 times, 2Punk, P2, P2, P2, P2, P2, Popen *. Circular series 4, CC: * Popen, bl1 *. Circular row 5, OC: * BL1, Copen *. Circular row 5, CC: * Popen, bl1 *. Circular row 6, OC: * BL1, Copen, 2Punk, P2, P2, P2, Popen, (BL1, Popen) * Repeat 2 times. Circular series 6, CC: * Popen, bl1 *. Circular series 7, OC: * BL1, Copen *. Circular series 7, KC: * Popen, bl1 *. Circular series 8, OC: * 2Punk, P2, P2, P2, P2, Popen, (bl1, Popen) repeat 3 times *. Circular row 8, KC: * Popen, bl1 *. Circular row 9, OC: * BL1, Popen *. Circular row 9, KC: * Popen, bl1 *.
Repeat the circular rows 2-9 more than 4 times (5 times for the elongated version of the header).
Makushka formation. Go to straight knitting needles if you wish. Circular row 1, OC: * (BL1, Popen) Repeat 3 times, 2Punk, Popen, (bl1, Popen) 2 times * Repeat 5 times to the end of the edge row (12 loops of the Ubaulo, 72 remained). Circular series 1, CC: * Popen, bl1 *. Circular series 2, OC: * BL1, Popen *. Circular series 2, CC: * Popen, bl1 *. Circular row 3, OC :: * (bl1, copun) 2 times, 2punk, copun, (bl1, mopen) 2 times *. (12 loops are Ubuleno, 60 remained). Circular row 3, CC: * Popen, bl1 *. Circular series 4, OC: * BL1, Popen *. Circular series 4, CC: * Popen, bl1 *. Circular row 5, OC: * BL1, Copen, 2Punk, Copen, (bl1, Popen) 2 times *. (12 loops are Ubuleno, 48 remained). Circular row 5, CC: * Popen, bl1 *. Circular row 6, OC: * BL1, Popen *. Circular series 6, CC: * Popen, bl1 *. Circular series 7, OC :: * 2Punk, Popen, (bl1, Popen) 2 times *. (12 loops is unheated, 36 left). Circular series 7, KC: * Popen, bl1 *. Circular row 8, OC: * BL1, Copen *. Circular row 8, KC: * Popen, bl1 *. Leave the thread of the CC at work.
Article on the topic: Gerbera from Foamiran do it yourself in a lung master class
Circular row 9, OC :: * bl1, Popen, bl1, Pokun, 2Punk * to the end of the row. For the last accommodation, you need to use the two recent loops and the first loop of this series. (12 loops are Ubuleno, 24 remained). Circular row 9, KC: * Popen, bl1 *. Circular series 10, OC :: * SPU, 2Punk *. (12 loops are unheated, 12 remains). Circular series 10, KC: * Popen, bl1 * until the end of the row, then cut the thread of the CC. Circular row 11: * 2 together facial * to the end. (6 loops are bullied, 6 remains). Completion. Trim thread and hide in a tapestry needle, stretch through the remaining loops, tighten and secure. Hide sticking threads. Make a lock in order to straighten the top.