
Make a wardrobe on the balcony with their own hands at all is not difficult. It may be simple, roomy and very modest outside, but on the contrary - to be the subject of vintage furniture on the sunny balcony. If you want to find a compromise solution and connect the simplicity of the design with the external attractiveness of things, this material will help you to make a conceived.
Balcony score
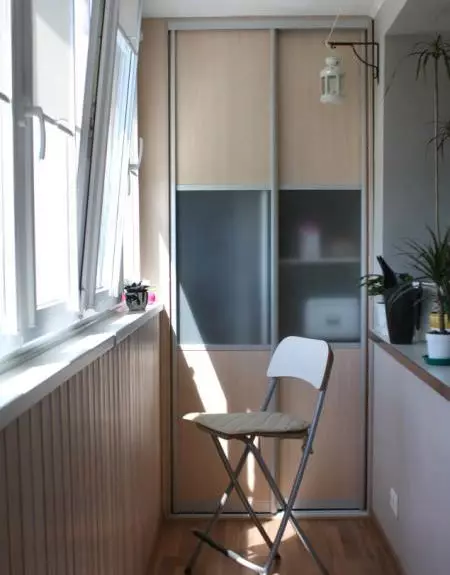
The cabinet directly will be like it can be submitted on this balcony. If the balcony is not insulated, then no wardrobe is suitable - any temperature differences will affect the state of the furniture. Also look, there is no cracks. They will need to be smeared when detecting. If you leave the gaps, moisture in a certain amount on the balcony will fall, and sending furniture will have much earlier than it is generally possible.
Paul coating also need to be aligned and insulated. It may be ordinary linoleum. You can, of course, spend on laminate, and on the tile. The most important thing is warm and dry should be on the balcony, it depends on whether the wardrobe intended to be exploited for a long time.
On the balcony should be warm and dry, it depends on how long the wardrobe
Where to start the building of the cabinet
About how to make a wardrobe is written quite a few. But the preparatory work often does not work out.
And in the process of preparing for the construction of the construction includes:
- Measuring room parameters for cabinet drawing.
- Creating a drawing taking into account the size and wishes in appearance.
- Optional moment, but still: creating a cardboard layout (many helps many).
- The drawing should be seen how many shelves in the closet, which in height and width of the shelves, etc.
- Defining materials.
As for the material - the laminated chipboard leads in the list of the most used. If you order this material, you can turn on the order cutting the laminate according to the drawing. That is, you will present your drawing, sizes, and they will reveal the laminate. For many, this is a good option, if there are no conditions for self-sifted.
If the balcony is trimmed with a tree, then the material for the cabinet should be related. And if the balcony is presented with plastic panels, then the material for the cabinet should be plastic.
Article on the topic: Wall mural with peonies in modern interiors
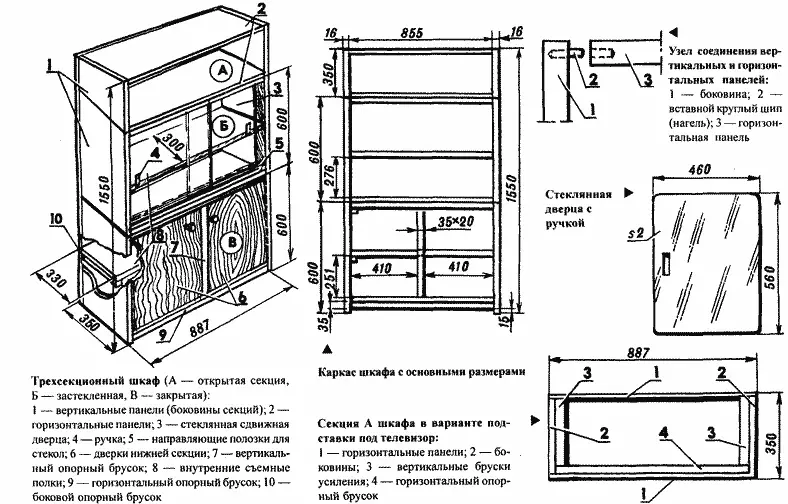
For the construction of a cabinet on a balcony with their own hands, there will be drawings
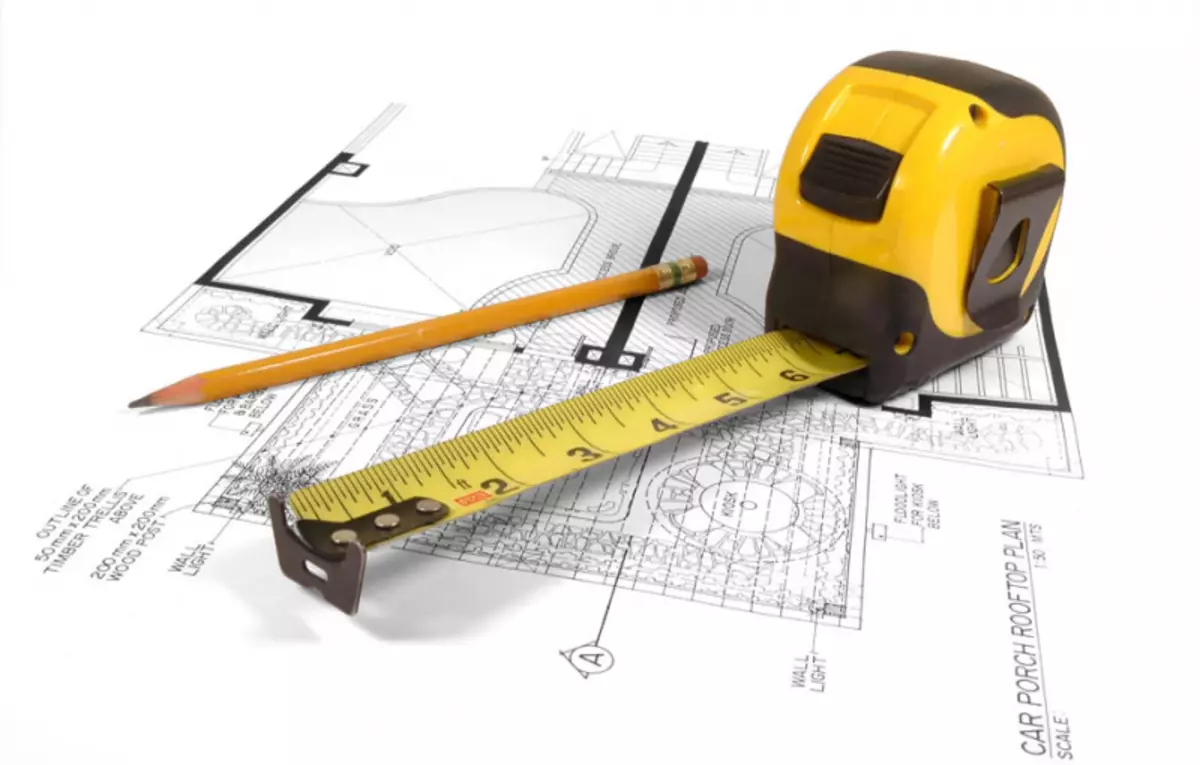
How to calculate the size
Pencil, roulette and sheet of paper are needed for sizes.
Three parameters are measured:
- height;
- width;
- depth.
Think about the inner shelves: as practice shows, there are no many of them. If the cabinet has already been on the balcony, and you just want to update it, remove the dimensions from the old locker.
Accessories and other devices, without which a convenient locker will be difficult to collect, today you can buy literally in every construction store. There you can also find factory elements - exactly of them, many prefer to make a wardrobe. That is, already purchased ready-made details, and then they are just customized by the desired size.
On the example of factory billets, we can consider the construction of one of the balcony lockers.
Determine the sizes and make measurements - this is the first need to install the cabinet to the balcony
Cabinet made of finished elements
To assemble a locker from factory parts, you need to prepare tools.
Among the necessary components and tools:
- screwdriver;
- electric jigsaw;
- Euro Shurus;
- Self-tapping screw;
- Furniture tape;
- cruciform screwdriver;
- iron;
- a hammer;
- clamps;
- Metal Cornel;
- Metal corners.
If factory blanks are made of chipboard (and most often this is exactly the case), it is worth remembering the recommendations for working with this material. The surface must be protected from moisture, if it is laminated chipboard - the question is resolved if there is no - the surface is desirable to be accumulated by a protective film.
So that the material does not crack in the moment of euroscope twisting, the hole must be made initially smaller diameter. Preferably eurhores with a hexagon head - they are not afraid of moisture, but ordinary screws will start rust over time.
The easiest way to build the cabinet with your own hands is the purchase of ready-made components from the chipboard
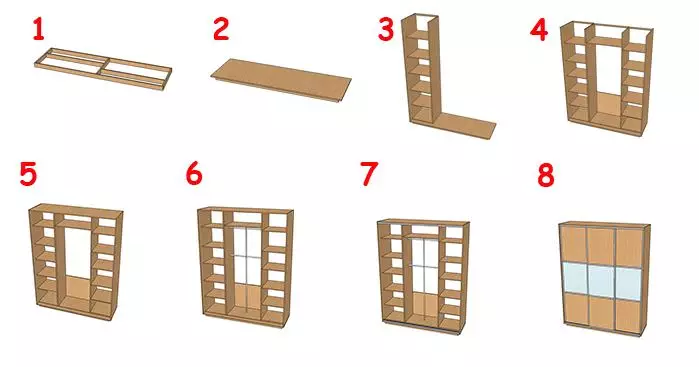
Assembling the cabinet step-by-step
If all tools are prepared, and the details correspond to the drawings, you can start assembling.The order of assembly will be:
- First collected wooden frame. The bottom of the entire design and the side wall must be connected. The sidewall should be installed on the end and connect at an angle of 90 degrees. Clamp This node must be fixed.
- In the bottom and in the sidewinks need to drill holes. To make hidden heads of EuroShrup, you need to make chamfers using more drill.
- Screwdriver bolts are screwed, and the heads of the bolts are closed with plugs.
- When the framework details are fastened, the legs can be screwed to the bottom of the cabinet.
- After that, the frame must be put on the balcony, where the closet stand all the time. It is necessary to test the dimensions of the design.
- When the sizes are checked, the framework must be folded down the facade, and take up the rear wall. For this purpose, a plywood sheet is suitable. You can fix a special stapler.
- The process of drilling holes for shelves, installation of doors, accessories and attracting magnets is completed.
Article on the topic: Rules for installing Roller on plastic windows
With the help of purchased furniture parts, you can make such a beautiful and simple wardrobe. However, not everyone likes to buy not the cheapest finished furniture parts, an alternative option may be an instruction, how to make a closet with your own lumber.
Locker to balcony from lumber
Lumber can be used different, one of the best - pine. It is easy to process it and decorate it is also easy.
Materials for the cabinet:
- Bar 40 by 40 mm,
- Board with a thickness of 3 cm,
- Accessories,
- hardware
- plane,
- electric drill,
- a hammer,
- roulette,
- hacksaw,
- level,
- recess
- 2 clamps.
Step-by-step instructions for the design of the cabinet looks like:
- According to the drawing in size, blanks are cut off.
- As in the previous description, first of all frames and all vertical parts are collected. Their vertical is verified by the level.
- The skeleton of timber needs to be collected to get the bottom. It is fixed with the mounting kit straight to the floor, and the upper base, respectively, to the ceiling.
- Now the design must be collected together, and inside the resulting frame to install bars for shelves.
- The height of the shelves is measured in the height of the items that will potentially stand in the locker.
- Loops, accessories and doors are better, of course, to buy in the store. Marriage in these details will violate the integrity of the entire design.
- Doors hanging: loops are attached on vertical wardrobe racks, half the doors are applied, the place is noted where the loop will be attached. Drill the hole and screw the loop with self-draws. Doors are hung, their correctness is regulated.
- Final barcode - fastening the handles on the door.
This cabinet and simple, and modern, and comfortable, and practical. The instruction can be improved in the assembly process, but Canva remains the same.
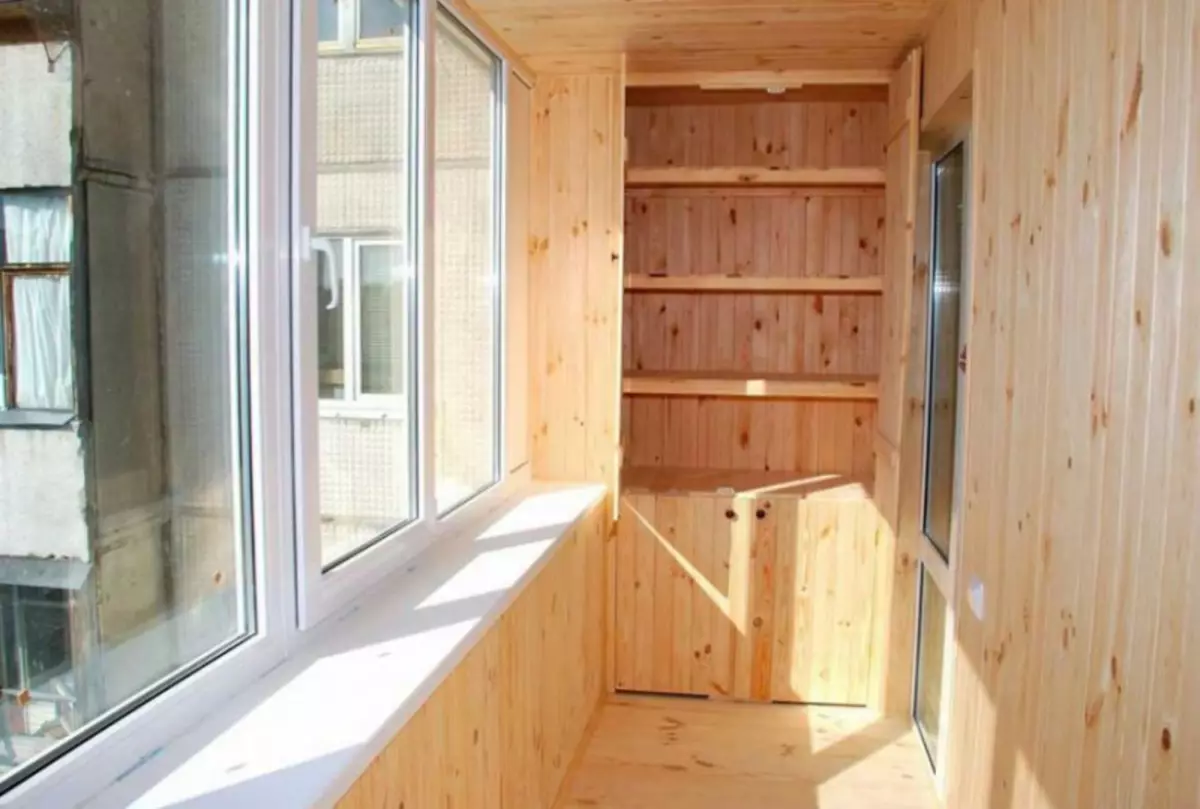
For the manufacture of the cabinet on the balcony, do it yourself, you will need a minimum set of tools and sawn timber
How to make a wardrobe yourself - decoration
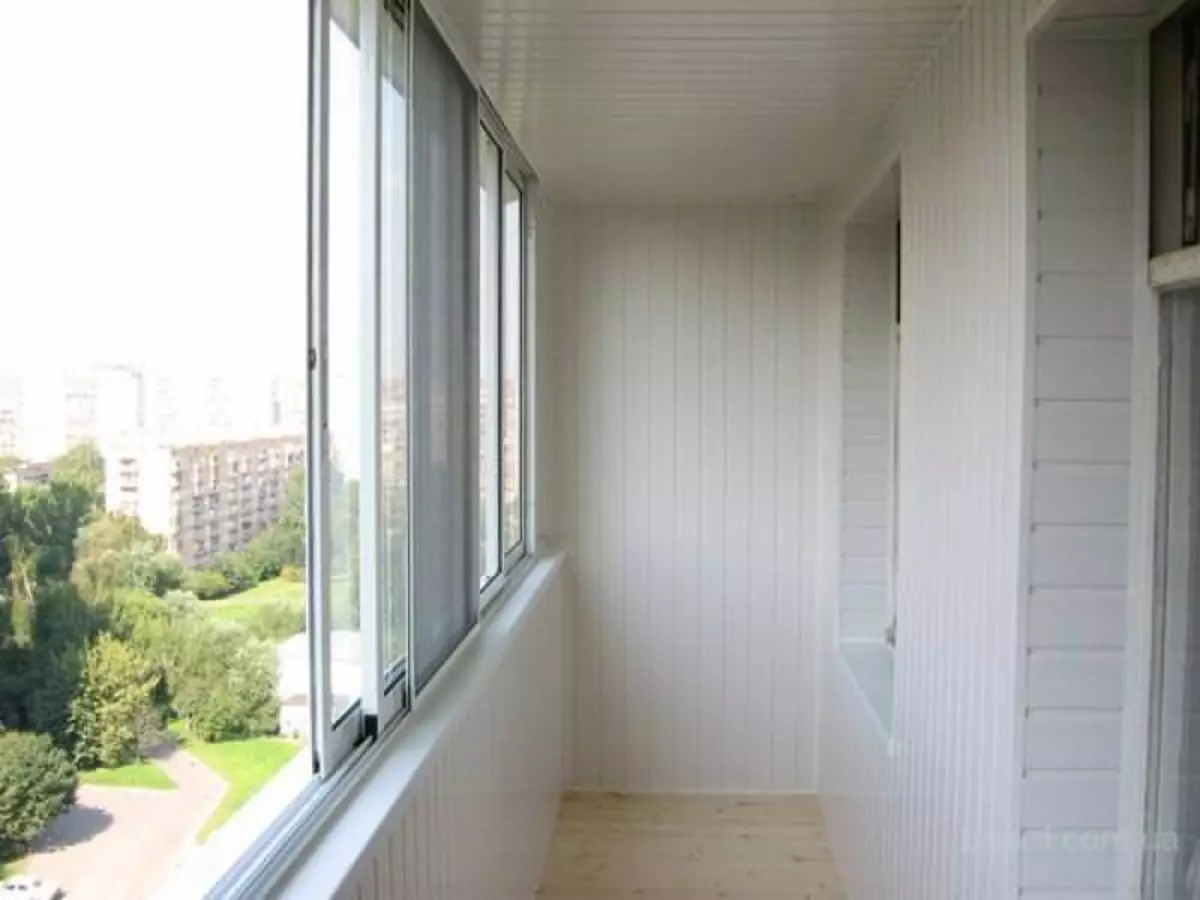
On the bright balcony, a snow-white cabinet always looks great. This is a classic option that will never come out of fashion. And if things in it have to be stored in baskets, wicker structures, jars and boxes, the bright cabinet will be cozy for these items. Therefore, to paint the locker with white paint and covered with varnish - a win-win version.
Article on the topic: Entrance metal street doors for a private country house or cottage
If the cabinet without doors, that is, it is rather a shelf, and some shelves need to be hidden from the eyes, this task can be solved like this:
- Bright lung tissue curtains in rustic style;
- Lightweight curtain of transparent fabric;
- Boxes that hide in their depths all that should not be seen eye.
Decoupage who has fallen in love today and here can help: the best decor for the cabinet will not come up with. If the skills of the visual art are available, you can decorate the wardrobe with special markers for furniture. This is modern and fresh, especially if patterns or drawings will be with humor.
Stained glass films and self-keys can also come in handy: no need to be a specialist to go around the cabinet.
If you are a scrupulous owner, and each trifle is important, then the outline of the locker also needs a decor. That is, opening the door of the cabinet, you can see interestingly decorated inner walls. The easiest option in this case is bright wallpaper.
Carefully get the inner walls of the cabinet, if wooden crossbars interfere, simply paint them into color, which is found in the wallpaper drawing.
You can use not one type of wallpaper, but several: so that such a bizarre mosaic has developed.
Just paint the paint cabinet from the inside is also an option. But you can go and in this way - to leave the wall where the cabinet is accurate, brick. And these bricks are painted with snow-white. Very style and relevant.
The cabinet on the balcony is easy, if there is experience in the design of hot, even if there is an ordinary stool. Make cardboard templates, carefully check the sizes, use only high-quality components, and the wardrobe will definitely work out.
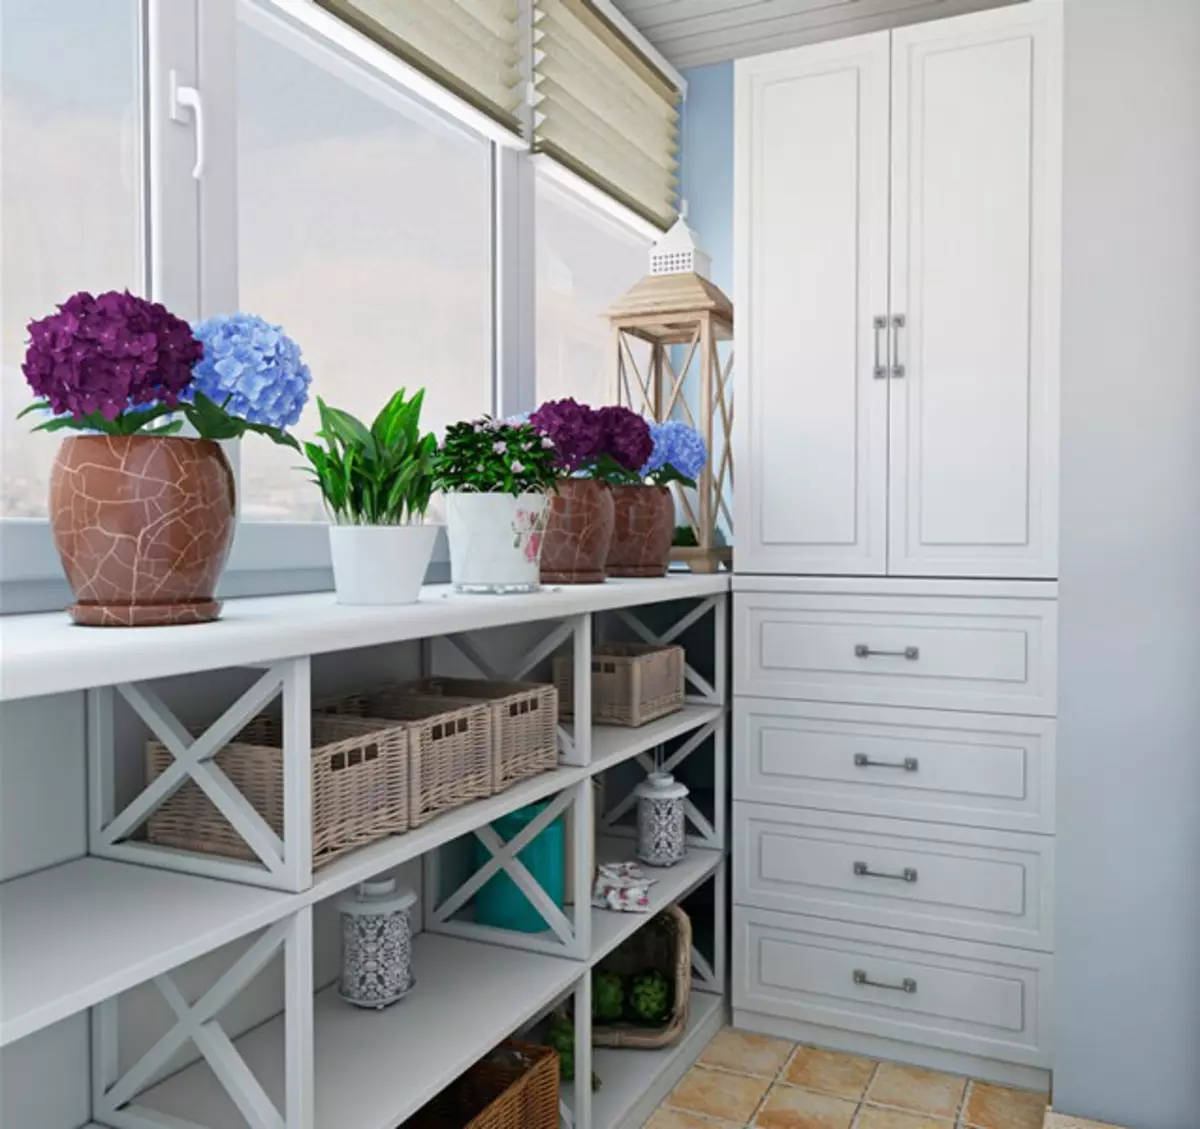
On the bright balcony, it always looks great. Snow-white cabinet
Good job!