
The plasterboard box on the ceiling is the best solution to the design of the room or the way to hide various communications: air duct, air conditioning system, wiring.
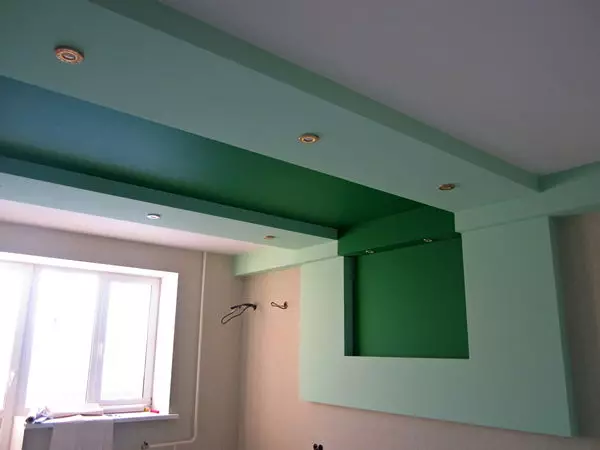
Plasterboard box on the ceiling can be of various designs to embody any fantasies.
In addition, the box of GCL can be used to install additional lighting or decorative illumination. These works are not distinguished by complexity, so they can be performed with their own hands. The finished design is almost no different from a two-tier suspended ceiling. The difference of boxes for plasterboard ceilings is that they do not touch the base part of the ceiling. This design can be performed in several options. For example, make a box around the perimeter of the entire room or arrange any geometric shape in the center and install the lamp.
Device carcass box
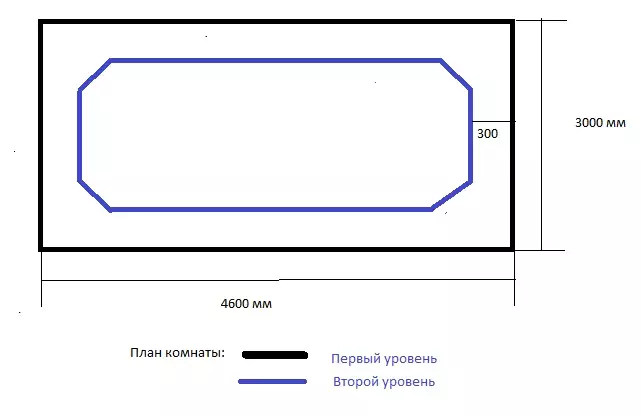
Even for the simplest designs, you must first prepare the drawing.
Montage with your own hands has a number of advantages. Such a design will cost much cheaper than a two-level ceiling. It will require less time and materials. Before starting work on the device of the drywall box, it is necessary to make a drawing of a future design to determine its size and prepare all the necessary materials and tools. A carefully compiled drawing will help to avoid errors in the process of mounting the box of plasterboard on the ceiling. The first stage of work is the construction of a frame. To make everything with your own hands, you will need:
- Perforator.
- Screwdriver.
- Scissors for metal.
- Metal profile UD and CD.
- Dowels and selflessness.
- Level.
- Missing cord.
- A hammer.
First you need to make marking. The label on the ceiling will correspond to the width of the box from GLC, and the label on the wall is its height. It is enough to put one label on the opposite sides of the wall or ceiling and connect their line with a folding cord. Making markup, it is necessary to take into account the thickness of the sheets of GLC. Over the removed lines, you must install the UD guide profile. Attach it to the wall at the mark and, holding the hand, drill holes under the dowel with a diameter of 6 mm. Insert a dowel and score with a hammer. Guide profiles are attached equally and on the walls and the ceiling. Performing this work with your own hands, it is necessary to clearly stick with marks. When the installation is completed, to conduct a control measurement: check again the horizontal of the profile installation.
Article on the topic: How to get rid of smell of cat urine: video, tips, recipes
The final result depends on the quality of the voltage setting, therefore we necessarily check their horizontality.
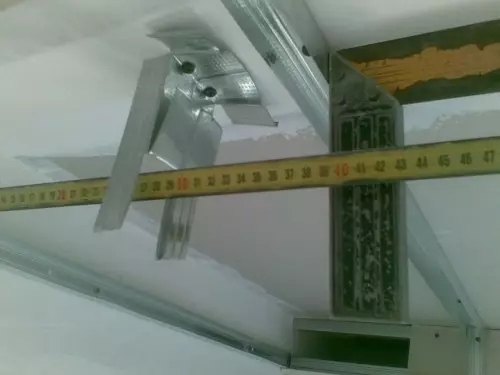
The next step is the formation of the corner of the drywall box. First you need to make ribs stiffness. Level measure the distance from the bottom of the guide located on the wall to the ceiling. This is the length of rigidity. From the CD profile cut the necessary segments. Secure them with self-assemblies for metal on the ceiling profile with a pitch of 600 mm. To make an angle, you need to use two UD guide profiles. A little to save material will allow us to use with a whole profile of segments. The profiles are connected in such a way that their shelves are directed in opposite sides from each other at an angle of 90 degrees.
The angle must be copped. The prepared profile is worn on the stiffeners protruding down. It is fastened with screws for metal. After installation, check its geometry, pulling the rope from one edge to another. If necessary, be corrected. Next Installation of the angle. Fastening it to the wall will provide the necessary rigidity of the entire future design. The finished part of the frame is installed strictly vertically, and the size of the rigidity ribs is measured. Prepared stiffener ribs are attached with self-draws with a step of 600 mm.
Plasterboard design
After the installation of the box frame is made, you can start the cover of it with plasterboard sheets. This work without problems can be made with your own hands. Before the start of the trim, you need to think about the role of a plasterboard box on the ceiling. If it is used to install additional lighting, then the electrical wires must be paved, outline the location of the lamps. If the ceiling box closes, for example, pipes, it may be necessary to insulate them. To perform your own hands on a framework of a framework, you must prepare:
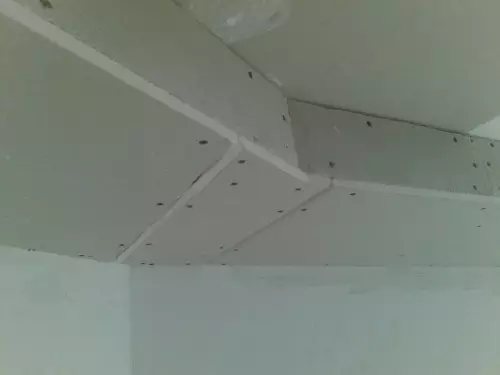
For decoration, the necessary sheets of drywall are measured and are screwed to profiles with self-draws.
- Sheets of plasterboard.
- Construction knife or saw for cutting sheets.
- Roulette.
- Screwdriver.
- Saws.
- Long line.
Article on the topic: Waterproofing of the bathroom under the tile: what is better to choose
To cut the material on the necessary bands, you need to make the width and height of the box. Cut the sheet of GLC knife with the help of a long line. Put it on a flat surface, apply sizes, attach a ruler and cut along it. If there is no ruler, you can use a long piece of profile. The next step is the installation of the harvested bands. The mounting of drywall to the frame is carried out by self-drawing with a step of 150-200 mm. In the process of work, it is necessary to ensure that there was a profile in the docking places. Otherwise, cracks will be formed on the finished surface of the box.
Finishing finished design
When the installation of a plasterboard box is finished, he needs to give a presentable look, for what to carry out finishing works. For putty, you need to prepare with your own hands:
- Spatula 200x250 mm.
- Spatula 50x100 mm.
- Perforated greasy corner.
- Grid for grout.
- Putty.
- Emery paper.
Two spatula will make it easier for putting on putty. Auxiliary, 50x100 mm, will be used to apply a mixture to a working spatula (200x250 mm) and to clean it from residues. Processing the box with your own hands, the spatula is pressed and is carried out on the surface. The putty should be filled with all the recesses, the surplus should be removed.
Corners on boxes for plasterboard ceilings output. To be formed a clear geometric edge, you need to install a greasy corner. Its installation on the design of the box is carried out with a putty. It is necessary to do so: put a thick layer of the mixture near the verge, then press the corner. Due to the fact that it has a perforated structure, the excess of the spacion mixture will be displaced outward. It will only remain evenly distribute it on the surface. During the work, geometry should be checked. Installation of the perforated corner must be carried out on all the faces of the box.
Grouting putty make a special grid by moving it with circular motions. After a complete drying of the mixture to carry out the finishing grout of sandpaper. Installation of the box is completed. Under the compliance of the installation rules, ceiling structures will serve for many years.
Article on the topic: how to punish the wallpaper without junctions (photo and video)