
Photo
To date, quite a lot of people prefer to separate the ceiling with plasterboard. But like any other option, work on the decoration of ceilings by plasterboard requires careful preparation of the surface and compliance with the rules of the technological process. Only in this case can be obtained high-quality, aesthetic, infant eye ceiling. The decoration of the ceiling of plasterboard with their own hands is not even very experienced masters, the main thing is to carefully familiarize themselves with some nuances and take into account the advice of professionals.
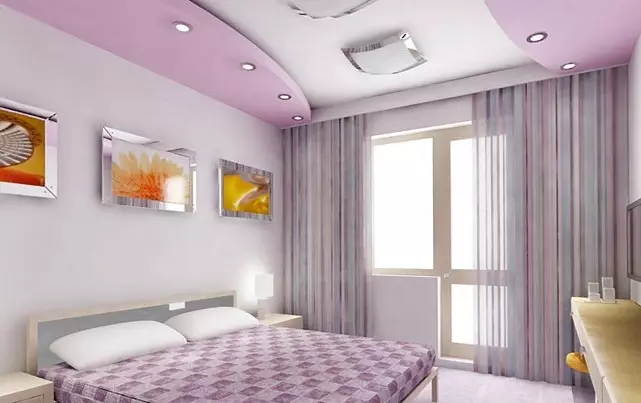
To date, many people for a house prefer a ceiling of plasterboard. Such ceilings can be made any form with multiple lighting variety. In addition, they are strong enough.
Errors made when completing the ceiling trim plasterboard lead to sad consequences and a result that can disappoint. There are a number of certain difficulties with which you may encounter the ceiling finish with GLC. On how to avoid them or correct the mistakes allowed, will be described further. In addition to useful tips, you will be able to familiarize yourself with the technology recommended for high-quality trimming of the ceiling of plasterboard with your own hands.
Ceiling Option
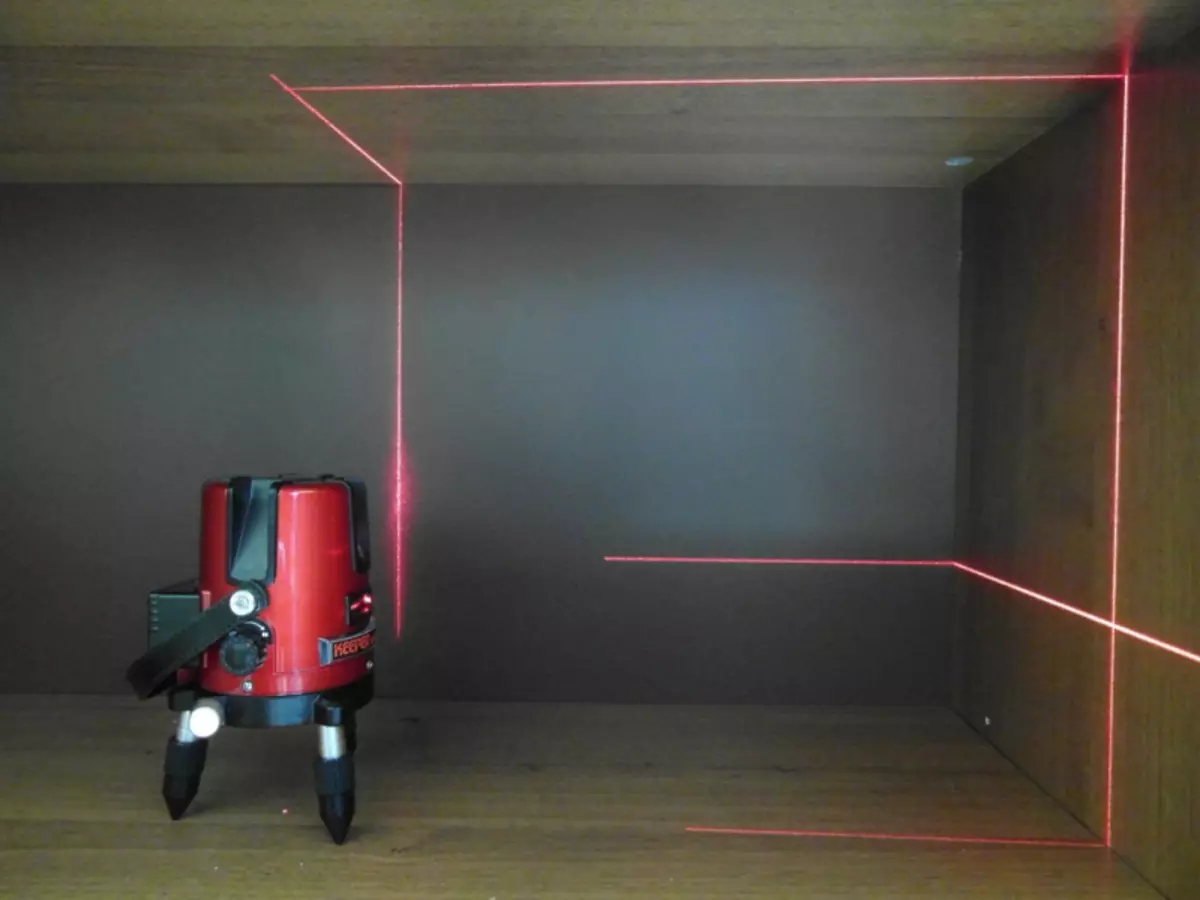
In order to mount the drywall ceiling, it is necessary to draw accurate markups. To do this, it is better to use the laser level.
In order to illuminate as many nuances of the ceiling ceiling as possible with their own hands, we give as an example installation of GCC on the attic room ceiling. Understanding how to do it right, with simpler options you will cope with yourself.
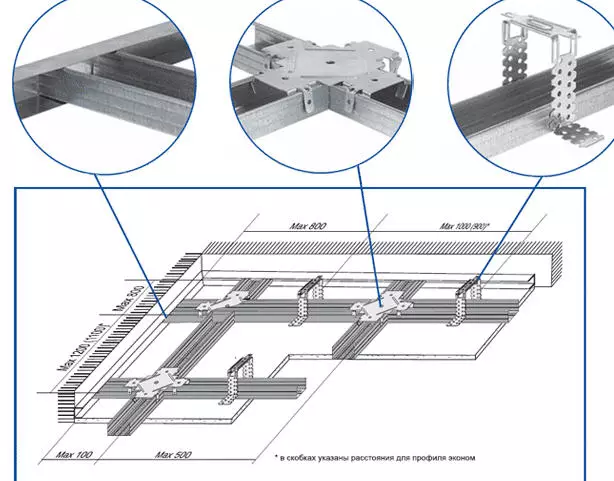
The first thing you need to take care is to carry out accurate markup. The first dimensions are aimed at folding a horizontal lines. The most convenient device for this purpose is a laser level. The replacement of the laser level can be a water analogue or a greasy cord. With the help of these tools, initial labels are applied, and then the subsequent markup. It will be needed for high-quality and accurate fastening of guide elements.
According to the pre-markup, it is necessary to install the profile of the guide type. For this purpose, we use fasteners, called a dowel-nail. The step of the fastener should be no more than 1000 mm. And the choice of fasteners, or rather its type, directly depends on what material of the wall in your home. Despite the oblique position of the ceiling in our example, the fastening of a guide profile will be carried out in places having a slope.
Article on the topic: how to choose a material and put the floor from larch
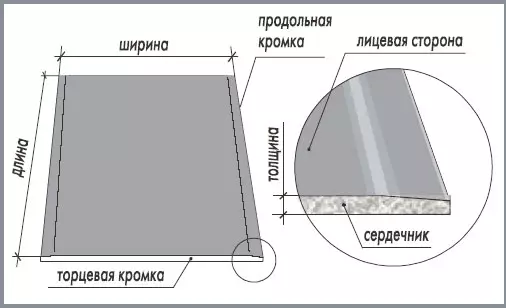
Scheme measurement of the size of a leaf of plasterboard.
Please note that if you need to connect two parts of the profile, you are ideal for this, special brackets that perform the function of connectors are perfect.
It is a queue of marking of the already mounted profile at the calculation of the multiplicity of half of the size of the leaf of plasterboard. Next, the ceiling type profile will be installed on these labels. It is such a way that will make the connection of two sheets in the middle of the profile for the ceiling.
I would like to note that the size of the leaf of the plasterboard, or rather its value of the width, corresponds to 1200 mm. Exactly in the center it is necessary to arrange another part of the ceiling profile. So, we will be able to achieve the result, in which the location of the ceiling profile will be completed with a pitch of 600 mm.
The connection of the ceiling type profile and the guide is needed using the screws designed to work with the metal.
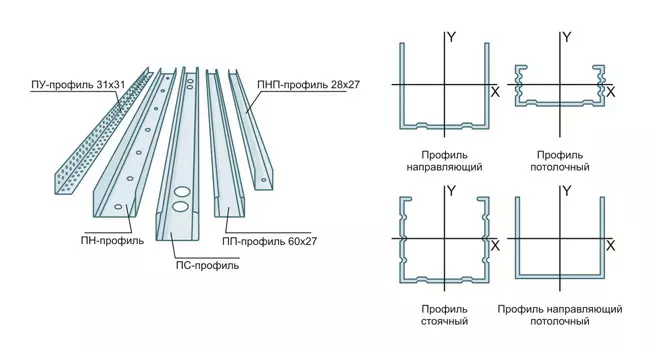
Scheme of the main types of metal profiles for fastening drywall.
Pay attention, by virtue of the features of our room (attic), where the place of transition of the ceiling surface is located from the inclined in the smooth, the installation of another part of the ceiling profile is performed.
The following actions imply applying the middle of the ceiling profile marker. They will help it easier to navigate further work when installing GCL. You just need to connect marks and sheets, after which it is fixed.
Next, you can install all the remaining parts of the ceiling profile. Step is the same - 600 mm.
At the end of this stage, we turn to the implementation of the markup necessary for further attachment of the transverse profile. Thus, cells will subsequently have to form.
Continue work: Features
The following actions will be directed to the installation of the suspensions required in the implementation of the ceiling formation profile to the work ceiling, as well as the walls having a slope. The step of the location of these fasteners (suspensions) is no more than 1000 mm value.
Scheme of fastening profiles for plasterboard to ceiling.
For convenience in the work between profiles, located on the edges, stretch the cord. It will help to implement the ceiling profile alignment procedure. So, as a result, you will get a flat horizontal, which does not have drop surfaces.
Alignment of the ceiling profile is performed after the mounting of the suspension to the wall of the inclined character is completed. After that, the suspensions are also attached to it.
Self-tapes for working with metal are suitable as fasteners. Speakers (unnecessary) parts of the suspension bend on the opposite direction.
Article on the topic: how to clean the filter in a washing machine
And one more important point to fulfill the cross-type profile, you need to purchase special brackets that are differently called crab. Only with it, you will receive a connection that meets the requirements of strength and reliability.
Mounting Nuances: Secrets and Tips
It happens that some places do not allow to apply a comfortable mount in the form of a crab. For example, a profile located at the bottom of the wall with a slope. There is almost impossible to do it. This is due to the fact that one side of the profile is pretty close to the wall. That's just about these difficulties and spoke at the very beginning.
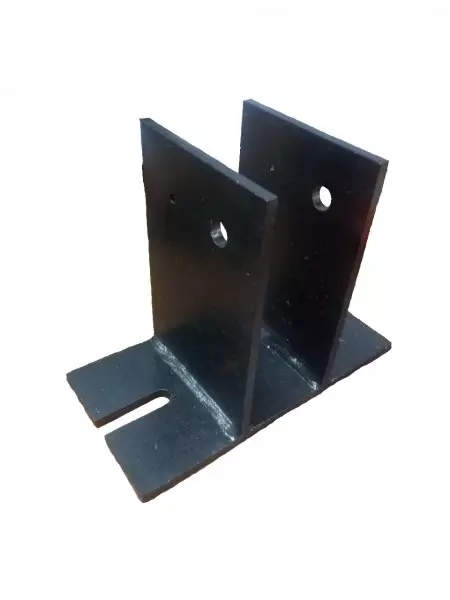
Use brackets for fastening profiles.
If you paid attention, there are special purpose brackets in construction stores, it is with their help that a profile connection in different planes becomes possible, at any angle. Their cost is quite accessible, if not more, but usually they forget about them, and they may not be at hand at the right moment.
So, experienced professionals advise the following. It is necessary to take advantage of a small segment of the guide profile in order to make the mount between it and the transverse profile. Since in the process of work we carried out a cutting of the guide profile, then the consumption went its number so that it does not disappear, it can be used as described above.
Finishing the ceiling of drywall do it yourself
Now it has failed to install crabs on the place allotted for them. Then make the installation of cross-type pieces from the ceiling profile. Their location will be at the bottom of the profile of the guide type. After their attachment, they are fixed by snaping the protruding parts from the crab.
So, the entire profile of the transverse view found its place and is highly fixed, now you need crab tongues to beateled towards the profile and consolidate them with the help of metal screws.
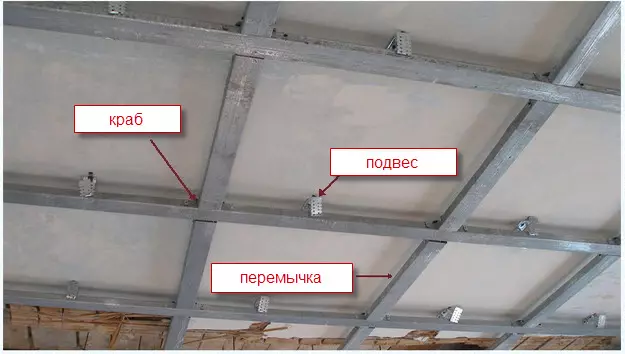
The scheme of the finished frame for fastening the plasterboard on the ceiling.
Thus, you have completed the installation of a frame design, and it is ready for the installation of GLC.
Please note that it is over the stage of installation of the frame on the ceiling, which has a tilt. But the smooth surface of the ceiling, horizontal, also requires installation of a structure that will perform the framework of the frame. Working in the same way as described above. To do this, after aligning the ceiling profile, the cord is marked, necessary for high-quality and accurate crab installation.
Article on the topic: Water Wall in the interior - 60 photos of unique designer ideas
It is possible to achieve high rigidity of the frame design if the size of the cells will correspond to the 600x600 indicator. So, the frame is ready, its rigidity is sufficient, you can move to the attachment of GLC.
Installation GLK: Recommendations
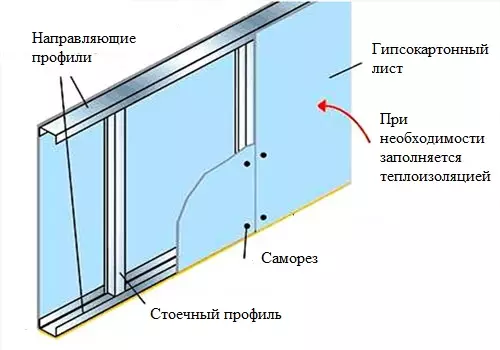
To start working on the fastening of plasterboard sheets, you should prepare them, giving the right shape and size.
The beginning of the work will capture the inclined part of the ceiling.
Mounting plasterboard to the profile.
HCC mounting to the frame is carried out using self-tapping screws directly to the guide profile. In this case, you need to be quite attentive and neat to achieve a good result.
Please note that the upper part of the self-press, i.e. His hat should be recessed in a sheet, but not particularly deep, about 1 mm. The sampling step must correspond to a value from 150 to 200 mm. And if you do not be lazy and advanced work on the markup, it will be more convenient to mount the screws, it will not be necessary to determine the desired distance every time. But it is not at all necessary, just so more convenient. Especially if you do it for the first time.
After working with an inclined ceiling is completed, you can move to the finishing of the horizontal part of the ceiling. To work easily, it is necessary to get such devices as the stops of the tree. They are made of primary materials and will be useful if the work is performed by a small brigade of two. They will hold GLK, pressing them to a profile frame. It is this way that will allow you to cope with the task of the ceiling trim on your own.
So, after you leveled the position of the sheet, you can fix it to the surface of the profile. Only after the attachment stops can be removed. As for communications and electrical wiring, it needs to be engaged before you have begun to cover the ceiling of GLC. Fastening sheets need to be carried out to all available cells, otherwise they will not achieve the desired stiffness. This requirement is mandatory for execution.
Do not worry if the whole sheet does not cover the surface of the ceiling surface you need. The remaining gaps can be closed using the remnants of HCL. Just after the end of whole sheets, open areas are measured and the desired GLC details are cut into the size.
The following steps implies joint processing, ceiling putty and decorative finishing works. Good luck!