Photo
Each family loggia has its meaning. Someone keeps there old things and dried underwear, for someone this place is a seating area, and someone uses it as a gym or a greenhouse. The loggia is considered an integral part of modern housing, so the task of its reincarnation should be suitable with full responsibility.

The loggia is unfairly referred to as a balcony, and its storage of old trash and tools falls. The insulation of the loggia is a priority task in order to turn it into a residential room.
You can resort to the help of professionals who will make repairs and insulation of the balcony for money, and you can repair the loggia and create a special comfort there with your own hands.
Not even hiring builders can make a loggia with a multifunctional and comfortable room.
How to make a disassembly of balconies (loggias) and eliminate damage with your own hands
To start repairing the balcony, you need to produce preparatory work. First of all, you need to remove the old shirt, unscrew and endure everything that is not included in the balloon package.Now you should check the destruction that could be formed over time. These can be cracks and cracks around the edges that need to be excluded. To do this, the surface is cleaned from all kinds of garbage, stone, pumping out parts. After that, damaged places are processed by primer, you need to wait for drying and apply a cement layer. For minor destruction is just one cement layer. In the cement mixture there must be a glue basis in order for it not to be blurred and did not crack.
If the cement surface has a variety of emptiness, they must be carefully cemering.
Materials and tools in order to make repair of loggias (balconies) with your own hands
The insulation of the balcony is inextricably linked with the inner cover of the walls and the flooring of the new floor.
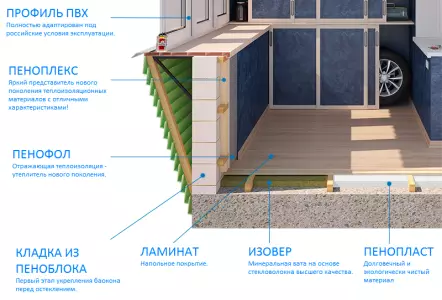
The reconstruction of the balcony cannot do without certain tools and materials that need to pick up. The insulation of the room requires materials such as mineral wool or expanded polystyrene. For the parapet finishing, siding or decorative panels need. Wooden panels require mandatory processing by means of antiseptics and flames.
Article on the topic: Detector of hidden wiring MEET MS-158M
To repair the loggia, we need materials such as:
- polystyrene foam or foam (4-6 cm);
- Moisture-resistant sheets of plasterboard and gypsum fiber;
- Foil polyethylene film;
- Foil foamed polyethylene;
- mounting foam without toluene;
- self-tapping screw;
- Perforator;
- level;
- saw for cutting the casing material;
- Tailing material (wooden lining);
- fasteners for a wooden surface (nails);
- mounting thread;
- Wooden timber for (40x50);
- Direct suspensions for a metal profile;
- Mounting stapler and brackets.
Installation of glazing loggias (balconies) with your own hands
If you want the windows on the balcony literally "breathing", the best material for the frames will be a tree.
To protect the apartment from external influences, with leaving noise insulation on the second plan, you can do by conventional wooden frames. In this case, there will be insignificant muffling of external sounds, but not effective enough. Pros of such glazing - inexpensive repair, simplicity of installation, as well as good passability of fresh air.
To achieve maximum comfort on your loggia, you need to install plastic windows. They will provide protection against wind, noise and other external stimuli, will keep the temperature, regardless of the time of year.
Plastic windows are distinguished by a long service life. The only disadvantage of such glazing is the lack of free air circulation in the apartment.
First, we need to collect window designs. Double-glazed windows, sash and sandwich panels must be removed, and the frames are combined with each other and with expansion elements.
Now elements are installed for mounting to this design. After the attachments are installed, it is necessary to proceed to securing the window design by level using self-tapping screws. They will guarantee a reliable fastening. After that, a facing corner is mounted on the sides and on top of the window structure, and the refill is installed below.
At the next step, the openings are filled between the walls and the window using the mounting foam. Now you can mount the double glazed windows, sandwich panel, sash and other additional components.
High-quality loggia insulation requires a root thermal insulation material.
Upon completion of the glazing of the loggia, carefully check the sealing. This will help keep warm and significantly relieve from noise.
Now you can proceed to mount lighting. Here you can use any lighting devices. They can be fixed on the ceiling or wall, fit built and ordinary. You need to use your fantasy and push out the design of the room. Sockets and switches are installed using a cable with three veins to one and a half square cross section.
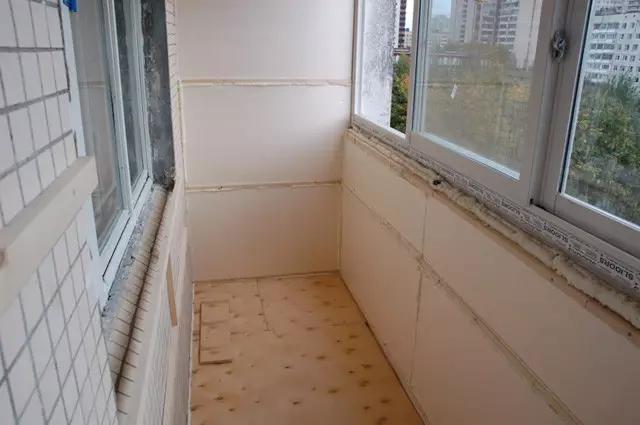
Warming up the ceiling and walls of loggias (balconies) with their own hands
After installed high-quality plastic windows, you need to make insulation of walls, ceiling and floor.
Article on the topic: The order of disassembly of the shower
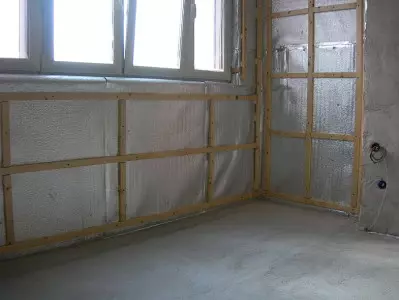
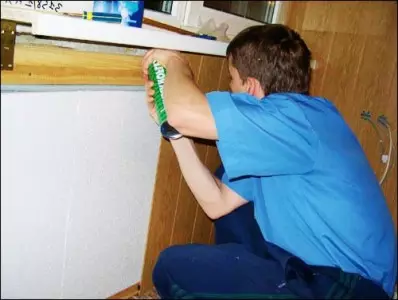
In order to make the insulation of the walls of the balcony, we need a heat insulating material, such as a penplex or polystyrene foam. It is necessary to fix it to the wall with the help of wooden rails or dowels with a plastic head. The joints are carefully processed using a mounting foam to avoid getting cold, the joints between the insulation sheets need to be attached to the scotch. It is followed by a mounting foam that does not contain toluene so that the polystyrene was not dissolved.
The ceiling can be mounted by rail or plasterboard. There are other ways, but these are more convenient in the installation.
Next, it is necessary to proceed to the fastening of vapor barrier and reflective layer. To do this, you will need a foil polyethylene film or foamed foil polyethylene. Parosolation is attached to the joints of scotch tape or glue on a polyurethane basis.
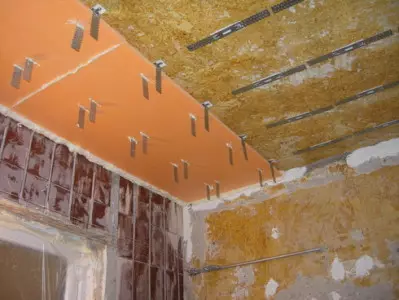
The ceiling is done in the same way, but the suspension ceiling is suitable better, which will hide the wiring for the lighting of the loggia.
For a start, the transverse lags are attached to the ceiling, which will need to fasten the facing material, after which the sheets of foam are placed between them. Shakes are filled with mounting foam.
Testing (repair) ceiling and walls of loggias (balconies) with their own hands
In order to separate the loggia, the least suitable wallpaper, as they will quickly determine under the influence of high humidity and temperature drops. Here you need moisture-proof finishing material. It is best to separate the panels for walls, moisture-resistant plasterboard, as well as plastic or wooden clapboard.
Before you start finishing the balcony panels, you should hide the walls of a cork or wooden frame. After that, you can start assembling with panels or other finishing materials, connecting them with each other. Easy to connect panels with a frame is that the groove tongue from the outside is shorter than the tongue with the inner. In the case of finishing and ceiling, and the walls need to make the installation of lags on the ceiling. For this, 3 lags are mounted. The first lagua should be placed in the middle, and the rest along the long walls.

Sockets should be avoided in the corners and wall connections, ceiling and gender. This will allow in the future to avoid unpleasant cold bridges.
You can hide the walls with wooden lining. First you need to fix direct suspensions for the walls to the walls in 3 rows every 50-70 cm. You should take a distant angle and measure 50 cm from it, then fasten the suspension by a perforator and shock dowels.
With the help of the level and suspension the bars on the suspensions are attached. In order to mimic a flat surface plane, the mounting thread is stretched. Next is processed by the surface of the BRUSEV antiseptic and the walls of mineral wool are insulated. Mineral wool is attached to the suspensions with its edges. Now you need to attach the waterproofing film using a mounting stapler.
Article on the topic: Septic from Eurocubets with their own hands: without pumping, how to make from cubic tanks, video
Finally, it is possible to start mounting wooden plates. You should start from a long corner. Fucking the lining to the bruus with nails. If the last rail is not placed entirely, then you need to measure the desired part and sprinkle. Ends the repair of varnish on the lining and installation of plinths.
Warming and decoration (repair) of the floor of the loggia (balconies) do it yourself
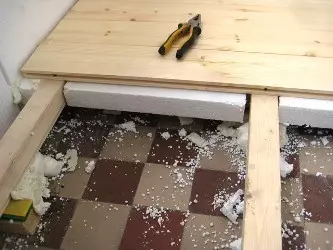
There are several ways of floor insulation on the balcony:

The height of the supports + the thickness of the applied lagows should be located above all the layers of the insulation used on the floor at least than 5mm.
- Wooden lags. For the basis of the future floor, lags are attached in the longitudinal direction and fixed by the assembly foam. Then there is a thermal insulation material between them, it can be a foam or mineral blocks. If you use mineral wool in the form of thermal insulation material, then you need to evenly close the entire surface. At the end of the work, tipped boards are attached to the lags.
- Screed. To do this, you will need a screed with a width of 4 cm. You need to leave the gap between the wall and the screed, for this you will need foamed polyethylene, which you need to carry out a centimeter strip. At the end there is a ceramic tile on the screed with glue.
- Floor heated screed. Aligns the floor with a screed. The heating cable is laid and attached to the construction ribbon to the screed. The cable should be a power of 90-100 watts per 1m². From above the self-leveling mixture is poured, it must completely close the heat-conducting elements. From above, put ceramic tiles.
Cosmetic repair of loggias (balconies)
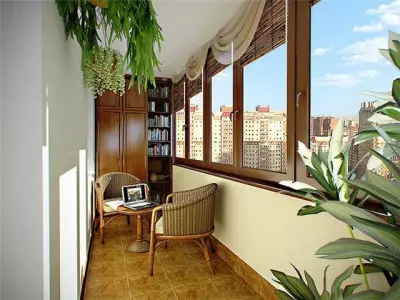
At this stage, the main thing is a fantasy. Only financial capabilities can limit you. Loggia can be a cozy, secluded place in which you will play sports, arrange tea drinking or growing flowers . The selected finishing material fully defines the style of the balcony.
Here are the most popular ways of cosmetic balcony repair and for which you can use it.
On your loggia can be equipped:
- Orange. For this purpose, additional lighting and insulation should be made. Plants blooming all year round completely compensate for all your costs.
- Room for tea party. To do this, you can provide your loggia with a wooden table, a couple of chairs, a carpet with a big pile.
- Study. In a small apartment, the loggia will find an outlet for creating a personal space. For this, the room is complemented by a computer table, a chair and additional lighting.