The popular pattern of spikelets, which can often be seen both on the sweaters and on the headers and scarves, is quite simple in knitting. With this pattern, even beginner authors will cope with due attention, and the result will be different with its multifunctionality. The fact is that due to the alternation of the loops, the spikelets can be used both as an independent pattern, and as an elastic band for the edges of the products. To connect the pattern "spikes" with knitting needles, it takes not so much time: even in not very experienced knitters, this process will quickly become automatic.
Easy spikes
The easiest way to knit this pattern is a rapport in two rows. Its volume depends on the density of knitting: what it is the tight, the more dense the spikelets. The pattern is formed horizontally. For the base, you need to dial an even number of loops.In the first row, two loops are tied together with an invalible. Without throwing out these loops, the first of them should also be tied with facial. After that, two loops are reset. In the same way, knitting continues until the end of the row.
In the second row, the first two hinges are also observed together with an invalible. Without throwing them out, the first is in charge, this time the wrong one. Then both hinges are reset. The way knitting in this row also does not change.
With elongated loops
The rapport of this pattern is five loops and two additional. In the first and third rows alternate two wrong and three facial loops. The last two loops must be accurately closed. In the second and fourth rows, two hinges knit facial, and the following three - involved. They alternate until the last two loops, the row should end with two facial. These four rows will become the base part of the pattern and will not be repeated more.
Article on the topic: Master class on a panel of beans do it yourself in the kitchen with a photo
Two wrong hinges are tied in the fifth row, and then pull the loop to form a spikelet. To do this, you need to skip the extreme loop, under the next fall into four rows below and introduce the right spoke in the loop. After that, the thread picks up and excreted on the needle as the next loop. Next, you should connect three facial loops, and then re-enter the needle in the same loop, through which the thread was previously extended. Pull out another loop, after that you knit two irons. Then again you need to skip the extreme loop, pull the thread and continue to continue the rapport to the end of the row. It is completed with two irons.
The sixth row begins with two facial loops. Then the elongated loop is on the left needle, which you just need to be reassembled, having previously shifting the working thread forward. After that, you need to tie three more irons. The next long loop must also be repaid. This rapport continues until the end of the row, which is completed by two facial loops. The seventh row starts from two wrong, then the two are lying together face (with a slope to the left). After a facial, two more facial, but this time with the inclination to the right, as well as two irons. Rapport repeats, the row ends with two irons. The eighth and last row represents the alternation of two facial and three irons. Rapport completed.
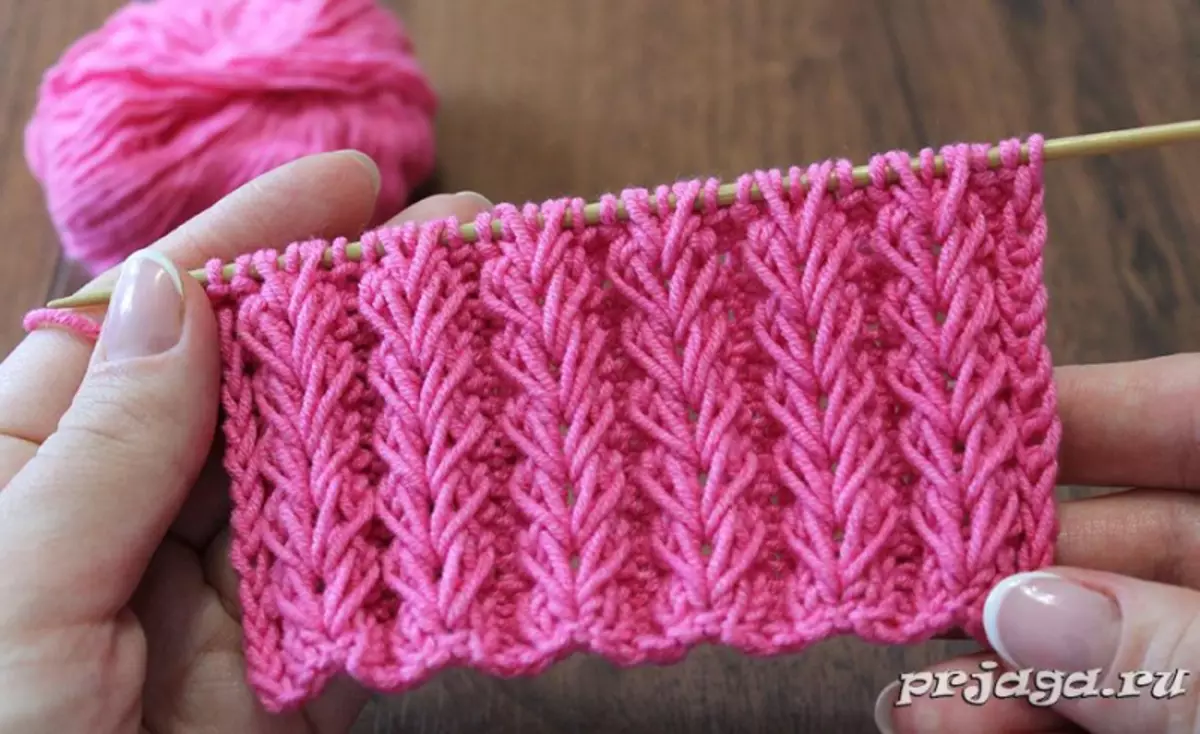
Rubber-Colos
A slightly complicated spiker variant - a gum that can be used for cardigan or jacket, as well as for decoration. Rapport pattern - five loops, dial two more for symmetry and two edges. Knitting is clearly shown in this video:The edge loop in the first row is removed, then alternate two irons and three facial. The last loop - the edge - is pronounced. In the second row, all hinges are tied in accordance with the figure of the first row, that is, the facial must be facial, and invalid - involne. The latter in the row of the loop - the edge - is attached as an invalid.
Article on the topic: Knitting openwork spackers
The third row begins with the removed edge loop, there are two irons after it. Then right, the working needle is introduced between the second and third loop on the left, capture and pull the thread. After it is followed, and then three loops need to check the face for the rear wall. This rapport is repeated, the row is completed with the wrong.
The fourth row fit the same as the second, that is, the loops of the previous series are pronounced. Casks occurring in it are pronounced. Rapport is completed, then the third and fourth rows should be repeated.
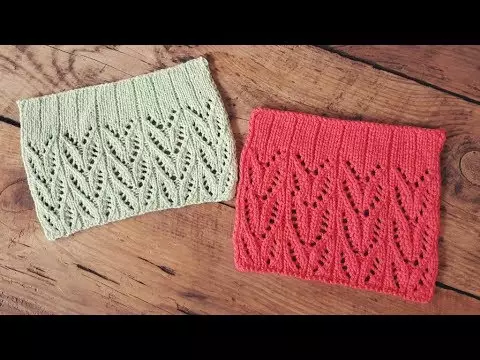
Openwork pattern
For light cardigans and cables, openwork variants of the spikele are more suitable. The following video features a description of one of them, the rapport of such an ornament is 10 rows and loops.
All even rows in this pattern knit in the drawing, occurring atmosphere and the favings - facial. The most complex element is two hinges that bind together face (with a slope to the right or left). Even and odd rows of this pattern should be started with the wrong. In the first row after the invalid knit facial. Behind them - two facial right. After they make a nakid, knit facial, involnery and another simple facial. Again make a nakid, knit two facial tilt to the left. Completes a number of simple facial loop. In the third row, two facial to the right, Nakad and two more simple facial are followed. After - the wrong and two more facial. Then - Nakid, the recent hinges knit one facial left.
The fifth and seventh row should be knit equally. After the first inside, the alternation of facial, nakid and another ordinary facial should be alternating. Then two loops of the face with the slope to the right, one inequate and two with a slope to the left. This series is completed with two facial with Nakud between them. In the ninth row for the wrong one follows two facial. After the two facial right to the right, and then make Nakid. You knit one simple inside, make another nakid. A series ends with two facial tilting to the left and two ordinary facial loops.
Article on the topic: How to weigh a wide bracelet from rubber stakeholder for beginners with video