
Far from the problems of construction, people often consider the breakdown with a comfortable walkway around the house. My friend knows that just nothing is done. It completes the construction of a country house and he is interested in the cesspool with his own hands, step-by-step instructions, how to make it right. Question: why it is necessary, he asks me constantly.

Skostka at home
Skosting around the building made with their own hands protects the foundation
We finished the trim of the base of his house with Vadik. Before the onset of rainy autumn it is necessary to make the rest of the outdoor work. The first question he asked: What is a breakfast and what are its functions?
Placing around the house the width of the future trench, I explained the step-by-step instruction and the appointment of the scene:
- Scene protects the foundation from moisture and destruction;
- It serves as an additional insulation of the building around the perimeter;
- It is assigned to the base of rainwater and flows the melting snow;
- As it is necessary, it is used by architects as an element of outdoor design.
Scene protects the foundation from moisture and destruction
The restoration of the old building begins with the finishing of the foundation and the scene. Without it, it is impossible to get rid of dampness not only in the basement, but not the first floor. The insulation of the upper layer of the soil around the perimeter reduces the turret of the soil of the neuropundament. A high-quality track around the house saves energy to heating, keeping warm in the building. The work is not complicated and you can make it yourself.
Step-by-step instructions for creating a breakfast with their own hands, as an element of outdoor design

SCHOOLS AROUND ACCOUNT
Designers use gestures as an element of the composition. She emphasizes the line of the house, separating it from lawns and yard. Built from one material with a trim of the base, the track visually makes the building above. The facade acquires completion. The structure seems massive. There is a step-by-step instruction, how to do everything with your own hands, without paying the work of specialists.
To create a single ensemble of the house and the surrounding landscape, use the same coating of the roads across the yard and scene. Material and color is selected in accordance with the architectural style of the building. Tile can be massive from natural, artificial stone. For wooden buildings, the coating close to the sand, natural tones are chosen. The avant-garde is emphasized by bright colors and non-standard forms. Techno fit strict glossy finishes and sharp corners of turns.
Article on the topic: Excellent garage homemade. Cool homemade workbench
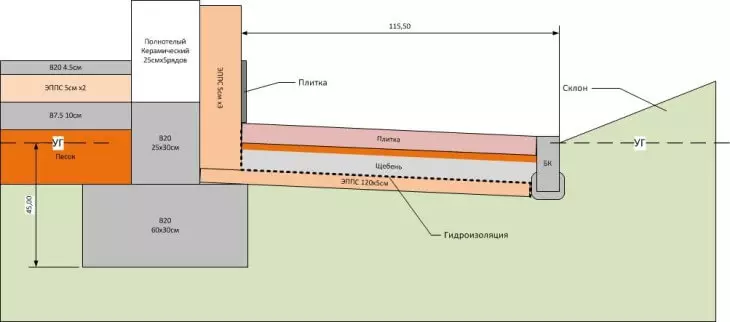
Dimensions and slope tracks around the house, do it yourself
We went around the Vadik around the house, noting the roof shed line on Earth. The roof has a complex configuration and different size of tilt and hanging. Chose the largest size, added 20 centimeters. They stated the width of the future glood, which will make it yourself. From the walls of the building in the corners, the same size was postponed perpendicular to the plane of the base. With the help of the cord, there were lines, continuing them in the corners to the node - intersection.
The width of the scene must be at least 60 centimeters. In this case, the size of the cornese skes is checked. Water from the roof should not fall on the ground, but to drain along the path. From the border of the runa, it is necessary to retreat outside 20 - 25 centimeters. The resulting value is measured from the foundation. We have determined the greatest size and noted it all over the perimeter. Different width of the scene is possible. But it looks worse. After all, we are important and design of our house.
Water should not get to the adjoining track and foundation. Therefore, the bias from the base is made. The edge should be above the soil.
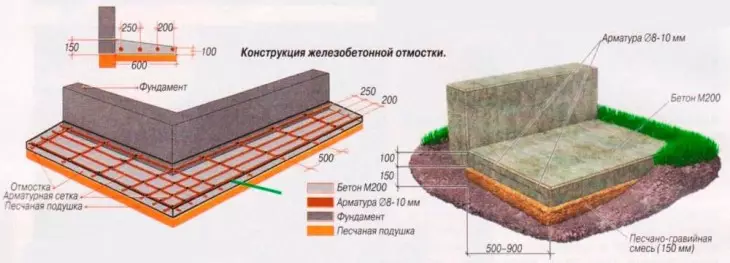
Design scheme Ozostka
The depth of the ditch below the slate is considered to be in the height of the layers that will be filled with it:
- 10 cm - clay for sealing and leveling the base;
- 15 cm rammed sand;
- 20 cm rubble;
- 10 cm sand under the tile.
Now my healthy received a step-by-step instruction and began to dig a trench along the foundation around the house to a depth of 55 centimeters. So that the edges do not appear, he immediately installed the formwork - shot down boards. The edge of the shield should perform above the surface of the soil for several centimeters, if the scene is made.
Ceramic Tile Device
Preparatory work, perimeter insulation: Step-by-step instructions
On normal moisture, the soils of the clay can not be saturated and the gravel layer is less than. In our case, the house is in lowland, near the river and need reinforced waterproofing. The adjoining of the scene to the base of the house should be dense. For this surface is completely cleaned.
On the bottom with their own hands, clay hung up and with the help of the square immediately tumbled it with a slope from the building. The height difference was 2 - 3 centimeters width. From above laid waterproofing, observing step-by-step instructions. You can use a conventional film. Vadik decided to take nearest, make a century. Ruberoid strip cut off on 20 centimeters more and bent along lines with the foundation.
Article on the topic: How to warp the floors of plywood?
Warming and waterproofing of the scene
Now our building has reliable protection against water destruction. All moisture, which falls from the soil, stalks at the inclination of waterproofing.
The sand was saturated with a smooth layer and tamped, withstood the angle of inclination. The clamping plank attached to the base of the house a node from the referenced on clay and posted on top of the sand geotextile. Porous fabric will miss moisture and keep gravel, not letting it to urge the sand. Similarly, the second layer of matter was laid on crushed stone. If there is a fill of the breakfast concrete, then the thickness of the crushed stone layer is greater, to the very top of the trench. For a good shrinkage, they walked all the water and waited several days.

Warming of Game Foam
Pouring the screed scene with your own hands, step-by-step instructions
In areas with a deep freezing of soil on crushed stone, you can put insulation with your own hands. It will be minvat or foam, to solve the owner. A hygroscopic material needs protection against moisture. It is covered with a film and the metal grid is stacked on top. Under the line of adjoining, waterproofing is attached to the surface of the foundation. The angle of inclination must be withstanding on all the materials of the pillow. This is the protection of the foundation from destruction.
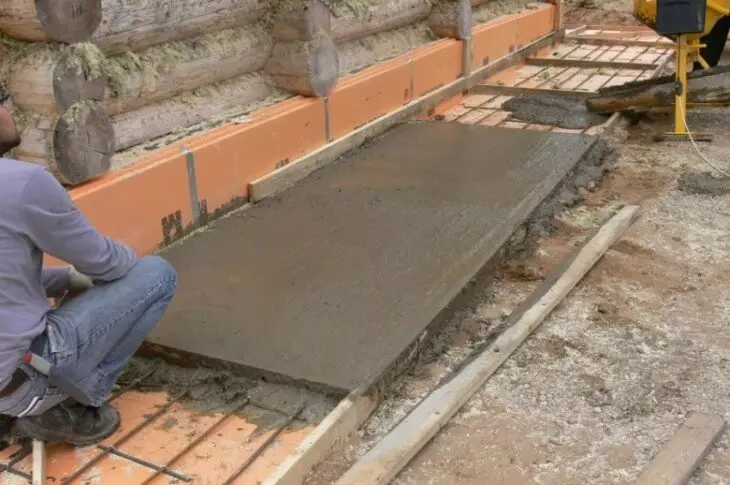
Pouring a cement mortar
Pouring the scene is made in the lighthouses. The cords along the foundation and the edge of the track at the surface level are stretched. Through each meter, a board impregnated with bitumen is set by the top end at the label level. The solution is poured over it, the slope is determined. These planks remain in concrete and serve as compensators of linear expansion screed from temperature drop. In places where the knot of water pipes and sewage pipes is going, it is necessary to make taps under the path in advance.
A large amount of work on concreting the scene is difficult to do. I use the separation of straps and fill in the meter between them. Then I align at the end of all works and I wash the dry cement - jelly. The adjoining of the base to the ability to close in the color of the decoration. This prevents destruction, and improves the design of the foundation.
Article on the topic: Black parquet: Dark floor in the interior, photo of blonde walls, in the kitchen Laminate and bedroom design, brown and white furniture
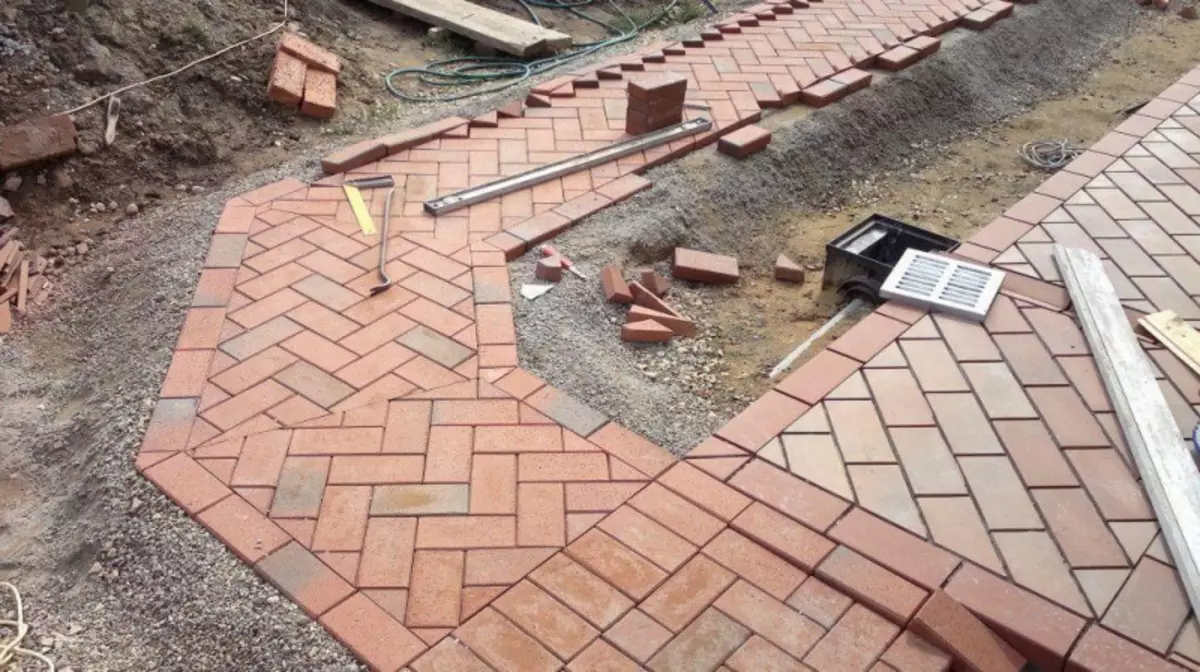
Step-by-step instruction masonry tiles do it yourself
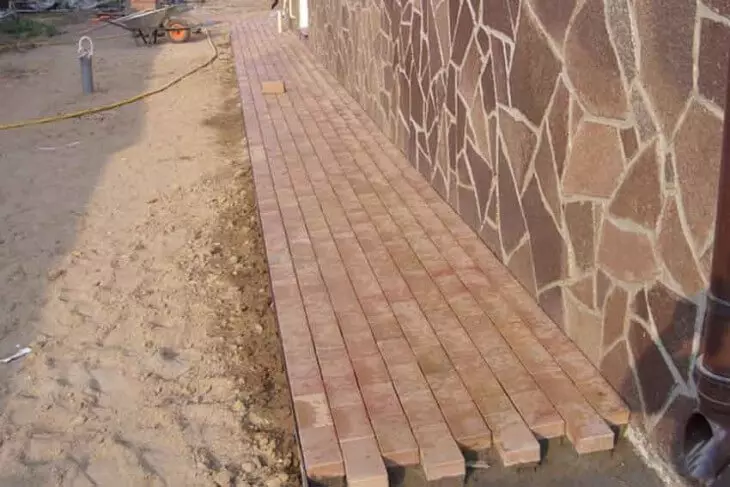
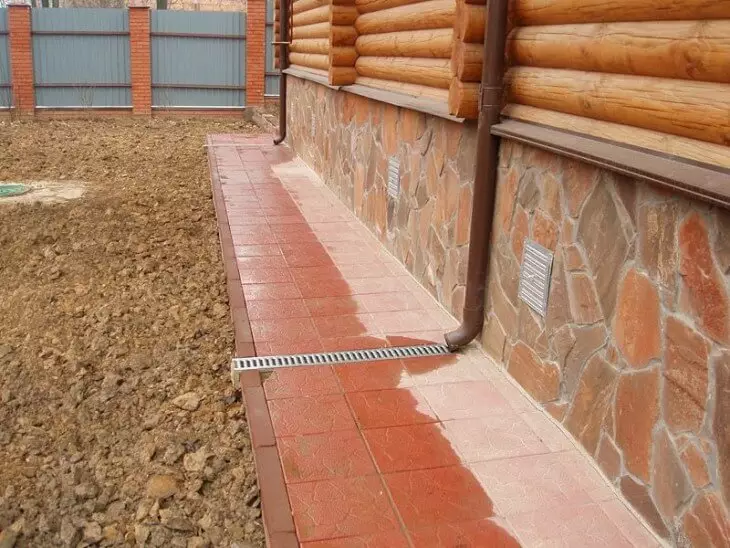
Sidewalk
My friend is not limited to the means and do it makes construction work on the protection of the building to increase its level. Therefore, the appearance of the yard is important for it. He developed the design of the facade finish, turning the structure into the castle. The protruding part of the foundation and the base is posted with natural stone. For the scene bought plates from the same material.
On the second layer of geotextiles, we poured sand, they tamped him. Then I began to lay out the tile. Vadik watered water, covered the gaps. To work with paving slabs you need skill. My entrance worker was afraid to spoil everything and just helped me. When everything was laid, we secured the castings by defending the adjoining.