
Knitting needles is one of the most beautiful and affordable ways to create things. The needles can be knit both winter and summer clothes. Sweaters and warm tunics will warm you with cold in winter, light sundresses and openwork tops will help you feel comfortable in a sultry summer. To master such a kind of needlework, you do not need to be "seven spans in the forehead", you can learn only a few knitting techniques at first and create simple, but useful and original things. If you decide to connect not a common smooth cloth, like a scarf or paletenna, but, for example, a jacket or sweater, you just need to know the methods of adding loops with the needles that we will consider in our article.
In the description to openwork things, a method of adding loops is usually indicated, and in the case of a simple web you can choose it yourself. You can enhance inside the row and the edge of the canvas. It is desirable to do all add on the front of the product.
Admission inside the row
Inside the row, the addition of loops can be made in several ways:
- With the help of Nakudov, which are pronounced by an invalid mating in the next row or the movement of the knitting needles (Fig. 5a), or from itself (Fig. 5b):

If the product description does not indicate the addition method, the movement of the loop is used in the opposite direction from itself.
If you plan to get a hole for the opening with a nakid, it is cling to the distant thread. If the pattern should be solid, and the nakid is inconspicuous, it is cling to the near thread of the twisted loop.
You can see on the video how to properly perform an outwork for openwork pattern and for solid:
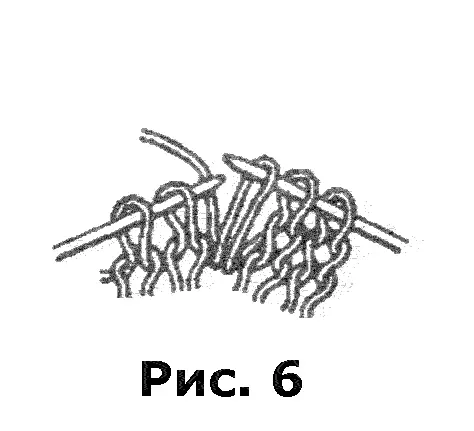
- The following hinges knit, pulling out between them, as shown in Fig.6. In order to preserve the integrity of the band, the broach must be twisted. This means that the needle in the left hand should be captured by the loop so that its left side is in front of the needle and stretching for the near thread.
Article on the topic: how to make a mannequin
- To get a new loop, an invalible or facial, you need to check the lower row loop, then knit the next loop on the needle in the left hand.
- To increase the width of the product inside the canvas, it is possible to rely on two loops from one, tieting the first facial viscous, and the second - invalid. In the same way, you can get more loops from one, the main thing is that it is even.
This method is also used to create intricate patterns.
- If you need to get an odd number of loops from one loop, then you need to do the ninks between them, I do not alternate and face mating, that is, the loops dive either only invalid, or only facial.
Loops around the edges
This method is considered optimal when the product or neck of the product is prog. In this case, all additions in the canvase are performed at the edges. The sleeves can also be expanded symmetrically on the right and left.
There are only 2 ways to add loops along the edges - along the right edge and on the left.
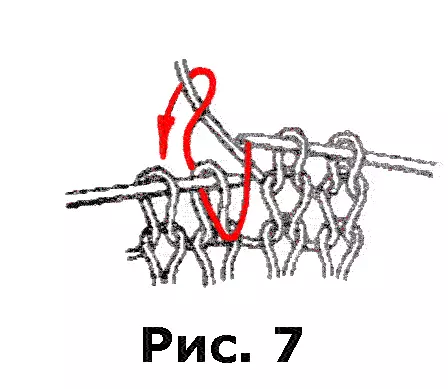
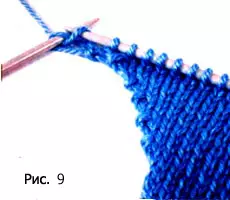
- Adjusted on the right edge.
- There are a number of hinges, then the web is rotated by the back side, and at the beginning of a row on the front side, add loops to the right by introducing the knitting needles in the right hand into the first loop and making it face;
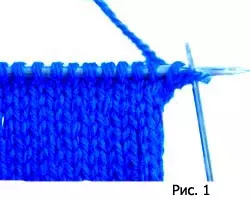
- For the rear thread, throw the pricious first loop to the needle in the left hand and knit on the wrong and facial;
- This is how the addition of a certain number of loops is carried out, getting a smooth edge.
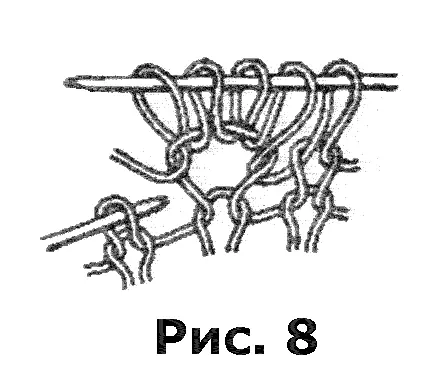
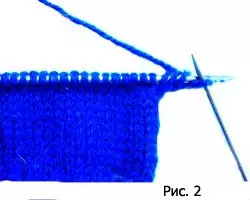
You can use another addition method on the right edge: first knit the cloth on the wrong side, then at the end of the row to dial the required number of twisted loops by throwing the thread on the finger, and knit with facial mate.
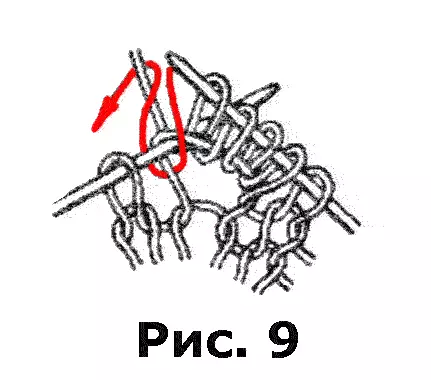
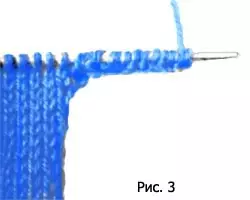
- Addition to the left edge.
Such a reduction is no less simple than right. Tied to the end of the face row, also add a loop. This can be done in two options:
- It is necessary to overtake the thread thumb so that its end is the front loop. After that, hook the back of the bottom of the thread, capture its upper end, freeing the finger and pull the loop on the needle. Continue these actions until the desired number of loops is obtained;
Article on the topic: Rings for napkins do it yourself for a wedding: master class with photo
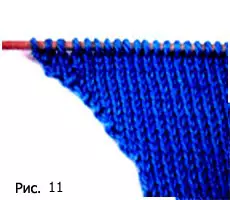

- Similar to the method of adding loops to the right with a set of the desired number of twisted loops.
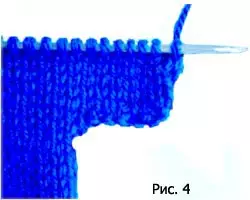
Thus, smooth edges are obtained, which are not stretched with sock and washing. Properly performed product, even without processing edges, it will look neat and aesthetic.
During the addition of loops when knitting the sleeve without a proposed scheme and description, the newcomer may face the problem of uneven addition from different sides. To solve this problem, you can use the formula of symmetric loops.
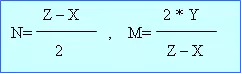
- N - the number of necessary additives;
- M is a row in which the addition will be made;
- Y - the number of rows of sleeves;
- Z - the number of loops of the top of the sleeve.
This formula will help to understand where and how many loops will need to be added.
Video on the topic
The video presented below will help you clearly see how the loops are added along the edges of the product and inside the canvas: