
Decoupage - type of decorative needlework. To update the familiar home furnishings, the technique of decoupage is applied. The basis of applied handicrafts - decoration with ready-made patterns of surrounding items. The closest comparison is the applique with which everyone is familiar. A varied material is used with a smooth and dense surface.
Essence of art
The base of the needlework is the sticking of the selected pattern (special or conventional napkins, newspaper or magazine paper, fabrics, other materials) to the surface of almost any product with a dense texture. It is not allowed to use a porous plane. The background is usually painted in a white color to save the brightness of the drawing color.Types of applied art:
- The classic way of decoration implies sticking pictures to a smooth surface. Different reliefs, biases, roundings are excluded. After gluing the pattern, the product is processed by several layers of varnish. Then sandpaper is grossing the errors to a homogeneous coating. If necessary, methods of picking, tinting, artificial aging of the material are used.
- The method of reverse decoupage is used for glass surfaces. In this case, the image in the figure is glued face from the reverse side, and the order of work is performed in the reverse order.
- The bulk machinery combines the techniques of artistic painting and sculptural creativity. At the same time, a bulk panorama is recreated on the surface of the subject.
- The smoke drawing includes a complete connection of motifs on the background and image. As a result, the work is similar to the original painting of the artist.
Deopatch technique resembles a patchwork, in which the storyline is created from multicolored solid-caliber images that are not linked by color or theme.
Despite the variety of techniques, needlework is quite affordable for beginners, which for the first time decided to take decoupage.
Required tools and devices
The word decoupage in translation from French means "cut", so to work tools need to be cut and pasted the pattern on the selected surface. Previously, you must select the item to decorate.
Basic tools:
- Scissors for manicure with stupid tips;
- Tassel for glue, brushes for applying a varnish on the surface;
- Sponges to spit paper surface, remove folds;
- sandpaper with fine grain;
- PVA glue, diluted with water;
- Multicolored paints, better acrylic;
- Grinding white. Often used acrylic or water-emulsion paint, which is divorced by water to the desired thickness;
- Pictures of special purpose or independently selected.
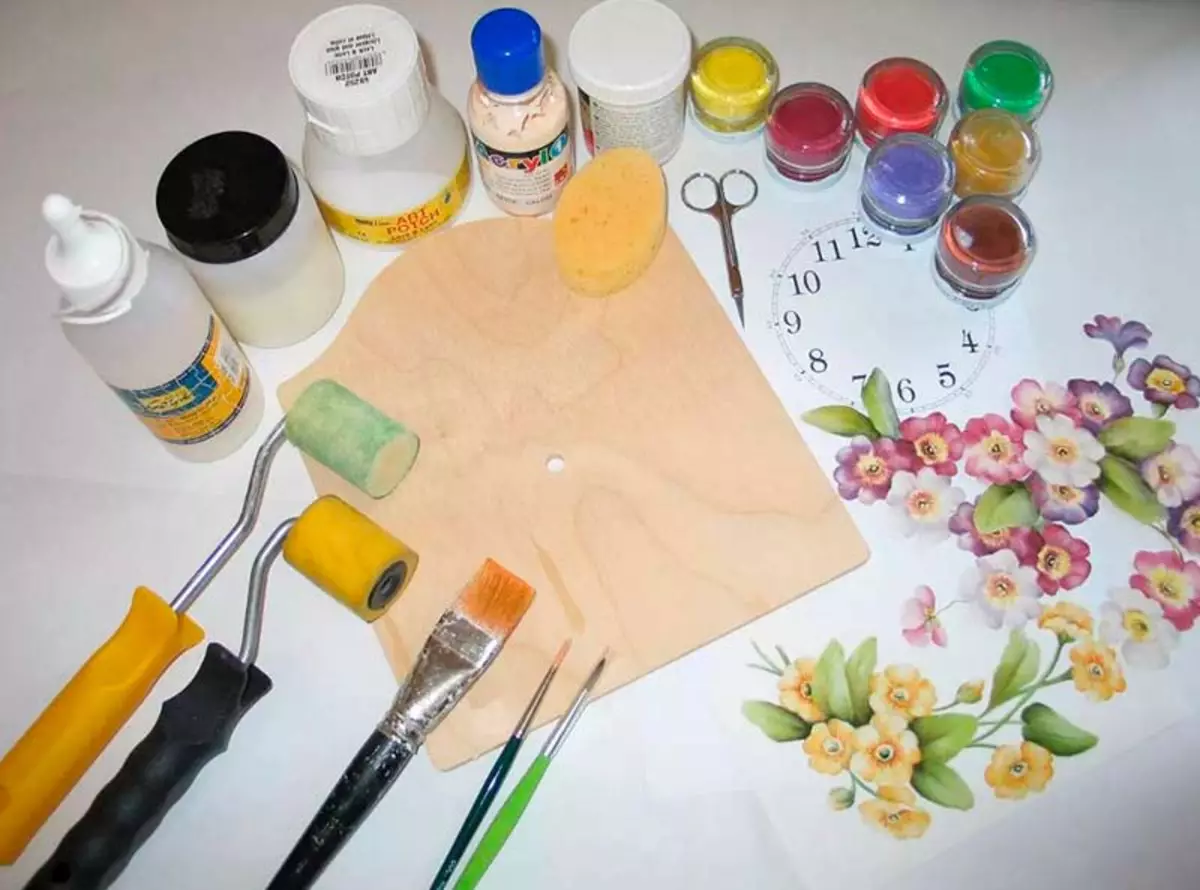
To draw small details of the pictures, thin brushes from a natural pile are suitable. A ruler, eraser, pencils can be useful.
Master class decoupage from napkins - advice beginners
For needlework, thin paper with drawing applied on it is necessary. The following types of material are used more often:- The napkins of three layers, from which only one with the drawing applied in the work is used. The material is characterized by low strength (torn when stretching), so it is necessary to adapt to it at handicrafts. Napkins are about 15-18 rubles per pack;
- paper from rice or tute fiber is less prone to deformation, but the cost of one element reaches 70 rubles;
- Paper decoupage cards have low elasticity, so the material on a flat surface is used. There are cards from 30 rubles.
Article on the topic: Features of the installation of electrocamines in the interior
In addition to special materials, pieces of wallpapers are used, cut from newspapers and magazines glossy pictures, thin multi-colored fabrics. Each house there will have raw materials for needlework.
Bottle decoupage for beginners
Decoration of glass bottles, which have a smooth surface, available to newcomers of decoupament techniques. The result is a beautiful and original packaging for wine, which can be used to be appointed with solemn, festive events.
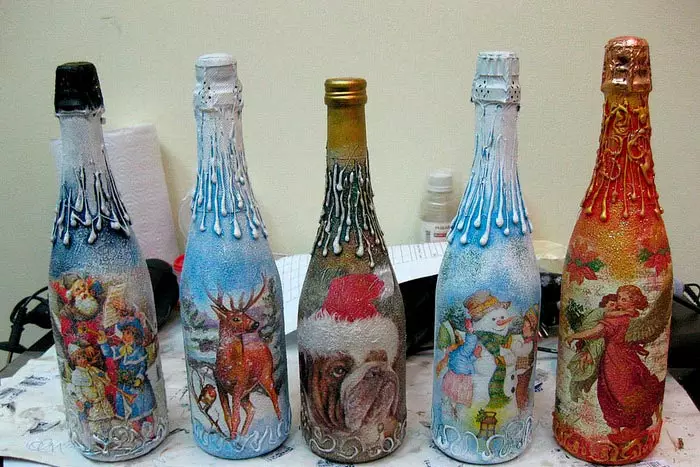
As a coating, special napkins are chosen, which are torn to better patterns.
- Before starting work, you must completely remove the old label. For this, the bottle is soaked in warm soapy water for 20-30 minutes. The surface is purified by a metal washcloth from the glue layer. The dried product is carefully disinfected with acetone or alcohol liquid.
- 1-2 hundred acrylic paint is applied to the surface, after which it is dried, all irregularities are processed by small emery paper. On a light background, the glove drawing looks brighter. If you need to darken a portion of the surface, appropriate paints are applied, applied using a soft sponge.
- From a three-layer napkin for decopter needlework by manicure scissors cut out a suitable picture. You can snatch the pattern. At the same time, the edges are better connected. The prepared place on the bottle is carefully treated with glue. Newbies are more convenient to use PVA, diluted in half water. A napkin fragment is pasted on a wet surface, fixing the image from the center to the edges.
- Smoothing the picture is recommended by a brush or sponge "driving" excess glue. Perform the procedure over the entire surface of the bottle, sticking the drawings in a specific order or chaotically. The space between the stickers can be fastened with suitable acrylic colors. Dorivovka is allowed with a thin tassel of missing parts.
- The finished pattern is covered with a layer of glue. When the product is completely dry, 1-3 layers of acrylic colorless varnish are applied from above. In this case, the repeated layer is applied after complete drying of the previous one. Souvenir is ready. If necessary, it can be washed with warm water.
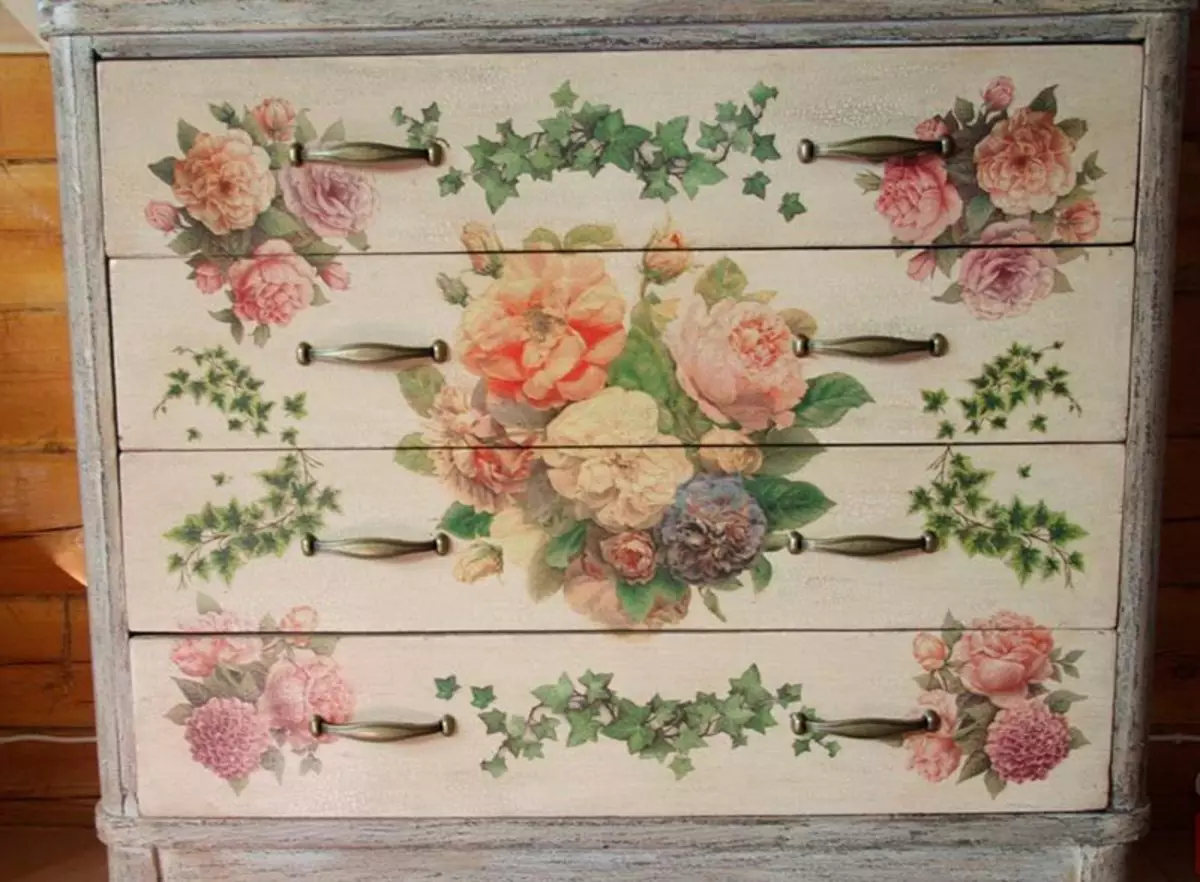
Furniture conversion for beginners
Decamental needlework allows to continue the operation of old furniture, updating the appearance beyond recognition.
- It is first recommended to disassemble products into separate fragments. It is advisable to replace or extort the fittings. Glass surfaces need to be deguted, by treating alcohol, a tool for washing dishes without dyes.
- Metal products are to be cleaned with sour solution (vinegar is taken with water equal to equal ratio). Then the dirt is considered a metal brush.
- Wood products are treated with shallow sandpaper to maximize all the irregularities.
- A primer is applied to the treated surface, after complete drying, it is recommended to clean the surface with zero sandpaper.
Article on the topic: how to make a cloth-jelly (velcro of dust) for cleaning with your own hands
Pictures are attached to the furniture surface in various ways:
- With standard technique, the renewal materials are pasted on the surface of furniture fragments. After drying, the area is covered with several layers of colorless varnish.
- Reverse decoupage applies to the extraction of glass surfaces.
- Art technique gives the effect of the picture. At the same time, a manual decisive of the colored background, combined with the drawing part of the pattern, is performed.
- Using the fragments of the ornament elbowed with uneven edges. Napkins are used, material, imitating plastic appearance, designer paper.
- The bulk machinery uses fragments of napkins to create a peculiar finished picture. After complete drying of the surface, fragments of the image are valued.
If polished furniture is updated, it is recommended to pre-completely remove the shiny layer of sandpaper.
Step-by-step decoupage instructions on glass
The decoration on the transparent surface is performed on the outer or inner surface. For example, a vase or a bottle is decorated outside, as the liquid is poured, the long-term contact of which is not desirable with varnish. If transparent utensils are used to eat, decoupage is applied from the opposite side so that the microparticles of the varnish do not fall into food.
If the working surface is smooth, you can not primitive it, but be sure to degrease. If desired, the background of the acrylic colors of the chosen color is pre-applied.

Step-by-step instruction of decaptentive needlework on the glass:
- Materials and necessary tools are laid out in the workplace;
- The image is cut out of the napkin, rice paper or independently printed on the printer using waterproof paint;
- A future picture is planned on the glass, marker is marker. Finding a pattern so that in the case of a displacement, return the pattern to the intended place;
- The napkin is wetted in clean water and pasted on a pre-lubricated PVE glue surface, without waiting for the layer dry;
- Separate the napkin more convenient from the center to the edges to smooth out all the folds and align bubbles with air;
- Gently lubricate the product with diluted in half with water glue, having a layer of soft tassel;
- When the glue base is dry, the decoupage surface is recommended to open lacquer;
- All the product is placed in the oven, gradually heating it up to 150 ° C.
After complete cooling, glass decorated items can be used.
The dishes can be attached to the form of historical antiquity, covering the surface with a plurality of cracks characteristic of antiques. Artificial ancient technique is called cracker.
Quick-drying varnish are applied to a non-fully dry painted surface.
Article on the topic: Sew the chair bag do it yourself: a sequence of actions
Basic decoupage
Decoration of a wooden decoupage style box allows you to create a unique souvenir with your own hands. For work requires:
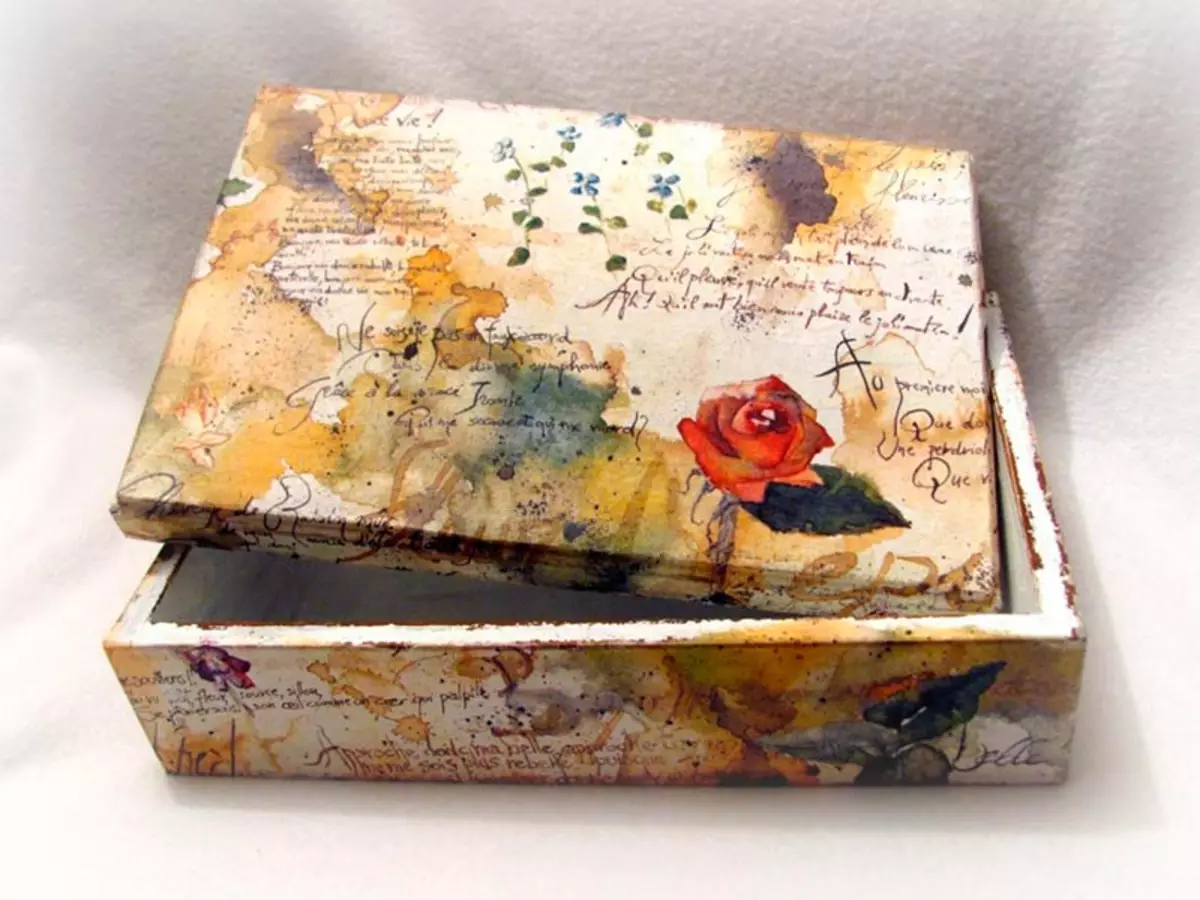
- The casket is small of the tree;
- PVA glue is desirable to dilute with water in half;
- Acrylic paints and varnish;
- scissors, brushes with genuine bristles;
- napkins for decoupage.
The surface of the product follows 2-3 times with white paint, allowing it to dry every time. Prepare appliques from solid sheet or individual components.
The surface is covered with a layer of glue. Without waiting for drying, fragments of the picture are superimposed, carefully smoothing the pattern, preventing the product from the formation of folds. From above, the casket is missing with a layer of glue, after drying which the box is opened by 2-3 layers of acrylic varnish.
Hound processing
Usually updated the wooden foundation of the clock clock. Previously need to disassemble the product to the components, separating the arrows and numbers.
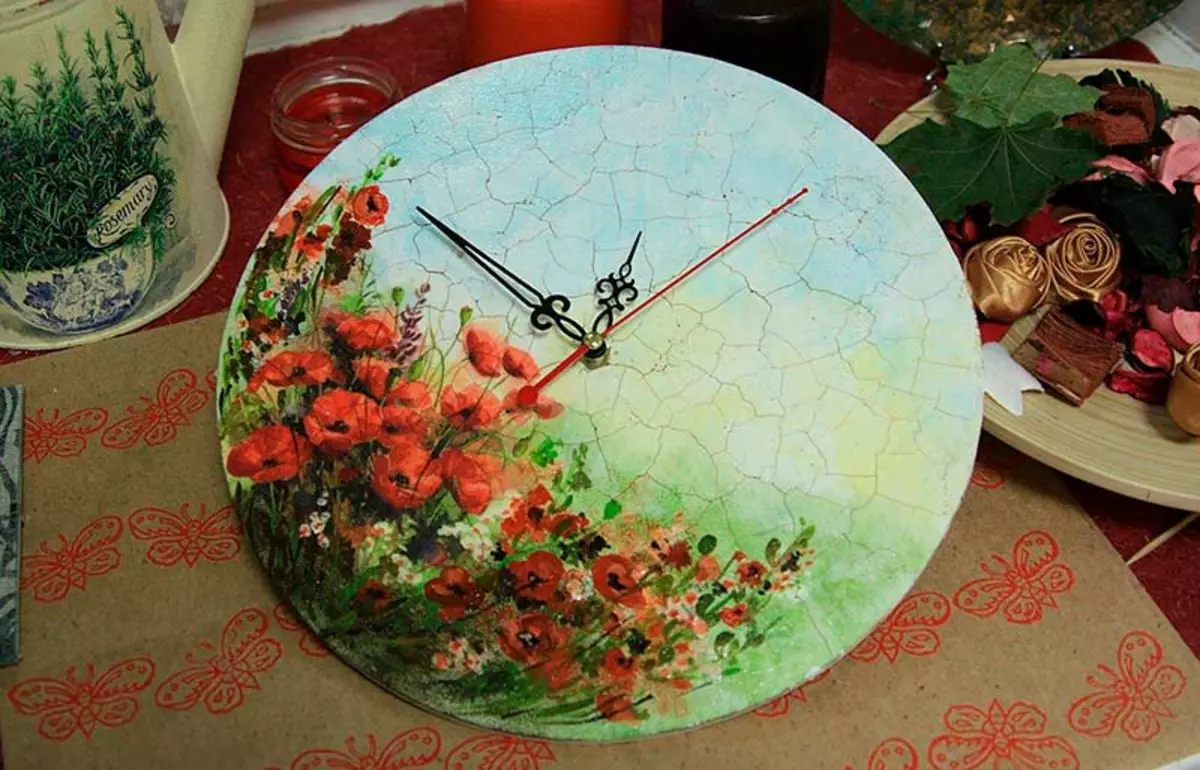
The work is divided into 2 stages: the decoration of the circle, according to which the arrows and the outer circuit of the clock are moving. The first part of the decoupage - update of the arrow space:
- Circle cuts out of paper;
- Cleaning and sweeping, if necessary, dial;
- Napkins or rice paper are pasted on the prepared plane, the pattern of which is made in a paper circle;
- The picture is glued on the base, moving the plane;
- on top of the napkin is processed by glue;
- After drying the workpiece with paper circle, the middle of the dial is closed, and the outer part is decorated;
- A structural paste is applied to the surface, mixed with acrylic paint, desired color;
- The finished surface is opened with varnish 1-2 times and a slightly sliced after a burnt;
- The clock is collected by inserting the arrow and numbers.
How to decorate a tea house
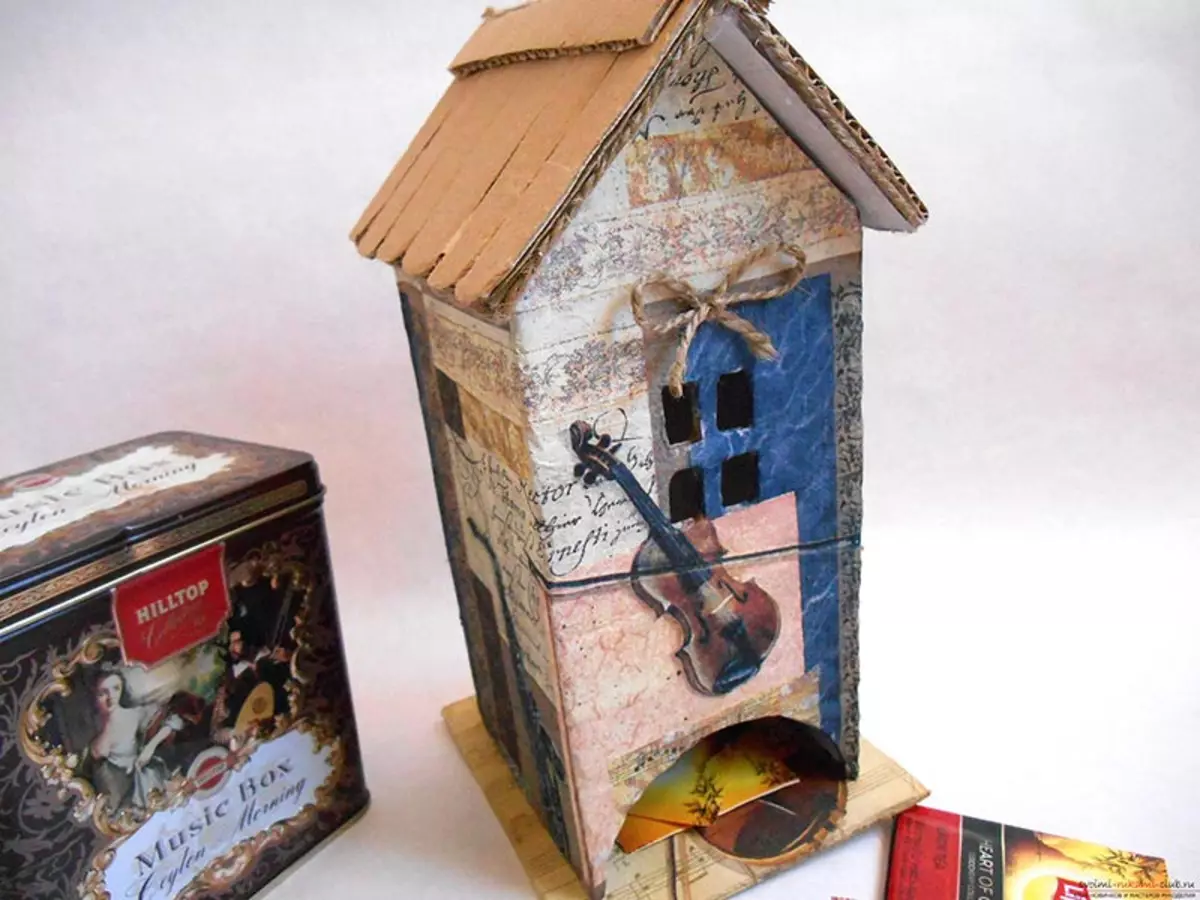
On the example of the decoupage of the decorative house "May roses" for tea bags, the processing of hard-to-reach places is carried out:
- It is preliminarily recommended to separate the surface of the primer house, dry, sanding small irregularities to sand, cover the working surface of the product with white acrylic paint in several layers. It is recommended to withstand one direction of smears.
- Corners, plane under the roof visor, curly arch need to paint the background green paint.
- For a more comfortable work, the napkin with the image of pink bouquets is necessary to try the hot iron, and then slightly spray with an aerosol quick-dry lacquer.
- Water moistened paper overlap to the file so that the image is slightly hung around the edge.
- Smooth the glued pattern to completely eliminate folds and bubbleness.
- The surface of the house and the lid painted green is covered with several layers of acrylic varnish.
As a decor on the roof, put the butterfly figurine, and glue the decorative bouquet of roses above the arch.
Each work performed increases the qualification of the wizard. The preferabity and flight of fantasy helps make housing beautiful and cozy.