
How to install a shower panel with your own hands
The shower panel is a high-quality supplement to the bathroom, which is located between the full shower and an ordinary shower nozzle.
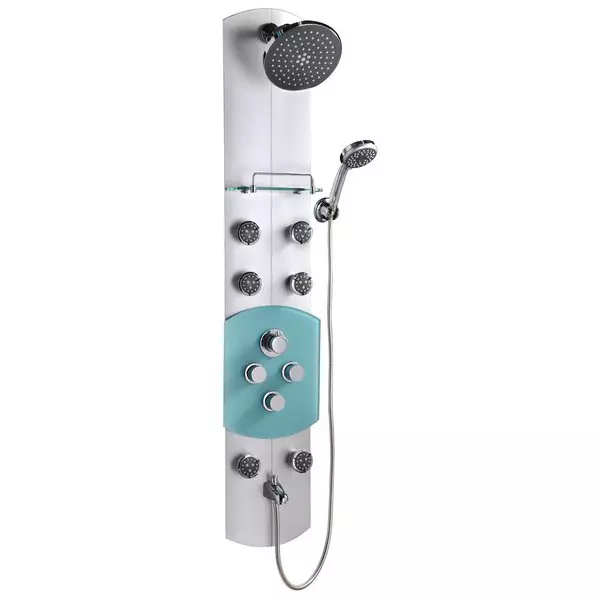
The shower panel will significantly save the place in small bathrooms.
These designs are not inferior to full-length brothers and competitors.
The process of connecting the shower panel will not be much difficulty, because in most cases such a design is supplied in a fully prepared, mounted form, in connection with which it will only be used to connect hot and cold water to it.
Installation of shower design in the bathroom over the bathroom itself - most often quite clean and not requiring redevelopment of the room process. This is another factor that makes shower cabins a more profitable solution than shower or hot tub. This is due to the fact that the latter in the process of installation require in most cases the overhaul in the bathroom. It should be known that this occupation is quite laborious and expensive.
Plum system in the shower.
When planning to connect a shower panel, you need to check the pressure in the existing water supply - it should not be below 2 atmospheres. In all other problems with the installation of such a panel, it should not occur, but installation work is not recommended independently. In this case, it is possible to lose a guarantee from the seller and the supplier in case something is done wrong.
In the process of carrying out repair work (even more overhaul) bathroom installation of the shower panel is left at last. It will need to be installed on the finishing tile or mosaic. In addition, before installing the shower design, you will need to make water supply to the installation site.
Devices of this type (both corner and wall) are supplied in full configuration with all accessories, which will be needed in order to perform installation. Contraindications for the installation process are practically no, which also makes sense to attribute the benefits of this design.
Article on the topic: Swing in the garden and in the country: rest for children and adults
Elements that will be needed:
- shower panel;
- cabin and pallet if the installation does not occur on the bathroom;
- brackets;
- Acrylic or silicone sealant.
Options for installing shower panels
Their installation may differ depending on where it is planned to install the design and from which materials it is manufactured.
Possible following options:
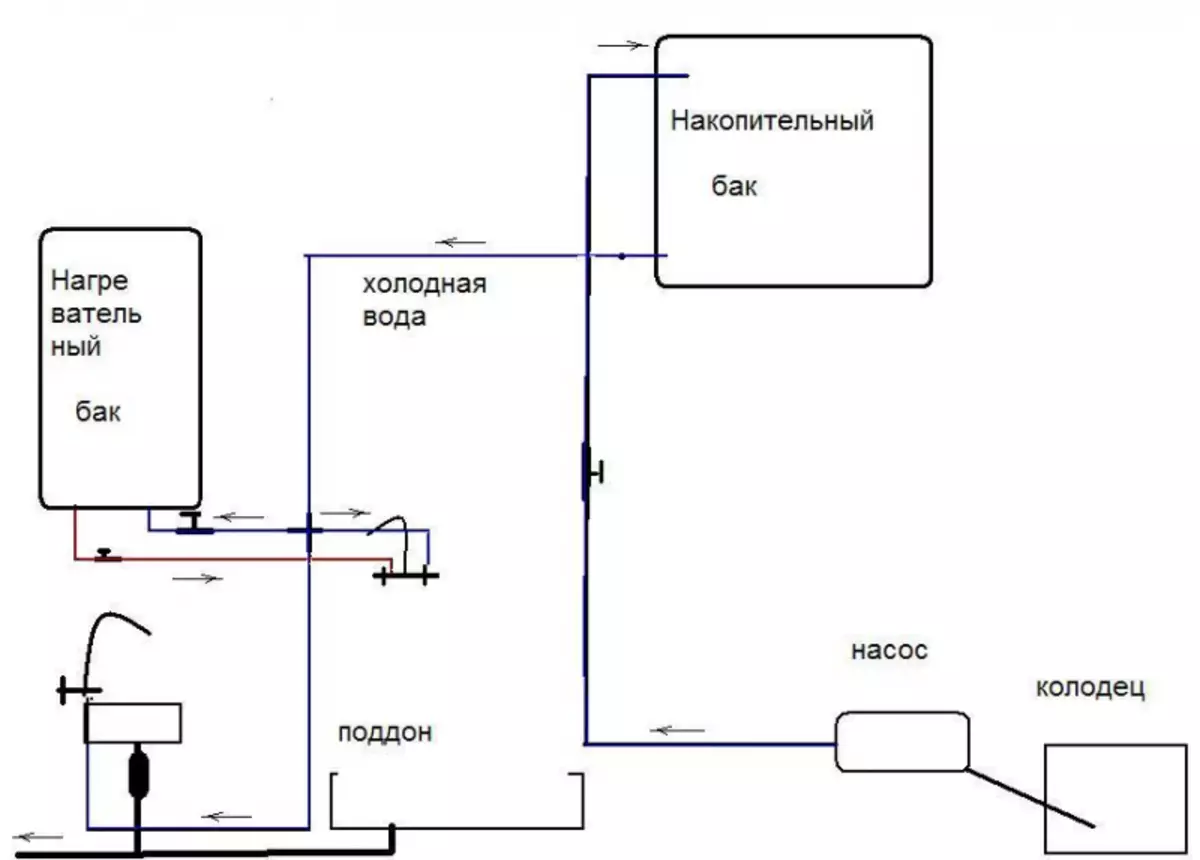
Wiring and sewage diagram in the bathroom.
- Installing the shower panel over the bathroom.
- Installation in a shower with pallet and ordinary drain.
- Multifunctional boxing with steam generator.
- In simple cabins with inclined floor (in most cases, installed in sports halls).
To date, you can purchase both separate shower panels and complete with shower cabins. In the second case, it is better to choose a cabin that has the size of at least 80x80 cm. It is necessary because in it in the process of taking the soul will need to be touched, raising your hands, move.
In the free cabin, the user will not have discomfort.
Regarding the shape of the pallet you should know that it can have a standard rectangular, round, square and semicircular forms.
It is quite important when you choose the shower panels to pay attention to the quality of the elements. If you plan to purchase a shower panel along with the cabin, it is worth knowing that the cabin should be made of glass at least 6 mm thick. Similar glass is more durable and resistant to shock.
As for the decorative side of the panel, then in this case, preference makes sense to give personal tastes. Panel models are available with different colors, patterns, and so on.
If it is planned to install it not above the bathroom, the process will include installation of equipment, which includes a panel with a mixer and a shower nozzle, pallet and fencing.
To date, there are cabins that have thermostatic mixers. It is able to maintain the optimal temperature in case of changing water in the system.
On this occasion there is some advice. When choosing a panel, it is best to give preference to the design, which has 2 shower nozzles - cascading and manual.
Installing a panel in a cabin with inclined floor
An independent installation of shower design in the cab can be made with inclined floor.Article on the topic: how to make the arch in the wall
To set up a drain (ladder), you will need to make a deepening in the floor.
In such cases, a facing tile with a small inclination towards the drain holes is placed on the floor. This floor arrangement can help prevent sewage stagnation. Further, the rack is mounted fencing, water is supplied to the mixer.
Before performing laying of facing tiles, it is necessary to carry out overlapping isolation to eliminate the possibility of moisture.
Functions of shower cabins
To date, a shower panel is rarely installed in a private house without a cab.
Most often consumers install cabins, which include:
- Side walls and rear panel.
- Pallet.
- Doors.
- The shower panel itself.
- Other accessories.
Quite convenient to use the cabins that have a function of hydromassage.
Installation of structures for the shower in the cabins of this type implies the installation of special nozzles, which with a certain intensity spray water.
The massage effect can be achieved when automatically turning on the nozzles with a variable frequency.
The quality of the massage is determined by the number of installed nozzles.
Such structures can be equipped with other functions:
- spinal hydromassage;
- lymphatic drainage massage;
- cervical and lumbar massage.
Some types of panels are equipped with steam function.
In the device of such structures, the main thing is that the correct air circulation can occur, and the couple is evenly distributed across the cab. Such devices must be equipped with a fan.
The main stages of the installation
It should be known that the independent installation of shower hydromassage panels in the cabins in most cases occurs with changes in the plumbing system.The location of the shower design in the cockpit may be as follows:
- In the corner of the room.
- With adjoining wall.
In order for such a design quickly fails or no grooves appeared, independent installation of the shower, should be carried out with the following moments:
Water, electricity, sewage is summarized after installing the shower device.
The sewage release should be no higher than 70 mm before the sewer tube from the floor. In another case, the installation of the pallet should be made on the podium.
Installation should be made according to the instructions that are offered by the manufacturer.
It is necessary to apply sealant to the location of the parts. His drying time depending on the brand can be up to 24 hours.
It is worth paying attention to the fact that the reliable panel in the shower cabin, the installation of which will occur with the help of acrylic or silicone sealant, should be carried out with the application of acrylic from the outside of the cab, and silicone - with internal.
Article on the topic: Waterproofs from sewer pipes with their own hands: how to make water
Installation of sewage and pallet design
Information that is described above may not be enough to understand how to install a shower rack with your own hands. In this regard, it makes sense to consider a more detailed description.
The installation should begin with a plum liner:
- The drain hose must be attached to the sewer.
- Connection locations are necessarily processed with sealant.
- In the suture hole of the pallet, you must install a sealing gasket.
- The surface of the gasket must be treated with silicone sealant. Installation of the gasket is made under the pallet, and the waste node is fixed with screws.
The next step in the installation operation of the shower panel in the cabin will install the pallet and the remaining cabin elements.
- The walls are fixed to the height of the pallet decorative panel, which are included. If the panel is absent, the height is determined by the possibility of connecting the sewage.
- Before installing the cabin for the shower panel itself, the place of the adjuncing of the pallet to the sewage pipe must be processed using the sealant. Next, it is necessary to be tested by tightness with the help of water intake into the pallet.
- If the flow in this place will not be found, you can begin to align the pallet in the level (horizontally) and its fixation using the settings of the legs.
It should be noted that the installation of the pallet is a rather light process. In addition, the structures with the pallet have a sufficiently large number of advantages compared to shower cabins with inclined floors.
When assembling there will be no need to carry out sanitary and hygienic events.
Installing enclosing elements
By mounting the side panels on the pallet, you must install the guides that are intended for the cab door.
Between themselves, elements are connected using regular fasteners using the sealant.
It is worth paying attention to the fact that the sealant should not fill in the grooves in the pallet, which are intended for better water drain.
To fasten the side walls, use sealant and regular hardware. The assembly of elements must be performed relative to each other.
After the upper panel is installed, it is necessary to test the operation of electrical equipment (light, ventilation, radio reception).