
Highlightened plasterboard ceilings are the optimal version of the ceiling. This technology is the most demanded and sold in the construction market.
Let's start in order and talk about the advantages and disadvantages of such a material as plasterboard.
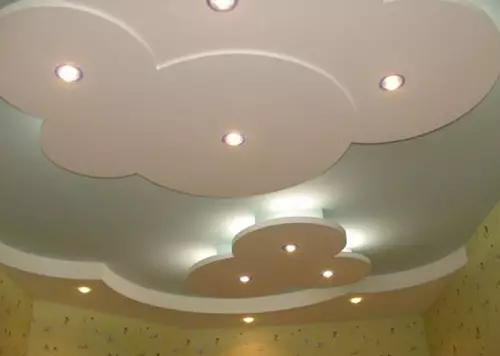
Highlighting plasterboard ceilings are the best option for making your home.
Advantages of drywall:
- is simple material in use and installation with your own hands;
- Sheets have a perfectly smooth and smooth surface;
- Plasterboard is an environmentally friendly product, the content of any kind of toxin is reduced to zero;
- The material is fireproof.
Disadvantages of plasterboard:
Ceiling diagram with contraction.
- The material is a fragile product, but if it is properly operation, it is not a hindrance;
- Plasterboard will be difficult to lift if you live high.
Now directly on the installation of the ceiling of plasterboard sheets with backlit with their own hands.
Externally, the technology may seem insanely complex and difficult, but in fact it is easy to perform, even if you are not a professional in this matter.
The only important point is the observance of all construction points.
To begin with, let's analyze the features of the plasterboard ceiling with backlight.
These ceilings are divided into two main groups:
- Ceilings with closed backlight.
- Ceilings with open backlight.
Let's start from the first type, since it is the most difficult in design. Why?
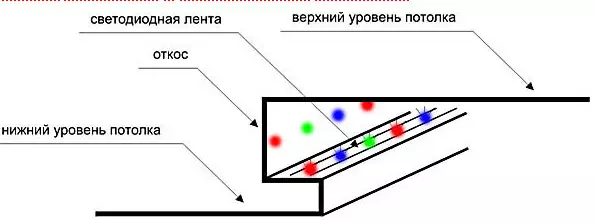
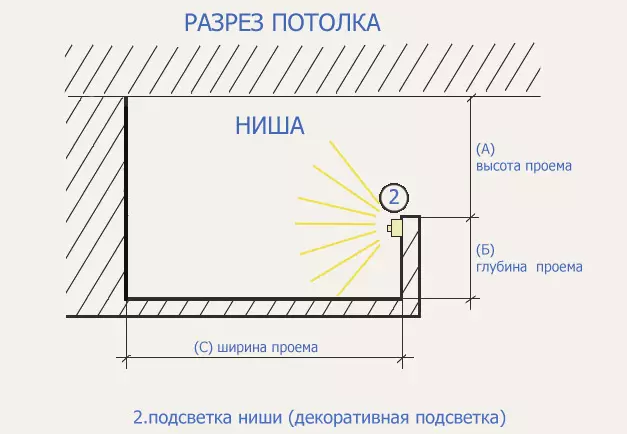
In order for the LED backlight to fit in a plasterboard ceiling, it is necessary to install a special niche, which is between the ceiling levels.
In order for the LED backlight to fit in a plasterboard ceiling, it is necessary to install a special niche, which is between the ceiling levels. In this case, the backlight guides its light not directly into the room, but to lighting the ceilings, from which, in turn, the radiation is subsequently proceeds. Thanks to these moments, an unusual and romantic atmosphere is created. LED backlight creates an amazing and individual appearance of the interior.
Article on the topic: Ball crane: Replacing the old product and installing a new
With the second option, everything is much simpler, as the lamps or chandeliers are either suspended, or embedded in a plasterboard ceiling. The only thing. What should be paid to, is the weight of lamps that can be used when installing plasterboard ceilings (maximum weight - 10 kg).
Now an important moment that should be discussed is the disadvantages and advantages of the installation of LED backlight.
Advantages:
- inexpensive and economical illumination;
- more efficient light source;
- simple installation;
- The ability to remote control.
Distinctive characteristics between LED ribbons and lamps:
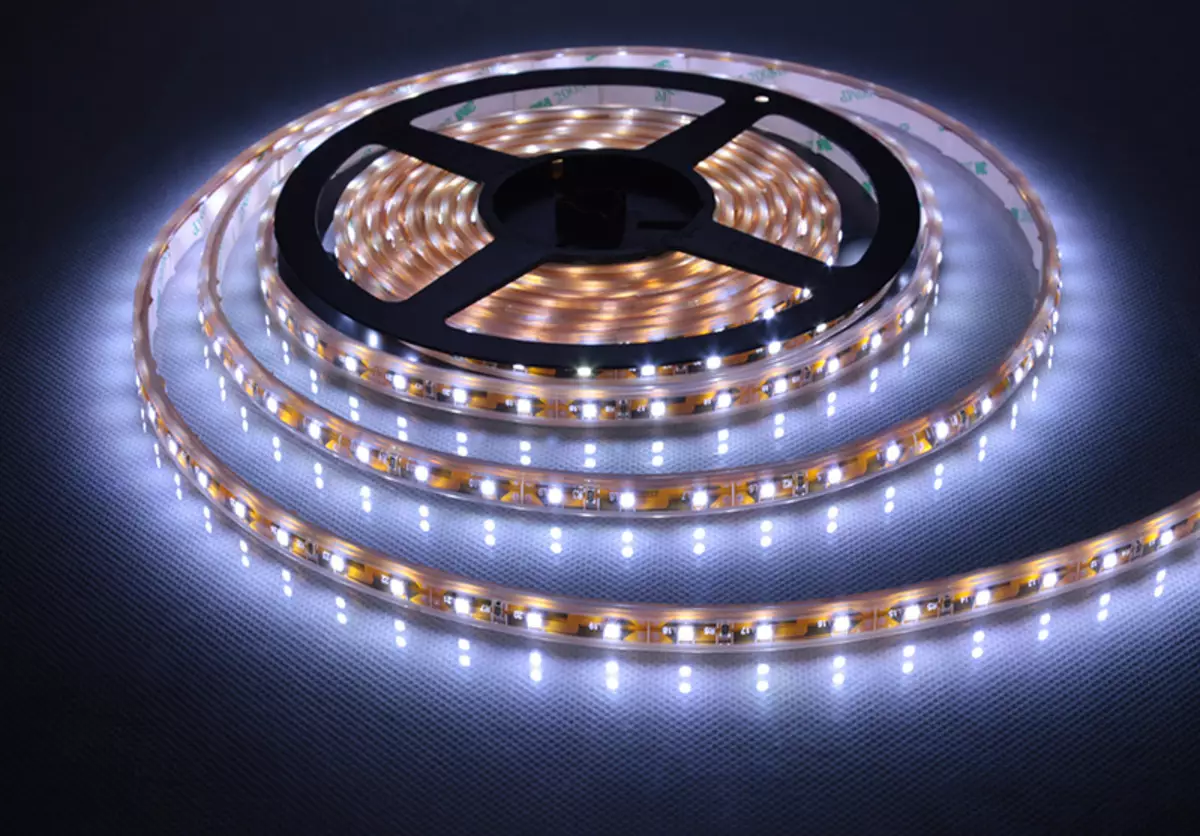
LED tape is an excellent solution for decoring the hidden ceiling backlight.
- Exterior of LEDs;
- Power of LEDs;
- LED color;
- The number of LED parts per 1 m tape;
- Availability or lack of moisture protection.
So, learning mandatory components of plasterboard ceilings with backlit, you can proceed to their installation. This work consists of two main stages:
- Installation of the ceiling.
- Installation of backlight.
And these stages, in turn, are divided into points that we will describe in more detail later, because you first need to list the tools and materials that will be needed in the work.
Instruments:
- Perforator (electric drill);
- screwdriver (screwdriver);
- level;
- Bulgarian (cutting scissors for metal);
- roulette;
- Corolnic;
- pencil;
- Plancock (construction knife);
- putty knife;
- Schucker (sandpaper);
- ladder.
Materials:
- plasterboard;
- Metal guide profiles;
- suspensions;
- dowels;
- self-tapping screws for metal frame;
- Self-tapping screws for drywall;
- primer;
- Putty.
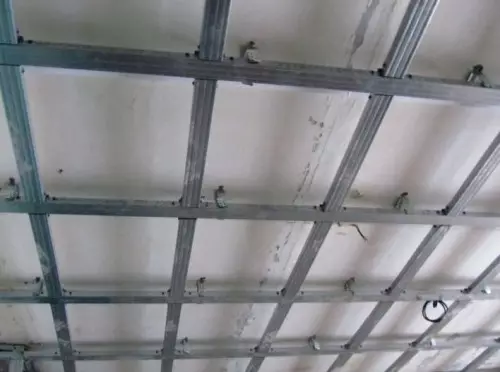
Installation of plasterboard ceiling with your own hands
It has already been said above that drywall is a fairly fragile material, so the presence of a second tier to which the backlit niche will be attached is simply necessary. The mount should pass through drywall. To do this, the main profile is installed in the middle, and after that, parallel guide profiles are recorded in a step of 40-50 cm.Montage Karcasa
In order to correctly and for a long time to install a ceiling of drywall with backlit with your own hands, the following items must be observed:
Article on the topic: Round bed in the modern bedroom interior: photo of furniture, which has comfort and comfort (38 photos)
Installation of ceilings from plasterboard sheets must be started from the profile installation, which is fixed exactly on the marking.
- Marking and measurement of the future plasterboard ceiling. To do this, with the help of a pencil, we make marks on both sides. The mark means how much the ceiling will be omitted. Next, there is a rectangle, where all parties must be equal. For this, with the help of a square, we note the distance to your own discretion, but it should be the same.
- Installation of ceilings from plasterboard sheets must be started from the profile installation. It is fixed exactly on marking.
- Installation of suspensions in the profile that are fixed by self-plugs in 40 cm increments. If you are all installed correctly, then you must have a box with uniform and the same parties where there are protrusions. After that, the entire protruding lower part is closed by profiles and is trimmed with drywall. It is important that for ideal ceilings, drywall must be cut smoothly.
Now you need to sew the framework itself, but the wiring is initially installed.
Fixing the plasterboard with their own hands along the directed profile, you get the desired vertical part of the frame. The horizontal end part is also drawn up.
At the final stage, a niche is made to illuminate. To do this, at the minimum distance in 5-6 cm, the side is installed.
Installation of LED backlight
LED ribbons are sold at 5 m. They can be attached both vertically and horizontally, thanks to adhesive basis: it is fixed in the cooked place. Before installing, check whether all the LEDs work well, only after that begin to fix the LED tape with your own hands.
Inside the ceilings, where the wires were displayed, the power supply unit was installed with their own hands, with which the LED backlight will work and it will be remotely controlled. Connect the block to the network - and everything, the design is ready!
Article on the topic: Wooden blinds do it yourself