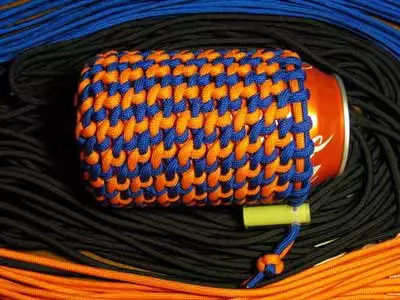
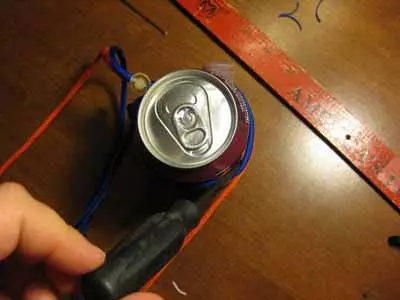
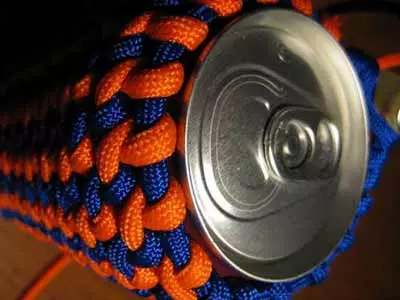
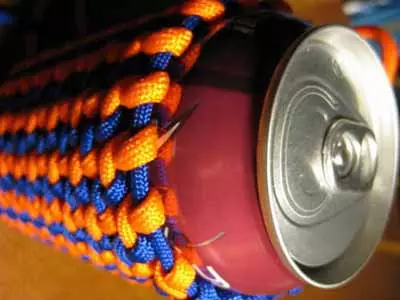
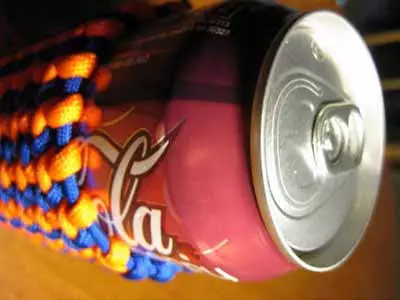
Returning to the already loved Paracon. Such a light and durable, he became an indispensable friend not only extreme guys and girls who love to jump from the aircraft (after all, the direct destination of Paraconord is the role of parachute sling), but also to people who love to spit from it all sorts of products. In this article, you will learn how to turn the Parakord into the original case for a tin jar with your favorite drink. Look attentively on the photo, read the description of actions - and you will all fail.
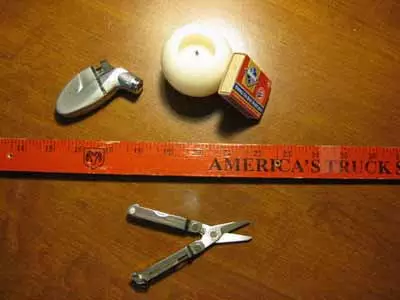
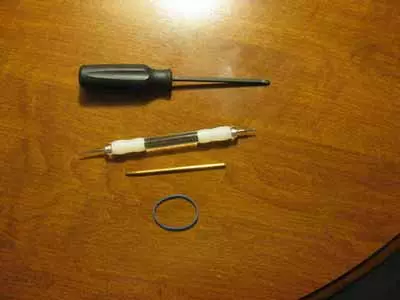
Required materials and tools:
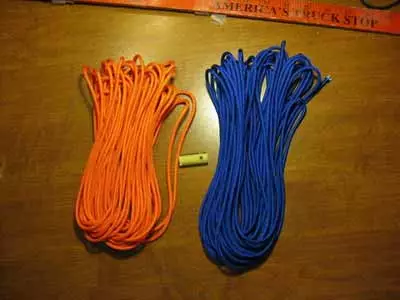
- Two Parakord, each 7-8 m in length, it is better to take with a margin, because it is not difficult to cut unnecessary difficulties, unlike the opposite situation when you are missing the cord to complete the product;
- cord lock;
- Tin Bank (better closed);
- lighter;
- Measuring tool (tape, roulette, etc.);
- Thin blotted tool (something like knitting needles, screwdrivers or studs). Whatever it was, it should be thin and durable so that they can be squeezed between tightly tightened nodes;
- Rubber belt;
- Long tongs or pliers.
Processing ends
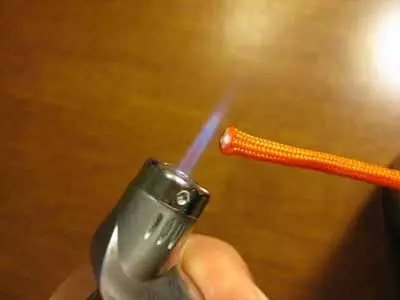
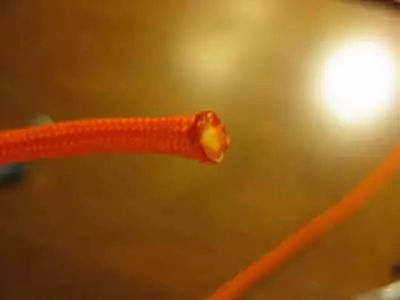
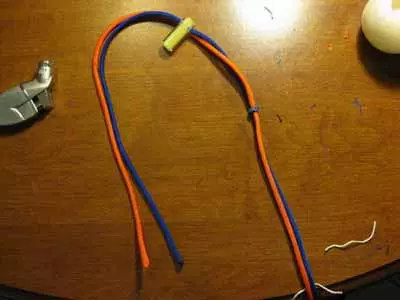
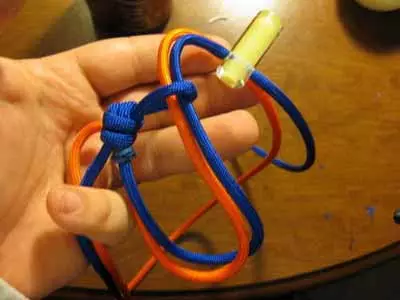
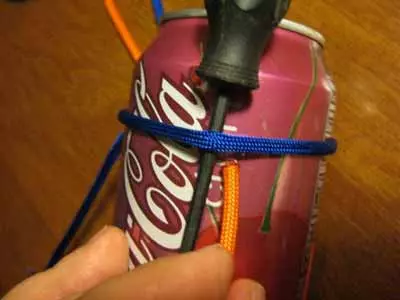
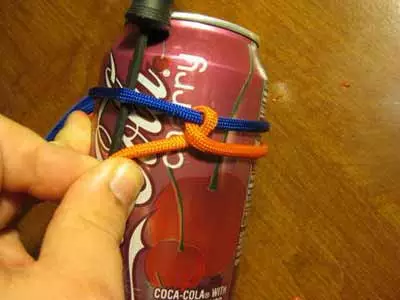
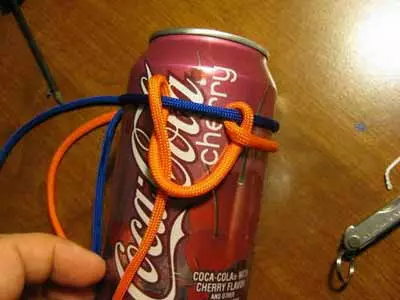
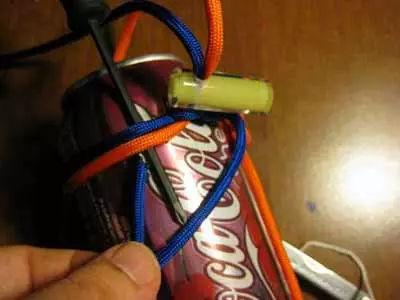
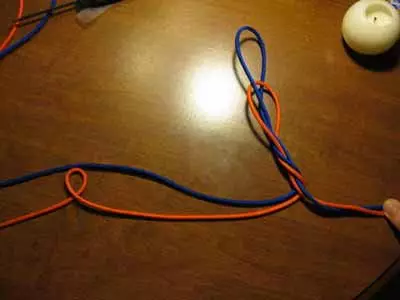
Consistent Blue Parakord call "Cord A", and orange - "Cord B". First you need to handle the ends of the cords so that the veins do not climb out of the colored shell, for this burn the ends of the lighter. Once again I remind you that you should not touch the place that you have just sent fire, "get a burn.
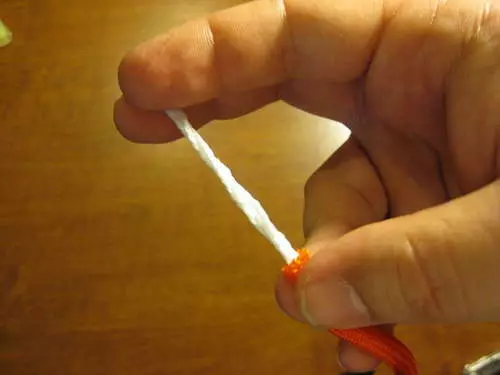
Take the gum and firmly cover it with it two cords, slide it at a distance of about 30 cm from the end. From the same side, fasten the retainer (position it at about 25 cm from the end). You can immediately tie a node at the end.
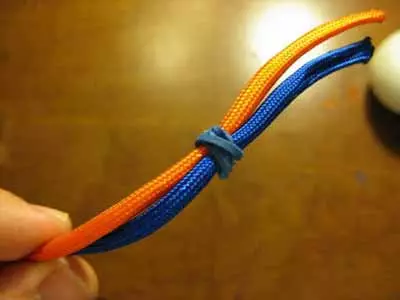
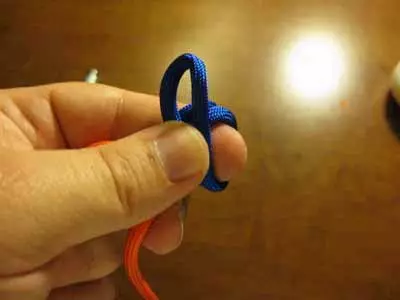
First knot
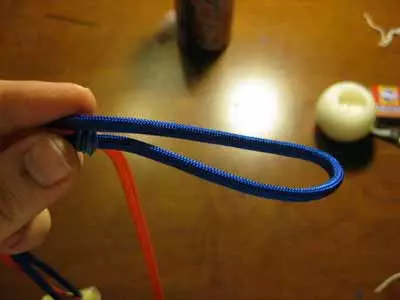
Now you can tie our first node, but first you need to measure where to do it. Just make one turn around the bank, ranging from the retainer and in the direction of the running end. I clarify a little ... The end end is our far end from here (the loose-free end of the cable, which is starting to move at the knitting knot), the root end - this one, near which we secured the rubber band (the end of the cable fixed motionless or used during the knitting unit; is opposite END). Click a rubber band, measuring one turn around the bank. Take about 15 cm Cord A and make a loop with a size of 7.5 cm (the loop is when the cable is bent twice as well, so that it does not cross with himself).
Article on the topic: Capper-Kubanka knitting needles: Women's products with schemes, photos and videos
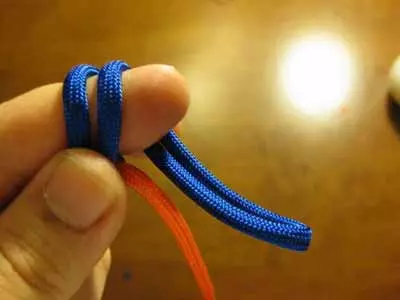
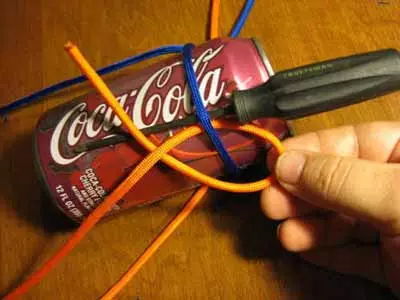
So, we do a node:
1) Help the rubber band, cord A, cord B and loop between the thumb and the first phalange of the index.
2) Loop Make a turn around the index finger.
3) Move the thumb to hold the cord on the loop, which was formed around the index finger (such a loop is called "cathing" or "closed loop" - made by the chassis or indigenous end of the cable so that the cable is crossed out with himself). You should distinguish just a loop and a closed loop.
4) Slide the index finger from the cathry and the end of the loop into it.
5) Stand out the loop as much as possible. Congratulations, you tightened the first knot!
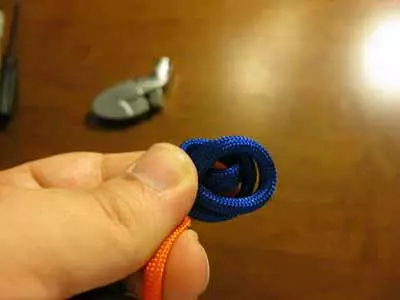
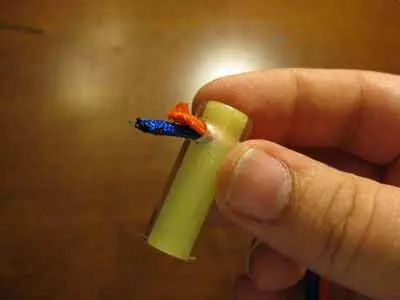
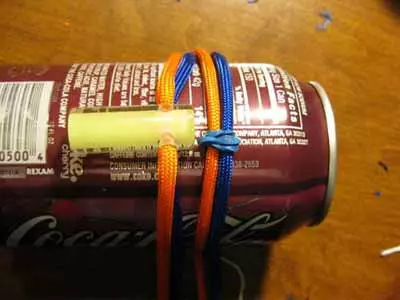
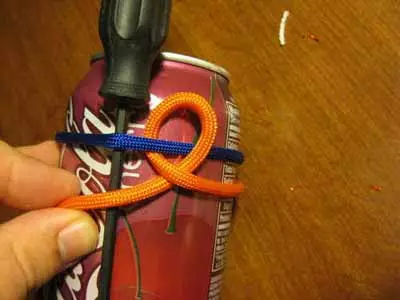
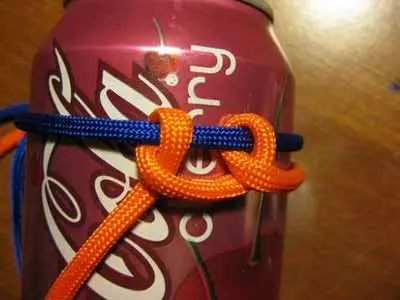
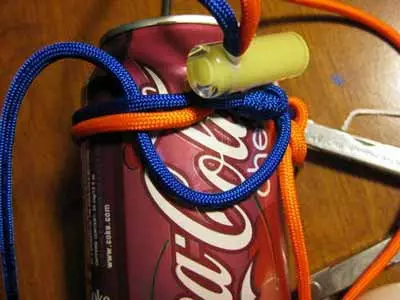
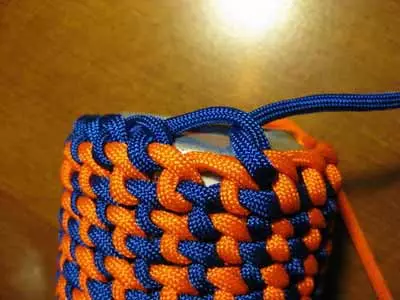
Skip the retainer and a root end through the resulting little loop and we will form a new big loop for our bank.
Our first node is too large and we must tighten the loop so that she wrapped two cords missing into it. Grab one of the blue cords at the bottom of the node (a thin blotted tool will help here, which I spoke at first) and pull it for it. If the loop on the other side of the node is tightened, then you pull for that cord. Tighten the loop so that the blue and orange paracords can slide in it.

Now get rid of the excess gap, tightly pulling it on the node itself.
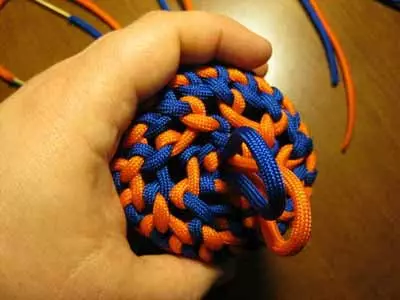
Cut into a large loop with a bank in such a way that the cord and was above the cord b and clamp the loop lock. You can cut the gum, we will no longer need it.
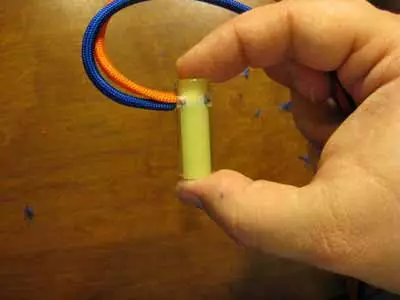
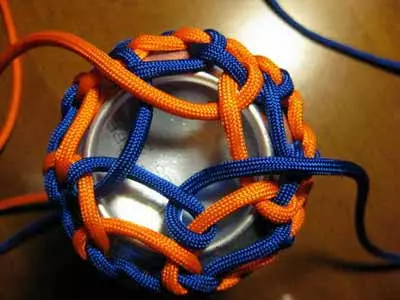
Now we are ready to start weaving.
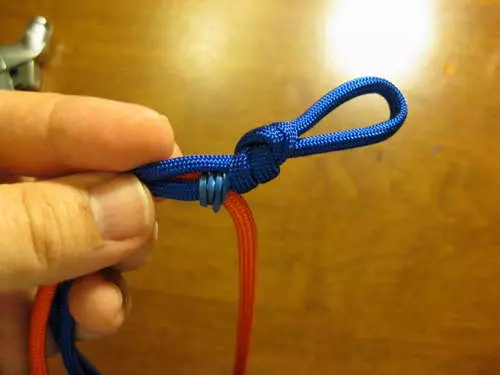
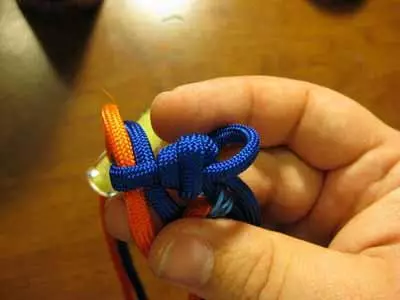
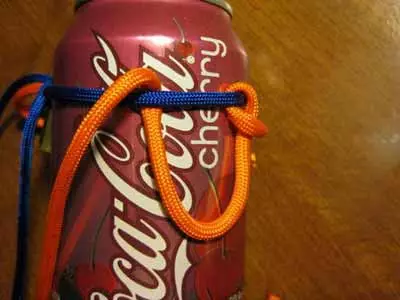
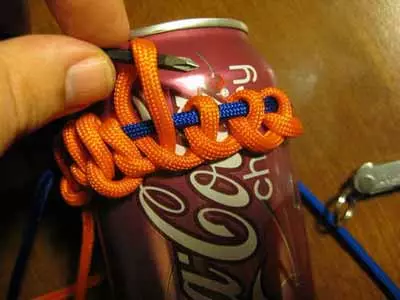
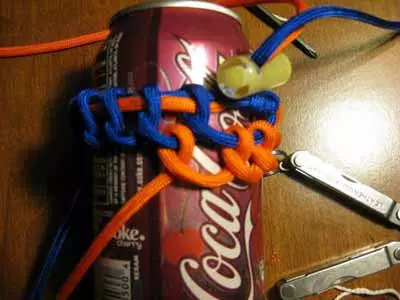
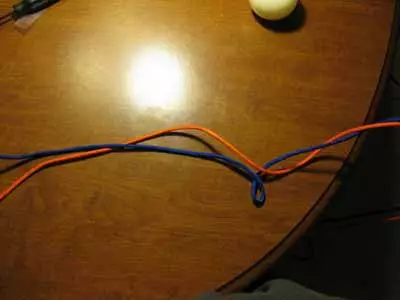
Second knot
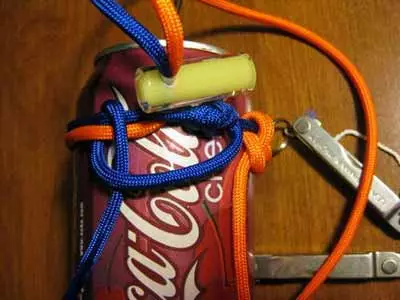
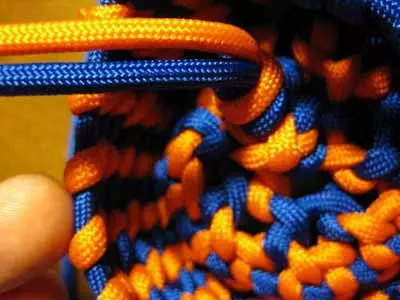
It is time to get acquainted with the second node ("Half-Hitch"):
1) Let's start with Cord B. Insert the needle between the cord and and the jar, exactly opposite the retainer on the other side of the can, as shown in the photo.
Article on the topic: Lanterns do it yourself from threads and ball: master class with video
2) skip the cord b under the cord A, moving upwards.
3) Cutting the cord A, send the cord B in the opposite direction.
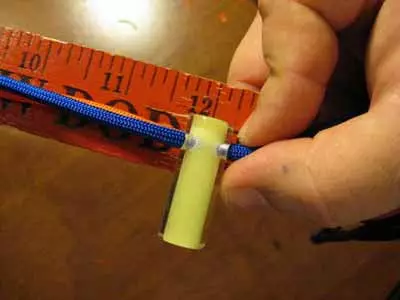
4) skip the end of the cord b under it and get our second node, it remains only to miss the remaining Paracon Fear through it.
5) Start through the node, all the remaining 6 with more than orange cord meters and tighten. Make sure the node is located opposite the retainer.


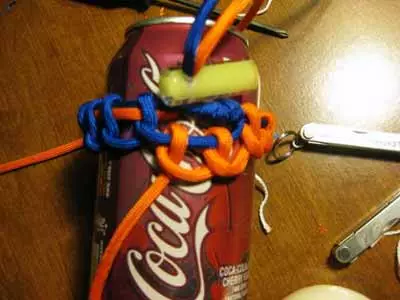
The third node is done in the same way: the end of the cord b we skip under the cord A, we return, rising a blue cord from above, and we skip under yourself, tighten, - ready. Make sure you make small gaps between nodes.
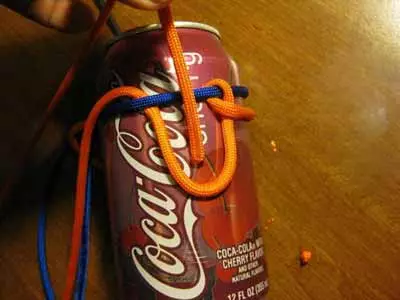
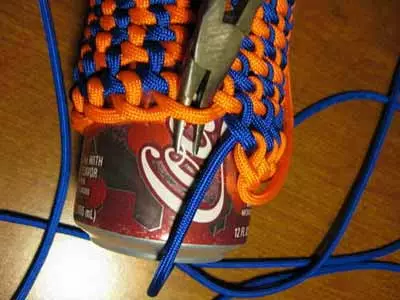
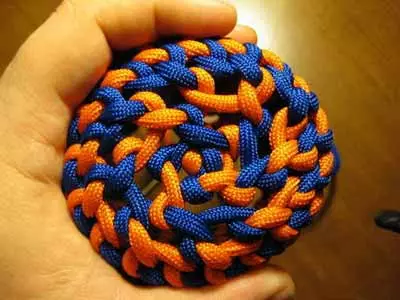
You need to make 9 such nodes between the middle of the circle and the first (large node). It is 9, because throughout the circumference can we need 18 such nodes. 20 - too much, because The cover will not firmly facilitate the bank.
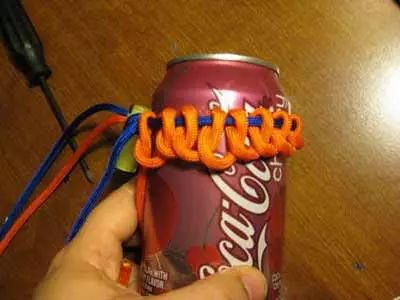
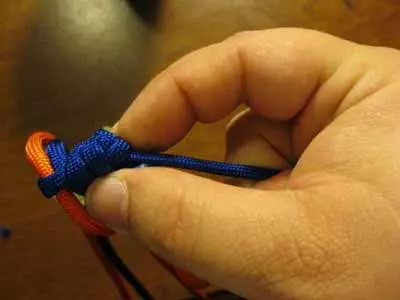
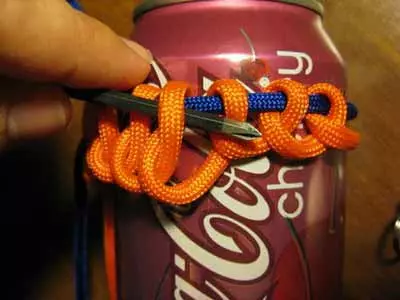
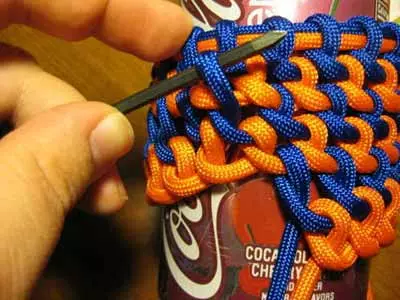
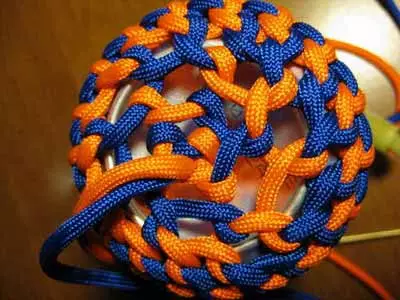
Before moving to the Cord A, we need to end our nodes. It will be convenient to do with the previously used tool. By inserting it into the gaps of the nodes, pull up the cord, tightening, aligning and evenly distributing orange nodes on the blue cord.
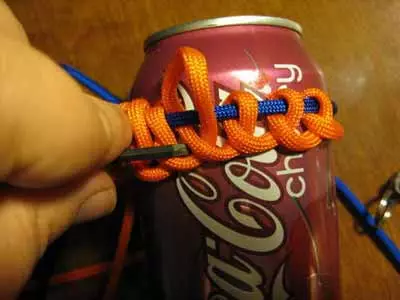
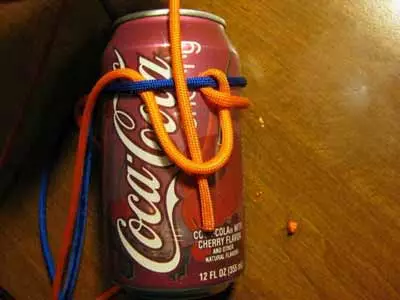
For cord and start from a double gap, as in the photo below. You need to make 8 knots (I was not mistaken, it was 8).
To start the next row, switch to the cord B. Tie two nodes at a long period and from now on to each "cell" we will insert one node. Continue to make knots in each "cell" of the blue cord until they are running out. Tighten all the nodes on the cord b, then - on the cord A and continue the job.
Article on the topic: How to make a box of cardboard with your own hands: Scheme and template with MK
Advice
While you are wearing your case, I would like to give a few useful tips.
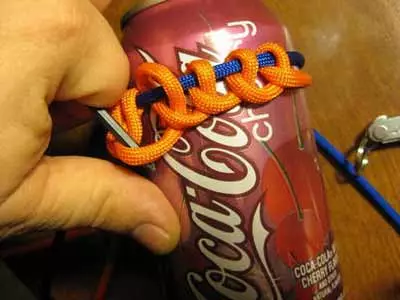
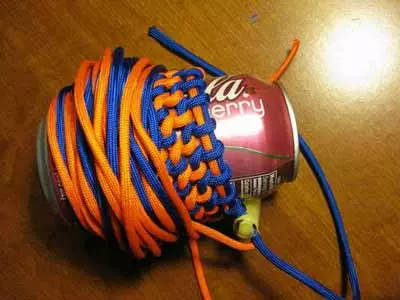
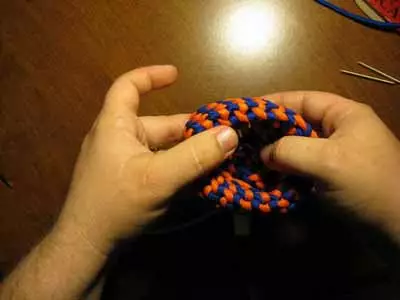
Note that this work will take you a lot of time. So, if you are tired or you have more important things, just wrap the free ends around the jar and take a break. When will be ready to continue weaving, just unlock ends
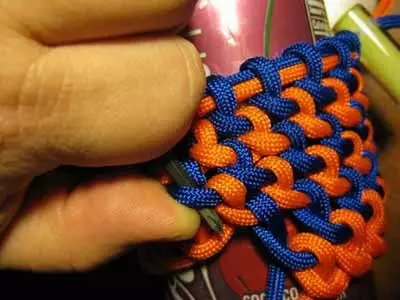
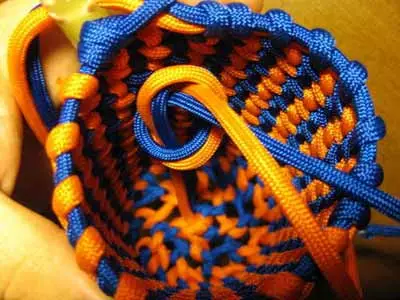
Keep track of your nodes, the ranks must be lightened to each other tightly and without big gaps. In the photo below you can see the section on the left, which is poorly "fitted", this should not be. Eliminate similar shortcomings.
Remember that the Parakord will be constantly leaving and twisted, periodically give it in order.

If you have any pliers or tongs with long pointed teeth (you can use a medical clamp), then using them, you facilitate your life.

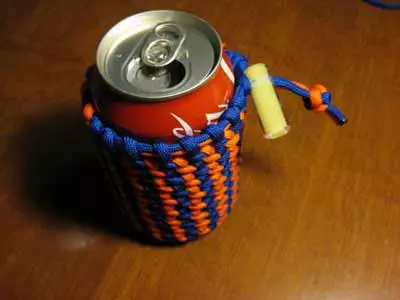
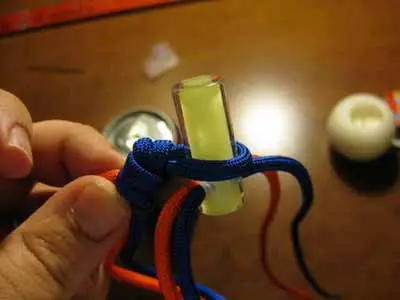
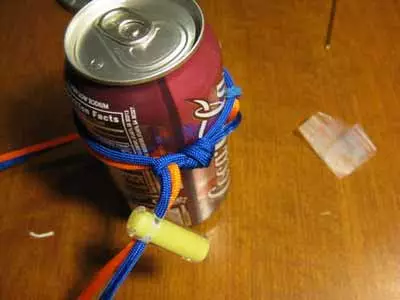
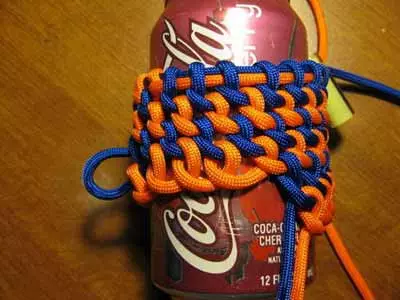
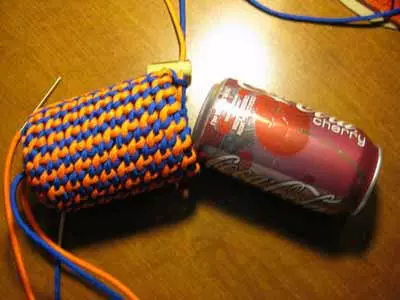
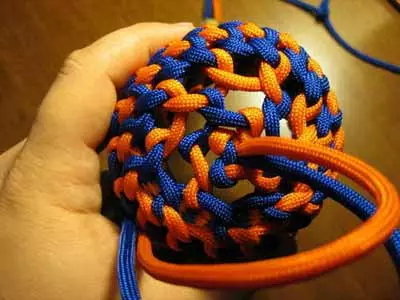
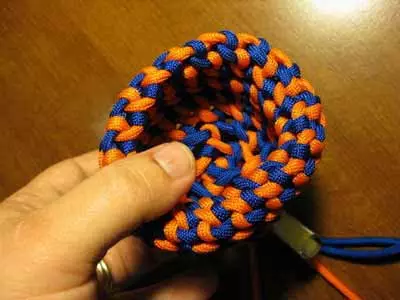
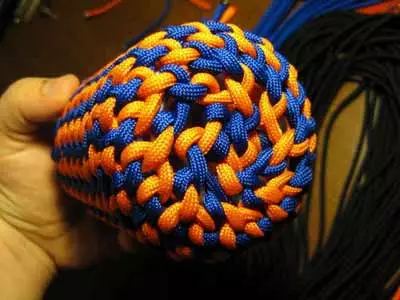
Case ready
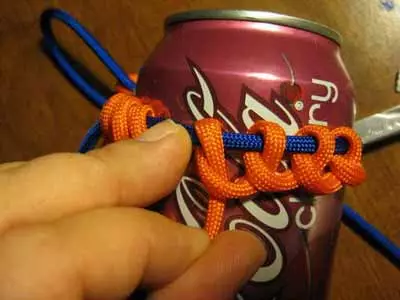
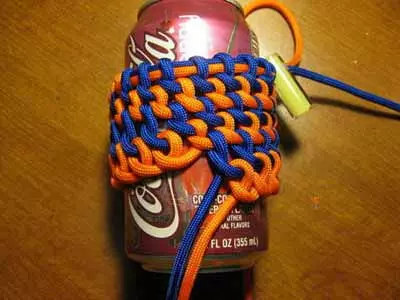
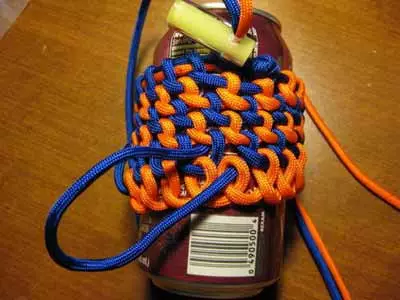
After you put about 10 rows, move the cover to the top of the jars and decide, the document will be covered with Parakord. Note: If you pull the cover to the top, then you will be inconvenient to drink. So find the best option and lock the top in the right place, tightening the retainer tighten.
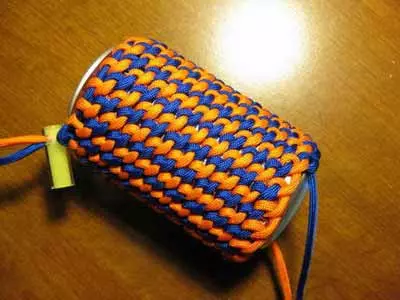
Continue knitting knots until one row remains to Niza banks. Now you need to narrow the seam, for this, start jumping through one cell. When tighten the last loop, tighten each node and form the bottom.
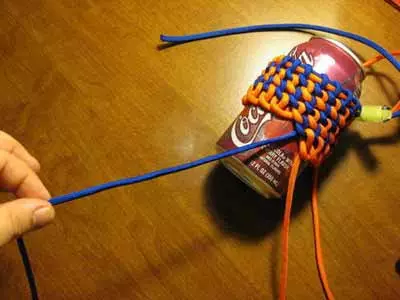
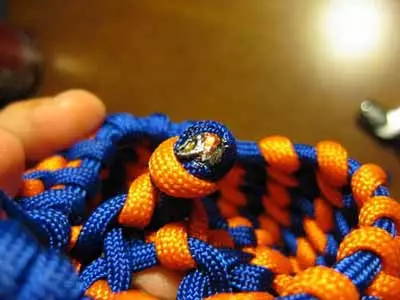
Pull the jar, find the smallest hole in the bottom and skip the ends of the cords. From the inside, tie the ends, cut down too much and burn the lighter. Lovely case ready!
Lovely case ready!