
Do you need to really urgently make a pilot for a parade or a military game? For a holiday in school or for theatrical performance? Then our article is specifically for you. Today we will tell you in detail how to make a pylot of paper with your own hands or sew it yourself.
Step-by-step instruction
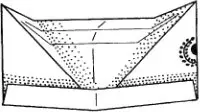
We offer the first step we offer to consider the detailed and phased process of making a paper file on the following diagrams and photos.
In order to make the soldier's cap in the Origami technique, take the paper. Also comes in handy hours of free time, a little desire and a droplet of patience.
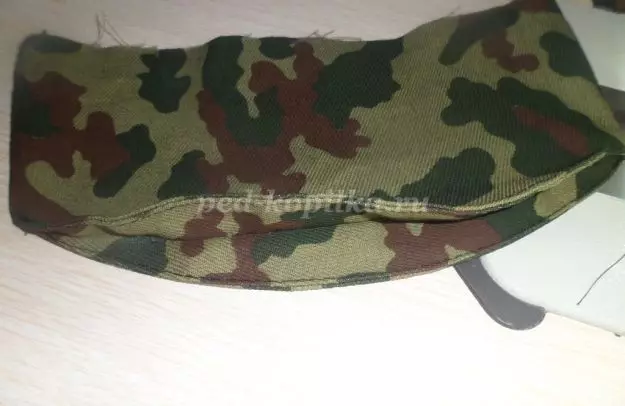
This is what the ready-made pilot looks like:
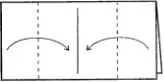
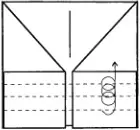
The first step we need to bend the sheet first along the vertical line, and then along the horizontal axis.

The second step is necessary to bend the edges on the sides by the middle.
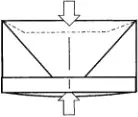
The next step is the upper corners inside, and then extend them.
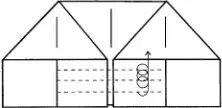
The fourth step we need to bend several times and break the rectangle.
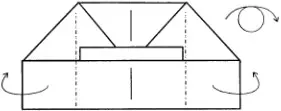
The fifth - bend the edges and turn the future soldier's cap.
Then it will be necessary to repeat the fourth item, that is, to make a rectangle several times.
From above, a little flatten the future pilot.
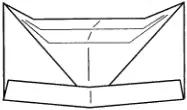
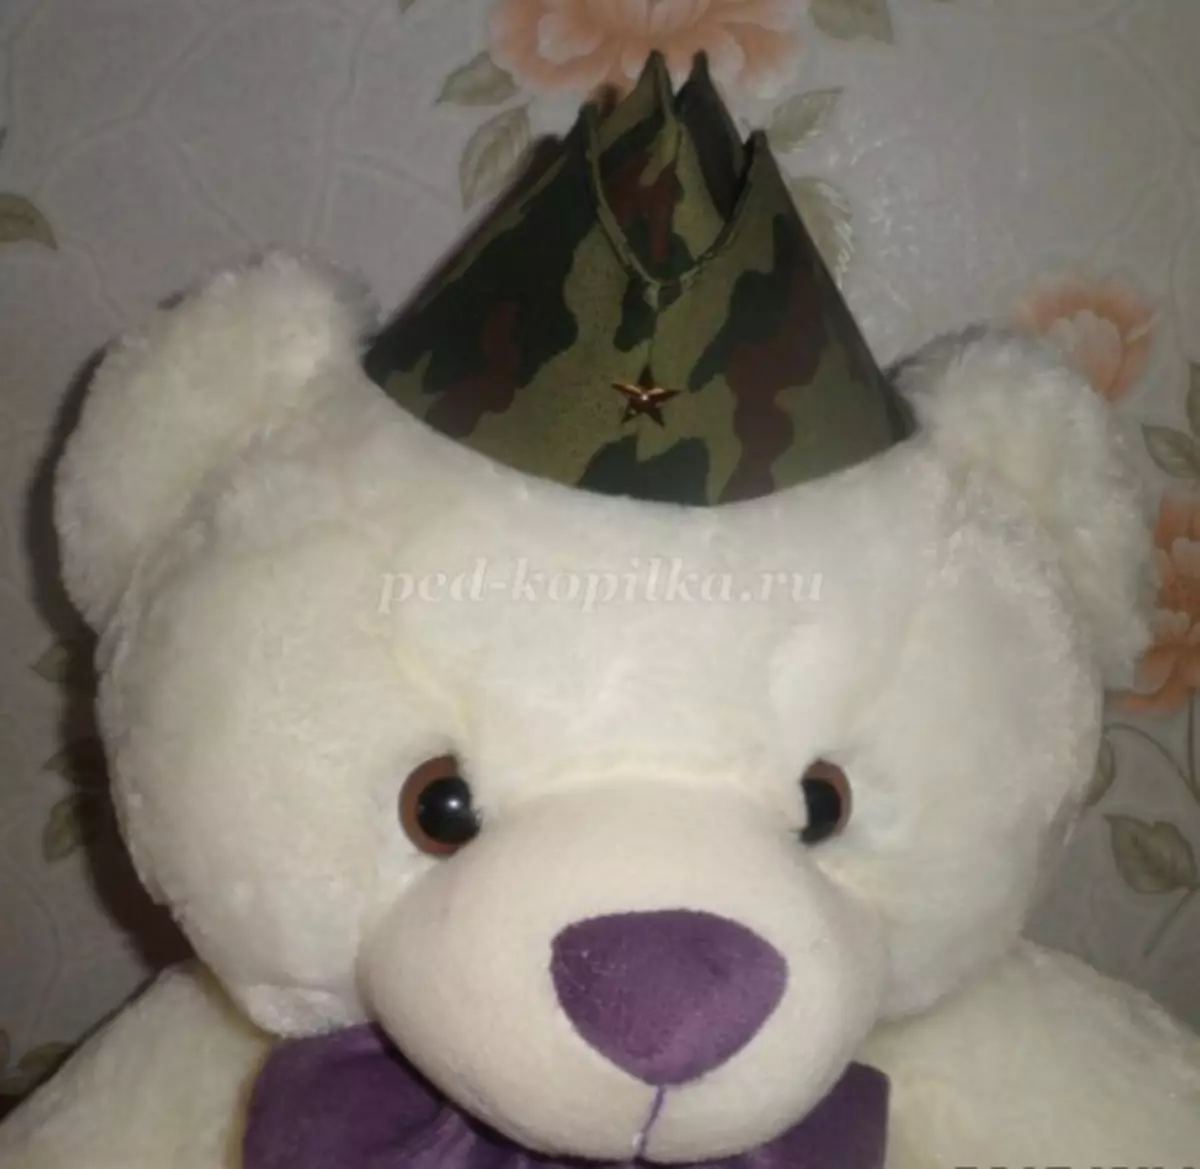
Military Soldier Pilot Paper is ready.
Second way
And we offer the next step to consider the detailed sewing process of the soldier pilot from the fabric of the military type with step-by-step photos.
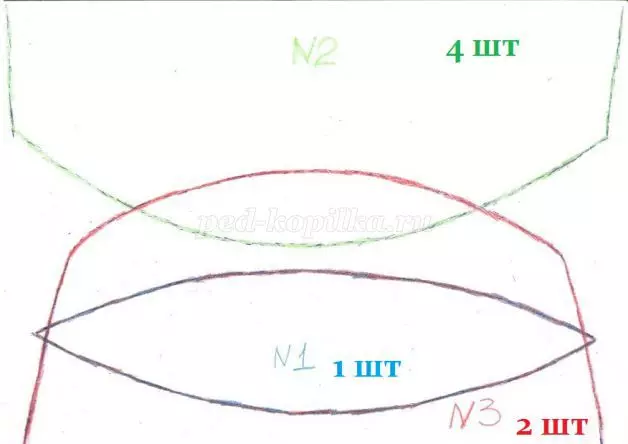
In order to make a headdress, take the khaki cloth, scissors, needles, threads, pins and pattern.
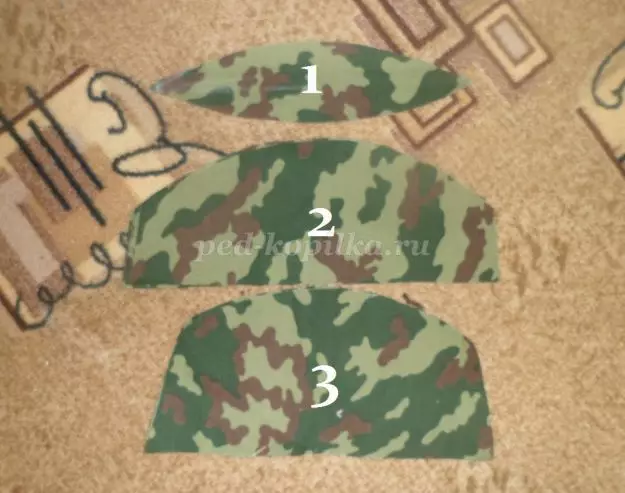
Pattern of the future pilot. Suitable for 50 cm head:
We want to remind: no need to forget the safety rules. When you work with a typewriter, a safe distance should be followed.
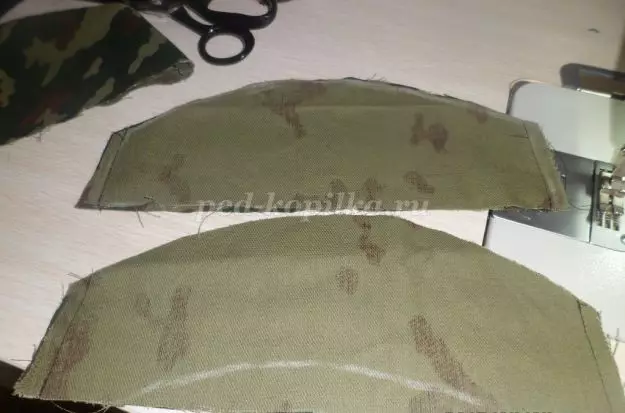
The first step we cut out the pattern, then put it on the fabric, supply and cut out all the details.
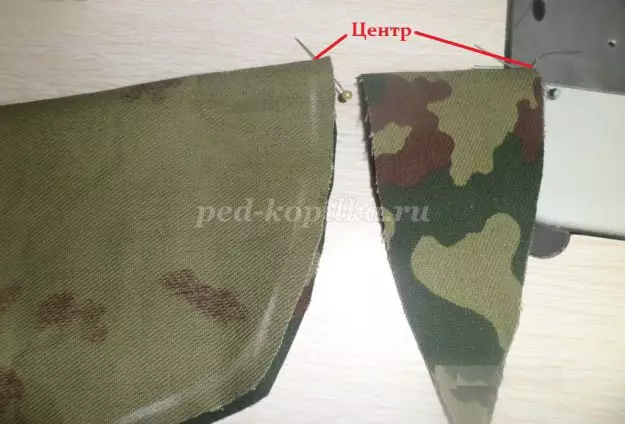
Then we need to connect the first and third details. To do this, find their center (fold the details in half, the place of folding center), take the line of the pins.
Article on the topic: Garden do-it-yourself sick materials with photos of ideas
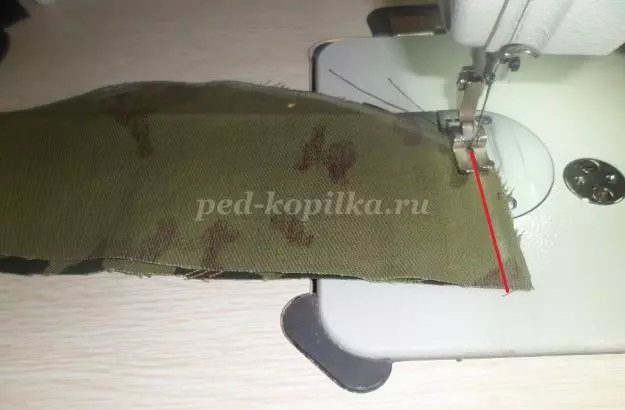
Route the machine line along the line, which in the photo is shown in red.
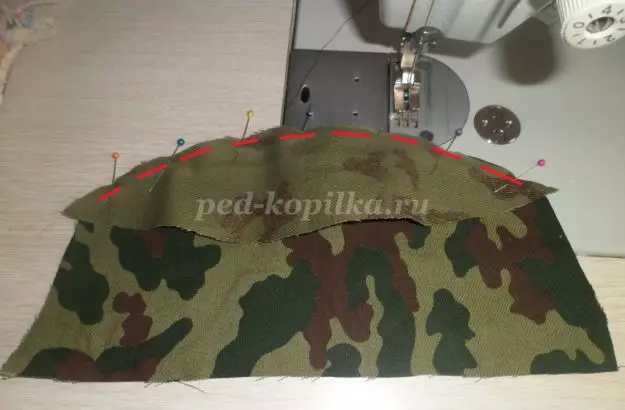
The next step we need to sew the second detail with one side to the third number, and the second side to the first workpiece.
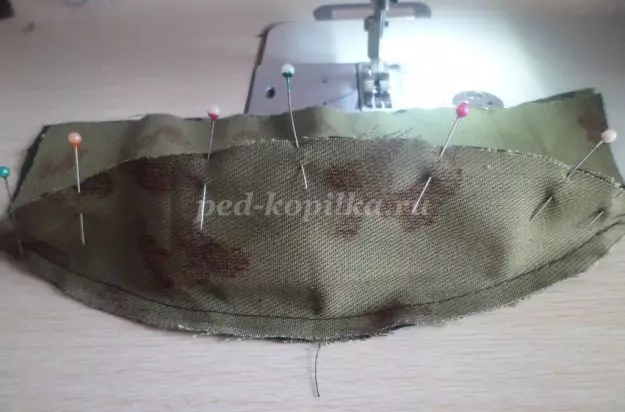
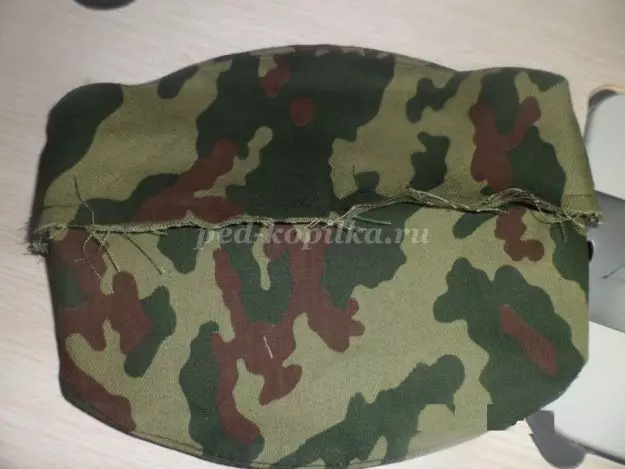
That's what happens at this stage:
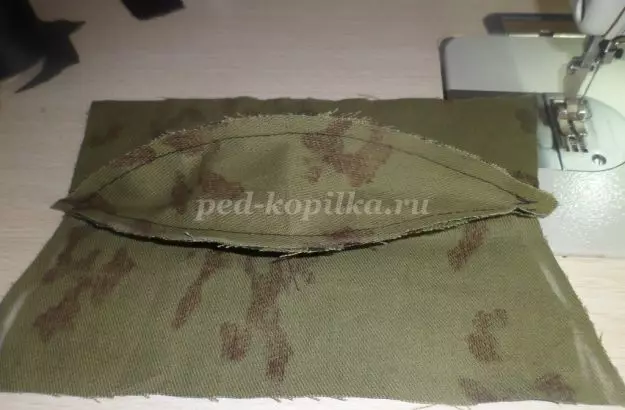
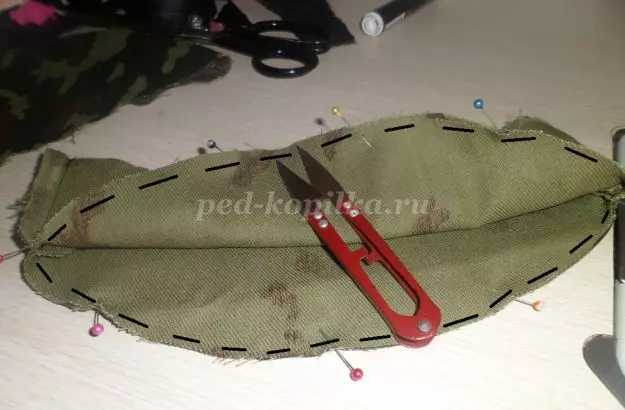
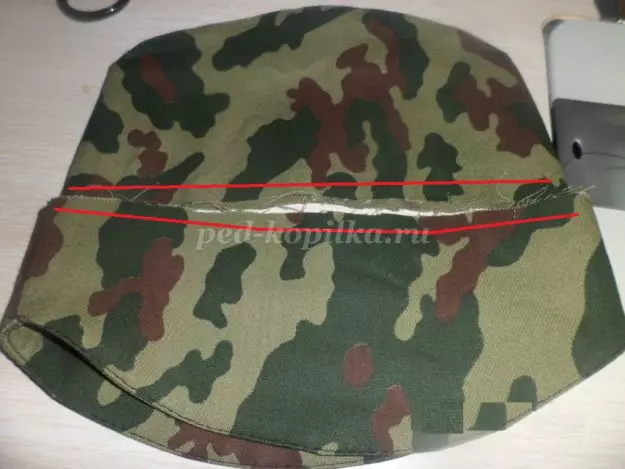
After that, we take the center of the first detail and on the red line (without reaching the edge of one and a half cm) we make a machine line.
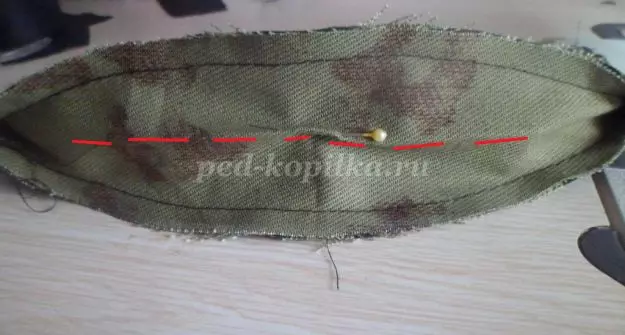
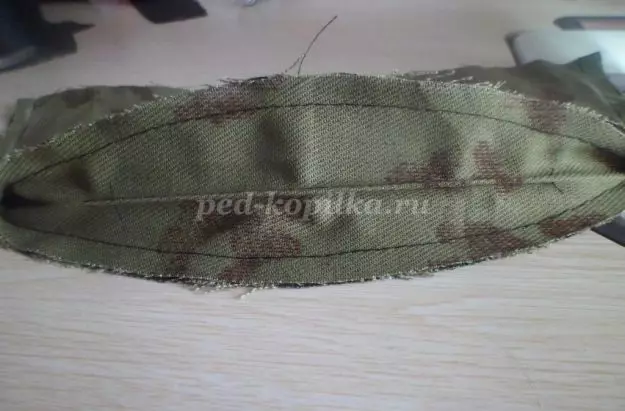
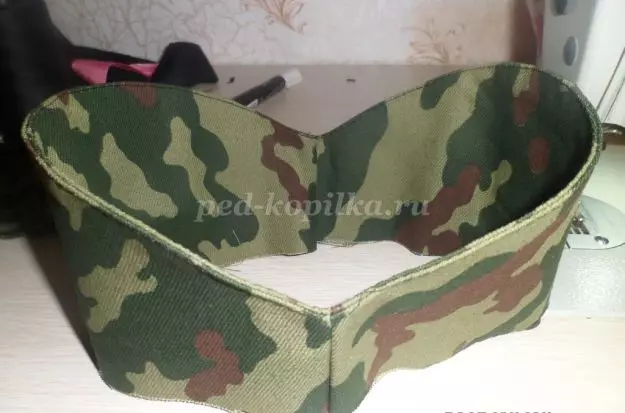
The photo shows how the pilot looks like after the previous action. It must be done in order to upload the product upwards.
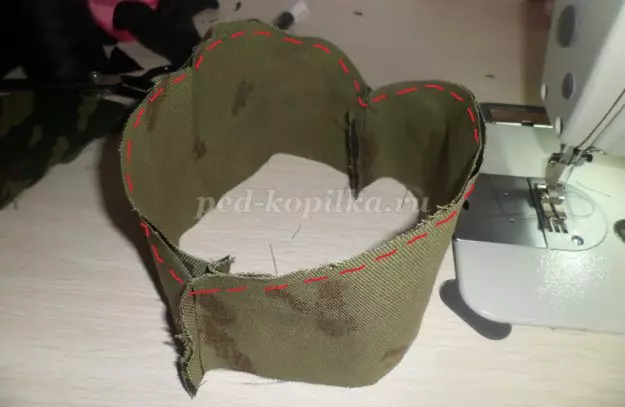
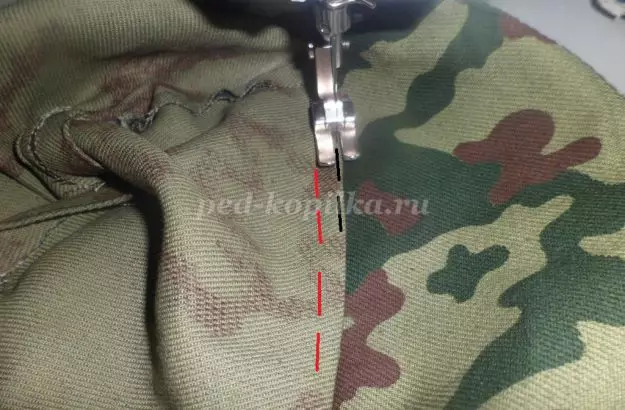
We need to connect both parts at number three among themselves.

Again make a machine line along line, which is highlighted in the photo.
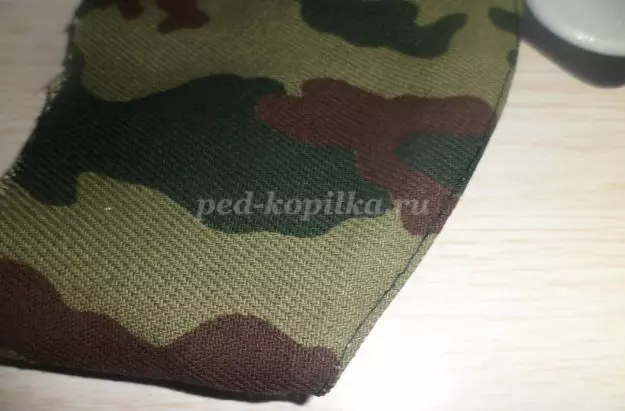
Then you need to turn the pilot and flash one mm from the edge. The photo shows how the seam should look like.
Now take the details for the number two (just four pieces). We fold the details face to face two and then we need to flash the details on the side cut. That's what happened.
Then the resulting rings insert into each other so that the facial part looks at each other (shown in more detail in the photo). Making a machine line over the red line.
The photo shows how to pass the seam closer.
Then we need to turn the product and bend down the newly stitched seam.
The next step at a distance of 1 mm we flash the edge of the seam.
After that, we prepare the details that we postponed, and lay the machine line over the red line.
Then it is especially in order to make it easier to work later, fold the parts one to another. Take the seam with pins or position.
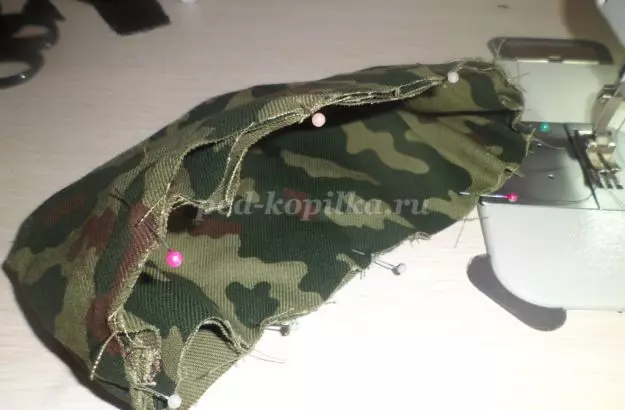
It is shown in more detail in the photo, as the wrong side and seam should look like, which we recently did.
A small trick is specifically for readers of this article: In order for you in the future you did not turn out the wrong side of the pilot, step off the seam around the perimeter on the black line, flexing the allowance on the seam to the side of the inside.
Soak the product and measure the finished pilot on a soldier. If you use a little less pattern, it will suit both children.
Article on the topic: Mittens for a boy with crochet and spokes with schemes and descriptions
Video on the topic
We offer to see a selection of video master classes for the manufacture of a military blanket from paper and not only.