
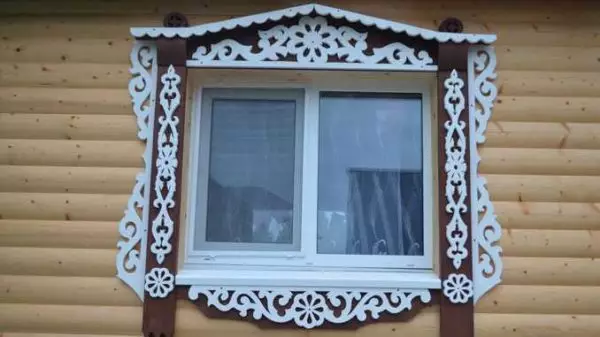
Make your home memorable and beautiful dreams of any owner. If the house is no longer new, it's not so simple. One of the features is carved platbands. They even the usual "box" will turn into a masterpiece.
Material for co-room
Carved platbands make mainly coniferous wood. The optimal version is pine, normally cuts, inexpensive, due to the high content of resin durable. In principle, you can use any other conifer board, but it is better not to try with a fiber: it is too fibrous, it does not cut even the most sharp tool.
You can make carved platbands and hardwood - lindens (the milder), poplar, maple, oak, cherries, etc. But with each breed you need to be able to work, fue your hand and there is no guarantee that it will be perpetual, and the hardwood wood is expensive. Therefore, they make platbands on the windows more often still from pine. It is only necessary to pay attention to high-quality characteristics.
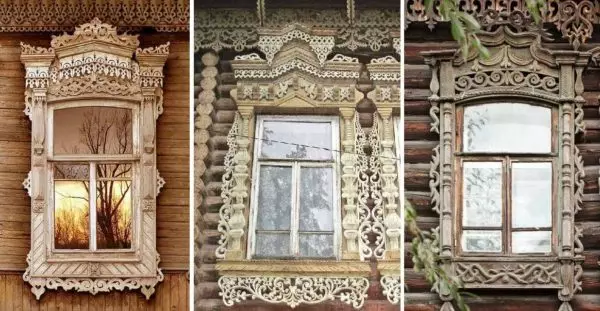
Carved platbands on the windows - the way to make your home unique
If there is a wood or board, having lain 3 years or more, you can use it: it is already exactly dry, only the processing and calibration will be required. If there are no woodworking equipment (reysmaus and circular saw), you will need a edged board. For carved platbands, the wood is suitable for the first or top grade. This means that there should be no bitch, chips, resin pockets on the board. Wood take chamber drying, with humidity no more than 8-12%. It is not for sale in the markets, it is necessary to search on the sawmills and in building stores.
Why chamber drying? Because it is dried in a special chamber, withdrawing moisture. In this case, part of the boards cracks, strung up - these go to the rejection, the rest are sold. If you make carved platbands from chamber drying wood, they definitely do not open and they do not crack.
Instruments
To make carved platbands with their own hands, you will need the next minimum set:
- Drill with a set of drills;
- Electric jigsaw with a smooth start and a bunch of different wood pylons;
- chisels;
- sandpaper with grain of different sizes;
- Petal disc from sandpaper wood on a drill.
Article on the topic: What should I hang curtains and how to fix them?
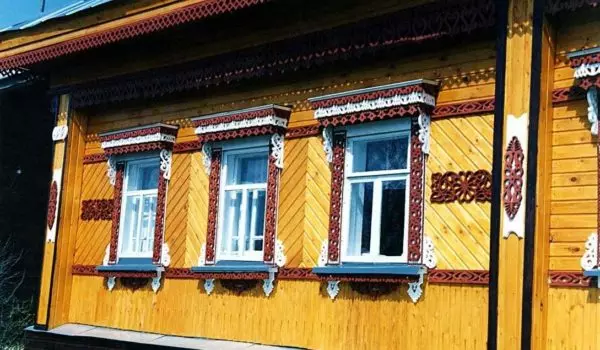
These are such carved platbands on the windows can be made with their own hands.
To reduce the time that will be required to create carved patterns and grinding, it is better to have a milling machine and grinding machine.
One or wholesale?
Carved platbands are usually from repetitive elements. At least two vertical rails on each window are made the same. And since there are usually several windows, the same elements require a lot. If the platbands are going to make slit, the desire to cut several pieces at the same time, folding the boards with a stack and somehow fixing them.
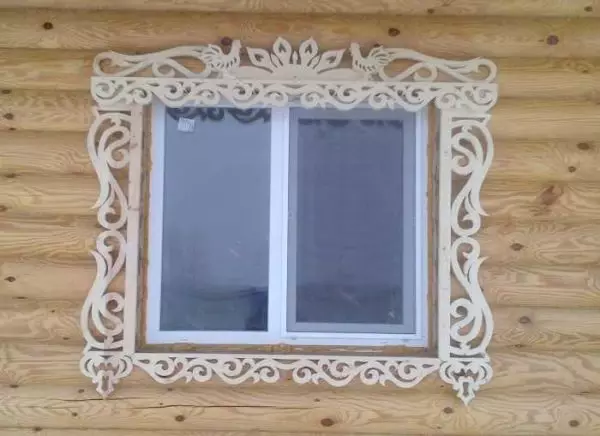
Overhead carved platbands are also interesting.
The desire is understandable, but difficult to realize, and the benefits in time are not so great, as it seems. The first complexity - homemade masters are usually in the presence of jigsaws are not too high. To cut through a few boards, you have to move more slowly to move the pink along the planned pattern. On straight lines, speed is still tolerant, on roundings - low. And, the smaller the bend radius, the slower you have to move the pink. If you work with one board, there are no such problems. So in time of winning, if there is, it is very small.
Another point. Even fat, good, expensive saws with a large thickness of the processed product are deflected. So, with the simultaneous cutting of several boards, the quality of the slot on the lower (or two) remains under a big question.
Procedure for manufacturing a platband with slit thread
The desired drawing using the template is transferred to the board (where to take it, how to enlarge how to make a template read below). If necessary, correctly draw parts well. Further the procedure we describe step by step.
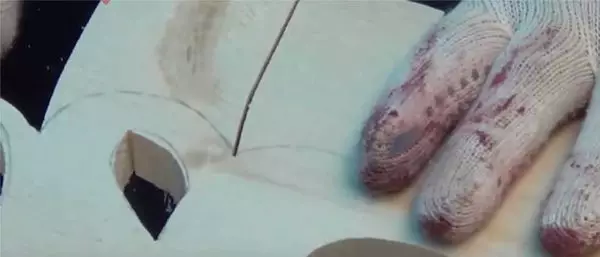
Short carving without a lining board. So that the drawing is clearer visible, you need a big difference in color
We clean the wood in the slots drawing
- To do this, drill the holes of the large diameter in those places where the wood will need to be removed. The diameter of the opening should be slightly more than the width of the pink of the jigsaw usually 12-14 mm). The drill should go vertically down, follow the hole not to go beyond the line (but small errors are unstable).
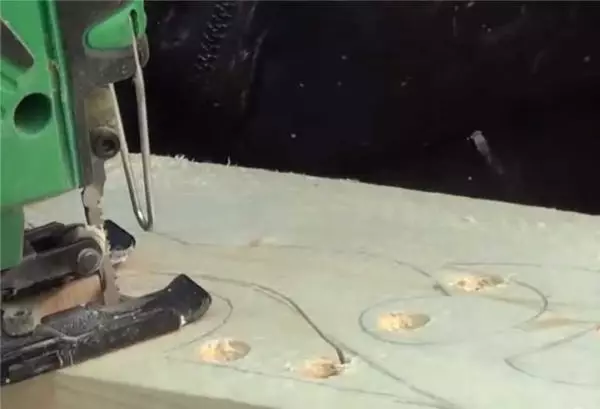
Here is the main stage of cutting of wood
- In the slots, insert the pubsik pink, catch the pattern on the outlined lines.
Since the threads will look from afar, some inaccuracies are not dimensional, but it is still worth striving for the ideal.
Make a figured area
Some platbands have a smooth edge. Then we skip this stage. If the edge is figure, you will still work the jigsaw.
- After approximately 5-7 cm we make perpendicular duties of "unnecessary" parts of the board to the planned platband line. Large accuracy or flat lines are not needed, we try not to move through the drawn line.
Figured edge to do easier
- Starting on the right or left, make the cut on the planned line. Dumpless pieces disappear into the process, so it's not too difficult to work.
If the res is complex, there may be not too attractive places. It is not scary, then they will be treated, where it is necessary - by the eyes, the same junk, emery. When you are satisfied with the result, you can move on.
Final refinement
Owners of wooden houses, probably know everything about how to handle wood. But, just in case, we repeat once again the general rules.
- Grind. Grind any available method. Faster and best, all - an eccentric grinder, slower - emery circle on a drill and a petal nozzle, very slowly - with hands and sandpaper. Ideally combine two methods - with the help of grinding machines, we proceed a horizontal surface, and the excavation is a petal nozzle and, where it lacks hands.
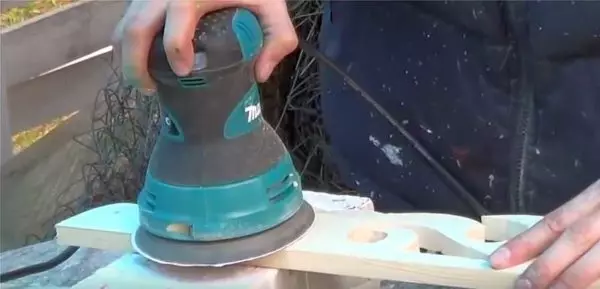
Spin and bring to a normal state
- Ground. Since wood needs to be protected from mushroom bugs, the effects of the rain and the sun, it must be covered with a protective impregnation. Look for any for outdoor use. It is best to soak the workpiece for several minutes in a bath with a solution. If it is not available, the tassel is well passing all the slits.
- Pray.
The choice of paints and varnishes is very wide. Suitable any for exterior work. But note that shelter paints will have to be periodically updated - once a year so accurately. And this means - to remove the old paint, priming, painting again. It is easier for the case with oils for wood - they do not give films on the surface of the wood, and absorbed into the fibers. Update the coating is also necessary, but simply clean from dust and cove your new layer. And processing frequency less. Cons of wood oil - higher price, fewer colors.
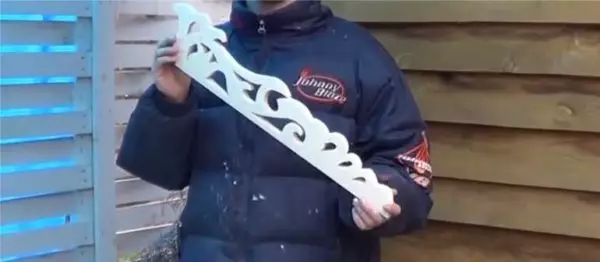
This is the result of the Labor
And then - installation of a carved platband. It depends on the selected type: you can immediately on the wall, and you can - on the lining board, and then on the window.
How to enlarge template
Simple carved platbands can be done without templates. A few examples will be in the video - there is shown how to draw how to cut. But more or less complex patterns will be drawn independently not all. Need skill, and talent. The easiest way is to find a scheme, print it in the desired size, transfer to cardboard and cut. It turns out a template that can be drove.
Second way: draw from the photo. Not all schemes can be found. Some, especially vintage window platbands, you will not find anywhere. If there is at least some drawing abilities, they can be sught.
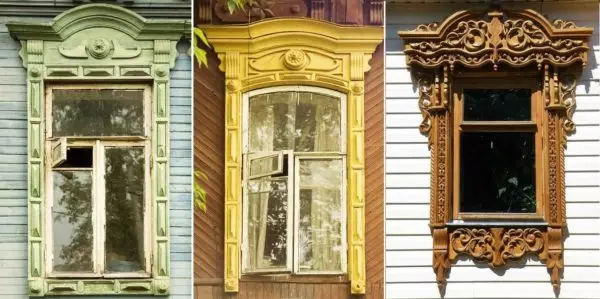
Even such an ornament can be drawn ... if there is a skill
Questions may arise about how to increase the size of the found circuit or template. There are three options:
- With any graphic editor. The simplest - Paint - there is in any computer running with Windows ("Image" tab, string "Change image size", select "Santimeters" and install the desired length (height) in the window. The resulting file can be printed. If a small format printer, You may need to break into several pages. They should then be glued down and, according to the resulting figure, make a template.
- With photocopy. The xerox has a scaling function.
- Taking millimeter paper, carry the drawing on the desired scale. For this, the original image is divided into squares with a side of 0.5 or 1 cm (you can print on a sheet into a cell). Then we carry the lines on the millimeter, increasing them in the desired proportion.
The first two ways are faster. But when scaling, the drawing can be fuzzy and blurred. It can be corrected by hands, you can draw in some editor, for example, CorelDRAW. How to do it look in the video. Just an example of drawing a carving scheme.
Video on the topic
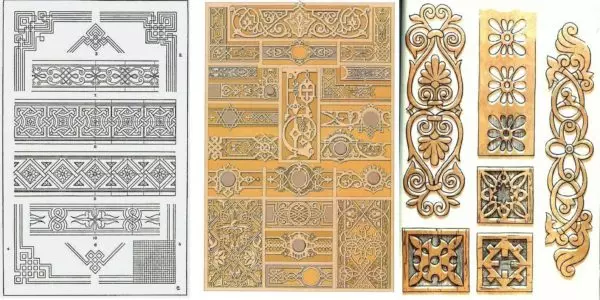
Schemes, templates, patterns
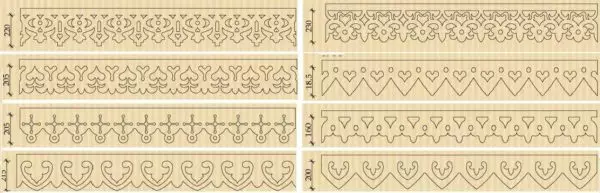
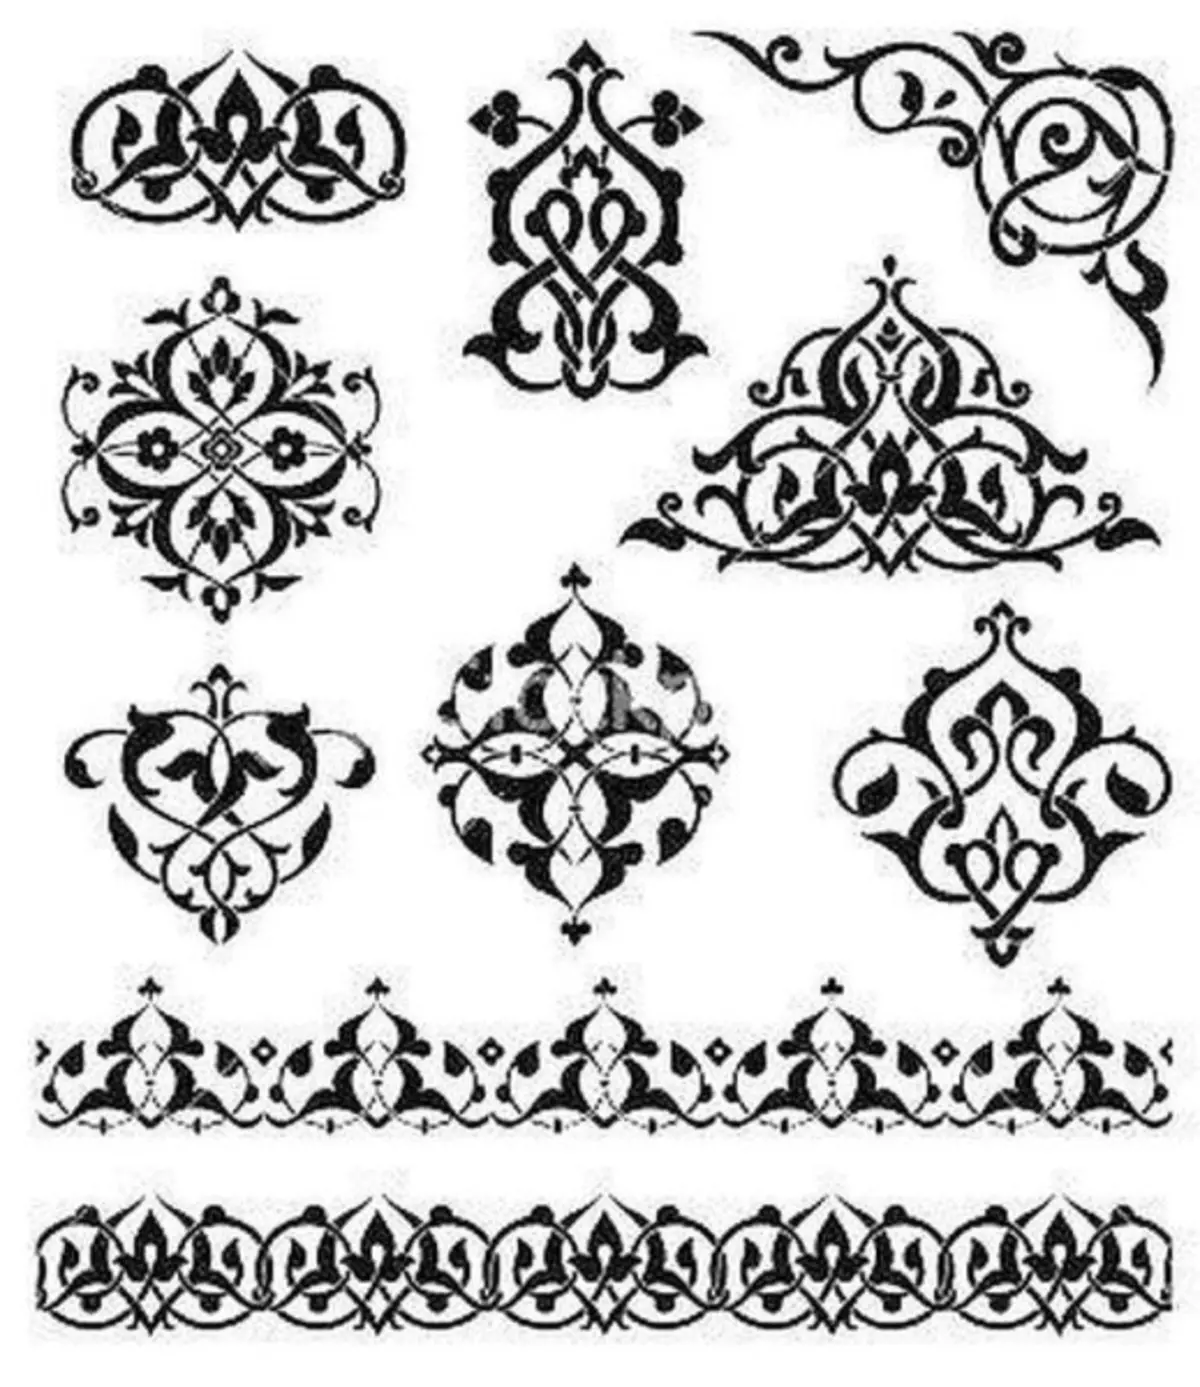
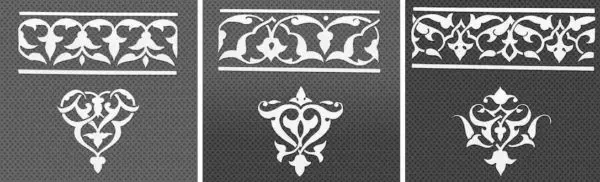
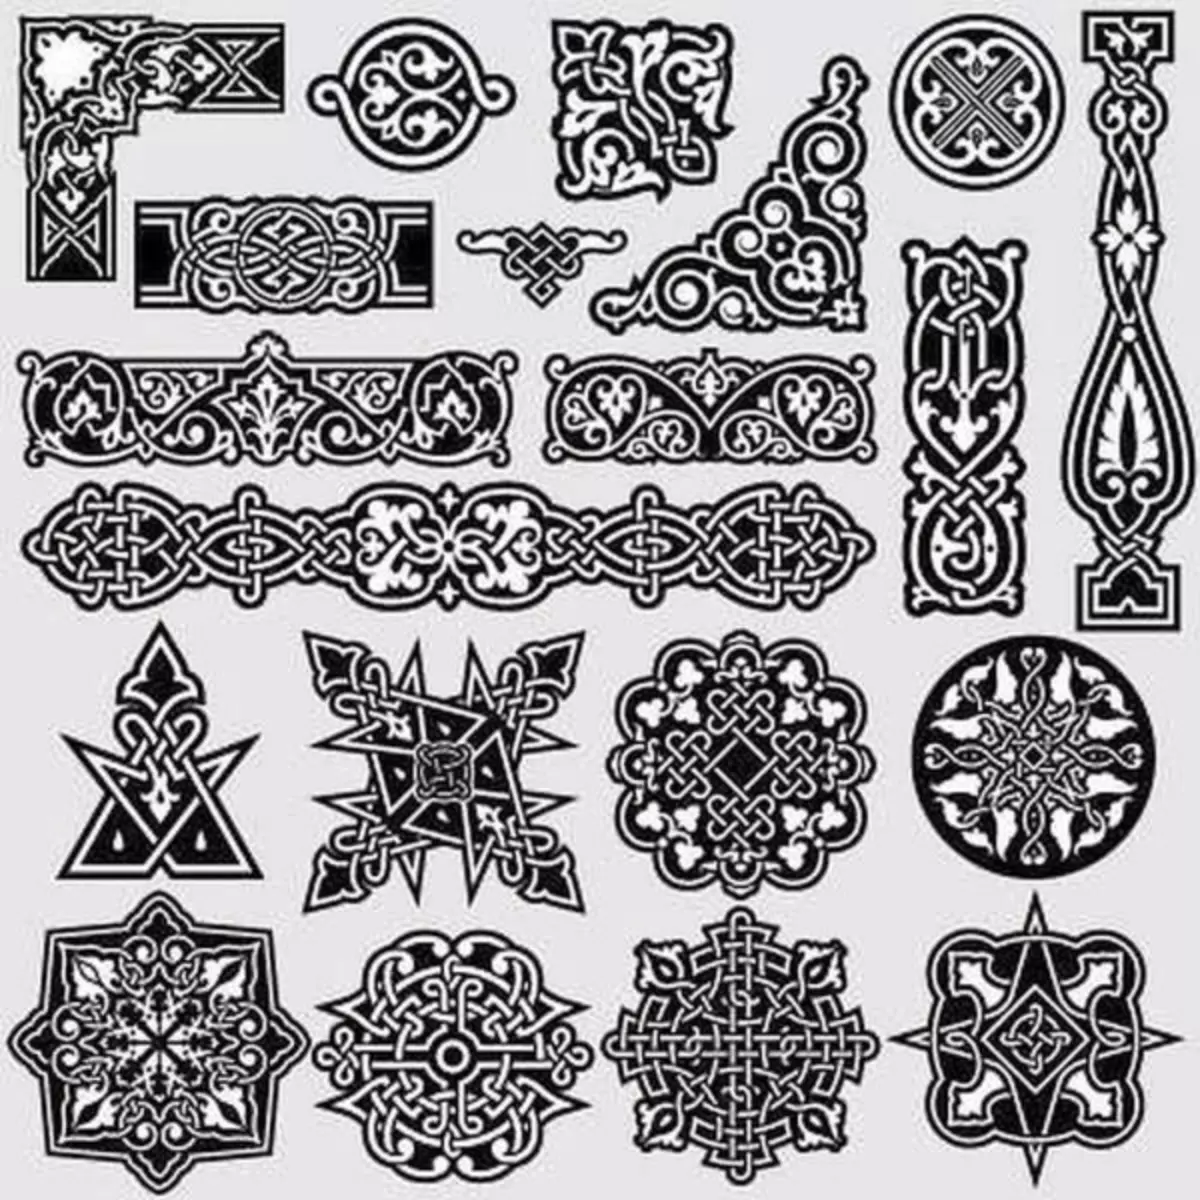
Narrow edge elements

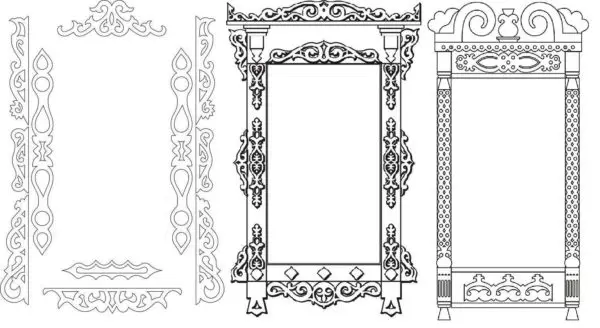
Decorative elements for vertical or horizontal planks
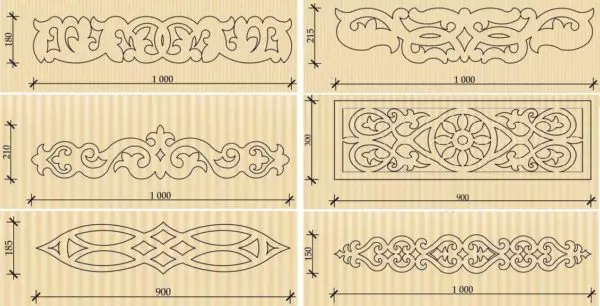
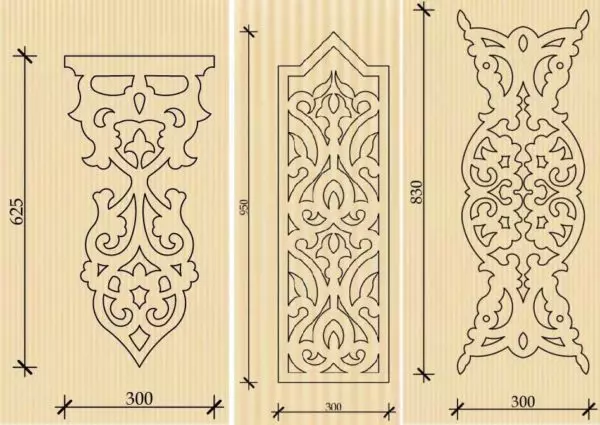
Schemes for sawing platbands from wood
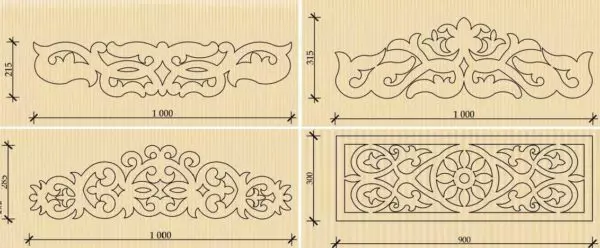
Short elements for window decoration
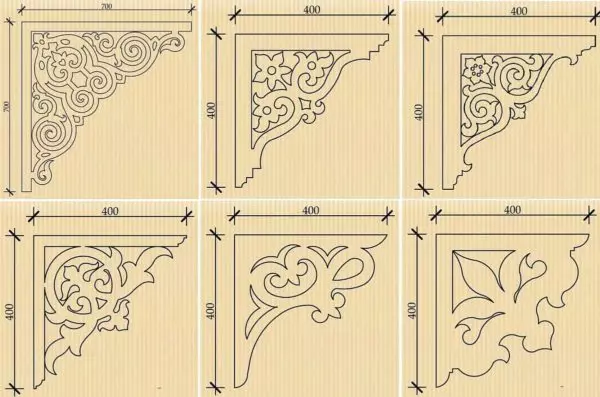
Schemes of patterns for decorating brackets
Scheme of carved concubine
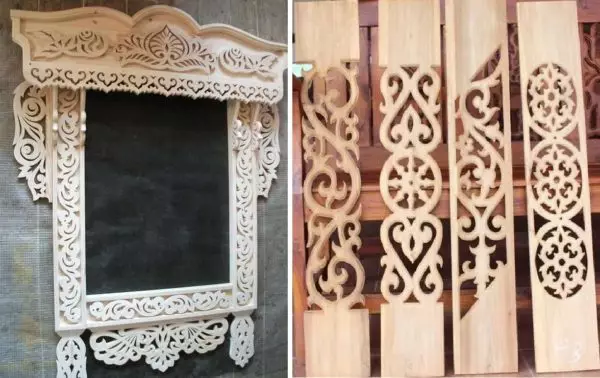
What can turn out and options for vertical slats
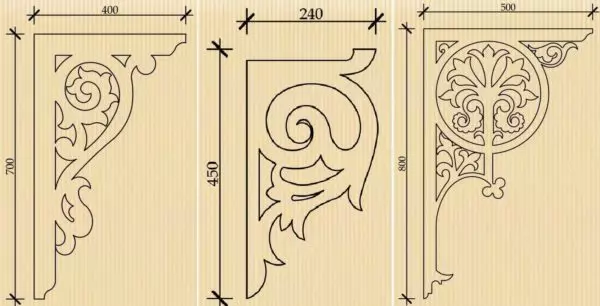
More brackets
Towels or side patterns
Possible schemes
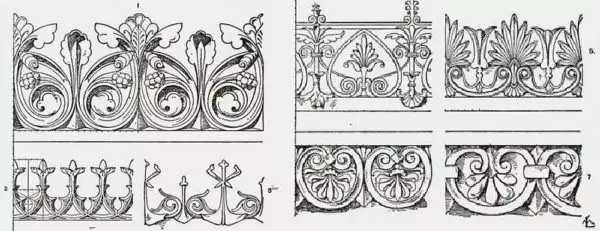
This is a non-cut carving
Variants of jewelry
Drawings and schemes
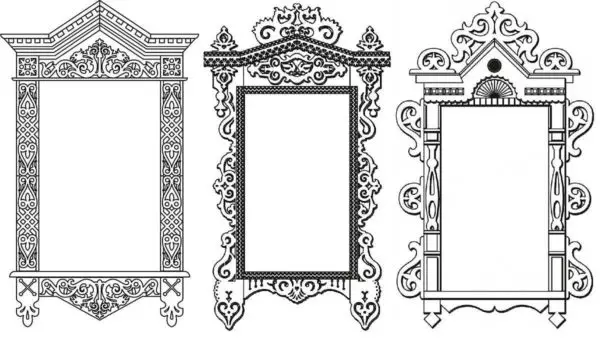
Promotional, overlaid, with crowns

Central elements for vertical slats
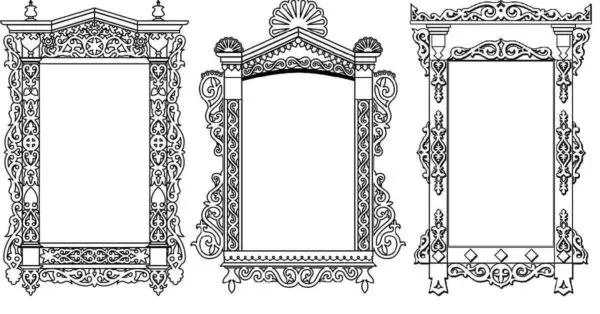
Three more options

Different styles, but no doubt are spectacular
Style completely different ...
Article on the topic: How to lay a laminate on the wall: Practical advice