
As knitting with amigurum crochets, diagrams and examples of knitting different animals, fairy characters and simply inanimate objects, which, at will, you can give human traits and emotions, will be considered in detail in this article.
Surely you had to see pretty knitted animals of small size. This article creates a master class for the manufacture of some toys. Translated from the Japanese language "Amigurumi" sounds like a "knit soft toy". Many craftswomen store their miniature works of the house using them as decor elements, for example, decorating them with cascap or using accessories attached to the eaves. Children play with larger masterpieces with pleasure. Looking at such adorable works of arts, the heart is rejugging, and there is no limit to the lion.

Knit toy
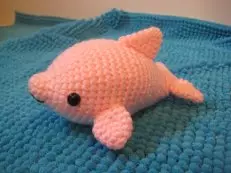
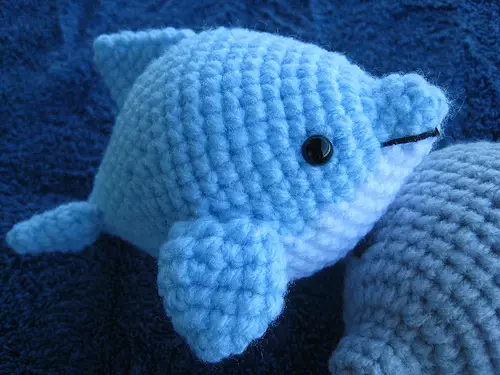
Consider a way to crochet toy on the example of a dolphin.
In order to fulfill such a toy It is necessary to prepare the following materials:
- Cotton yarn of several colors, and specifically: blue, white, green, black and red;
- Hook;
- Thread, needle;
- Amigurum packing;
Work description
Below are the schemes that you need when working, then there will be a description of the order of priority.
Torso: From the yarn of blue, you need to dial the chain of 4 VP and squeak it into the connecting ring.
- 1 row: 1 VP in lift, 6 fails. Next, continue knitting the spiral of the UBB;
- CO 2 to 8 rows: Slip 16 failures;
- From 9 to 18 rows: each row must be added about 2 fails;
- From 19 to 30 rows: impose 36 loops of BN, after which you have a filler torso;
- From 31 to 35 rows: Lower 3 failures evenly, you will succeed 21 fails;
- From 36 to 42 rows: Drop the failure;
- From 43 to 50 rows: Tie 14 failures and the remaining hinges connect the working thread.
Rubber Tail: Blue Color Type a chain of 2 VP and tie 1.2 parts according to the scheme. Then attach them to each other and connect the 1st fail.
Article on the topic: Frivers needle for beginners: Schemes step by step with a master class
Upper fin: out of 11 VP Dial the chain of blue yarn. Add 1 VP to raise and tie according to a 2.2 detail scheme. After folding parts, connect them into 1 row of the fail. Do not connect a set edge.
Bottom fins (2 parts): From the blue yarn, type the chain in 7 VP and 1 VP lifting. Tie according to a 2.2 detail scheme. After that, fold them and connect into 1 row of the failover, leaving the open set of the edge.
Eyes (2 parts): From black yarn, raise a chain of 6 VP and closer to it around the connecting sides. Check 1 row, based on the Scheme number 5.
After the end of work, the seashest of the eye and bring the fin material for packing. Threads can be embroidered eyebrows and mouth, as shown in the photo.
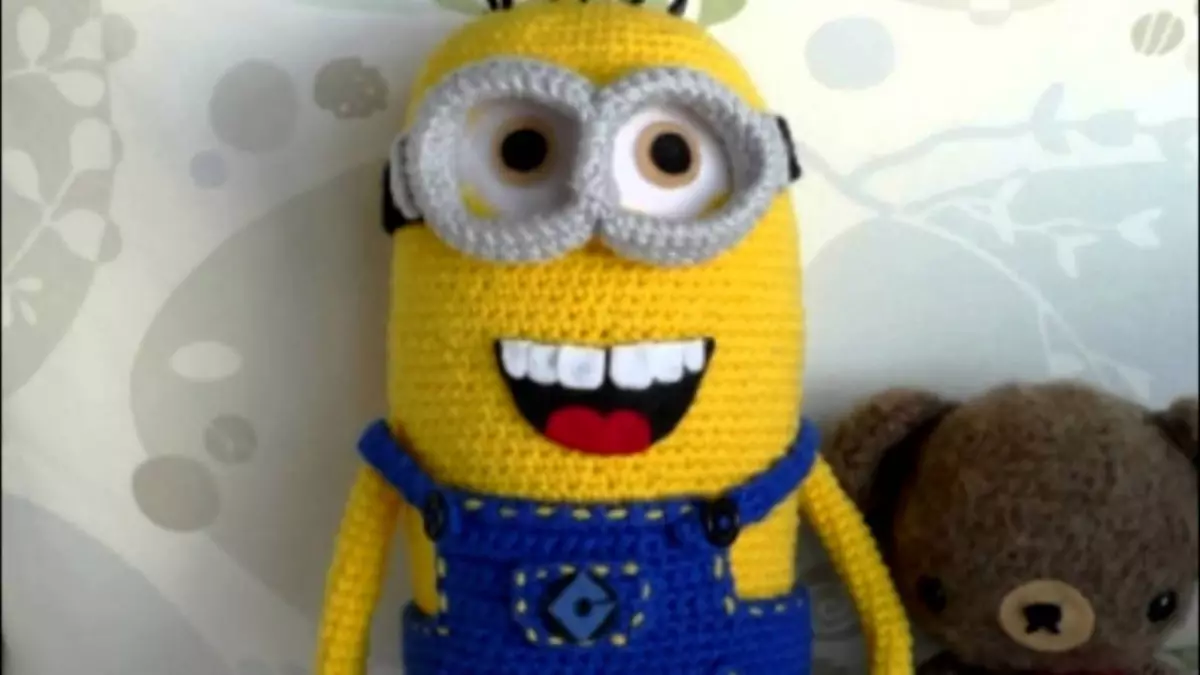
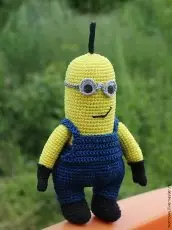
Maine manufacture
To work on this toy you will need: yarn (yellow, blue and black color), 2 small black buttons, hook 3 mm, needle and scissors, filler for details.
The following is offered a step-by-step description of the work for beginner needlewomen.
Consider in more detail the steps of the work that the following scheme will express, minion, which should be obtained by a height of 17 cm.
Torchith:
- 1 row: dial 2VP and make out of 1 loops 6 failures around the circle;
- 2 row: from all loops alternately form 2 fails;
- 3 row: 1SBN, add 2SBN from 2 loops and so to the last loop;
- 4 row: 2SBN, 2SBN in 3 loop and so on;
- 5 row: 3SBN, 2SBN in 4 loop and continue to the end of the row;
- 6 row: 4SBN, 2SBN in 5 loop and further;
- 7 row: 5SBN, 2SBN in 6 loop and to the end;
- 7 row: 5SBN, 2SBN in 6 loop, etc.;
- From 8 to 20 row: insert a crochet troubles with a well-loop in a loop;
- From 21 to 25 row: check in the reverse order, repeating the ranks from 3 to 7, but on the dispatch;
- 26 row: you need to stuff the torso figurines with syntheps and tie alternately every 2 loops together.
- The remaining 6 loops will cover and scratch the needle with a thread, pulling it into the knot and secure.
Article on the topic: Radi-hook for beginners: master class with video
Jumpsuit: It knits separately from the body, but by the same scheme.
The only nuance: in the 8th row, make it identical to each other addition so that the clothes can be easily dined with the Taurus.
Having measured the height (approximately 1/3 of the body), begin to encourage the apron. Remove the knitted product anywhere in the circumference and throw 12 loops of the UBB, then 1vP, expand back and do the same. By sticking 8 rows, not cutting off the thread, make an apron from the edge of 20VP straps and check in the opposite direction. Stop the last loop and dispel the thread. Similarly, make the second strap.
Handles: Check the black twist 2VP and 6SBN. Next follows 3-4 series of scan without adding (it will be a minion glove). Continue to knit yellow without adding another 8 rows. Then do hard thread.
Legs: Black thread spun from 2VP 6 fail. Add 2SBN in the second row. Next will go 3 rows without additions. Then change the black thread on blue and run 4-5 rows of sconf. Then cut the thread. Another leg is similar.
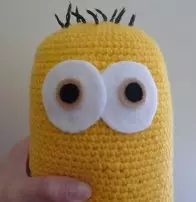
Glasses: White thread type 6SBN from 2VP. Tie 1 row after making add-ons in each loop. 3 row - scan without adding. Disconnect the thread. Tining the second such circle, proceed to the strap, type 24VP and combine them in 1 row of scon,
Assembling toys: put on the torso overalls and behind the seashest to it straps. Yellow threads take the emblem on the apron, at the corners of its gunpowder.
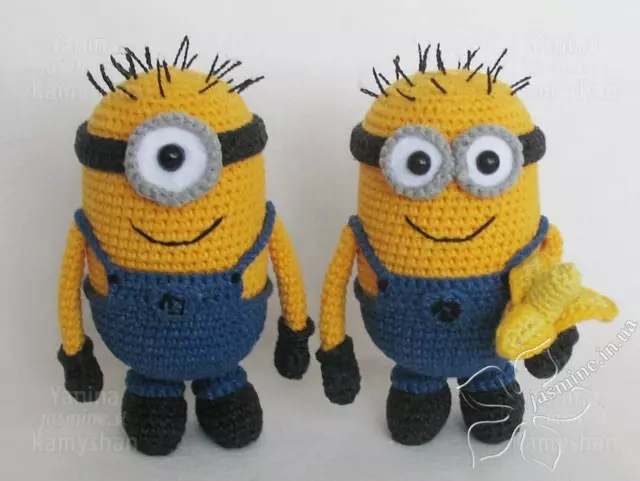
Handles position so that the straws of the overalls do not fall and covered the place of connection with the torso, which are admitting them. Also attach the legs, having previously stamped with a synthetic for stability.
In the same way, secure the strap from the glasses on the head and the points themselves with the eyes. Black thread bulging mouth. Hair can be done like this: Take a needle, pulling the right amount of threads and cut them off.
Article on the topic: Butterfly Wings | Paper: Master Class Decoration for Dolls
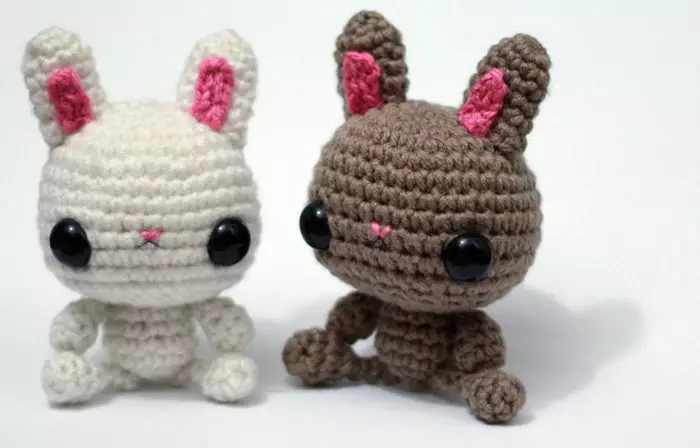
On the Internet there is a huge amount of information on how to make amigurines with your own hands. Pisting a variety of pictures with a detailed description of cheerful little animals - schemes of owls, birds, fish, elephants, hares, monkeys and so on.
Simple scheme
To perform a cat scheme, you will need the following materials: 2 wines of white and gray yarn, a little pink yarn for nose, 2 buttons, hook, thread and needle, sintepon.
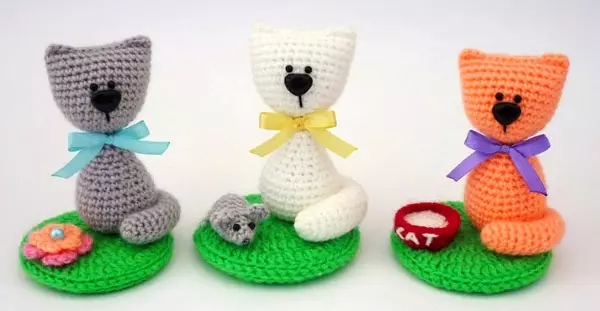
Head:
You must associate 2 identical halves. Starting from the middle, make a two circle with a hook with a hook of 10 cm in diameter each and witching them not to the end. In the remaining hole, push the syntheps and the hole.
Torchith:
Knitting Start from the bottom of the toy. Type 6 loops and from them around the circumference, adding the loops, reveal the sleeve, in diameter of 10 cm. After unscrewing every 2 rows, it is necessary to drop 2 loops in the neck, the neck must become a diameter of 6 cm, and the body is 14-16 cm with a height of 14-16 cm. Next Vide the torso with filler and sushach it to the head.
Paws:
The knitting diagrams of the front and rear paws are the same. Move the pipe with a diameter of 4 cm in a circle and a length of 8-12 cm, making a little wider by the end. All 4 paws fill with syntheps and a trick to the body.
Tail:
A knitted tail is the same sleeve, as well as the paws, the diameter should be 2-3 cm. Fill it with synthepsum gradually as knitting. Sun tail.
Next, it should be hooked with a hook of a pink yarn and sew it on the face, as laid down inside the syntheps. Ears Knit a triangle, for greater stiffness, use a double thread. Attach your eyes (buttons), bullying your mustache.
Video on the topic
Along with the schemes painted above, I don't want to forget about master classes with video knitting classrooms by Amigurumi. Some of them are offered below for a detailed study.
Video lesson for knitting chanterelles:
Video lesson for knitting rooster:
Video lesson for knitting monkey: