
The final stroke of the laying process of flooring is the installation of the plinth throughout the perimeter of the room. This element is mandatory, as it hides the fine slits between the floor and walls, wiring and other communication cables. Outdoor plinth gives the lower part of the room neat and attractive view, thanks to modern materials and their color scheme, the plinth edge serves as an excellent element of the room decor. How to put a plinth on a linoleum coating to serve the owners of the house for a long time, retaining his aesthetic look?
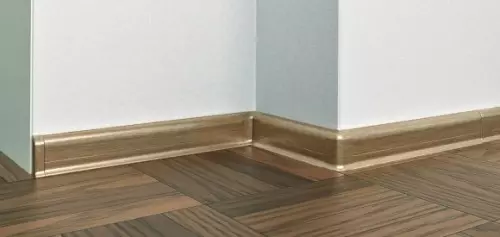
The plinth hides small gaps and irregularities on the floor, so its laying is so important.
What edging is suitable for linoleum?
Before you take for the installation of the plinth, you should first buy it. When choosing decorative slats, it is necessary to consider the type of coating on which they will fit. When it comes to linoleum, plastic plinths or products from laminate are the best option for it. PVC planks are good because they are not only flat, but also volumetric with internal cavities to accommodate wires.

Device plinth for linoleum.
They are sold complete with connecting elements, so attaching such plinths is easy. Wooden straps, you can also bore the lower part of the room, but the installation of them will be more complicated.
As for the color of plastic plinths, it is necessary to pick up the planks or a little darker linoleum, or a little lighter. A good solution will be the combination of colors of planks with a cooler or furniture in the room. For wooden plinths, paint is selected in the same way. When purchasing planks from PVC, you should take the goods from one party, otherwise they may differ slightly with their shades.
Laying volume plastic planks
Any process consists of several stages, and the installation of plastic planks is not an exception. All work will include the following operations:
- The work of measurements of the perimeter of the room.
- Preparation of the instruments and material required for installation.
- Cleaning the walls from dust and their markup.
- Drilling holes in the walls.
- Fastening planks on the walls and their connection.
First of all, the owner of the dwelling will need to measure the room after the perimeter in order to know how much the plinth is needed for it.
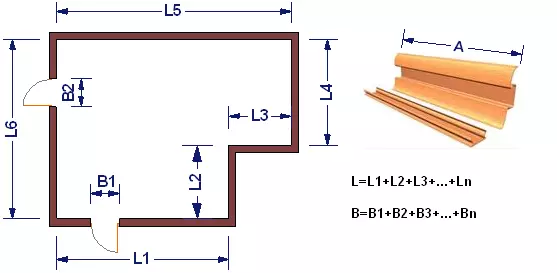
The scheme for calculating the required amount of plinth.
The standard length of the plastic bar is 2.5 m, but it is better to take the material with a margin of several meters. You should calculate how much it is necessary to place the connecting elements (end plugs, exterior and internal angles, connectors).
Article on the topic: Lamps with traffic sensor for entrances
Next, the owner will need to prepare all the materials and tools for work. In addition to planks and connection items, it will be:
- Building vacuum cleaner;
- Rag or brush.
- Construction roulette;
- pencil;
- a hammer;
- Hoven for metal;
- screwdriver;
- awl;
- Perforator;
- screwdriver;
- Screws.
It is important to clean the lower part of the walls and linoleum adjacent to them, from dust and construction garbage using a special vacuum cleaner, rags or brushes with a non-rigid pile. After that, you can proceed to markup. It is better to start performing from the corner. Marking is made as follows. Take a long bar and put on its end corner, then the plinth is applied to the wall so that the angle of the room and the corner of the plank coincided.
The first label is made at a distance of 5 cm from the corner: it is here that there will be a hole number 1. It is then measured with a tape measure 40 cm and a pencil is observed. In the same way, all the rest of the holes are marked. After that, the plinths move to the side and proceed to drilling.

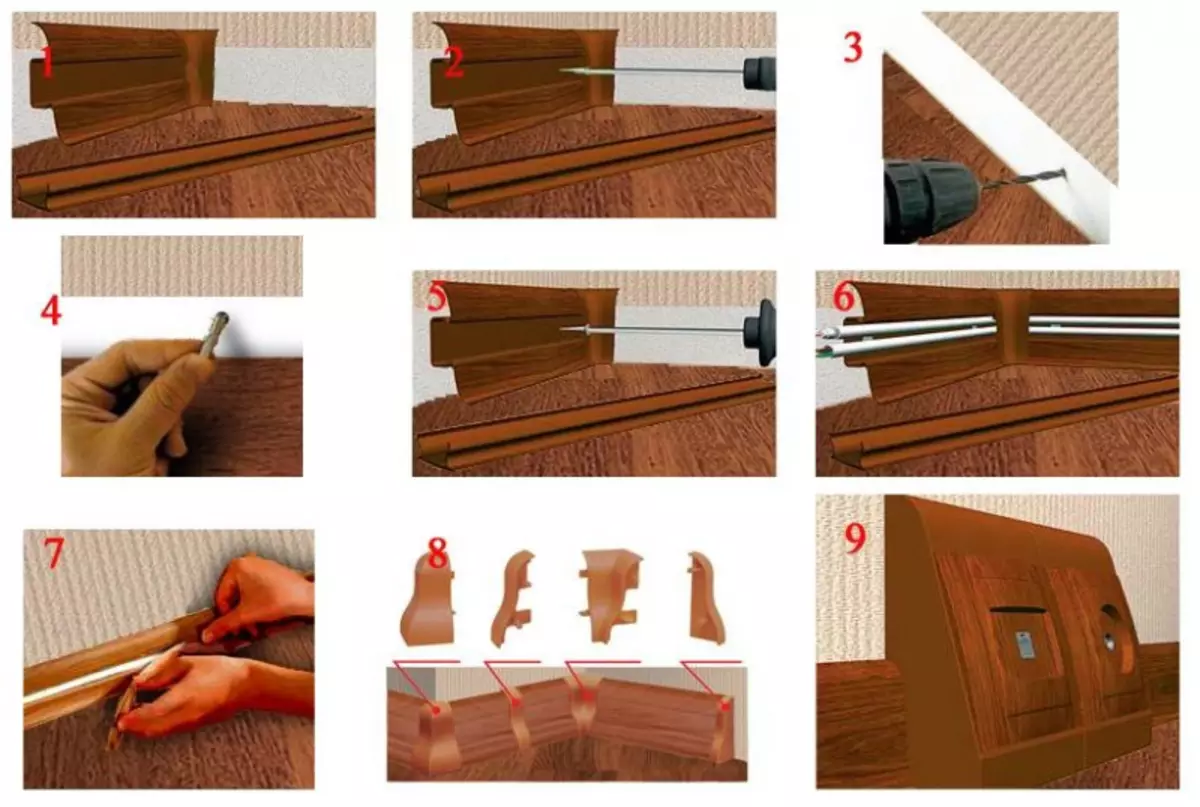
Scheme of installation of accessories on the plinth.
Holes are better drilled by a perforator, but if the wall in the house of plasterboard, a professional drill is suitable. When the holes are ready, the vacuum cleaner or the brush will need to use again to remove the seizure of the garbage. The next stage of the work will be the installation in the holes of the plastic dowels. Heat them into the wall with a hammer.
Next, the installation of the plinth is made. In the design of plastic planks, a channel for laying a cable is provided, it is located on the front wall of the detachable plank. Before mounting the top of the bar (pad) is removed. The back should be attached to the wall, and then pierce the holes in it. It can be easily made with a seboard, as the plinth is very soft. All hole holes must coincide with dowels, into which through holes it will be necessary to insert screws, and then screw them with a screwdriver or a screwdriver. When the length of the bar will approach the end and without screws, 1-2 holes will remain, on the second end of the plinth, it will be necessary to put the connector and only then screw the last screws.

Holes on the slats under the self-tapping screw with the help of sewing.
Next, the next piece of the plastic bar is attached to the connector, and its installation is similar to the first segment. A moment will come when it is necessary to spill a piece of plinth, since the angle of the room will rise on its way. To do this, the metal is suitable for metal. The end of the plastic plank is inserted into the corner-connector and continue the installation in the manner described above. In the same way attach plinth and the rest of the walls of the room.
Article on the topic: How to set your hands overhead loops on interroom doors?
After that, below the dowel level carefully laid the wires into special grooves of the back of the plinth. So that the communications are well fixed in the channels, you can glue a bilateral tape for reliability in some places. Then the narrow front panels of the bar are connected to its rear.
Installation of flat plastic planks
The installation of a flat plinth differs from the installation of volumetric planks. Typically, a flat plinth is not screwed to the walls, but glued to them with liquid nails. For work you will need:
- building level;
- pencil;
- roulette;
- hacksaw;
- Glue liquid nails.
First, as in the above-described method of installation, it is necessary to prepare the planks of the desired length for the entire perimeter of the room, pick up the corners to them. Next, you need to try to lean the plinths to the walls to see, all the materials are enough and are well adjusted one to another.

Installation of flat plastic plinths.
After getting styling on the walls on the walls. To do this, be applied to the clean inner surface of the first plank glue with a wavy line or in the form of points, and then tightly press the panel to the wall.
In the same way, they come with all other parts of the plinth, if necessary, connecting them parts and connectors. You should not squeeze too much glue from the tube immediately. In order not to smear them the plinth, linoleum and unnecessary part of the wall. Liquid nails dry about 12 hours, and finally harden after 7 days.
The main condition for such installation is that the established planks must be glued only to the wall and can only touch the linoleum. If they are attached only to sex covering, then over time it will occur its shrinkage, which will result in the formation of gaps between the strip and walls, as the linoleum will move the plinth from the vertical surfaces. Some hosts for reliability are trying to fix the planks and on the wall, and on the linoleum, but this action is also an error, since the shrinkage of linoleum contributes to the deterioration of the appearance of the plastic: its cracking and deformation.
How to perform installation of wooden planks and veneer?
Although plastic strips are gaining popularity not by day, but by the hour, the host of the room in the presence of desire to linoleum can put the plinth from natural material. The difficulty in working with wooden planks is associated with the fact that they are harder to fit not only under the uneven walls and floor floors, but also one to another. Be sure to be painted or covered with varnish before installing the plinth. All these actions require excess time and strength costs.
Article on the topic: Arch with your own hands: Step-by-step instructions (drywall), 3 ways
The scheme of the phased installation of the plinth.
Installation of wooden planks can be performed in the same way as styling of volumetric plastic material. The same operations are performed: marking, cropping pieces, pre-trial installation, drilling holes with a perforator and fixing the plinth on the wall with a dowel and self-tapping screws. Sometimes a plank of wood is naked to the wall with nails, but the vertical surface in this case should also be wooden. With this installation, it is better to use chisel to not hit the hammer on the unnecessary part of the plinth and not deform the wooden bar.
Instead of solid plinths, veneer is often used, made of several thin sheets of wood of various breeds (pine, alder, ash) glued together. This material has a different color and texture and is perfect for such a flooring, like linoleum. Attach the wall and to the floor with a veneer in several ways:
- Adhesive (using liquid nails).
- Samores.
- With the help of special clips.
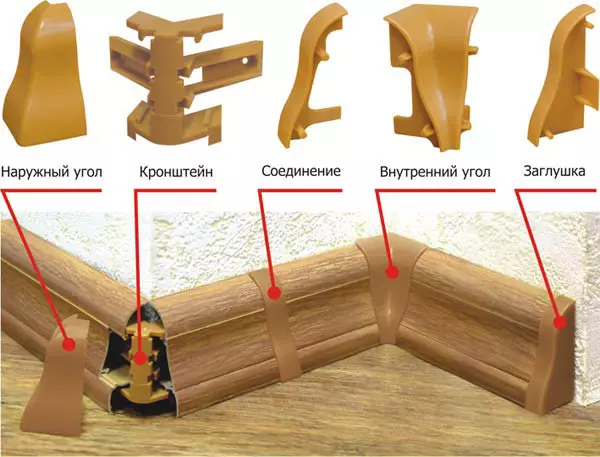
Elements for fastening plastic plinths.
When choosing any way of installing, all parts of the plinths that will be docked with each other, you need to be powered by a hacksaw at an angle of about 45 ° and carefully adjust one segment of the plank to another. The first 2 methods of laying the plinth from a veneer are performed as the installation of a bulk or flat plinth, the process of which is described above.
3rd way - fastening on clips. These are special devices sold complete with veneer. After fitting the sections of the slats, each clip must be applied to the vertical surface and as close as possible to press the linoleum. Then you should mark the location of the fastener and drill a hole for a dowel in it. After inserting a plastic dowel to the finished hole, the back of the clips are fixed on the wall using self-build.
The next hole is drilled after 40 cm from the first and do the same procedure. When all the necessary clips are installed, through the lower part of them you can hold the required communication wires, and on top to clips to wear with sponge planks. If all the mounting methods are made and correctly, and neatly, then beautiful and high-quality plinths will delight their owners long.