
The basis of creating figures with such a technique are triangular modules. As a result, it turns out three-dimensional origami (first received distribution in China). Each individual module consists of classic rules, and then connected to others. The design held by the resulting friction force between individual elements is quite strong and does not require gluing. There are several uncomplicated schemes how to make a module for origami.
Modular origami for beginners implies the basis for creating models - triangular modules.
For such origami, paper of any quality is suitable: office, color, coated. For particularly original ideas, you can use even clippings from magazines. The exception is paper from school notebooks. As a rule, it is easy to break and does not hold the required form. In such a technique, for example, it is very easy to make a cat.
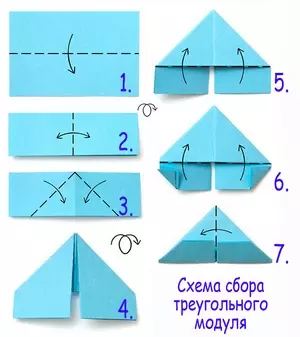
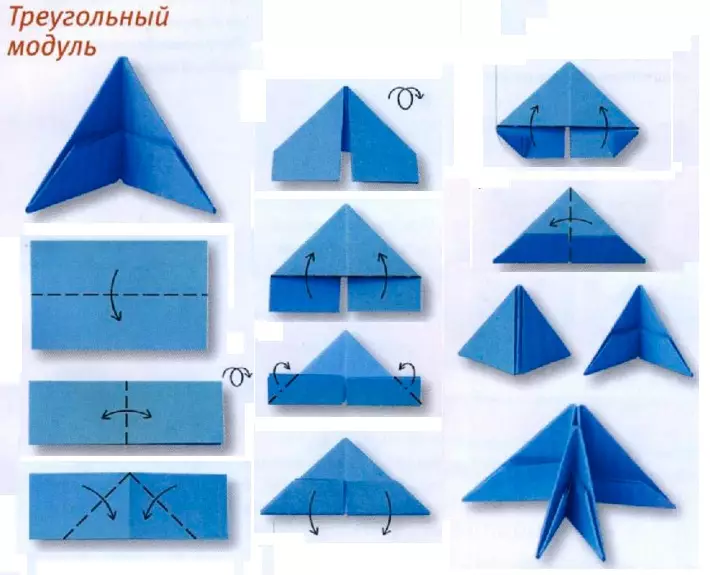
Creating a triangular module
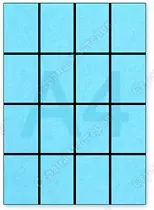
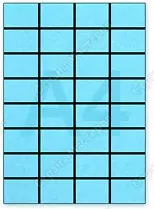
The triangular module consists of a rectangular sheet. The best aspect ratio is 1: 1.5. It is easy to achieve it easily, if divided by a sheet of A4 format on 8 or 16 equal parts.
You can use half of square block sheets for entries.
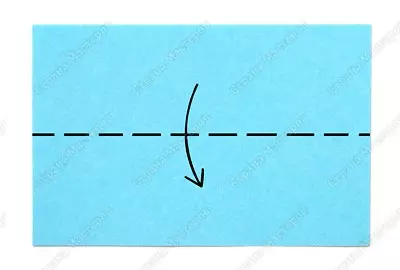
- Fold the rectangle exactly in half.
- Bend and expand the sheet so that the middle line remains noticeable. Deploy a rectangle.
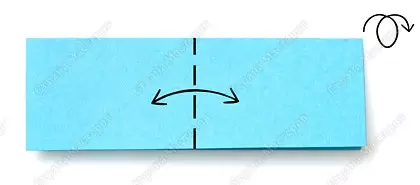
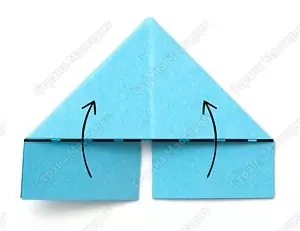
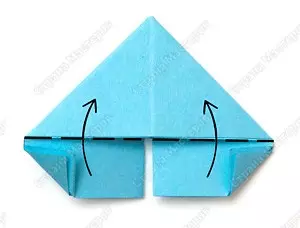
- Bend the edges to the middle line received.
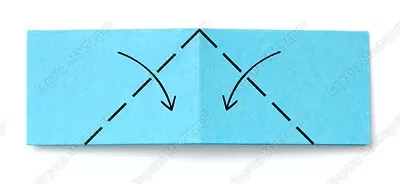
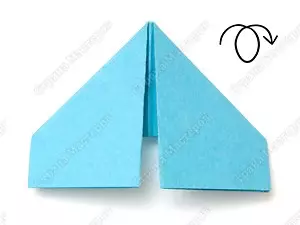
- Turn the construction with the other side.
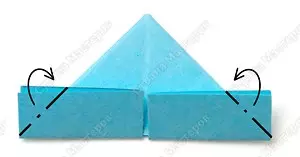
- Speaking edges, minimize. The remaining corners "hide".
- Separate the module and fold the corners again after the previous line.
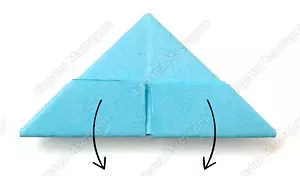
- Bend the figure in half.
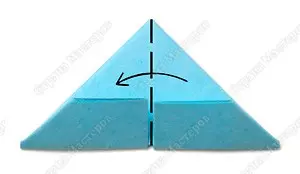
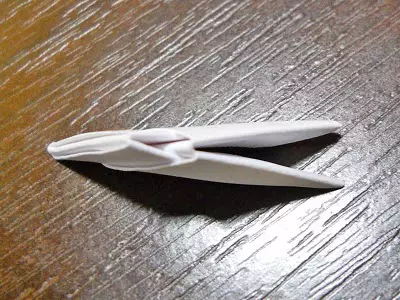
As a result, we got a triangular module ready to create bulk origami.

Creating a swan
One of the simplest and most beautiful modular origami schemes is a swan. It will require 459 simple identical modules for its creation.

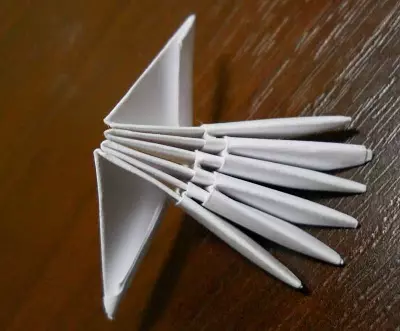
First of all, it is necessary to properly connect the modules with each other. To start, take three modules and insert the corners of two of them in the third pockets.
Article on the topic: 9 ways to make white-white towels


Take two more modules and attach to the three previous one.

Then two more.

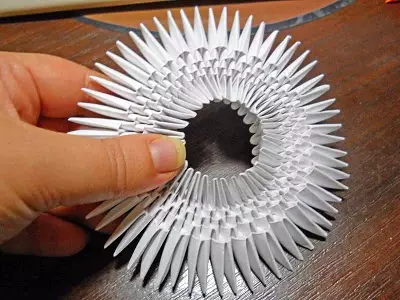
The design seems very weak and, quite likely falls apart in your hands? Do not worry, collecting three rows at the same time, we will solve this problem.
Expand the module and insert the new elements of the corners in the pockets.
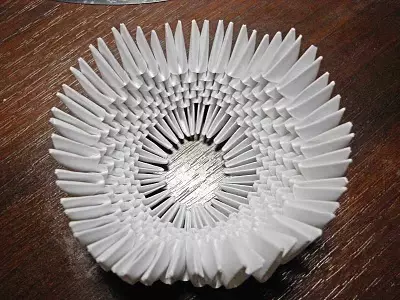
So make three rows (each will consist of 30 triangular modules). Close the circle.
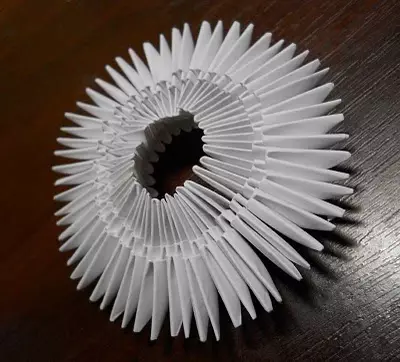
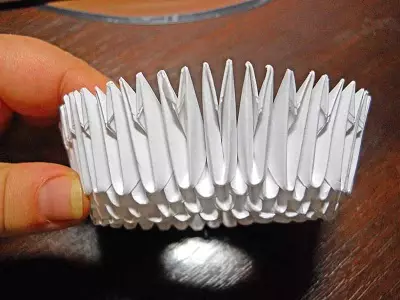
Similar to previous rows, take another two, after which you gently remove the design.
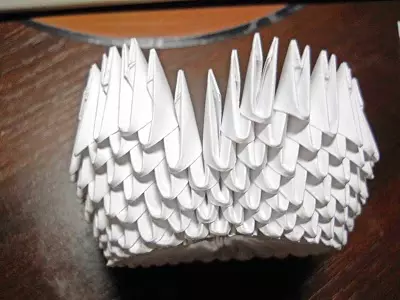
Edges. Bend up.
The sixth row is assembled in the same way. Starting from the seventh, you need to start making wings. To do this, after 12 modules, make a pass of two corners. From scratch there will be a neck, on a wider section - tail. Add another 12 modules.
In subsequent rows, reduce each wing on 1 module. Thus, in the ninth row there will be 11 modules in the wing, in the tenth - 10 and so on.
Reduce the number of modules until it remains one in each wing.

Deploy almost the finished swan and make it a tail on the same principle of the module to one.

Now the most beautiful item remains head and neck. Fortunately, it is not difficult. You will need 20 modules (one of them can be red for beak). The assembly of the modules will be somewhat different. Insert them will be each other.
As a result, such a great result should be obtained:
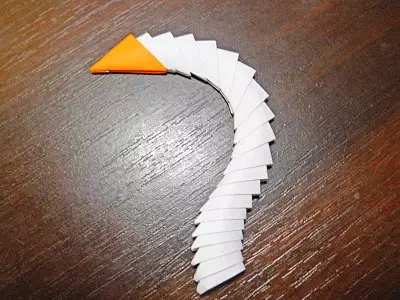
Now neatly suck the neck and head on the body. Swan from modular origami ready!

Video on the topic
Selection of useful videos on the topic: