
Door hinges are a simple mechanism that provides opening / closing the door leaf, its dense adjacent to the door frame. To install the loop itself into the interroom door, you need to pay attention to their design, since there are a number of mechanisms that require a specialist only.
From the quality of the loop installation directly depends on the service life of the door.
From the quality of installation of this product depends, how long will the interior door last you . The color scheme is not so wide, basically uses imitation of various metals: gold, nickel, bronze or copper. Products can be glossy and matte.
External overlaid loops
External overhead mechanisms are attractive and easy to perform, it is them most often used for the design of the door in an old style. The product consists of 2 parts, the plates are connected by a hinged pin. 1 plate is attached to the wall, and the 2nd - on the door canvas.
The simplest in the installation are external overhead loops.
Installation is extremely simple:
- It is necessary to apply the hinges to the doorway, the minimum distance from the bottom and the top of the web is 15-20 cm. If the door is heavy, then it is best to use 3-4 loops that will exceed the load.
- After that, it is necessary to perform the same similar markup on the wall, noting the venues for the screws.
- Drill holes under fasteners, after which it is necessary to fix the 1st part to the wall, the 2nd - to the door canvase. No complicated action is required.
Tools are needed the simplest
- line;
- simple pencil;
- drill;
- screwdriver.
Internal mortise and branded
Overhead internal loops are also called cards, they consist of 2 parts that are screwed to the doorway and the door frame. How to cut a loop of this species correctly? First you need to put markup, choose wood along the contour strictly on the depth, which is equal to the thickness of one card. It is taken into account during the markup and how the cards will be attached to each other.
Article on the topic: Rating of the most famous manufacturers of kitchens in Russia
The design is as follows:
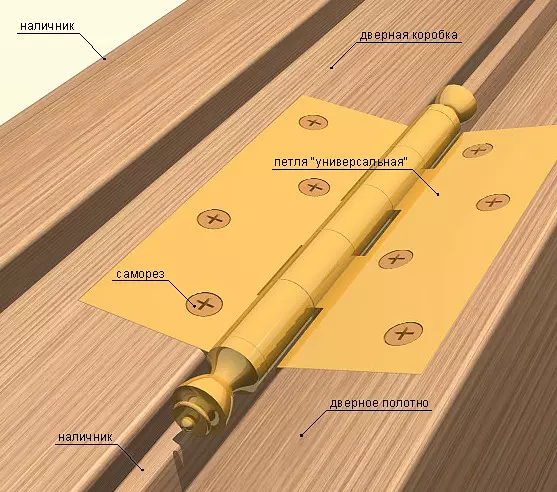
Installation scheme of universal door loops.
- The swivel axis is a central element that provides the movement of the mechanism.
- 2 cards, i.e. swivel plates that are mounted to the canvas and to the door frame.
- Decorative plug and hinge.
- Self-tapping screws for fastening plates.
To cut the loops in the interroom door, keeping the most attractive appearance, you will have to work hard. You can install special whirlpool products, they are no worse than other analogues. Externally, they are a compact size cylinder. The design of the mechanism is extremely simple. It includes 2 parts in the form of cylinders for the door leaf and box. The plates themselves are perfectly mounted, there is nothing complicated in the work. But it is important to choose the right mechanism depending on the weight and type of door. Products are made of plastic, aluminum, steel. They differ in the number of pins: usually 2, but maybe 3-4, if the canvas is severe.
Installation is as follows:
- It is necessary on the surface of the canvas and box markings under the loop.
- After that, drill drill holes, hinges set in the outlined places.
- The door can be checked, the performance of the mechanism.
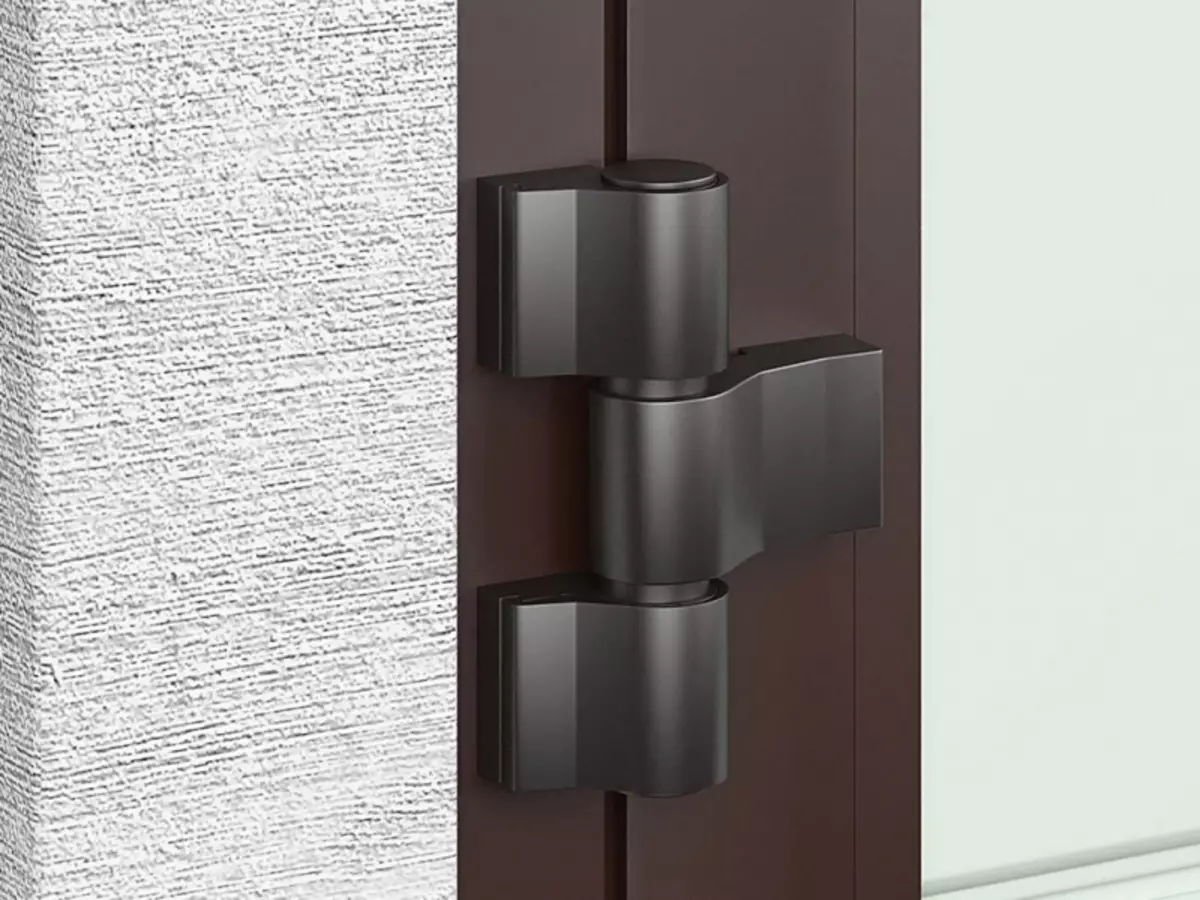
How to install a hidden mechanism?

Installation scheme of hidden door loops.
In some cases, the door mounts do not fit into the overall interior and the appearance of the door canvase, therefore special mechanisms of the hidden type are used. How to cut a loop of this species? The design of the loops differs from the rest, after closing, they are completely not visible outside, as they are mounted directly into the end part of the web. Design complex, in stock 3 swivel axes:
- swivel central axis;
- swivel fixed axis, which is not visible on the surface even in the open form;
- The moving axes are involved to open or closing the doors.
Advantages are as follows:
- They are suitable for any interroom door, ready-made canvas and door boxes that have embedded loops are often sold.
- The appearance of the loop in the open state allows you to see the design only with close review (it is necessary to come closely to the door leaf), in the closed mechanism is immeasured.
Article on the topic: Making a laser level with your own hands
But there are disadvantages:
- do-it-yourself installation is problematic;
- The cost is high.
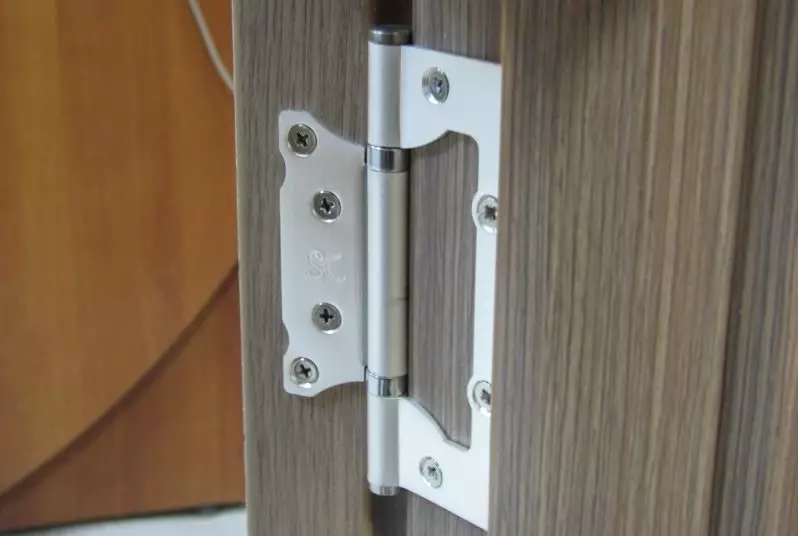
Installation of butterfly door loops
Overhead hinges (butterfly) are easy to perform and have an attractive appearance.
The loop on the interroom door can be mounted differently. It all depends on the design of the loops, the door itself, the installation features on the door frame. There are fasteners that require inserts in the canvas, and it is already more difficult. You will have to choose a piece of wood, and do it clearly along the loop contour. There is a type of hidden mechanisms that can only be able to install the master, without the necessary experience, you can only spoil the door.
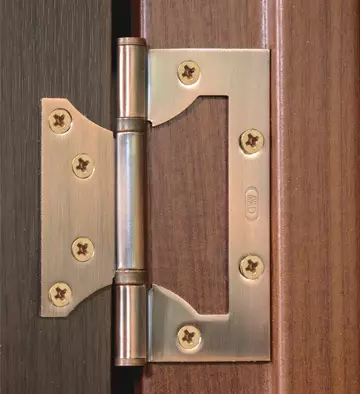
Special mechanisms "butterflies" are produced. This is an overhead type of loop, one plate resembles the shape and form of the butterfly wing. This type of mechanisms is also called card.
The 1st plate is similar to the butterfly wing, it is embedded in the cavity of the 2nd plate, i.e. cards.
Externally, after installation, the mechanisms look carefully and attractive, no special experience is required, the work itself is carried out quickly. In this case, it is not necessary to cut the loops, they are simply superimposed and screwed to the surface.
The process of installing the mechanism is as follows:
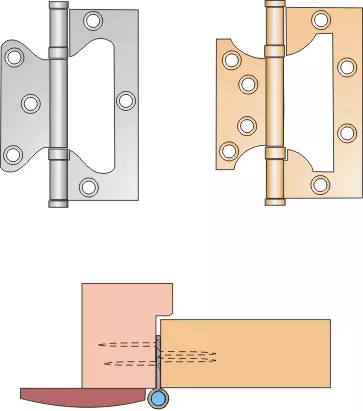
Mounting scheme of the butterfly door hinges.
- First, you must apply marking on the surface of the door leaf, departing 20 cm from the bottom and top. After that, a map of the wing is applied to the end part of the door, the contour will be burned with a pencil, holes are scheduled, where fasteners will be.
- Self-pressing card is firmly screwed to the surface, you can pre-drill holes for fastening.
- Next, you need to install the 2nd part on the door box. To do this, it is enough to apply marking, given the position of the ready-made parts so that after installation the door canvas does not shift. The second part is attached by self-pressing.
- When individual parts are fixed on the surface, the interroom door must literally put on the door frame loop.
Article on the topic: Panel in the bedroom do it yourself: master class
Usually, "butterflies" do not require adjustments, they are simple and convenient performed. They have and features. For example, after the insertion, the outer plate is loosely adjacent to the end part of the door. This problem can be easily solved, sufficiently under the map to put a thin strip of cardboard so that it is at a small angle.
Overhead "Butterflies" are perfectly suitable for light doors, but for heavy whose weight is 40-50 kg, they are no longer suitable. For ordinary veneered and laminated doors, this option is optimal. "Butterflies" are inexpensive, easy mounted and look great.
To work will require such tools and materials:
- "Butterflies" (usually requires only 2 pieces);
- self-tapping screws (can go complete with mechanisms);
- screwdriver or screwdriver, drill;
- line;
- Simple pencil.
To embed the loop, you must first select the type of mechanism, after which it is possible to determine how suitable for a specific door canvase. Installation itself is usually simple, although there are a row of loops that only specialists can deliver. Most often, simple overhead mechanisms are used for domestic interior doors, where you only need to fasten 2 parts, mounted them together. Installation does not take a lot of time, enough to spend not more than an hour.