
Give the door slopes a high-quality surface allows shocking. Since many residents of the housing stock have plastered walls (this is a logical moment), plastering windows and door slopes is carried out in a similar way. The method of plastering of slopes is available even newcomer. The main thing is to prepare all the necessary tools.
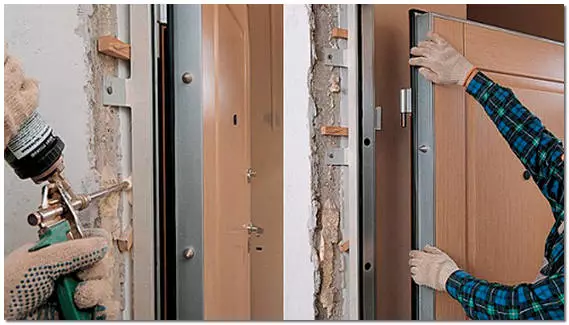
After installing the door, you need to shock the slopes, it will give a beautiful neat appearance.
To carry out the substitution of door structures so that they do not need their finishing, it is not possible, since the removal of unnecessary frames is associated with the removal of old layers of plaster. At the same time there may be chips with cracks in the door lumets. The distance between the walls and door boxes is filled at the expense of a suitable material that should be more denser in each gap. Next, the surface should be carefully cleaned from pollution, old paint, dust and soot.
Stages of plastering of slopes of doors
Before starting the plastering, the Lock Location is applied.
Before plastering door slopes should be aligned with the wall. The door is usually installed after leveling the wall where necessary. When the door is already installed, the wall from the right side is aligned. Start from measuring angles, taking into account the height of the side door slopes, not forgetting about the top slope.
Walls near door slopes should be carefully plastered and lured. Before working on the slopes in their upper part, the rules hang, which should be inspired by each side of the sides strictly vertically. The stucco solution is applied with a spatula, starting upwards.
If you want to make several layers, you need to dry them alternately before applying each next layer. Apply stucco on door slopes not only to create a smooth layer, but also an attractive appearance. At the same time, they are able to ensure additional heat and noise insulation.
Depending on how the location does the door have, carry out the appropriate selection of the type of plaster.
It can be outdoor or inner. Technology of plastering of door slopes is reduced to the following principles of action:
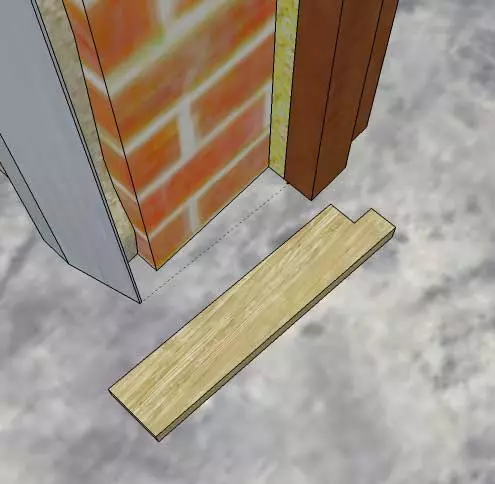
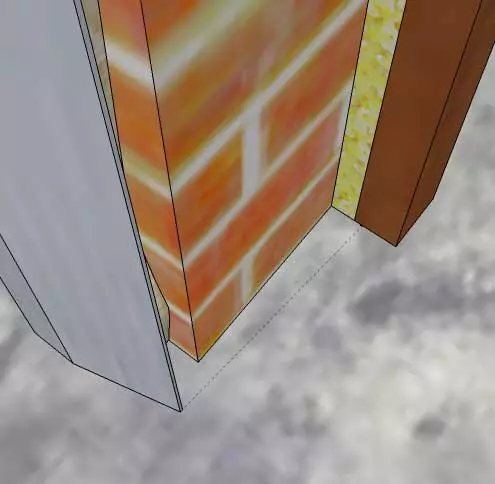
Making a template for removing unnecessary plaster is made of plywood or chipboard.
- The installation of the door is carried out at the same level, and the side parts of the door box have the left and on the right at a smooth distance from the walls.
- Cropped cracks should be pre-prepared insulation, which carefully needs to fill all the slots.
- You can handle felt with palaws with a 3% solution of potassium fluoride.
- Before plastering, the surface of the door slopes is cleaned and the installation of pendulum-pendulums made from metal, helping to level the surface to the maximum.
- The finishing of the slopes of the doors can be performed using the starting facade plaster or cement solution.
- When plastering the external slopes of doors in the solution, various impurities should be present, allowing to extend the use of the solution.
- The choice of type of plaster is carried out for a certain type of room - residential or non-residential.
Article on the topic: What glue is better to glue phlizelin wallpaper
The process of rubbing the plaster is produced by "corruption", and you can only take the rules after the grout is made. Side slopes should have a small segment whose acute must have a length of 20-30 cm. From below, rounded or flat chamfer should be made.
What instruments and materials need?

Next, the solution is attacked, the template is unnecessary.
Performing all works related to plastering windows and door slopes requires increased care and maximum accuracy. Make it can both beginners who have not been engaged in similar types of work. Strictly defined all requirements related to the rules for holding finishing works. Their observance will allow you to qualitatively arrange the surface of the slopes of the doors, as well as to maintain the cash.
The finished door slope must have a neat smooth layer of plaster, and it is possible to achieve this in the presence of the following materials and tools:
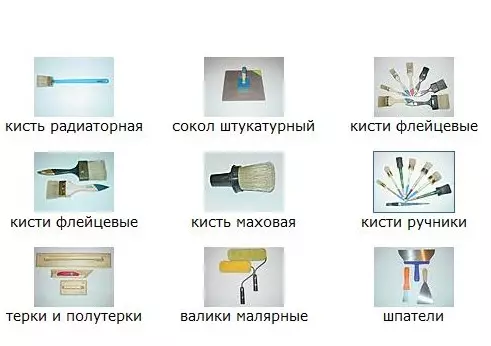
Tools and fixtures for plastering slopes.
- Drill with a nozzle;
- two-meter construction level;
- rule;
- Spatula whose width exceeds the width of the slope;
- Flat brush for surface primer;
- Metal corners perforated to protect external corners;
- mounting foam;
- Glue "Liquid nails";
- Mesh plastering from fiberglass;
- Perforated corners with a grid;
- Malyary Scotch;
- Small sandpaper.
Prepare the solution should be used using dry gypsum plaster, which must be dissolved to a certain consistency. If you use a foam, then the solution can be saved. If you have a chosable depth in the slope, the foam used is fitted with pieces in those places that are deeper. This must be done and then when the thickness of the door slope is greater than 2 cm.
The door frame will not deteriorate if it is painted with a painted scotch surface. Start priming and placing only after that. At the final stage, a rough finish is made using sandpaper, after which the surface is ground.
Recommendations for the decoration of the doors
How to shut down the slopes of the door?
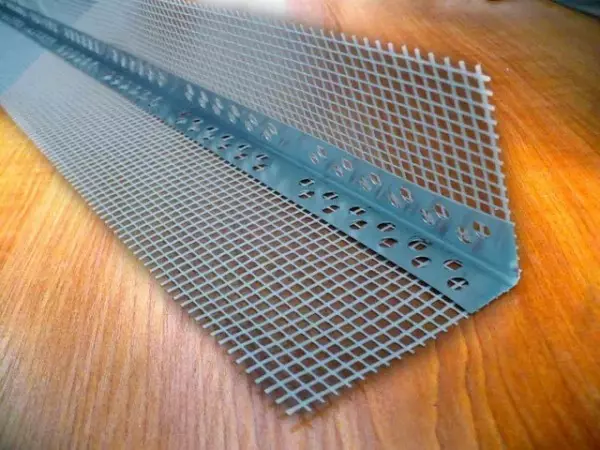
Image 1. In order for the angle to be smoothly installed a perforated corner.
The decoration of the slopes is performed at the expense of the cement and sand solution. First, the surface is prepared: they first remove all the remnants of obsolete layers of putty and paint, and then old stucco. With a strong fastening of the layer of plaster on it, it makes special obseks, allowing to increase the level of the adhesion of the following layers with door slopes. Then it is necessary to moisten the base with water in order to apply the cement and sand solution.
For the final elimination of all defects, the grater is used. At the edges of window openings, rains should be installed, which are guided. It is necessary to keep control of the level of the verticalness of the location of the slopes under control, which is associated with their levels. Further, work should be carried out by analogy with the finish of the upper slope.
Article on the topic: Room design 5 to 5
Before plastering, the surface must be treated with a layer of primer "concrete contact" or another that you want to dissolve in a small amount of water, having installed a perforated corner with a grid (image 1) and upper slope by level.
In order for the corner does not stand out on a flat surface of the wall, the plaster is cut by a knife to the level of depth equal to 3 mm. Using the level applied to the surface of the wall and knife, a horizontal line is performed. After that, there is a removal of plaster from the end. The resulting recess is used to set the corner.
Similarly, install perforated corners on the "Rotband". It should be used by the level that is applied to check the vertical installation. Perforated corners can be perfectly protected by the external corners of door sluts, which will continue to serve as beacons when plastered.
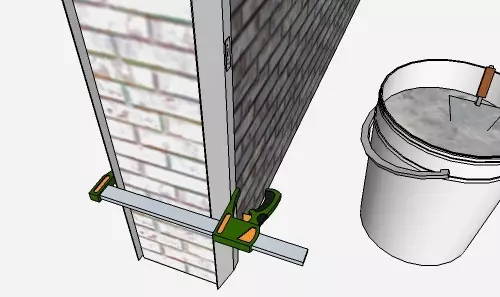
For the smooth application of plaster, a special rule can be installed on SPACE.
For mounting corners, you can use small carnations. The main thing is to ensure that they cannot move. For this, the horizontal and vertical are pre-perfosed using a construction level. In disruption, the vertical is usually put a piece of drywall, which will allow smoothly to strengthen the corner.
After alignment of the wall and attachment of the corners with a spatula, the slope is started. To do this, you can use the Plaster "Rotband", which has excellent qualities. It should be mixed with water in the necessary proportions manually either a drill with a special nozzle. This will make it possible to prepare a mixture that will not flock.
If necessary, you can put plaster with a thick layer. Watching technology involves the initial patch of the plaster layer, followed by its drying. This will give him strength, and the layer will not be able to fall off. Then the slopes of the doors and the angles are made, pouring the surface completely.
If the slopes have irregularities, and the size of the solution layer is more than 1 cm, the special grid is applied. This is due to the appearance of cracks on the surfaces. Therefore, you have to start doing all the work first. Watching is better to start on top to get a certain type of beam based on both racks. So you can increase the strength of slopes. Slices of plaster in this case will not fall off.
The upper tier should be strengthened by the rail, which must be installed on the plane of the doorway from above. This will make it possible to rely on it by the rule that you can remove the surplus of the solution. Then the solution layer must be left to dry, and later remove it using the rule and smooth the surface of the slope, which can be covered by various defects representing pits or other types of irregularities. To eliminate them, it is necessary to leave the plane of the door sluts to push for another time.
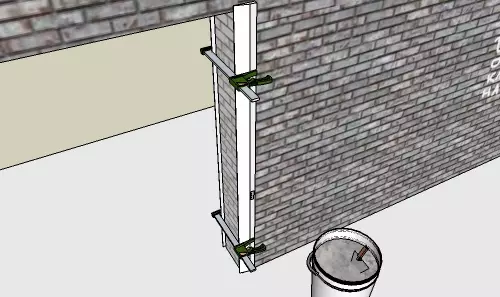
Rules are attached at an equal distance from each other over the entire height of the slope.
Article on the topic: Is it worth installing a shower in the toilet?
It is permissible to use a certain trick that is associated with that the surface of the frame is not hidden under the cement mortar layer completely and its certain part was located outside. Therefore, the rail should have been made in a certain place, which belongs to the frame. At the same time, it is possible to adjust due to a certain depth of this, as well as the height to which the windows frame plaster stucco.
Further on the surface of the slopes with small proportions, a solution for shuttering is enjoyed. It is necessary to produce it with a small excess, which will allow the overlap of 0.5-1 cm of the rails from the tree.
What should pay special attention to?
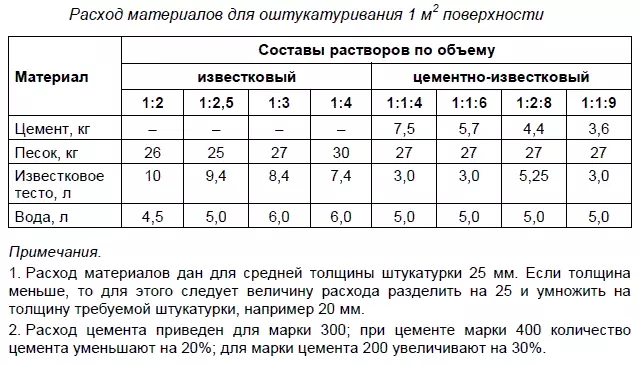
Plaster consumption table.
Turning the slope should be placed, waiting for the complete drying of the plaster solution, because with an accelerated process of evaporation, the mixture with cement will not become stronger, but will be covered by cracks. It follows when performing shuttering, create protection against drafts.
The plaster layer applied to the slope of the door will give them an even look, which will be associated with the creation of a layer of heat and noise insulation. The type of mixture for plaster is chosen, focusing on the way to install the door that is internal or external. For example, the slopes leading to the bathroom or sauna is better to be treated with cement-based solution, and the inner premises must be treated with a lime-gypsum solution.
With the subsequent installation of doors, it is necessary to ensure that the location of both parts of the door box is equal to the distance from opposite walls. The installation of doors should be carried out at the same level, and the gaps in the formed openings should be sealing felt, pacles or mounting foam.
Then they produce the installation of steel lighthouses, helping to level the surface. Both first, and the second lighthouse should be installed on the same level and equal distance from the location of the door frame. Plastering in a number of techniques is applied, their number is determined by the size of the layer thickness.

Image 2. Stripping plaster is performed using a grinding holder.
If plastering of outer slopes of doors is required, water-repellent impurities are added to the cement solution, which are protected from moisture penetration. This prolongs the useful life of the cement mixture.
The choice of solution for plaster must be explained by the fact that not every mixture is suitable for the decoration of residential premises. Therefore, it is necessary to carefully examine the instructions on the package, at the same time consulted with administrators for sales of a company that implements this type of finishing material or sellers in the store.
After a complete drying of the plaster, the surface is starting to clean up using a grift holder to which the abrasive mesh sheet is attached (Image 2) used instead of sandpaper. After that, the surface is covered with finishing putty and color.