
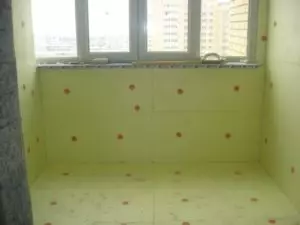
The problem of the lack of square meters is very relevant for the residents of typical high-rise buildings. One of the options out of position is the insulation of the balcony from the inside and turning it into the living room.
A warm balcony opens up ample opportunities for a more efficient layout of the indoor space of the apartment. However, in order to turn your balcony in a full room, you should produce a number of works on its insulation.
This step-by-step instruction of the insulation of the balcony is designed to answer all the questions that arise in this case, minimize the costs of time, strength and financial resources, warning you from meeting with all possible "pitfalls".
The possibility of using a warmed loggia
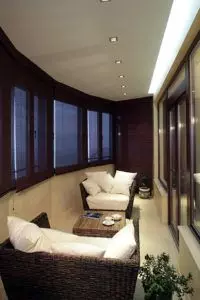
Warm loggia, being part of the indoor space of the apartment, can be used in several options. The possibilities of using each of them depends on the features of the internal planning of the apartment and from the needs of the hosts. Here is some of them:
- As an independent room. Here you can accommodate the workbook, a rest room, a home workshop, etc. In this case, the balcony entrance group is preserved, which is now as partitioned between the hall (cuisine) and a new room.
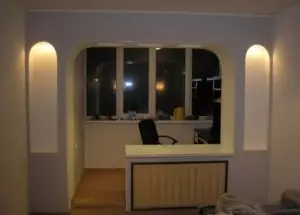
- Combine with living room or hall. It makes it possible to significantly increase their size, adding additional areas due to a warm loggia. The connection of two rooms occurs due to the dismantling of glazing and the door of the input group. In some cases, the dismantling of the simpleness is made under the windows.
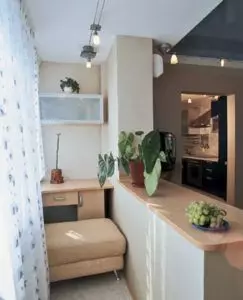
- Combining with kitchen or transfer of this room to the loggia. This allows you to leave for a former kitchen feature an exceptionally dining area, and plates and tables for cooking place on the loggia. This also disasses the balcony input group located on the part of the kitchen.
How to legalize the union of loggia with indoor rooms
Before rewriting, get all the necessary permissions.
Step by step guide on how to insulate the balcony with your own hands, it is necessary not only for the right phased work of work, but also in order to avoid violations of construction and administrative standards.
Often, insteading a balcony room, apartment owners set the goal to unite it with the rest of the rooms by dismantling the input group and balcony simpleness. It should be borne in mind that the rules for the operation of residential premises in apartment buildings are categorically forbidden to make unauthorized changes in their layout.
Unauthorized demolition of partitions, and even more coil walls (what the external walls overlooking the balcony) are fraught with a serious conflict with the management organization.
In order to avoid such problems before heating the loggia with their own hands, always recommend starting work with obtaining all the necessary permits. To do this, the project plan of the upcoming work should be drawn up and submit it to the relevant supervisory authorities - the Architectural Committee and the Ministry of Emergency Situations.
After receiving their approval, the upcoming redevelopment with the specialists of the management company should be coordinated. Only after "good" from all organizations is obtained, it will be calmly accepted for work without fear of any administrative and lawsuits.
Article on the topic: Independent strengthening of rafters
Stages of insulation work
Step-by-step instructions of the loggia insulation with their own hands, first of all, provides for the entire complex of the necessary work - only in this case can we talk about the effective insulation of the room. Neglecting any of the steps of complex insulation may eventually reduce all the work done.
The phased insulation of the loggia provides for the following work:
- glazing facade of the balcony;
- sealing joints of construction;
- waterproofing device;
- Installation of insulation;
- Decorative interior decoration.
Glazing of balcony facade

The glazing of the balcony is one of the main works, without which it is impossible to create an internal heat outline in the room. In this regard, it is necessary to approach glazing with full responsibility. Balcony glazing performs a number of important functions:
- thermal insulation;
- moisture insulation;
- noise insulation;
- Ensuring access to sunlight inside the room.
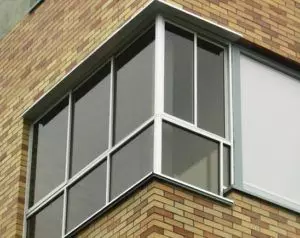
Modern glazing option - with aluminum or PVC Ramami
With the glazing of the loggia, you can use both the classic design option with wooden frames, and more modern windows of an aluminum or plastic profile with multi-chamber glass windows.
To create and maintain inside a comfortable temperature, it is recommended to choose window structures with multi-chamber windows. Depending on the climatic conditions of the region, the number of cameras can vary from two to six.
Window groups using double-glazed windows can have a fairly large weight, so you need to make sure that the parapet of the loggia can withstand their weight.
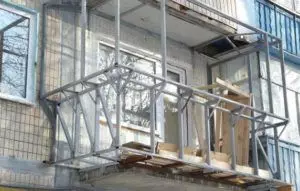
Stretch the balcony design, if not confident in her fortress
In the case of the slightest doubt in the ability of the fence to withstand the load, it will be better to progress and further strengthen it. You can use for this design of metal corners or chambers.
It should not be too overdo it in the amount and thickness of the metal - the excessive load on the balcony slab is not at all provided for by the building project of the building.
Trust the glazing professionals
Preferred when choosing window groups is better than designs that have proven themselves in this market. Window installation should also be entrusted to professionals. The fact is that it is unlikely to be able to install a window group with a qualitatively. Moreover, in the case of an independent installation, you can lose the manufacturer's warranty service.
In order to avoid clusters on the balcony of excessive dampness and condensate formation, it is best to install plastic windows with built-in valves for air exchange.
Preliminary stripping and putty surfaces

Align the walls and remove all bubbles, roughness and loud paint
Instructions for the insulation of the balcony special attention pays for preliminary preparation of internal surfaces. If you are going to mount the thermal insulation material using any adhesive compositions or on a cement (polymeric) basis, it is thoroughly cleaned all the inner surfaces from the old finish.
At the same time, special attention should be paid to peeling, bubble or shuffling fragments, paints or plaster.
Surfaces painted with glossy paint should also be cleaned with a large sandpaper or grinding machine to improve their adhesion (hitch) with adhesive composition.
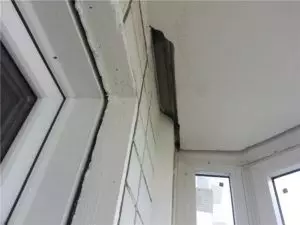
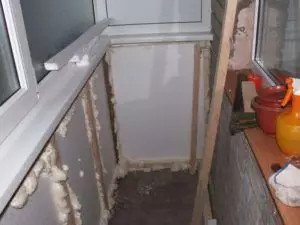
All cracks and cracks at the joints of balcony structures should be carefully covered. Large gaps, for example, between the wall (parapet, ceiling) and glazing, can be seen by mounting foam.
If you leave even the most minor slots unknown, the cold air and dampness will inevitably penetrate into the inner space on them, which will lead to the formation of condensate and dampness.
Article on the topic: How and from what to make a shelf for home with your own hands: 6 different ideas +16 photos
Waterproofing
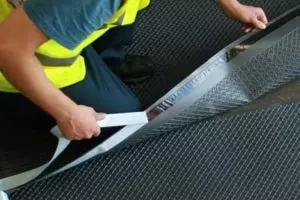
Paul balcony can be covered with rolled insulating material
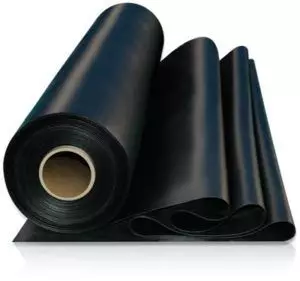
To do this, you can use any material suitable for this. In the modern market for finishing materials there is a large selection of various mastic and sealants on a polymer and bitumen basis, as well as rolled waterproofing materials.
To maximize efficiency, use mastic follows according to the instructions for use.
Liquid moisture-repellent compositions should process all joints of balcony structures. In order to prevent the formation of condensate and dampness, all the inner surfaces of the loggia can be covered with mastic.
Rolled material (rubberoid, isospan, etc.) are covered with walls, gender and loggia ceiling. Sheets are filled with the surface size of the loggia with the help of construction glue, mastic or pressed with a rush frame.
For greater efficiency, the joints of the sheets must be inserted and smoke with a sealant or scotch.
Selection of insulation
Thermal insulation must securely protect the balcony from the cold
After the inner surfaces are covered and waterproof, you can proceed directly to the insulation of the balcony. The choice of material depends on many factors: from the place of its installation, the minimum winter temperatures in your region, cost, etc.
The thermal insulation must, above all, qualitatively perform its main purpose - to protect the inner space from the outer cold. In order to correctly choose the heat-insulating material, it should be carefully familiar with its features of operation, pluses and minuses.
Penoplex.
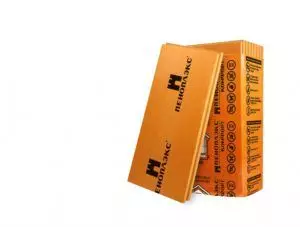
Penoplex or extruded expanded polystyrene is a modern heat insulating material. The insulation of the balcony is a penplex with their own hands has a number of advantages. It is distinguished by excellent performance - well kept warm, it is not afraid of dampness, has a small mass, but it is sufficiently flutter.
Penoplex easily rebels on the sheets of the desired size with a conventional knife and can be used to insulate any surfaces.
The insulation of the flooring of the loggia of the penplex does not require the installation of an additional frame. Due to the high density, it can withstand a lot of weight, not deforming and not breaking.
Styrofoam
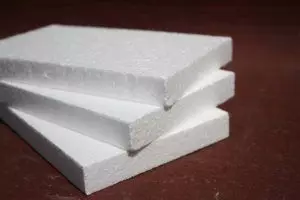
The insulation of foam has the same advantages as the previous version - it is lung and has good thermal insulation properties. But unlike the fastener, it is less dense.
Therefore, it is possible to use it for insulation of flooding floors only as a frame aggregator. It is not recommended to stipulate the floors directly under the finishing coating: under the weight of people and furniture, it can quickly quickly look around and come into disrepair. About how to quickly glue foam, look in this video:
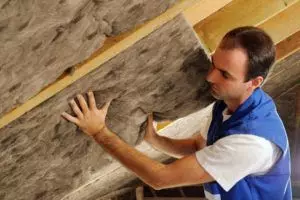
Mineral wool
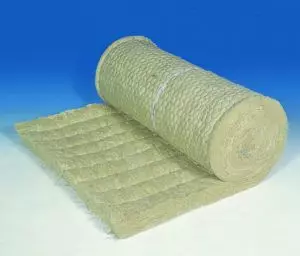
This insulation is made of various minerals (glass, stone, slag) by melting and foaming with compressed air in a centrifuge. As a result, fibers are obtained from which the insulation is pressed. It has a small density and is produced in the form of rolls or tiles.
Minvata has good thermal insulation properties, economical, but also has a number of serious minuses.
When working with it, the particles of stone or glass dust rise into the air and settle in the respiratory tract, on the skin, mucous membranes, causing itching and irritation. Another minus material is hydrophobicity. It is afraid of dampness and when wetting loses its thermal insulation properties. About how to warm the balcony, see this video:
Article on the topic: how to close the cracks on the balcony
Working with mineral wool should be strictly in protective suits, gloves and glasses.
Foilized materials
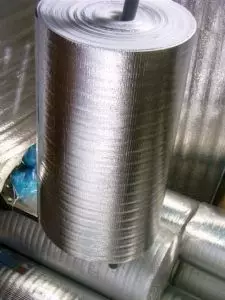
Penophol
Relatively recently, a new generation of insulation appeared on our market, the surface of which is covered with fine metallized foil. The most common among them is a foam-foamed polymer, which is placed from one or two sides by foil.
The main feature is in excellent thermal insulation qualities. With thickness, only 3 - 5 mm, it is equivalent to a mineral plate with a thickness of 100 mm. This is achieved due to the special structure of foamed polyethylene, consisting of a large number of closed pores with air bubbles.
The surface of the foil surface has a property to reflect back to 95% of thermal radiation. This makes foam and other foil materials unusually efficient. About how to insulate the balcony by Penophol, see this video:
When installing, the foam should be added to the foil side inside the room. It is also not to compress the material, because at the same time its thermal insulation properties significantly deteriorate.
Installation of insulation
Before proceeding to the insulation of the balcony from the inside with their own hands, on the walls, the ceiling and the floor should be mounted frame. It is possible to make it from wooden bars or metal profile.
It will be needed to us for fastening the decorative trim - drywall, PVC or LDSP panels, etc. After installing the frame, we proceed to filling it with the cells insulation.
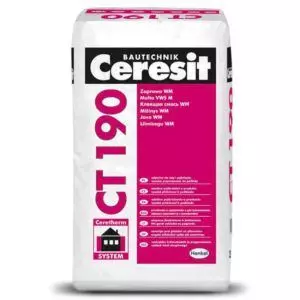
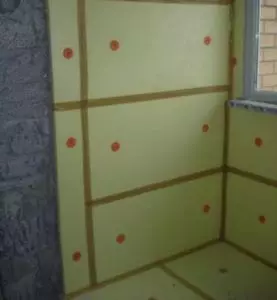
Insulation plates can be fixed with special glue
The features of the insulation installation work directly depend on the view of the material you chose. You can use for its attachment, you can either special adhesive compositions or fasteners.
The adhesive compositions are fastened with sufficiently dense materials, such as penplex or foam. With the help of fasteners less dense insulation - the Ministry of Body, Penophol. But with the help of dowels can be mounted and foam with penplex.
It is best for mounting to use plastic dowels-fungi with wide hats with a diameter of 50 mm. To install this method, cut the sheets of the insulation of the required size and insert them into the frame cell. In several places, with the help of a perforator drills through the insulation of the hole in the concrete plate or wall, in which insert "fungi" and fix, scoring plastic nails in them (come in the kit). For the qualities of the insulation of EcoWati, see this video:
Subsequent finish
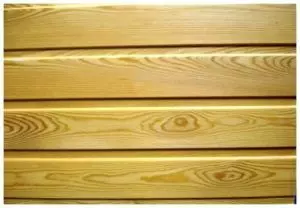
Lining - one of the most environmentally friendly materials for finishing
After installing all sheets (plates) of the insulation in the frame of the frame, all the gaps between them and the frame profile are carefully sealed with a sealant, shtakulavka or mounting foam.
After that, you can proceed to the framework of the frame with finishing finishing materials - sheets of GLC, LDSP, MDF, PVC panels, floor-coated, etc. On the floors on top of a dense insulation of the type of polyplex, you can make a cement-sand tie or filling floors, on top of which put the tile.
As you can see, using the instruction on the insulation of the balcony to produce all the work with your own hands will not be much labor. To do this, it is necessary to clearly follow the recommendations of the manufacturer of materials and comply with the requirements of construction standards in the work of work.